
This guide covers the default activity types. You may also add other custom objects as activities. Any custom activity configured will appear and behave in the Activity Component the same way as the default ones.
1. Introduction
The Activity Component provides a unified panel inside Salesforce to view, filter, and create all types of activities related to a record. This includes:
-
Tasks
-
Events
-
Logged Calls
-
Notes
-
Secure Emails
-
SMS
-
eForms
The panel is dynamic and automatically adapts to the record you are viewing (Account, Opportunity, Case, or any supported object).
2. Layout Overview
The component has four main sections:
-
Activity Action Buttons (top toolbar)
-
Filters Panel
-
Activity Timeline
-
Activity Detail View (expandable)
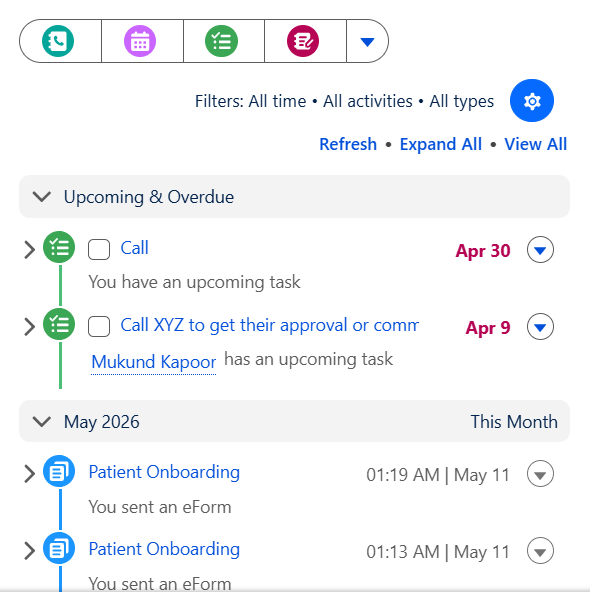
3. Activity Action Buttons
The top section shows the available actions you can take. These may include:
-
Log a Call
-
New Task
-
New Event
-
New Note
-
Send Secure Email
-
Send SMS
-
Send eForm
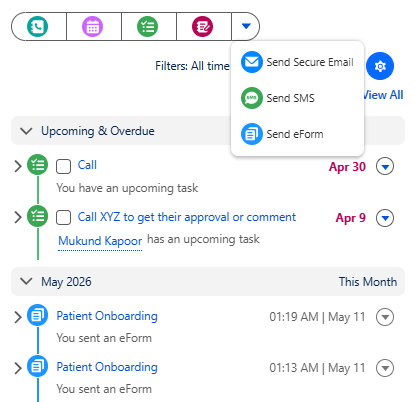
Depending on your organization’s configuration, some buttons may appear in the dropdown menu.
4. Filters Panel
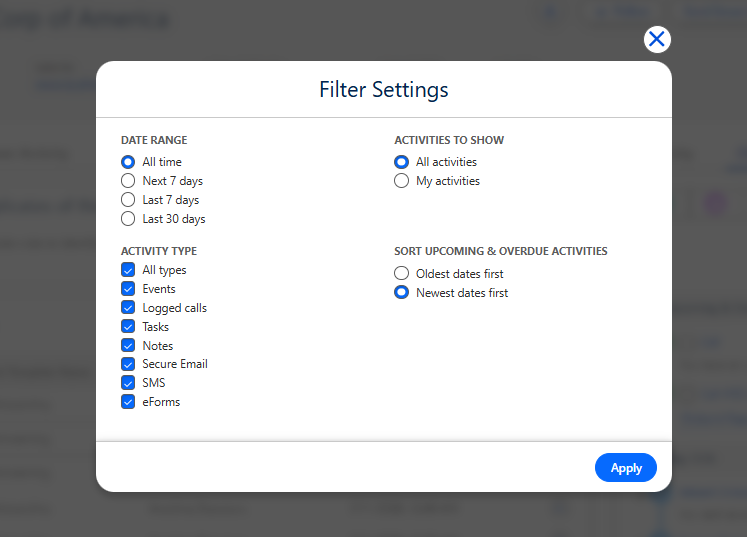
Use the filter section to refine the activities shown in the timeline.
Available Filters
-
Activity Type (All types, Events, Calls, Tasks, Emails, SMS, eForms)
-
Date Range (All time, Next 7 days, Last 7 days, Last 30 days)
-
Show Activities (All activities, My activities)
-
Sort Order (Oldest dates first, Newest dates first)
How to Apply Filters
-
Click any filter dropdown.
-
Select one or multiple(for Activity Type) values.
-
The activity list refreshes automatically.
To reset filters, select “All types”, “All time”, and “All activities”.
5. Creating Activities
1. Log a Call.
This guide describes how to log a call using Activity Component.
1. Log In to Salesforce
➡ Access your Salesforce org with the appropriate credentials.
2. Navigate to the Source Record
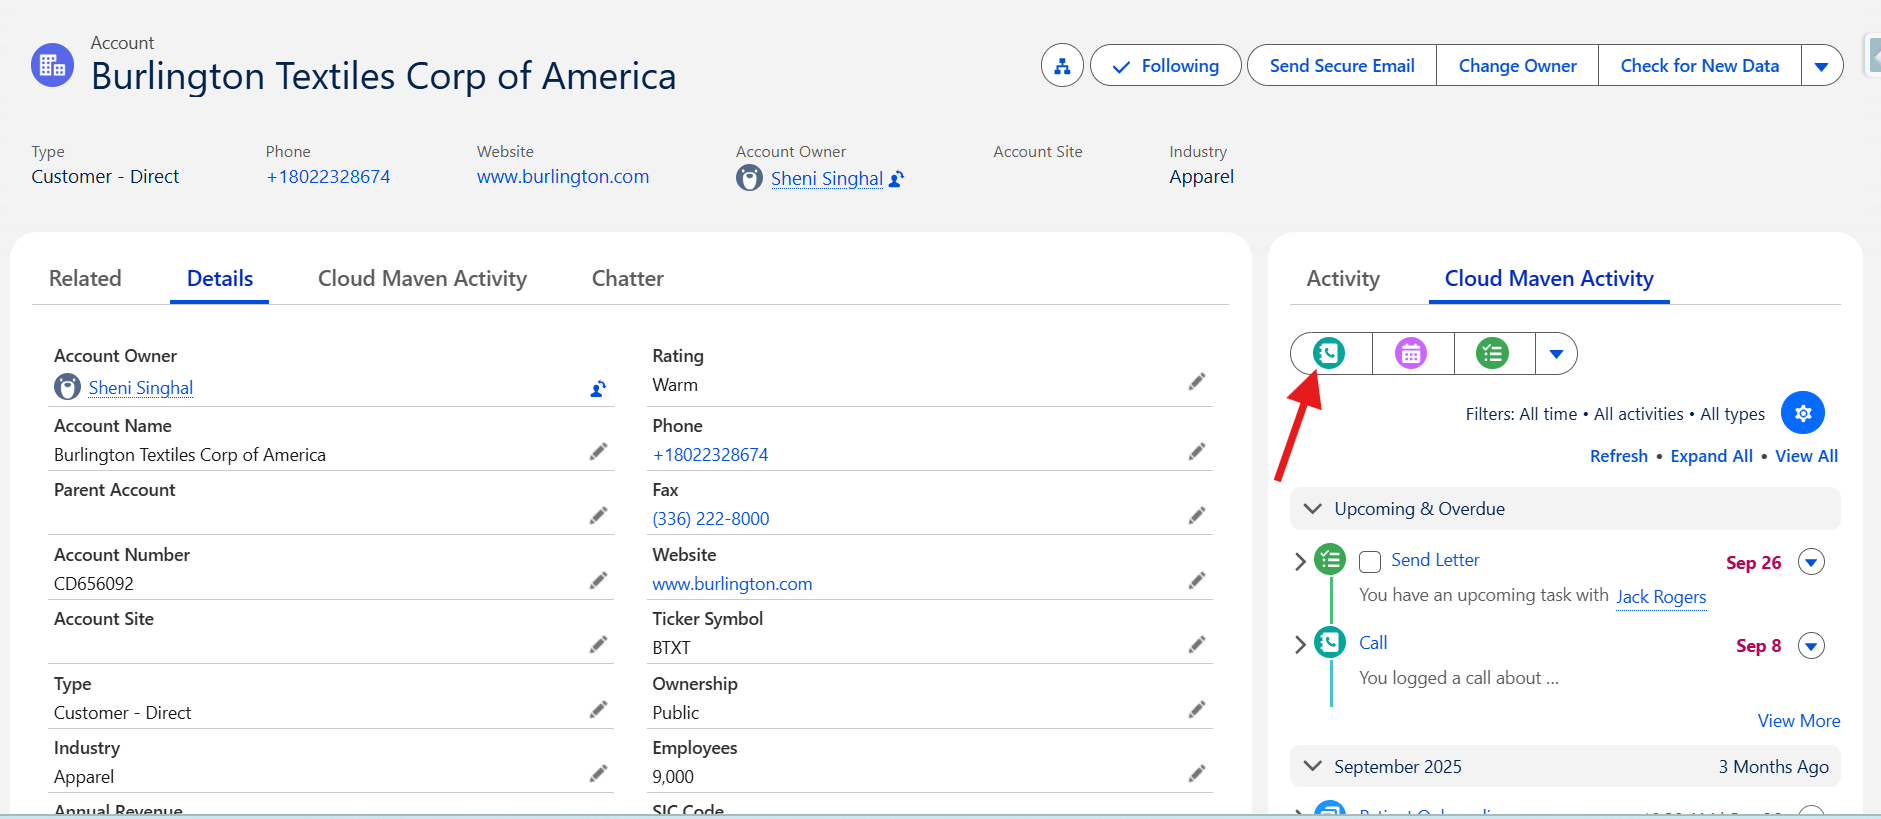
3. Open the Activity Component
4. Start Logging a Call
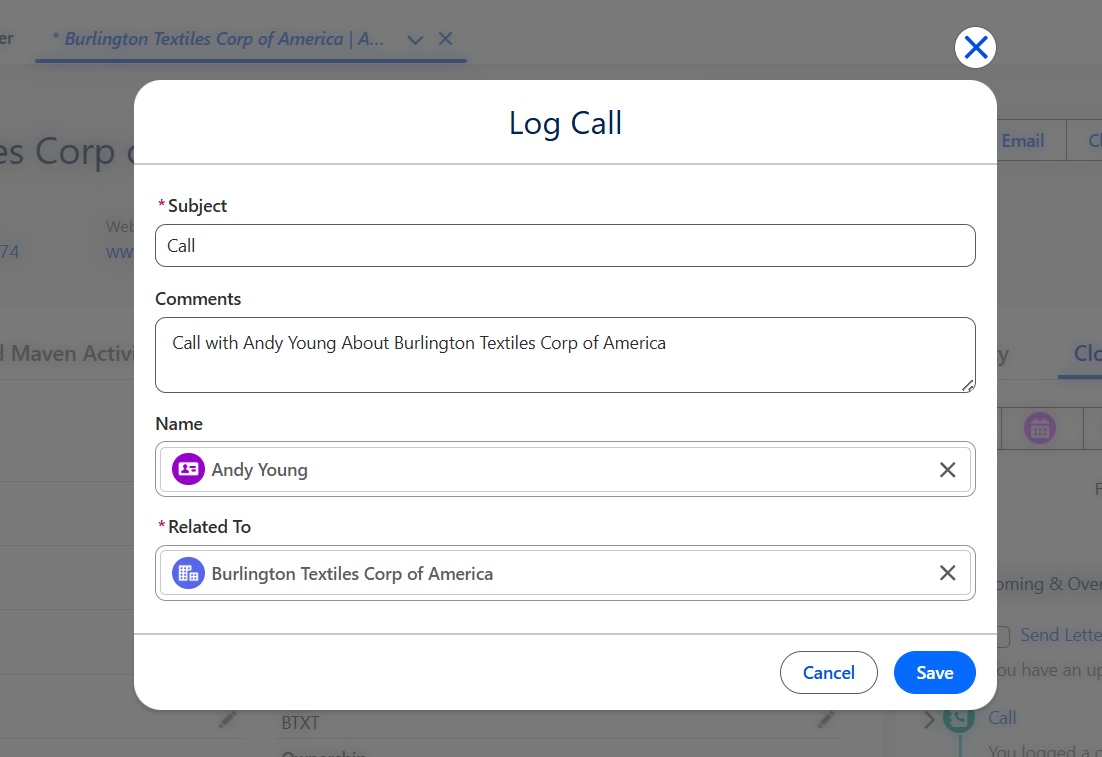
Click the Log a Call button/icon in the Activity Component toolbar. A popup window will appear.
5. Enter Call Details
Fill in the required information such as Subject, Comments, etc.
6. Save the Call Log
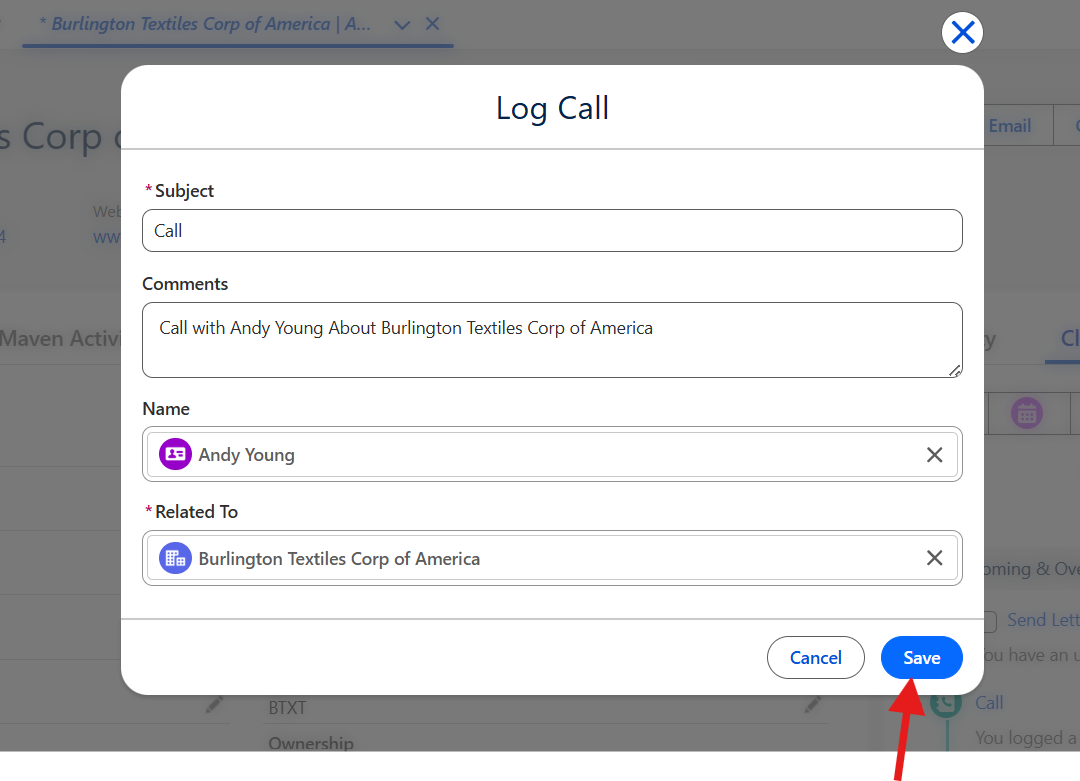
Click Save to log the call.
7. View Logged Calls
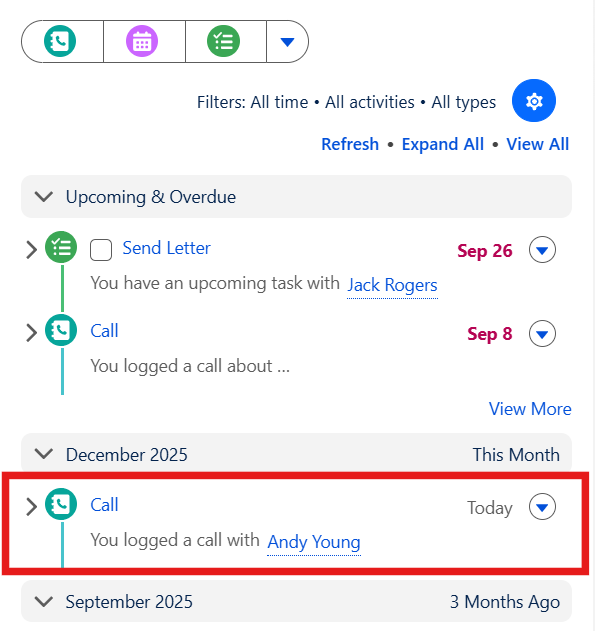
After saving, the call entry will immediately appear in the Activity Component timeline.
2. Create a new Event.
This guide describes how to create an event using Activity Component.
1. Log In to Salesforce
➡ Access your Salesforce org with the appropriate credentials.
2. Navigate to the Source Record
3. Open the Activity Component
4. Start Creating an Event
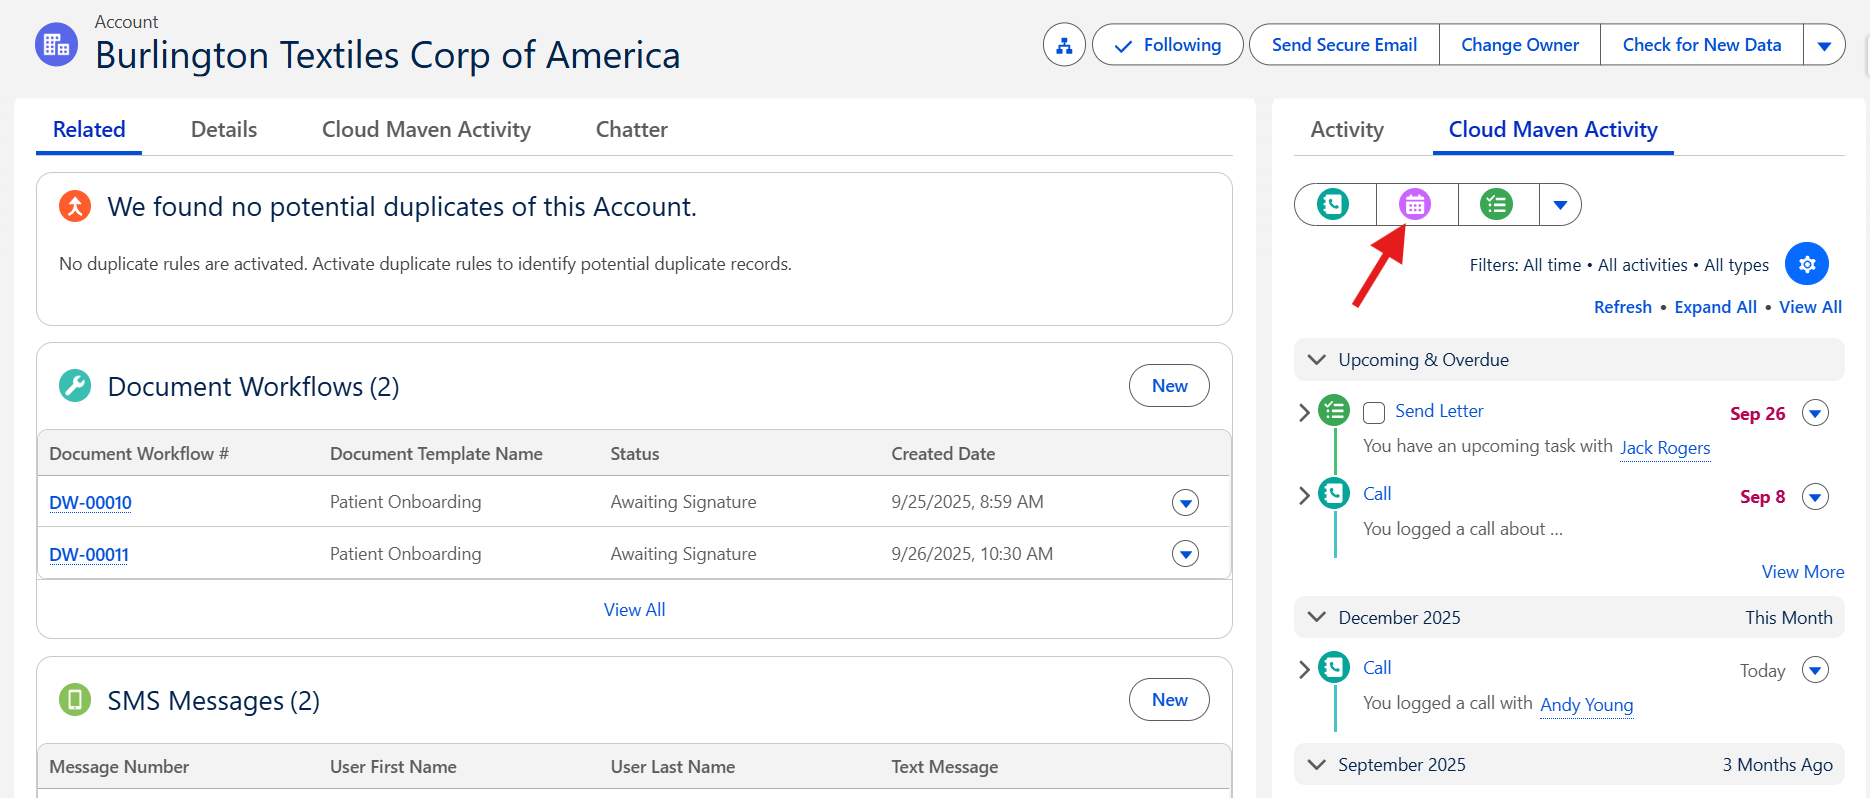
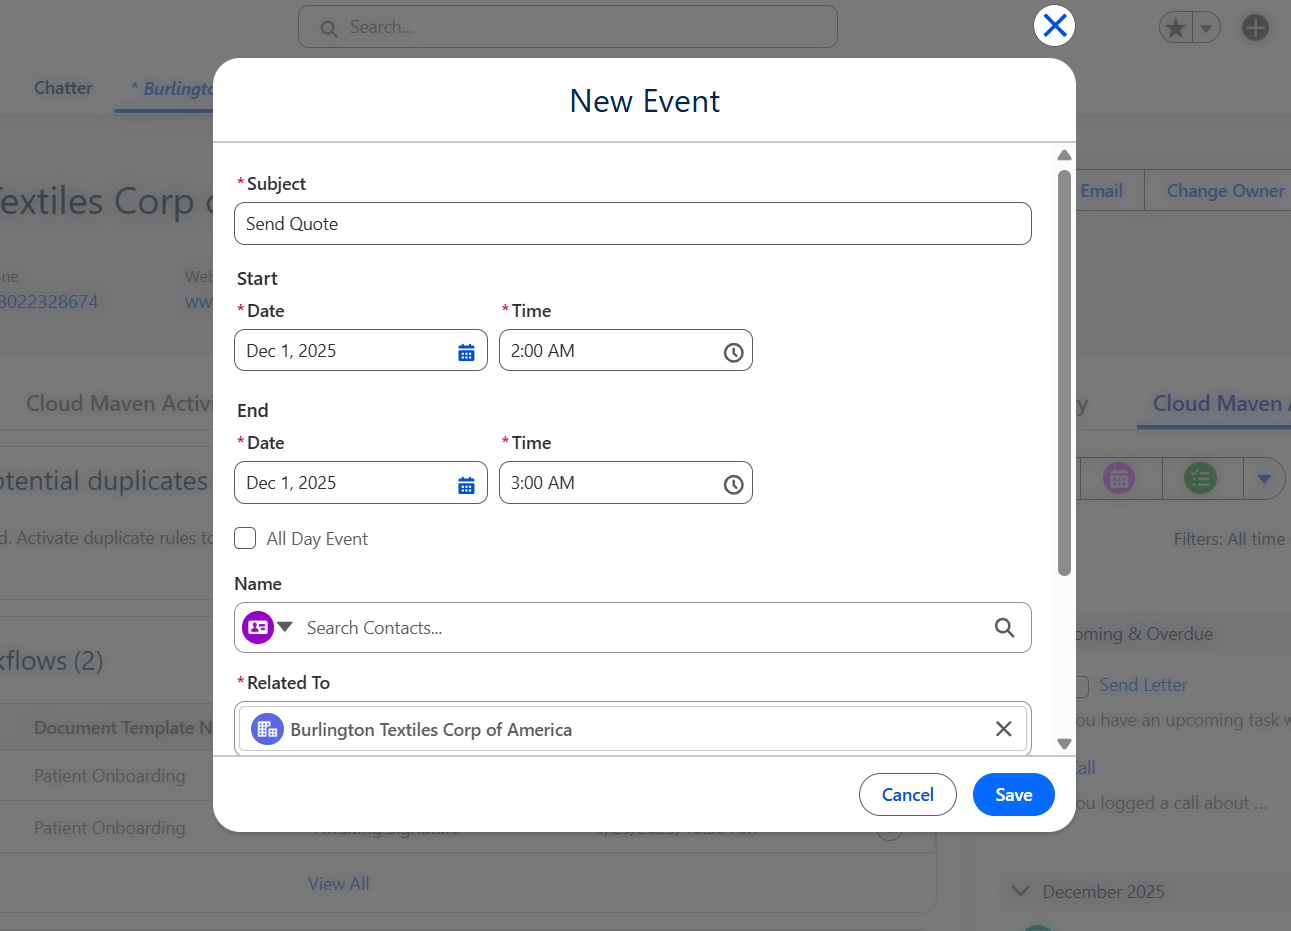
Click the New Event button/icon in the Activity Component toolbar. A popup window will appear.
5. Enter Event Details
Provide Start Date/Time, End Date/Time, Subject, Location, etc.
6. Save the Event
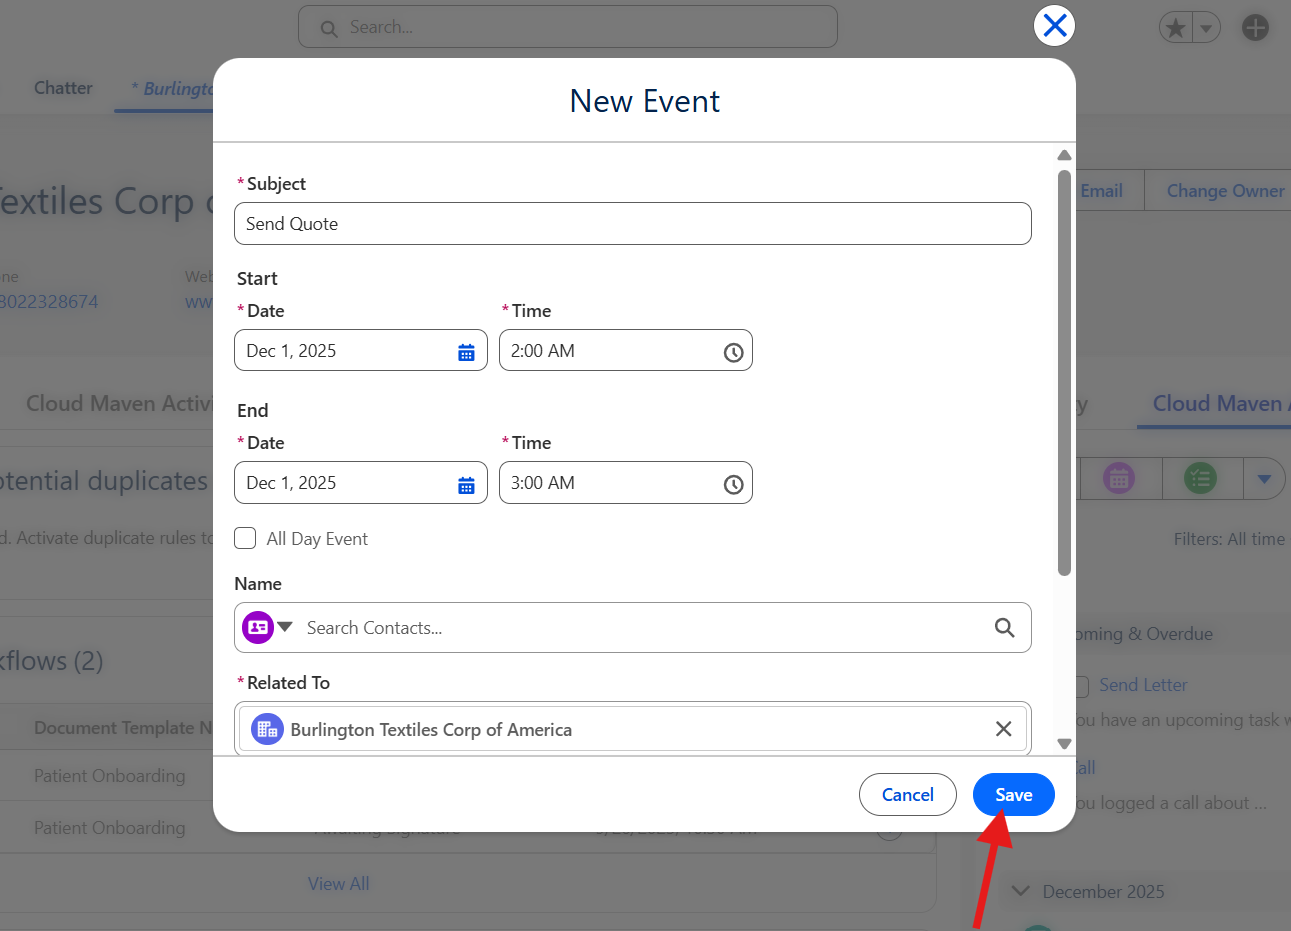
Click Save to create the event.
7. View Event
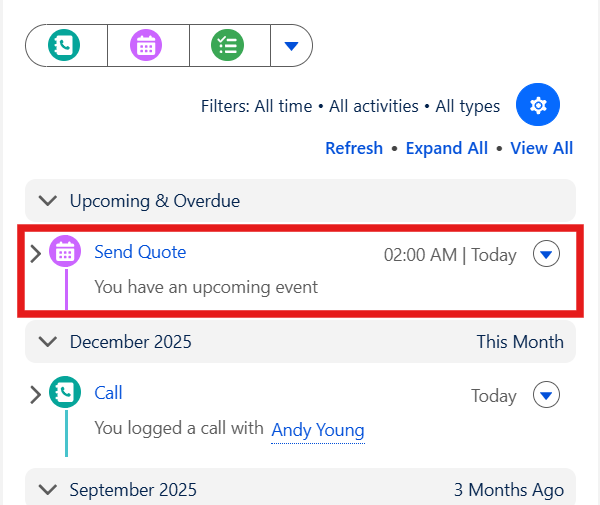
After saving, the event entry will immediately appear in the Activity Component timeline.
3. Create a new Task.
This guide describes how to create a task using Activity Component.
1. Log In to Salesforce
➡ Access your Salesforce org with the appropriate credentials.
2. Navigate to the Source Record
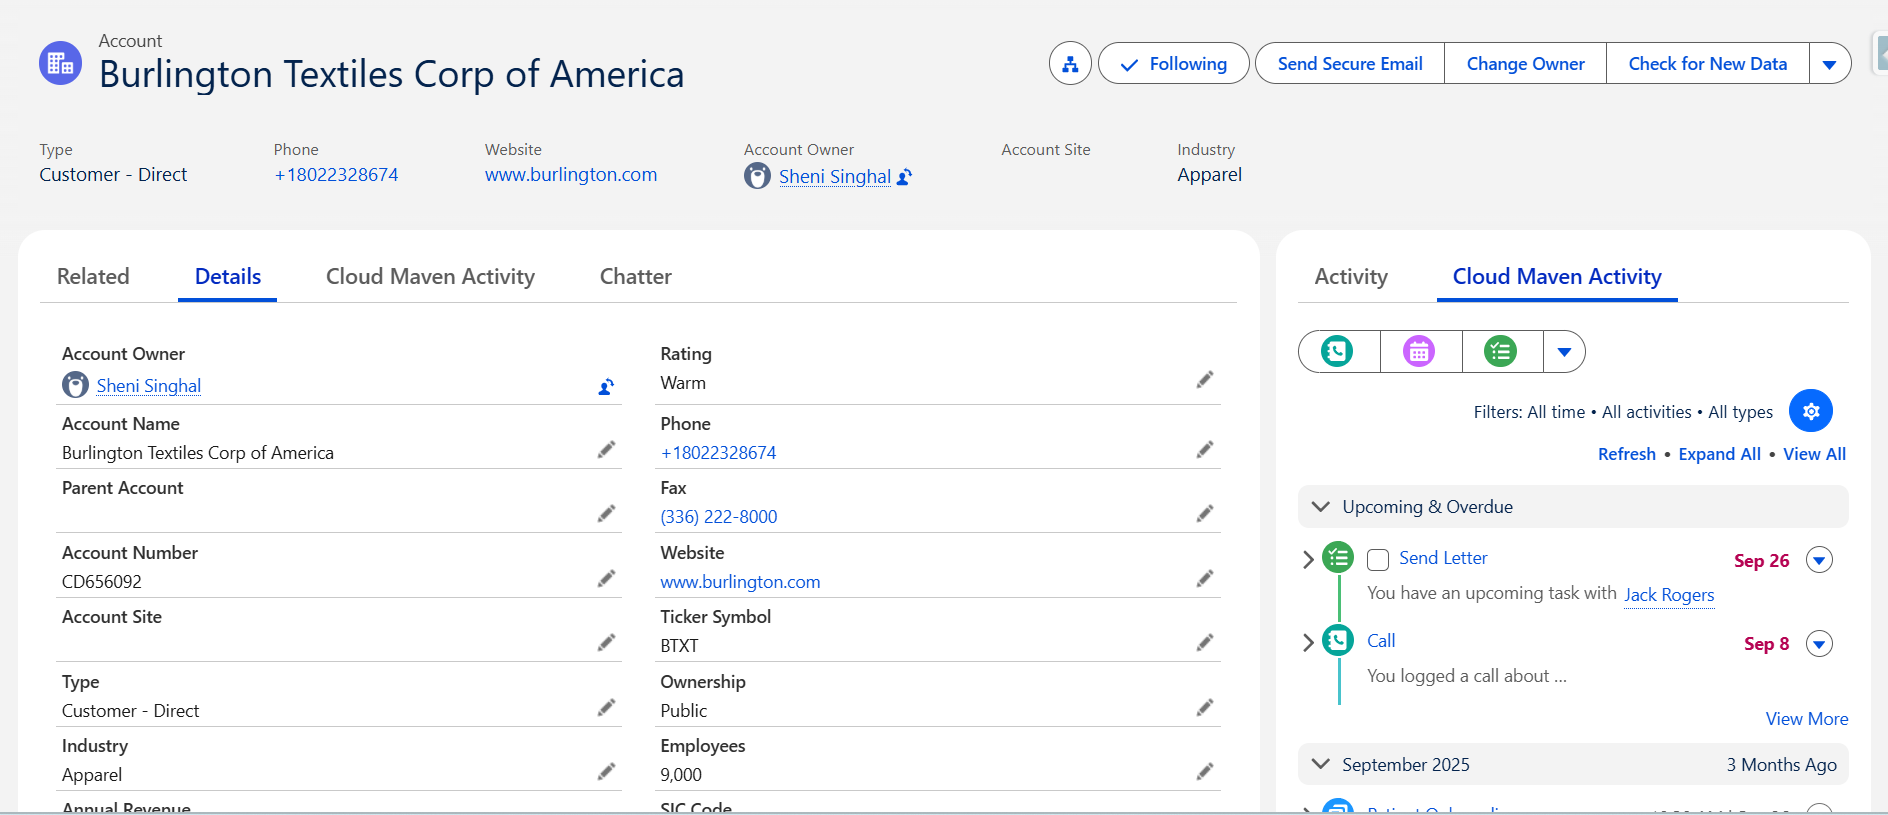
Navigate to the Account, Contact, Opportunity, Case, or any other record where you want to create a task.
3. Open the Activity Component
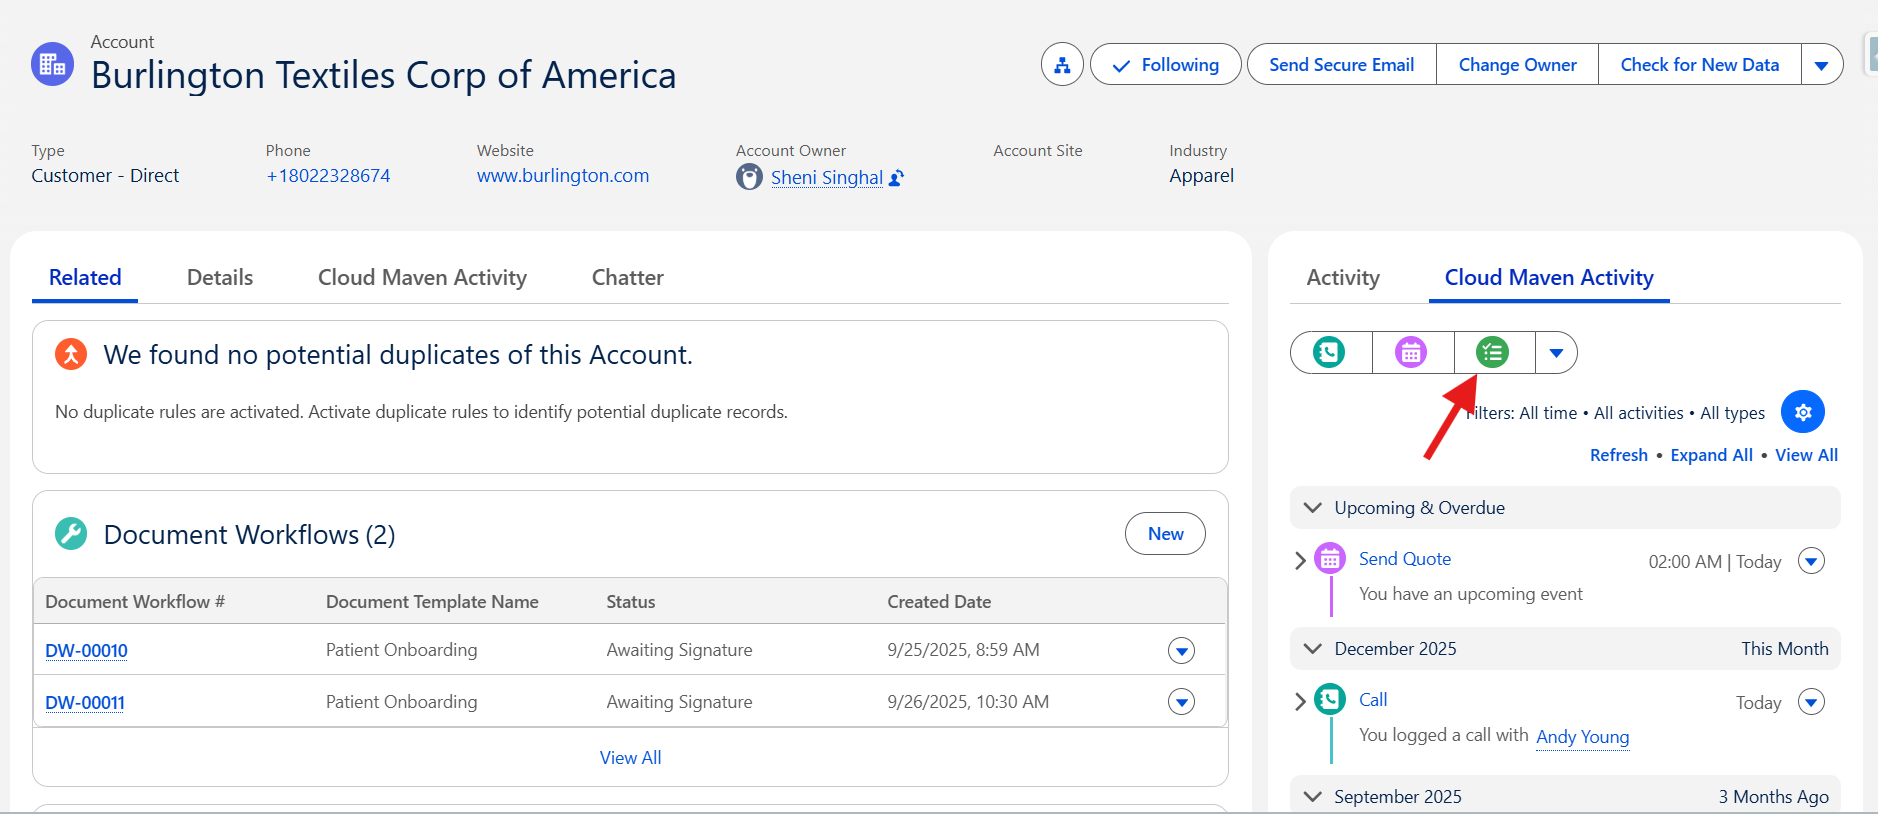
4. Start Creating a Task
Click the New Task button/icon in the Activity Component toolbar. A popup window will appear.
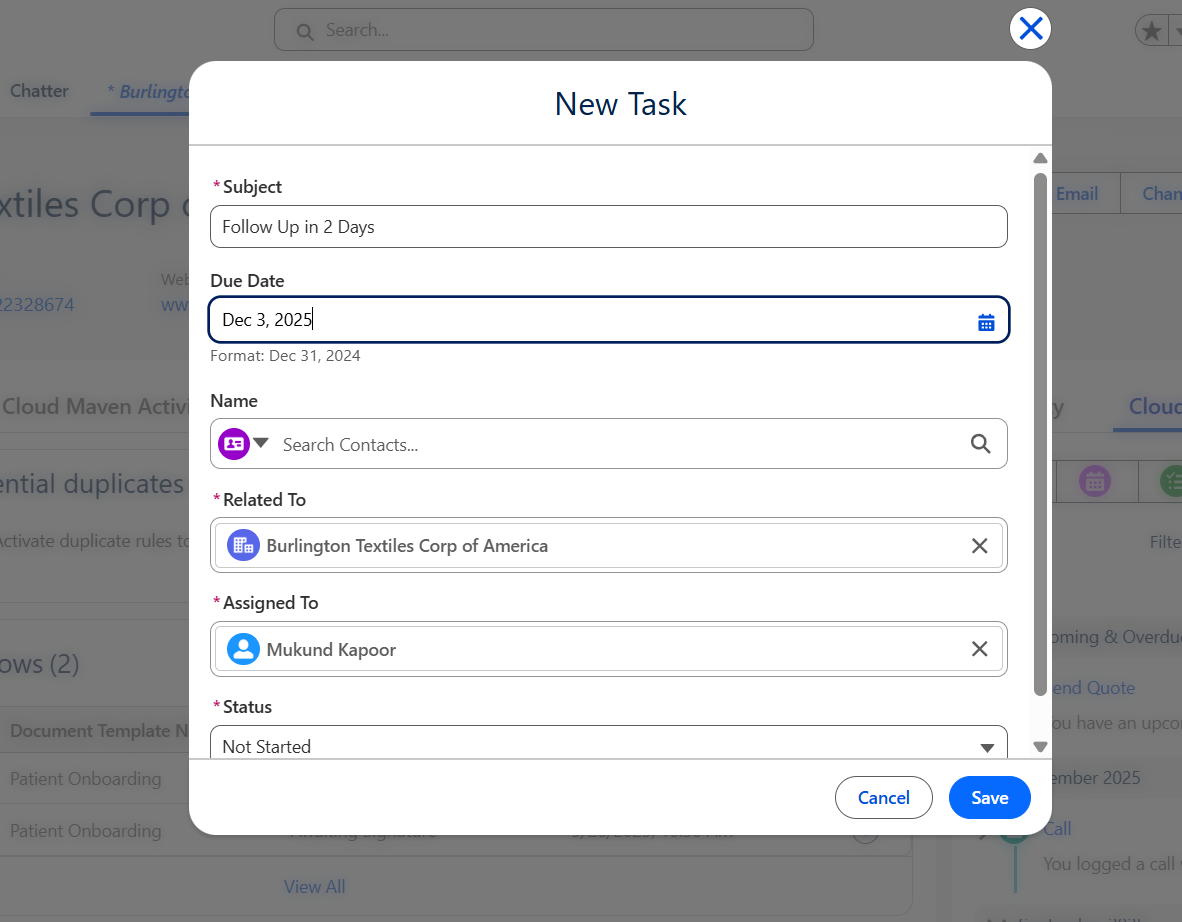
5. Enter Task Information
Provide Subject, Due Date, Description, and any required fields.
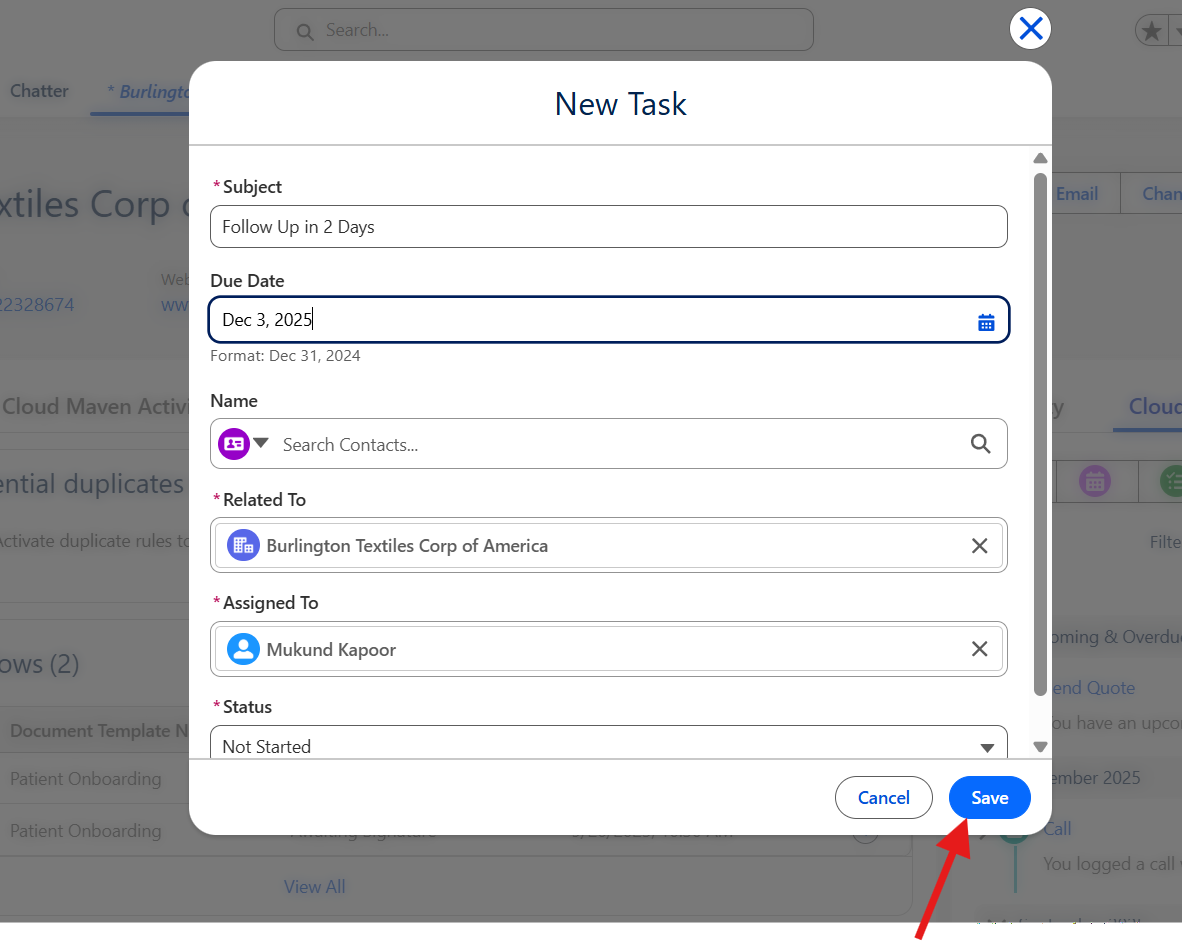
6. Save the Task
Click Save to create the task.
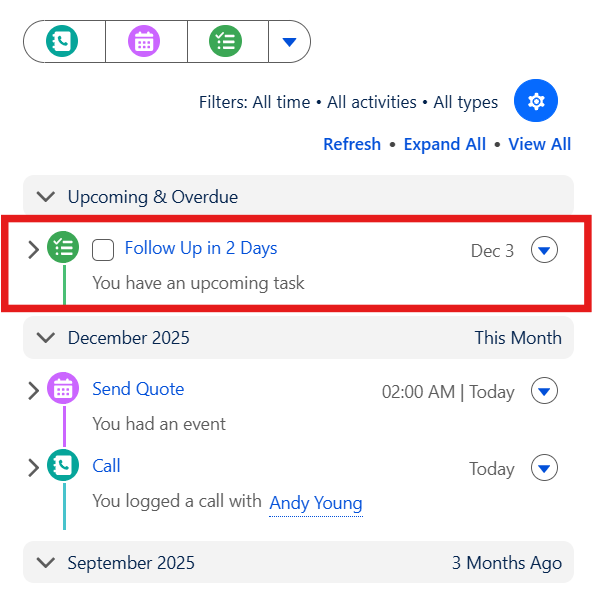
7. View Task
After saving, the task entry will immediately appear in the Activity Component timeline.
4. Create a new Note.
This guide describes how to create a note using Activity Component.
1. Log In to Salesforce
➡ Access your Salesforce org with the appropriate credentials.
2. Navigate to the Source Record
Navigate to the Account, Contact, Opportunity, Case, or any other record where you want to create a note.
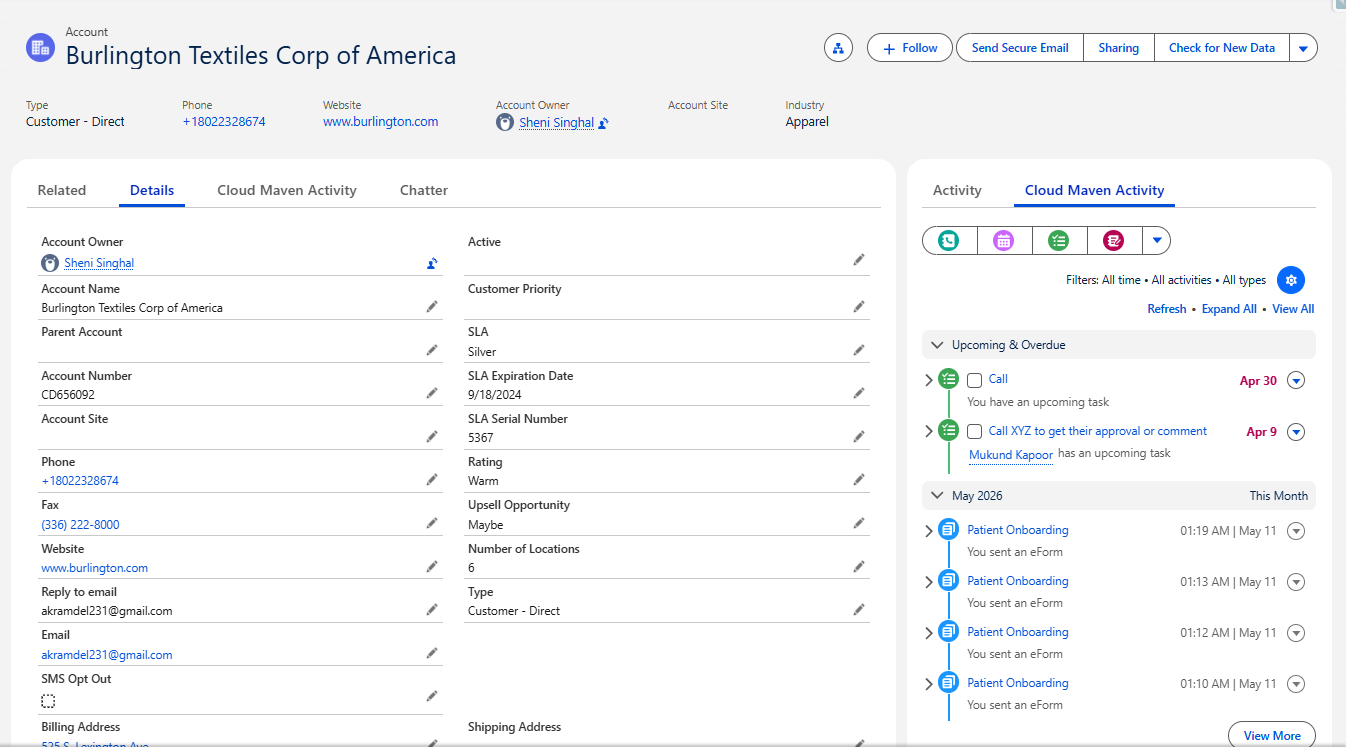
3. Open the Activity Component
Click on Activity Component Tab or Scroll to Activity Section on the record page.
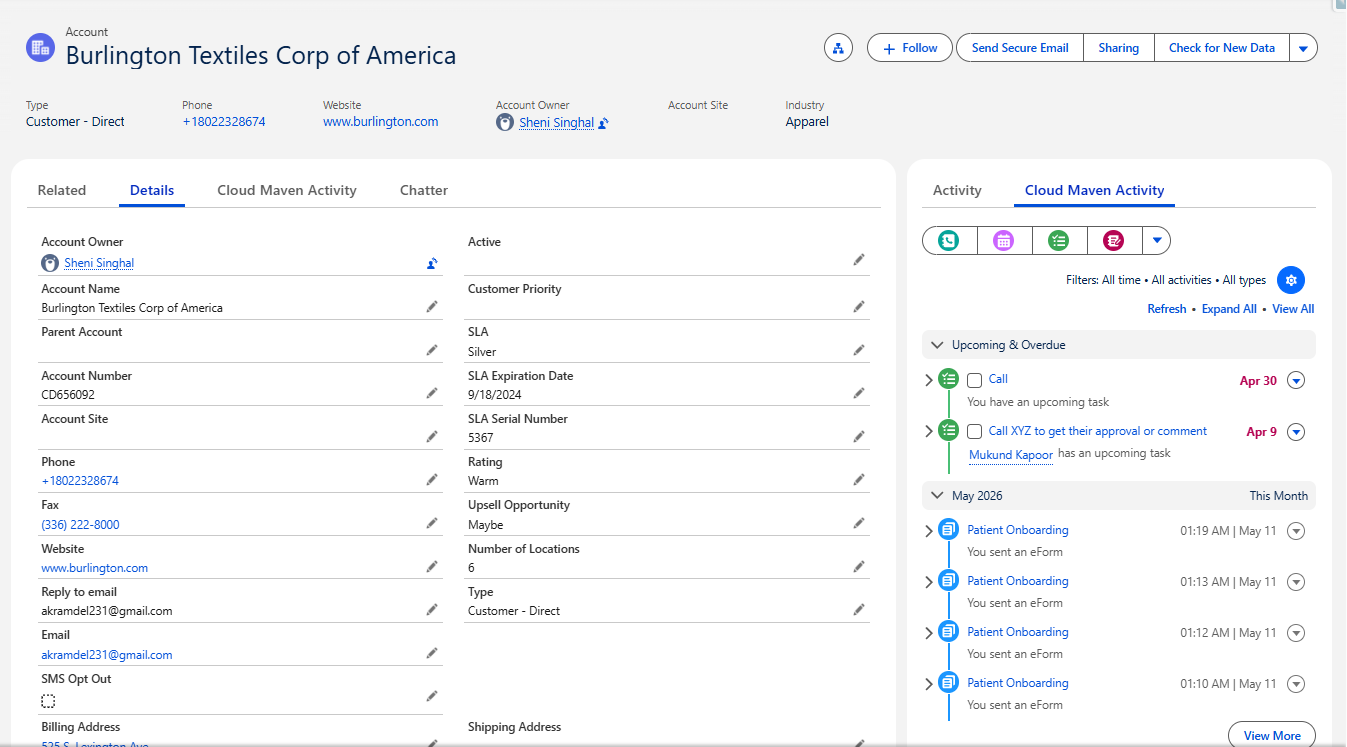
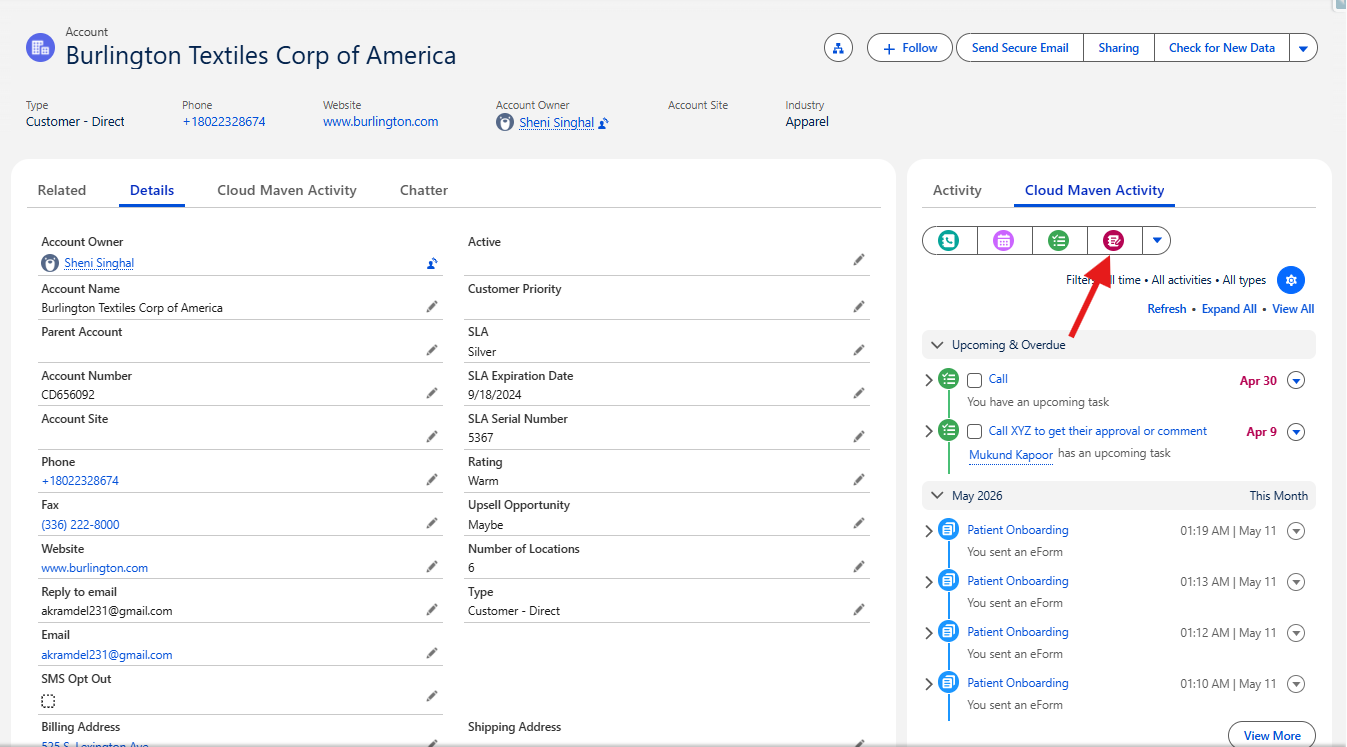
4. Start Creating a Task
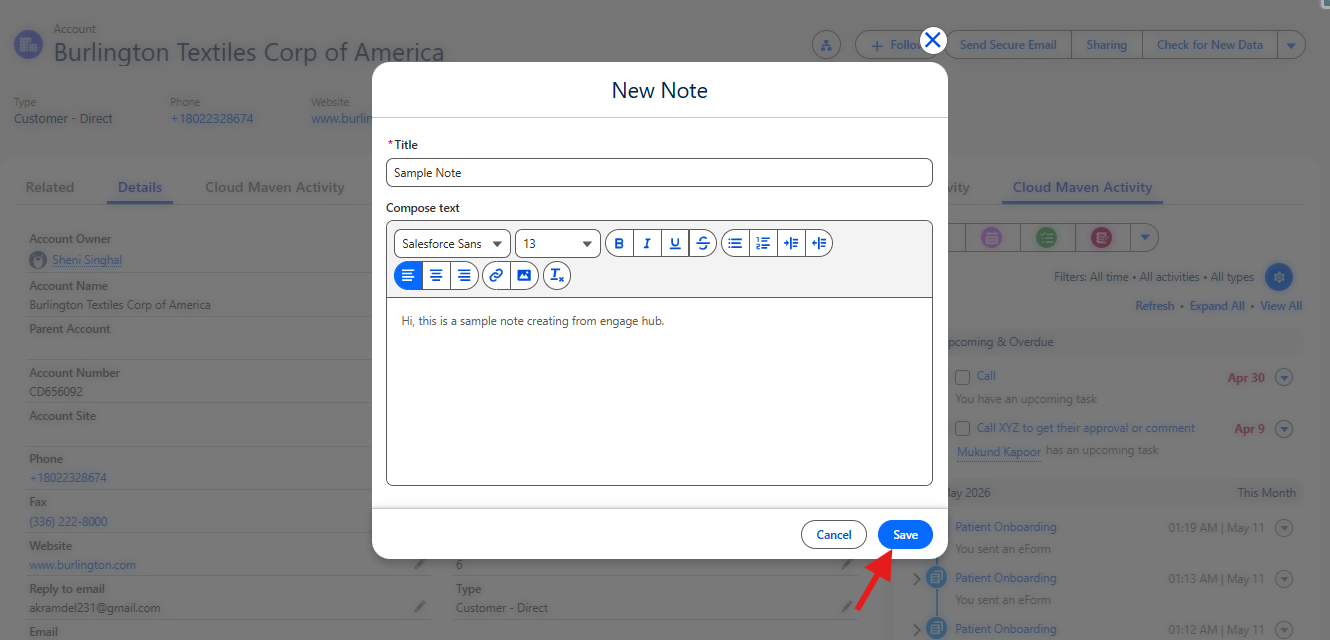
Click the New Note button/icon in the Activity Component toolbar. A popup window will appear.
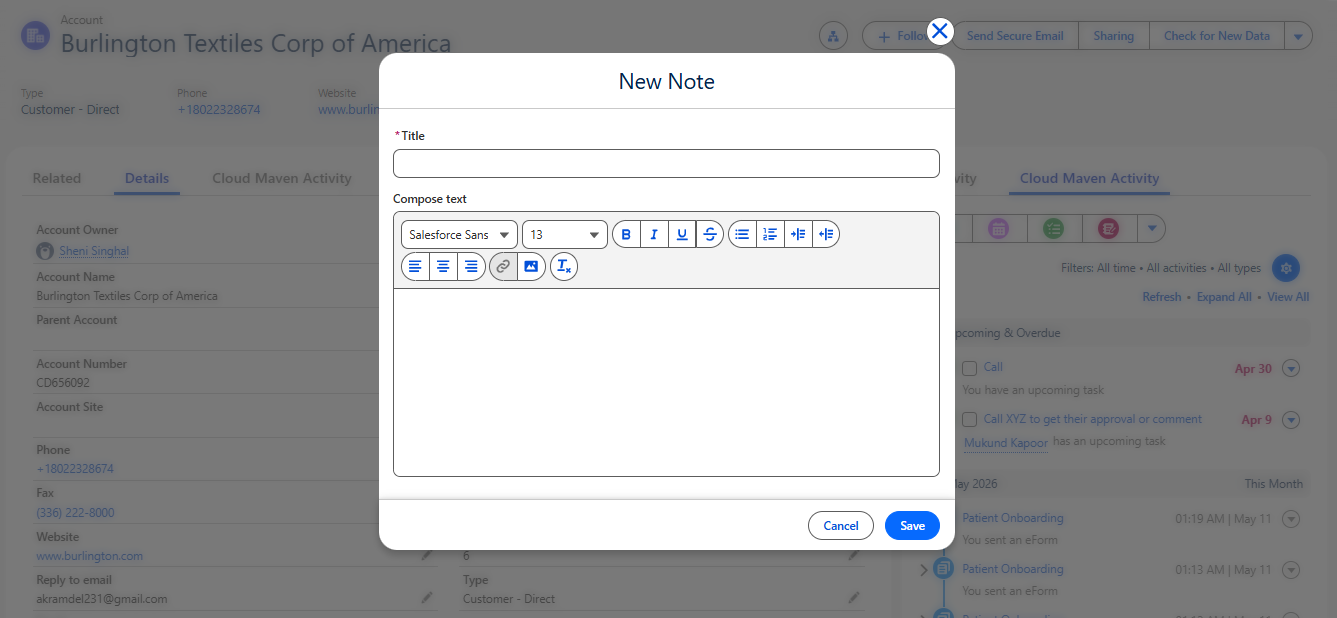
5. Enter Note Information
Provide Title and Notes
6. Save the Note
Click Save to create the note.
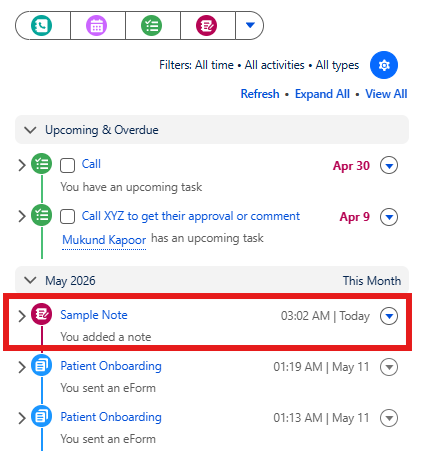
7. View Note
After saving, the note entry will immediately appear in the Activity Component timeline.
5. Send Secure Email.
This guide describes how to send secure email using Activity Component.
1. Log In to Salesforce
➡ Access your Salesforce org with the appropriate credentials.
2. Navigate to the Source Record
Navigate to the Account, Contact, Opportunity, Case, or any other record where you want to send an email.
3. Open the Activity Component
Click on Activity Component Tab or Scroll to Activity Section on the record page.
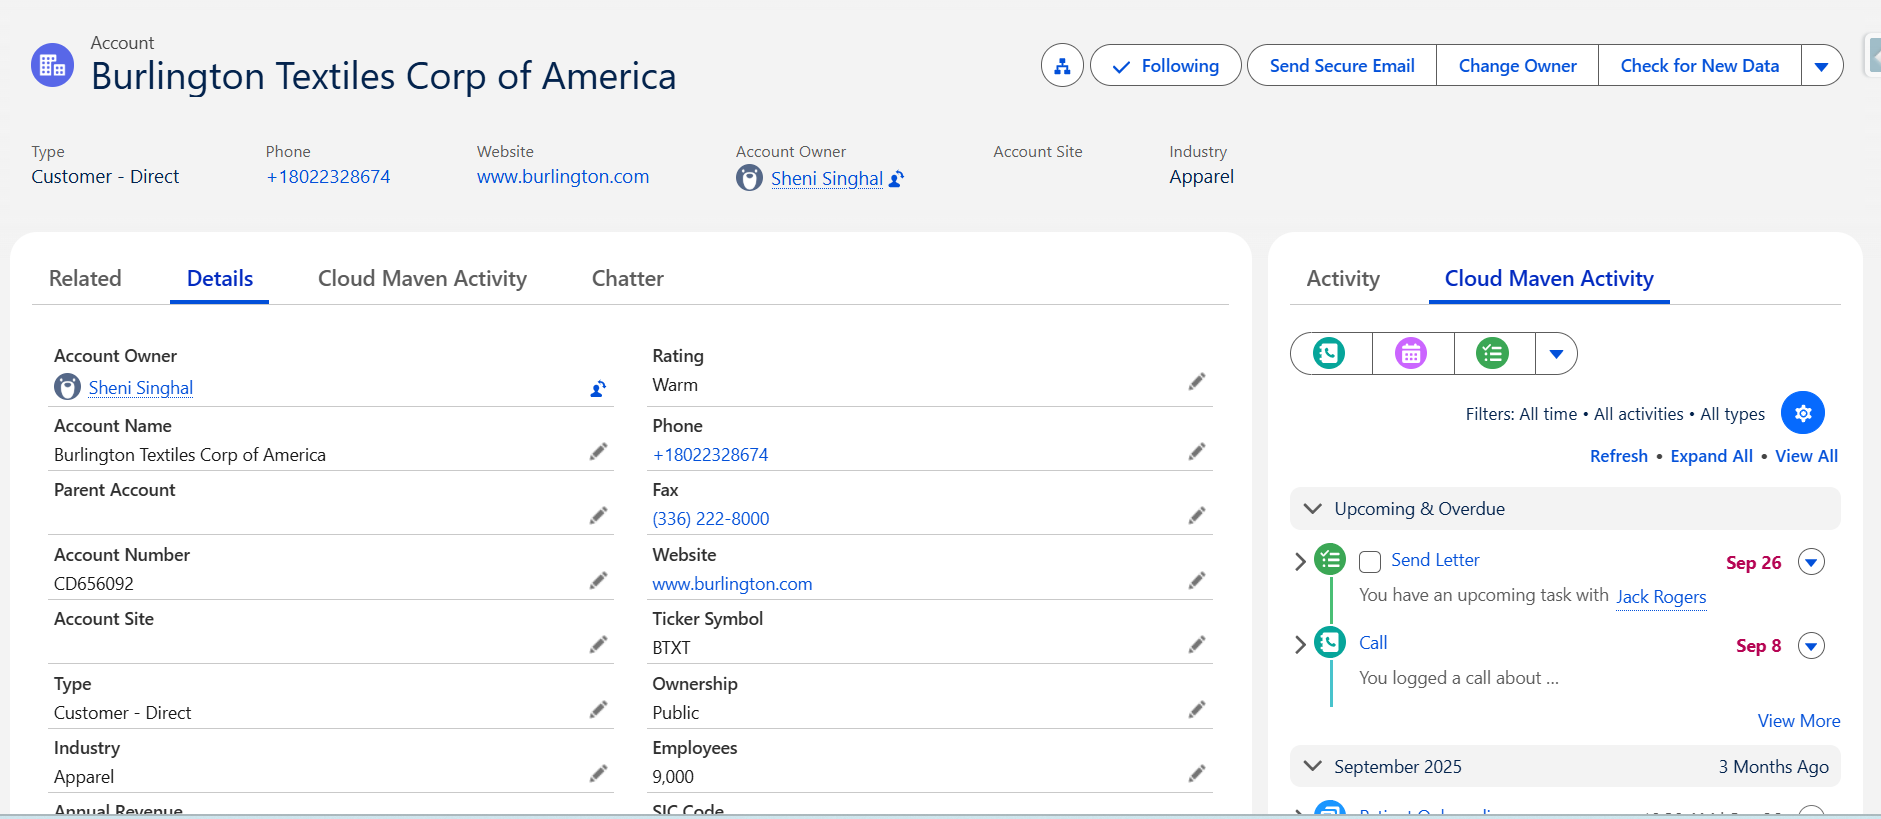
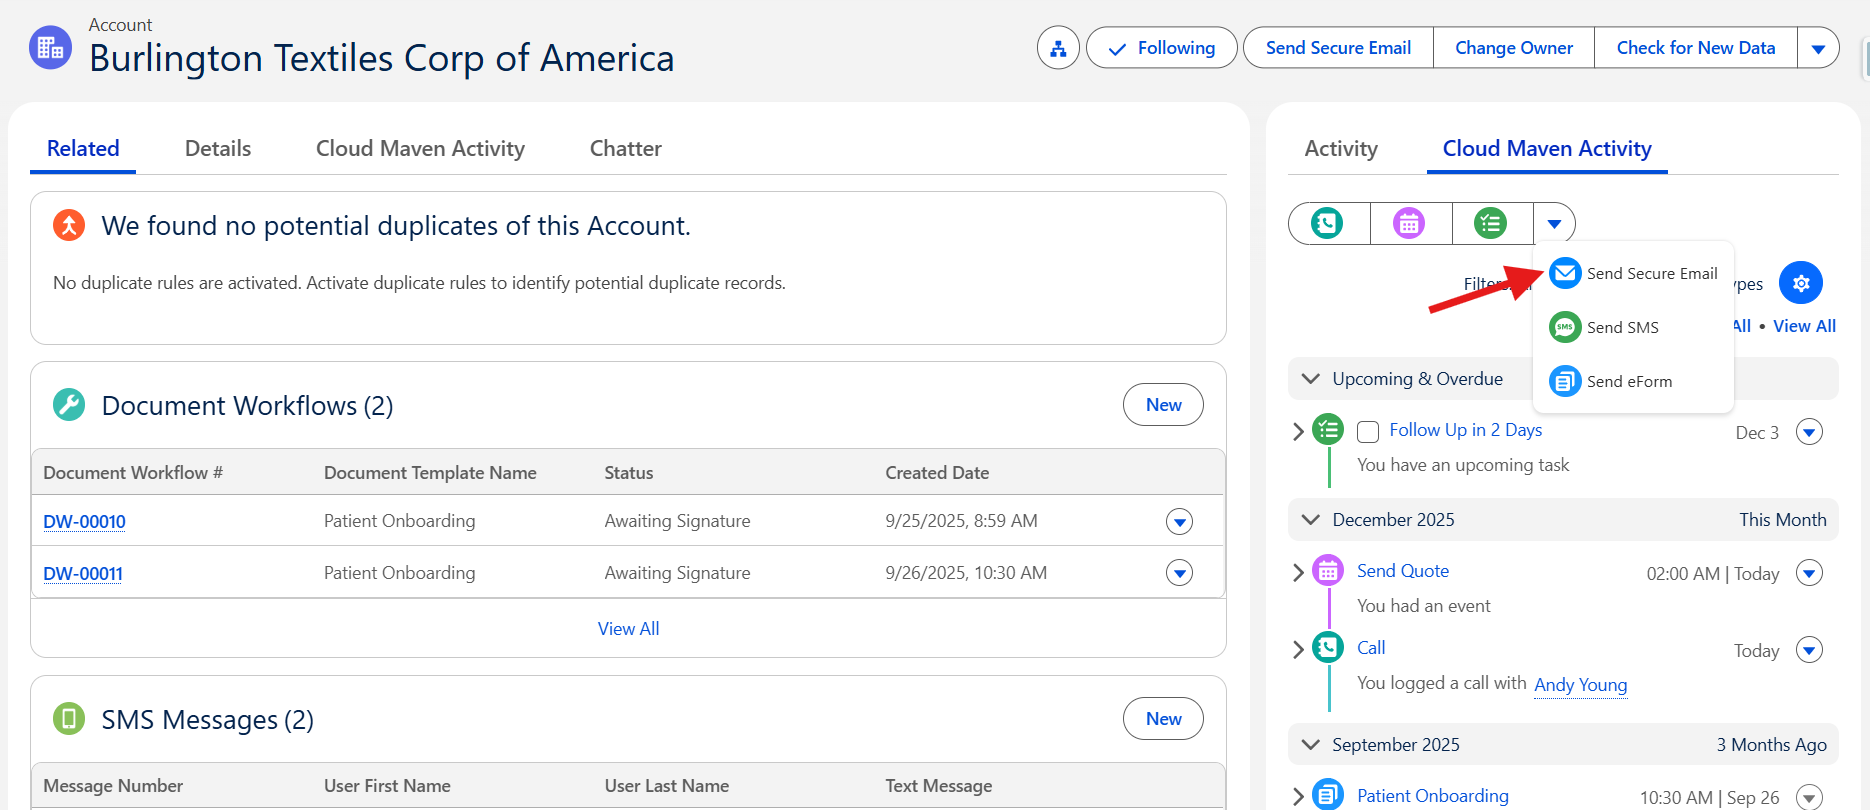
4. Click Send Secure Email
Click the Send secure email button/icon in the Activity Component toolbar. A popup window will appear.
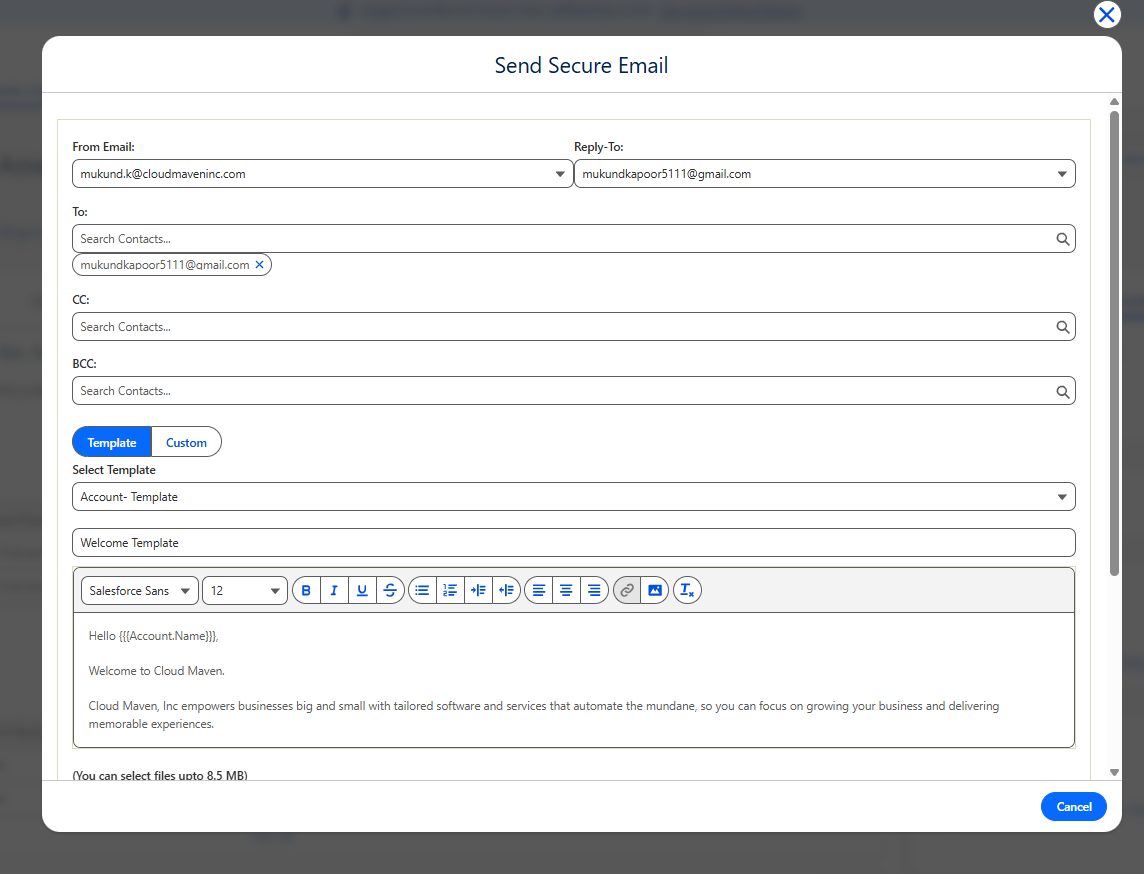
5. Fill in Email Details
Enter recipient information, subject, message body, and any additional required fields.
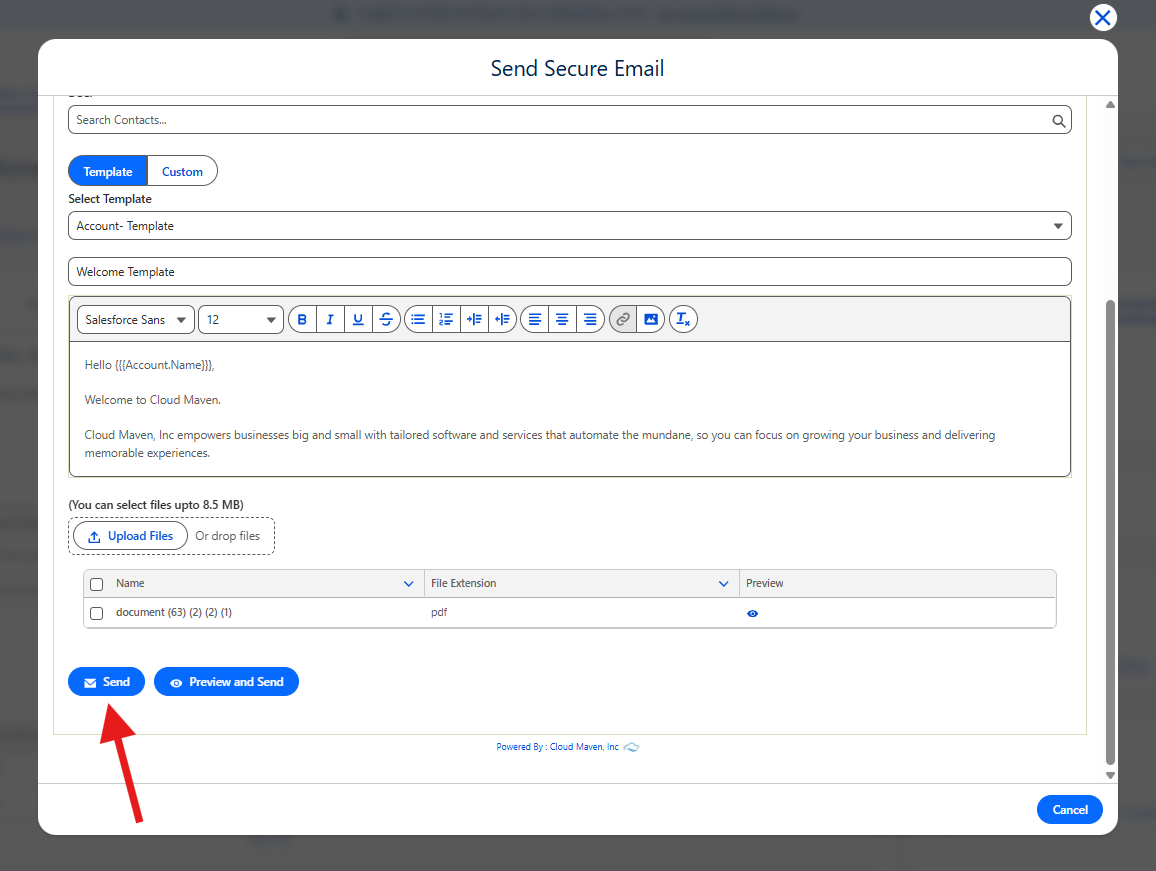
6. Send the Email
Click on Send button to send the email.
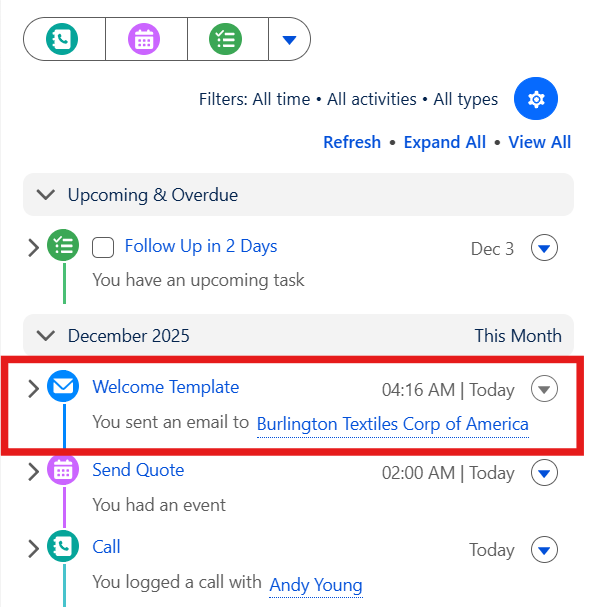
7. View Secure Email Activity
Once sent, the email activity will appear in the timeline.
6. Send SMS.
This guide describes how to send an sms using Activity Component.
1. Log In to Salesforce
➡ Access your Salesforce org with the appropriate credentials.
2. Navigate to the Source Record
Navigate to the Account, Contact, Opportunity, Case, or any other record where you want to send an sms.
3. Open the Activity Component
Click on Activity Component Tab or Scroll to Activity Section on the record page.
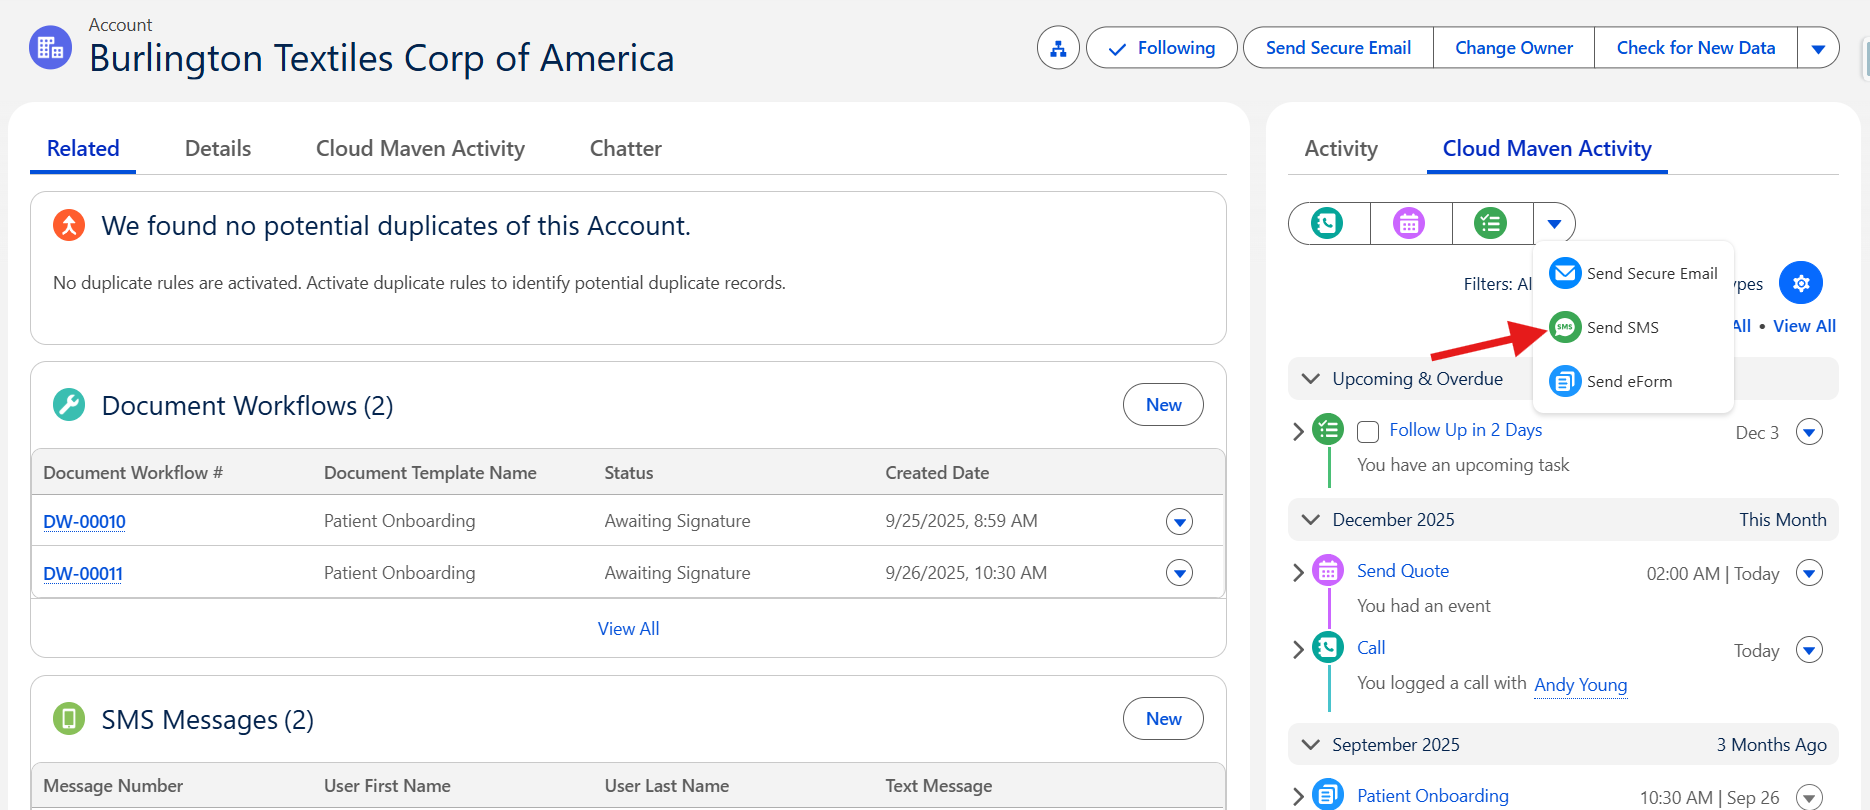
4. Click Send SMS
Click the Send SMS button/icon in the Activity Component buttons dropdown. A popup window will appear.
5. Enter SMS Content
Type your message in the provided field.
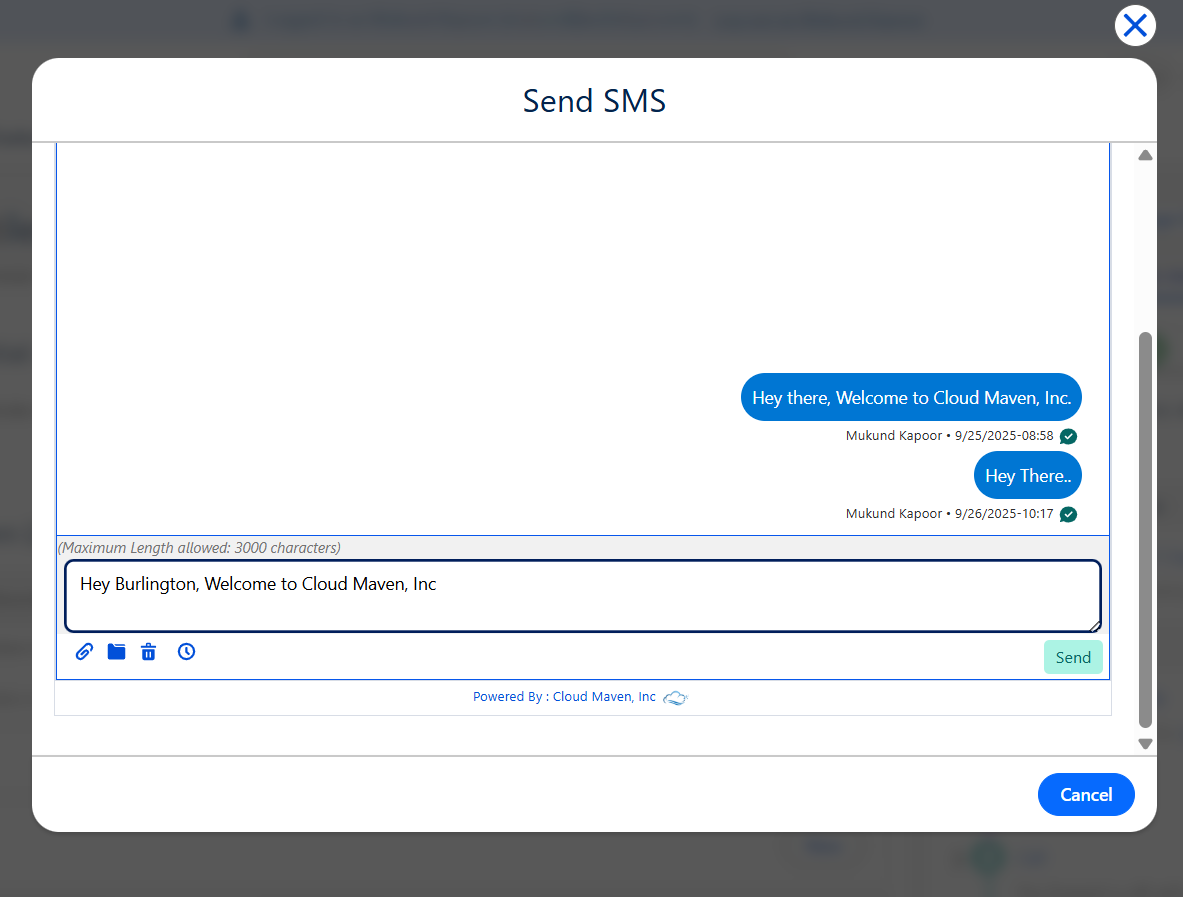
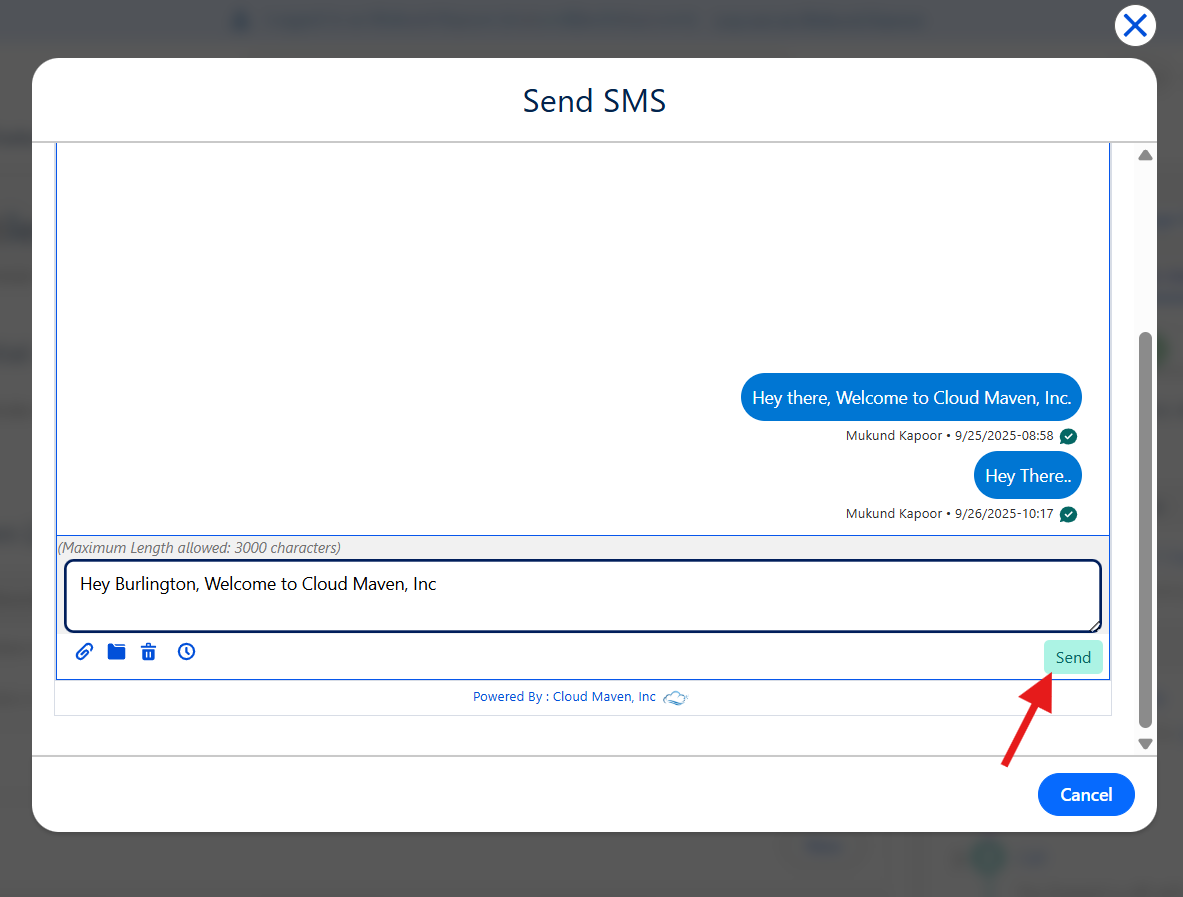
6. Send SMS
Click on Send button to send SMS.
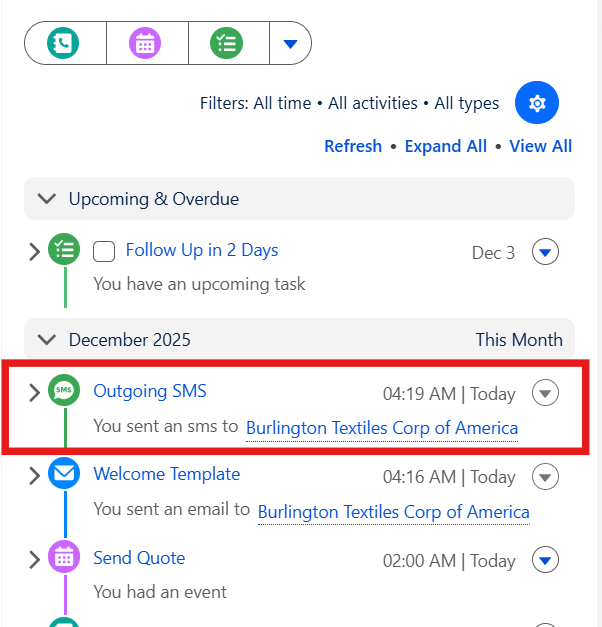
7. View SMS Activity
The SMS record will appear in the timeline after sending.
7. Send eForm.
This guide describes how to send an eForm using Activity Component.
1. Log In to Salesforce
➡ Access your Salesforce org with the appropriate credentials.
2. Navigate to the Source Record
Navigate to the Account, Contact, Opportunity, Case, or any other record where you want to send an eForm.
3. Open the Activity Component
Click on Activity Component Tab or Scroll to Activity Section on the record page.
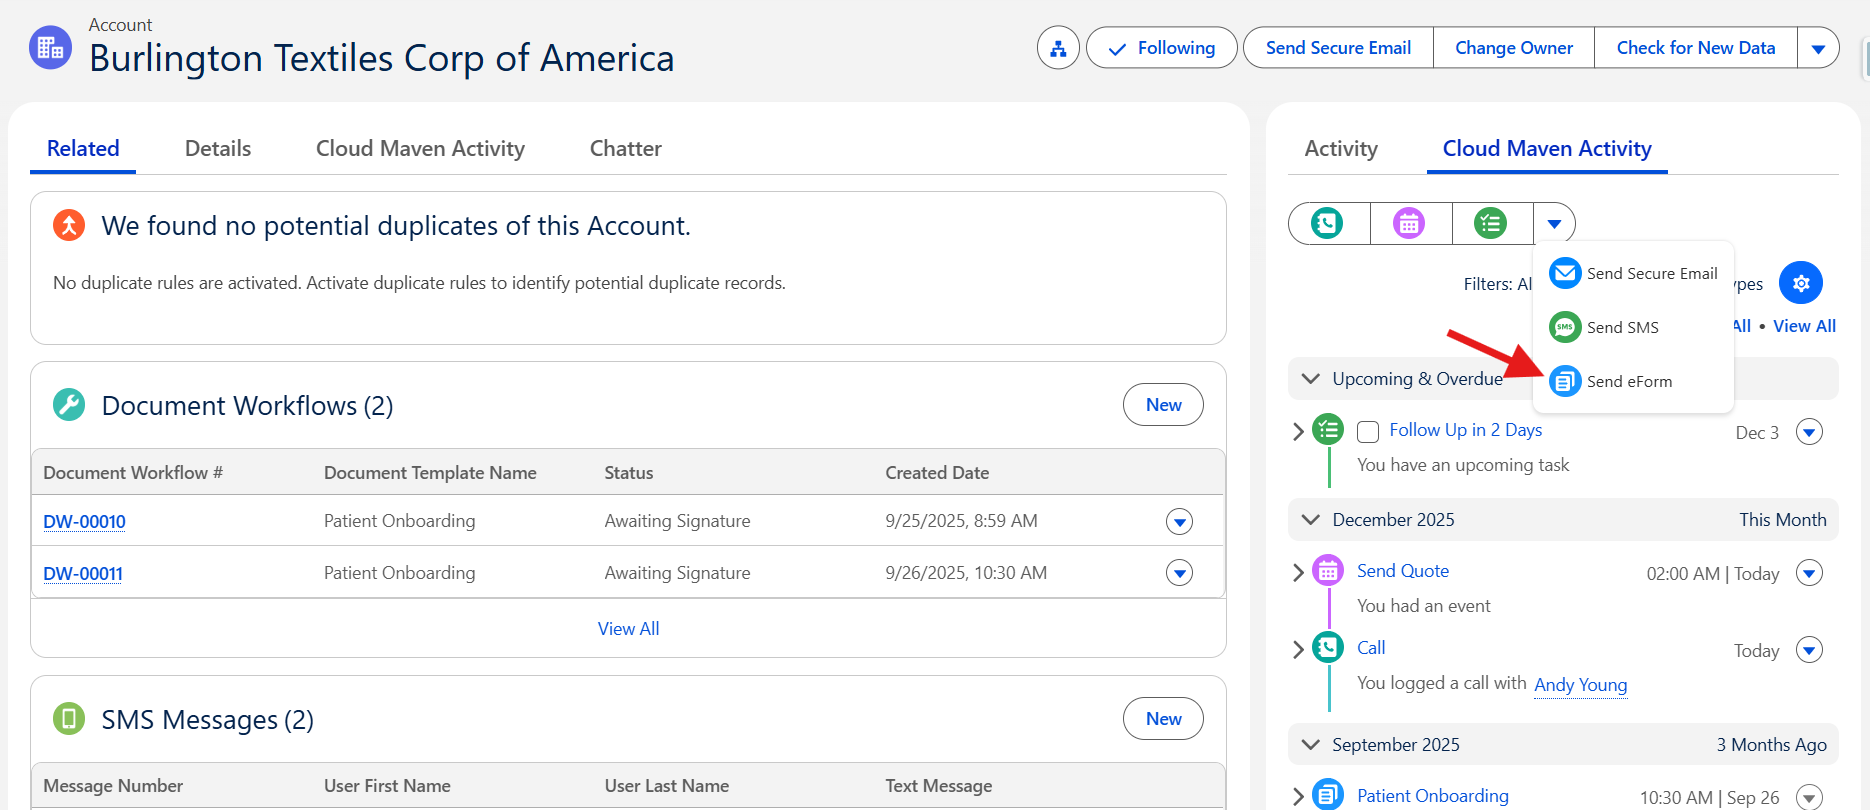
4. Click Send eForm
Click the send eForm button/icon in the Activity Component toolbar. A popup window will appear.
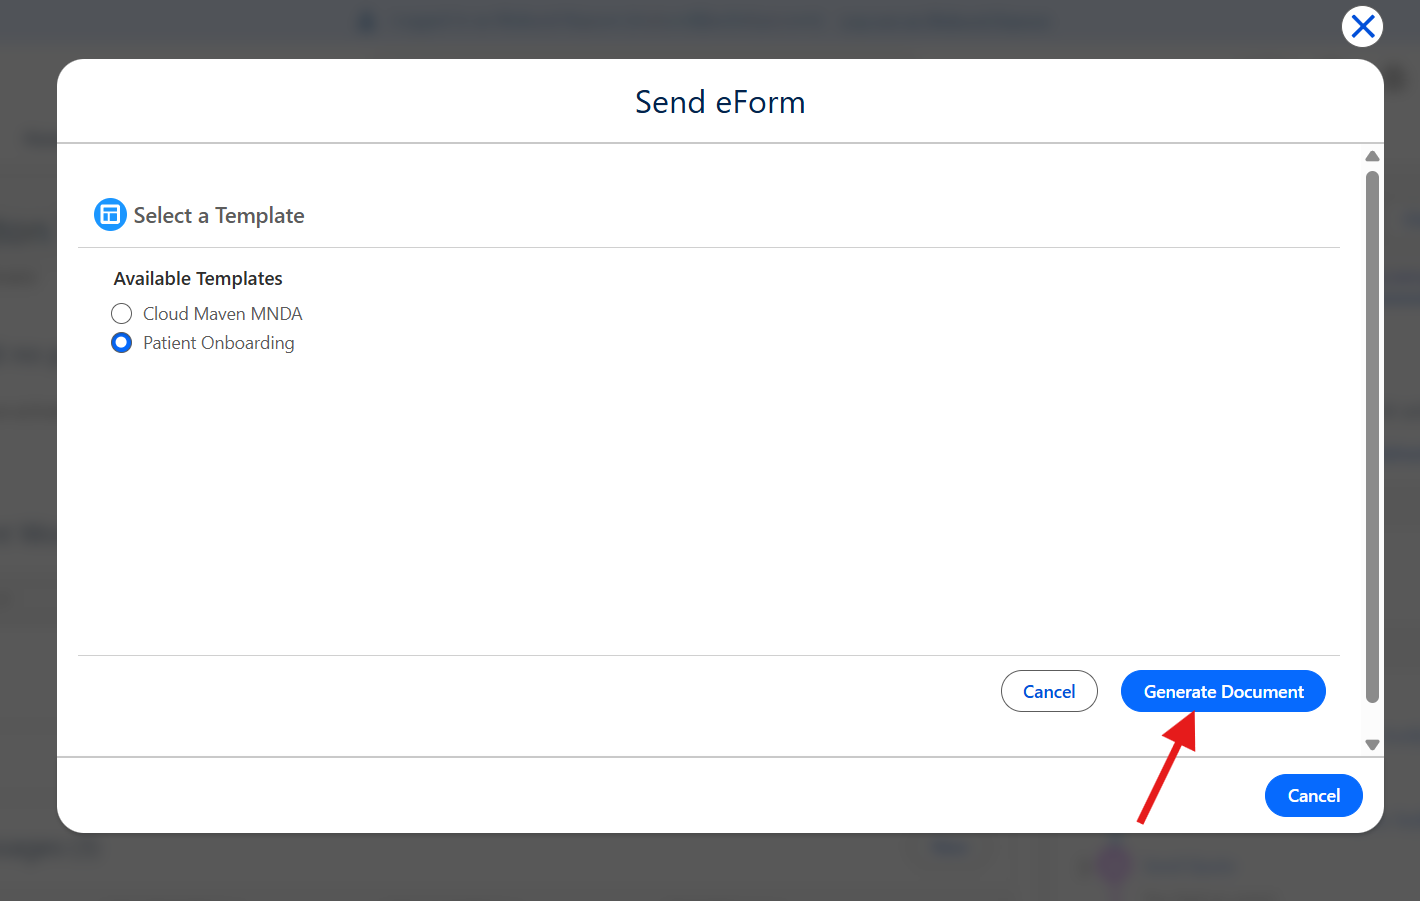
5. Select Template and click on Generate Document Button
Choose the appropriate document template and move to next page.
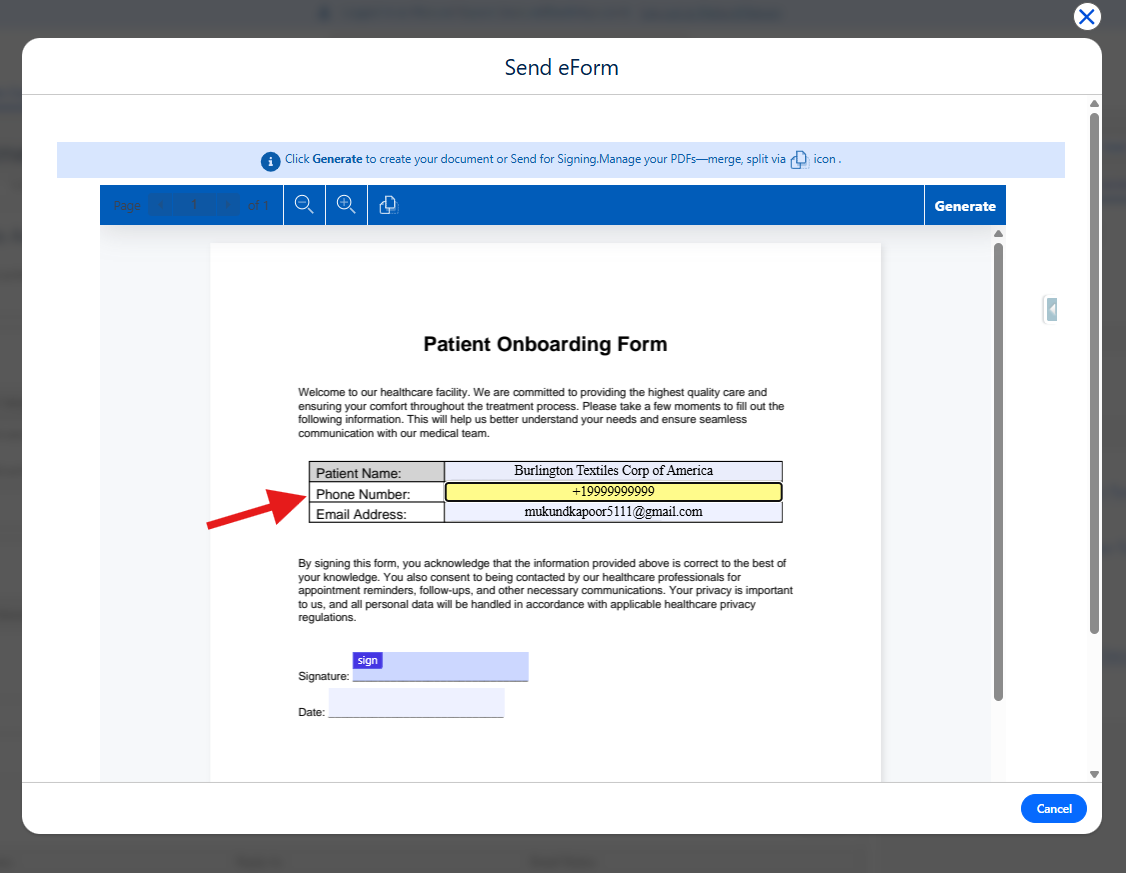
6. Fill in the eForm Details.
Fill in or edit the details in Form (if required).
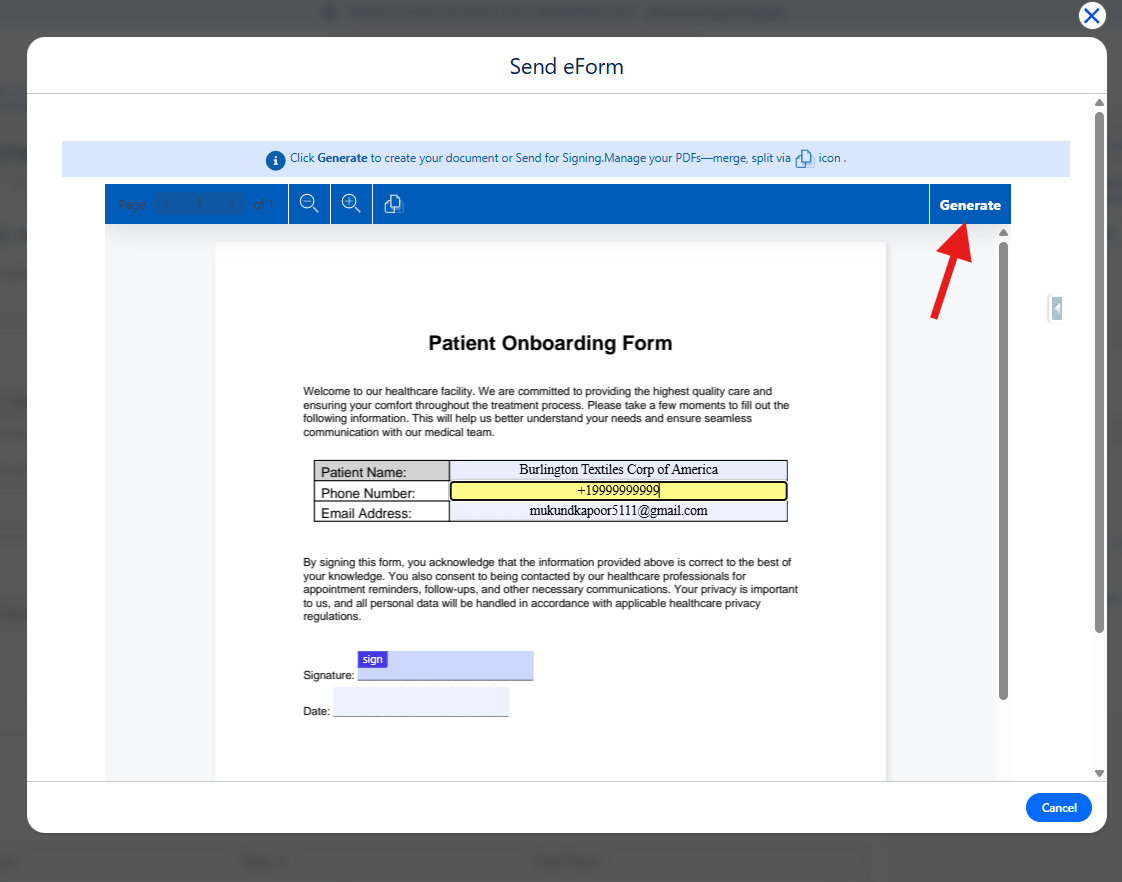
7. Click on Generate Button.
Clicking on Generate will generate and send the eForm.
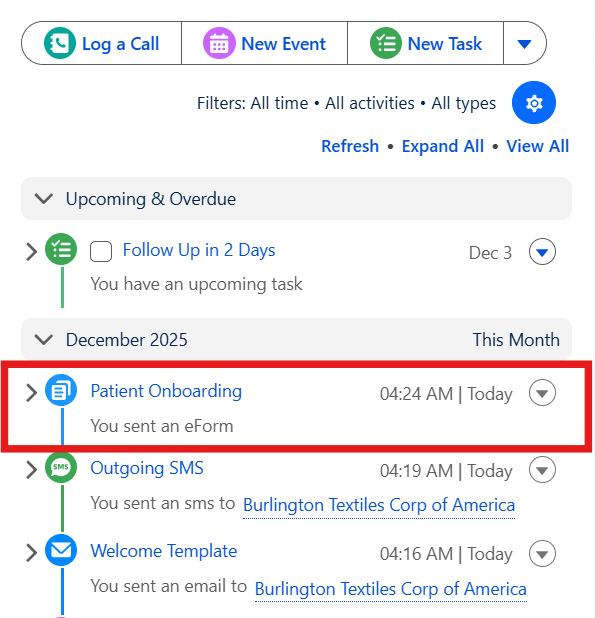
8. View eForm Activity
The eForm entry will appear in the timeline immediately.
📩 Need Help?
For any questions or support, don't hesitate to get in touch with us at: