
This document outlines the necessary steps to successfully configure and integrate Document Insights - Moneythumb with Salesforce. This guide includes remote site settings, site creation, user permissions, and additional configurations required for proper system operation.
Introduction
Please ensure that you have the appropriate Salesforce administrative privileges before proceeding with the installation and configuration process.
Click here to Discover the full range of features offered by the Document Insights.
1. Intended Users
-
Salesforce Admins – Responsible for setup and configuration
-
End Users – Business users who use document insights for parsing and storing the data.
-
Developers – Those integrating with external systems.
2. Prerequisites
2.1 System Requirements
Salesforce Professional, Enterprise, Unlimited, or Developer Edition
Required Salesforce permissions (System Admin access)
2.2 User Roles & Permissions
Admin Access – Required for installation and configuration
3. Installation
4. Post Installation Steps
Complete the post-installation steps to ensure seamless application functionality.
Step 1 - Remote Site Settings
Create the following remote site in the remote site settings and make it active:
-
Go to Setup.
-
Search Remote Site Settings.
-
Click on “New Remote Site”.
-
Fill in the below details -
Remote Site Name - MoneyThumb
Remote Site URL - https://online.moneythumb.com
Active checkbox - Selected
Step 2 - Feature Entitlements
-
Click on the gear icon and go to setup.
-
In the quick find box search for Custom Settings.
-
Go to “Feature Entitlements”.
-
Select “PDF Insights” and Save.
Step 3 - Plaid Common Settings
-
Click on the gear icon and go to setup.
-
In the quick find box search for Custom Settings.
-
Go to Plaid Common Settings.
-
Create the following entries:
|
Key |
Value |
|
|---|---|---|
|
1 |
DisableCloudMavenAnalytics |
false |
|
2 |
Minimum_NSF_Criteria |
150 |
|
3 |
MT_ContentSizeLimit |
3000000 |
Step 4 - Sites
-
Click on the gear icon and go to setup.
-
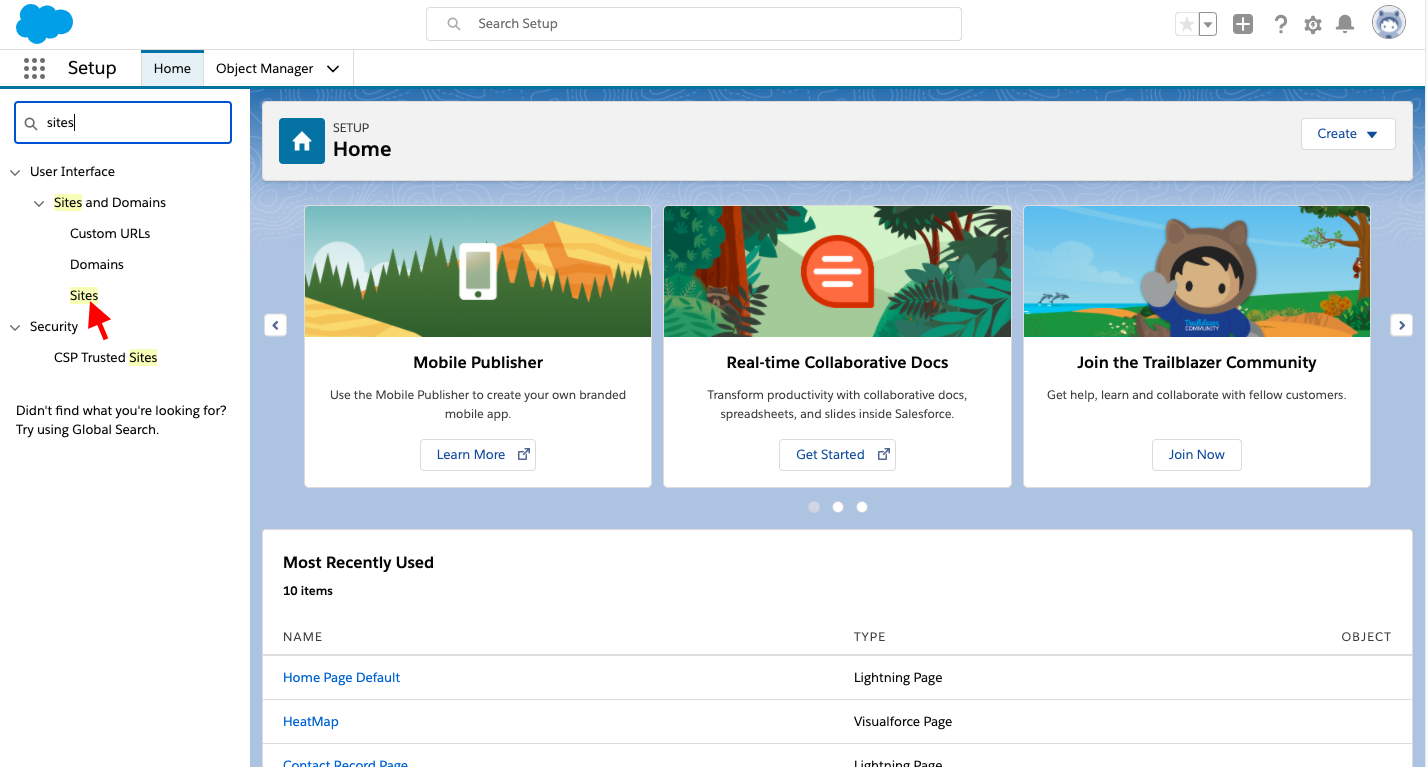
In the quick find box search for sites.
-
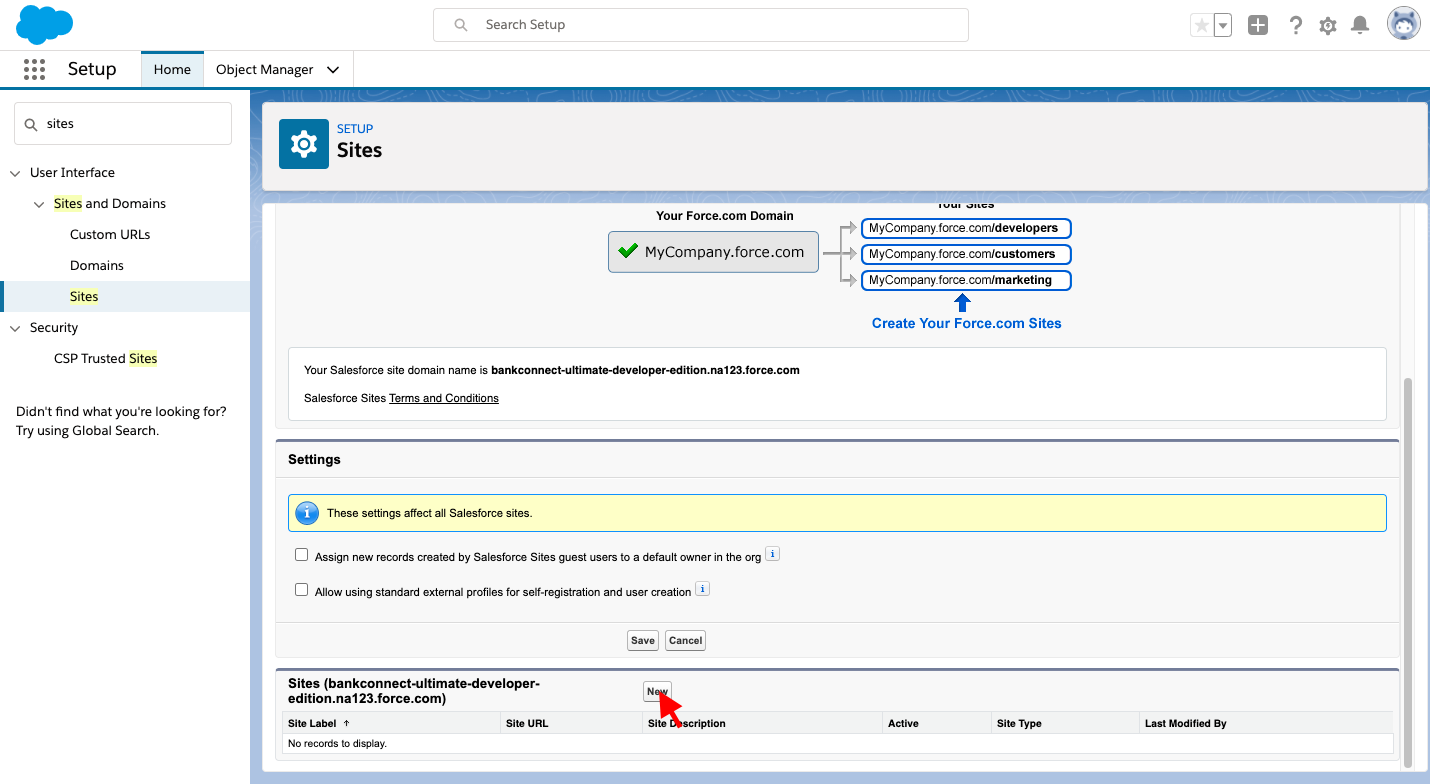
Click New
-
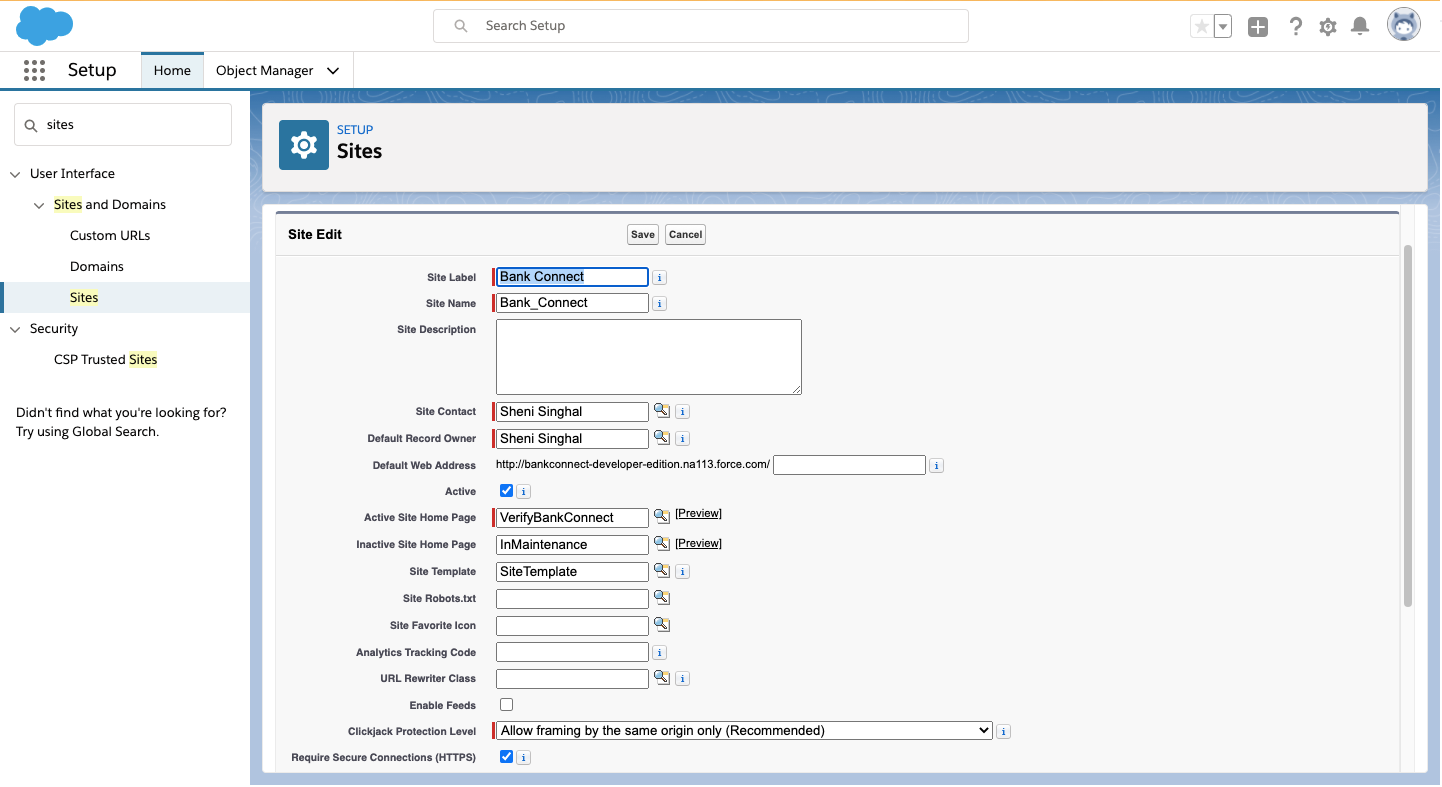
Provide the required information(Label, Name, etc.)
-
In Active Site Home Page Lookup field Add VerifyBankConnect Visual force page.
-
Click Save.
Apex Class and Object Permission Assignment to Site Guest User.
-
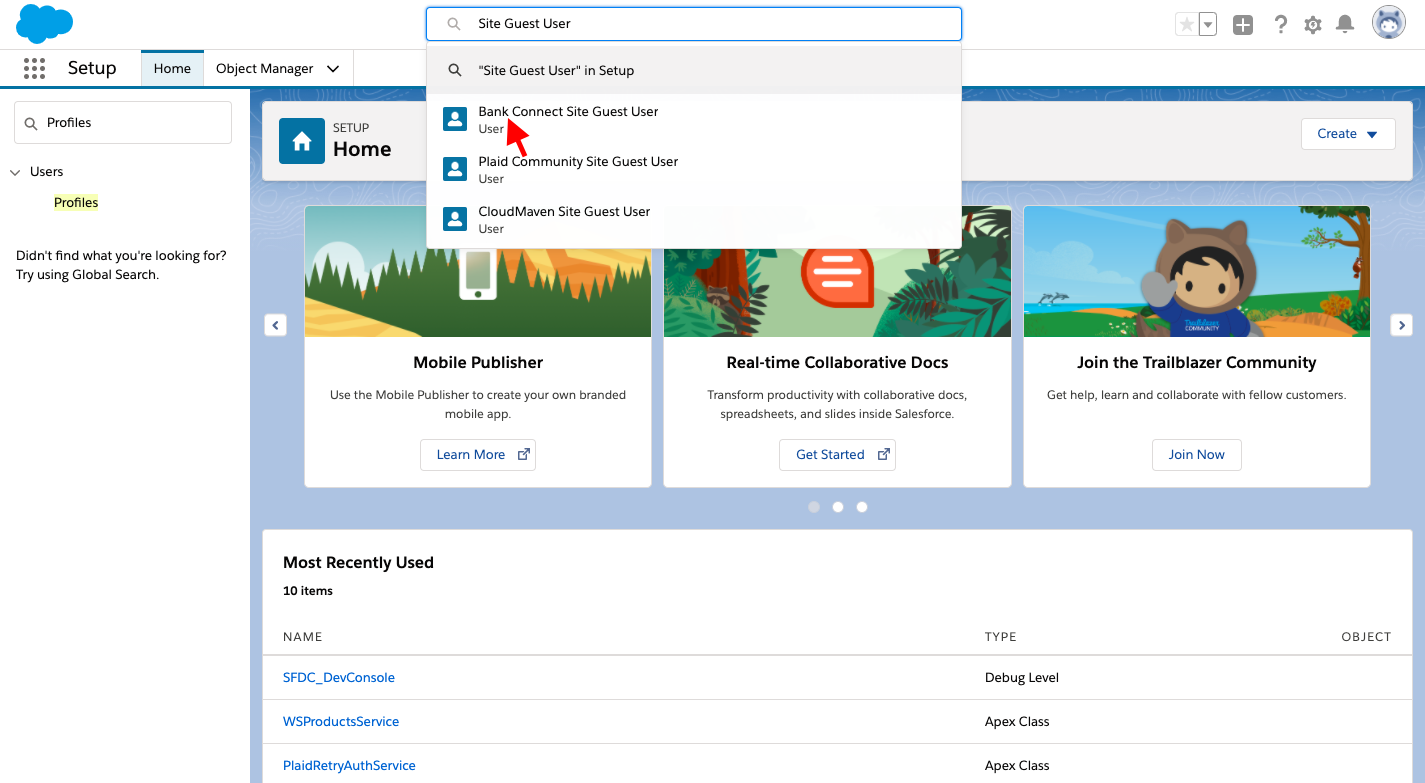
In Global search, Search for Site Guest User.
-
Click on the site name which we have created just now.
-
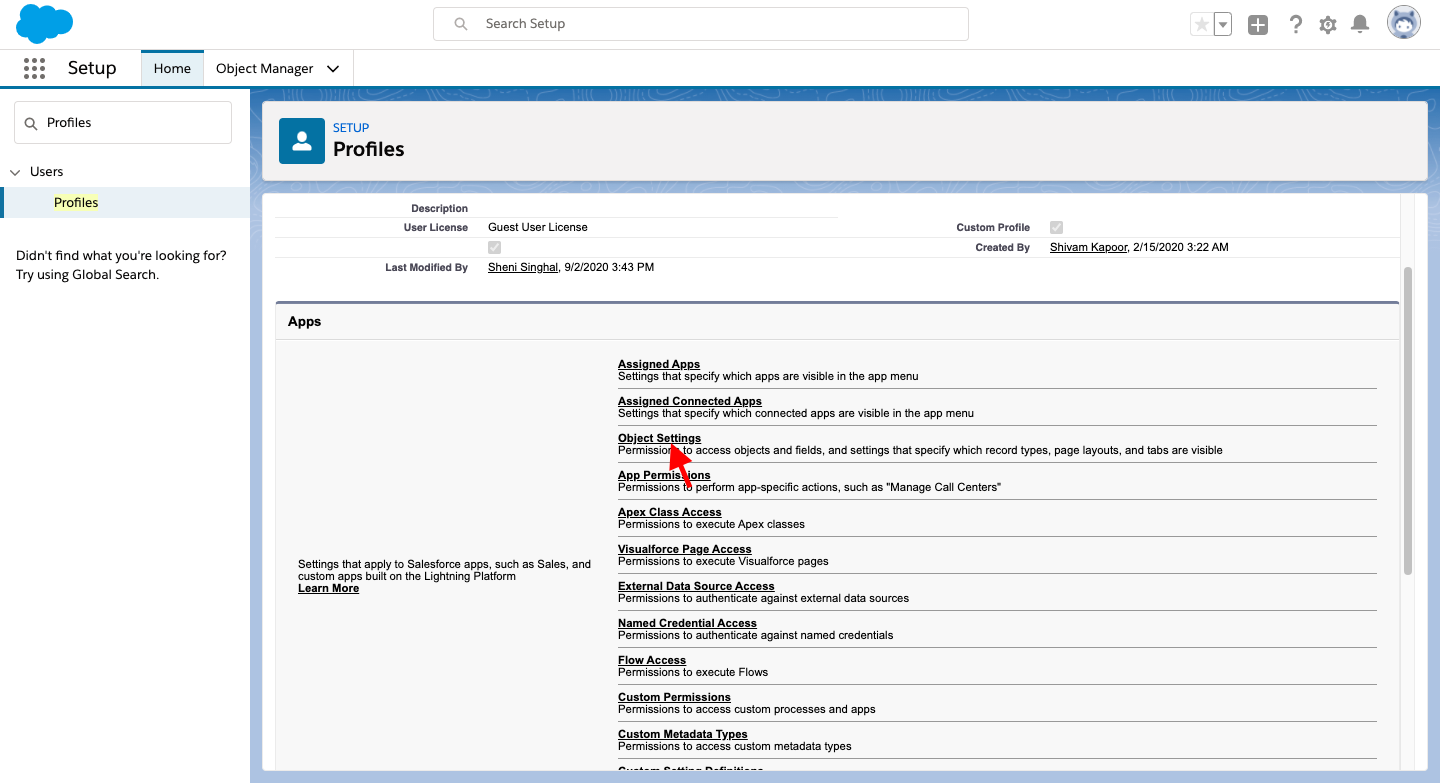
Click on the profile.
-
In Profile Select-Object Settings.
-
Provide Access(Read, Create, and Edit) to the below Objects.
-
Bank Transactions
-
Historical Balances
-
Fraud Signals
-
Companies
-
Statement Summary
-
Monthly Negative Days
-
Document Insight Items
-
-
Now provide access to Apex classes
-
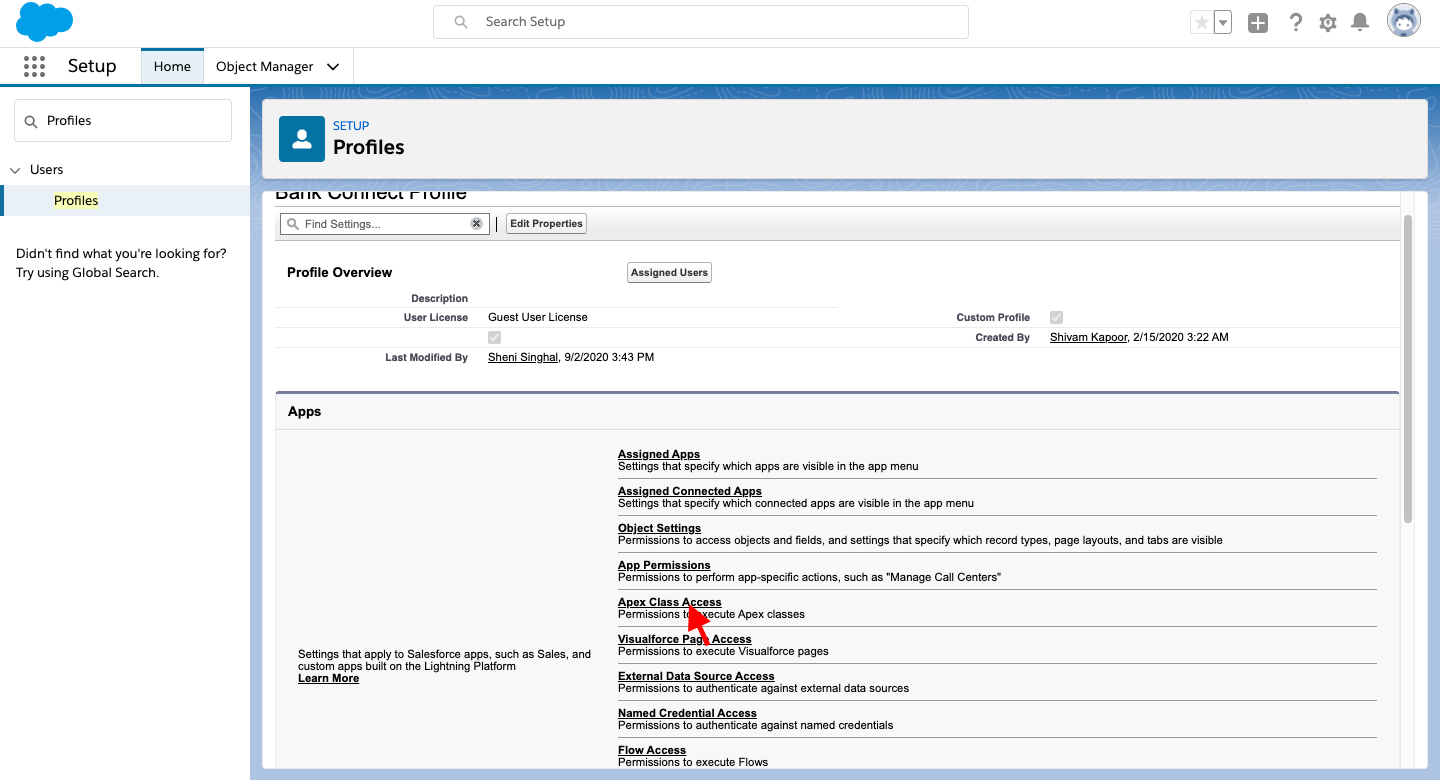
Go to Site Guest User profile again and click on Apex class Access.
-
Provide Access to below class:
bankconnect.Webhook_PDFInsightData.
Step 5 - Permission Sets
-
Click on the gear icon and go to setup.
-
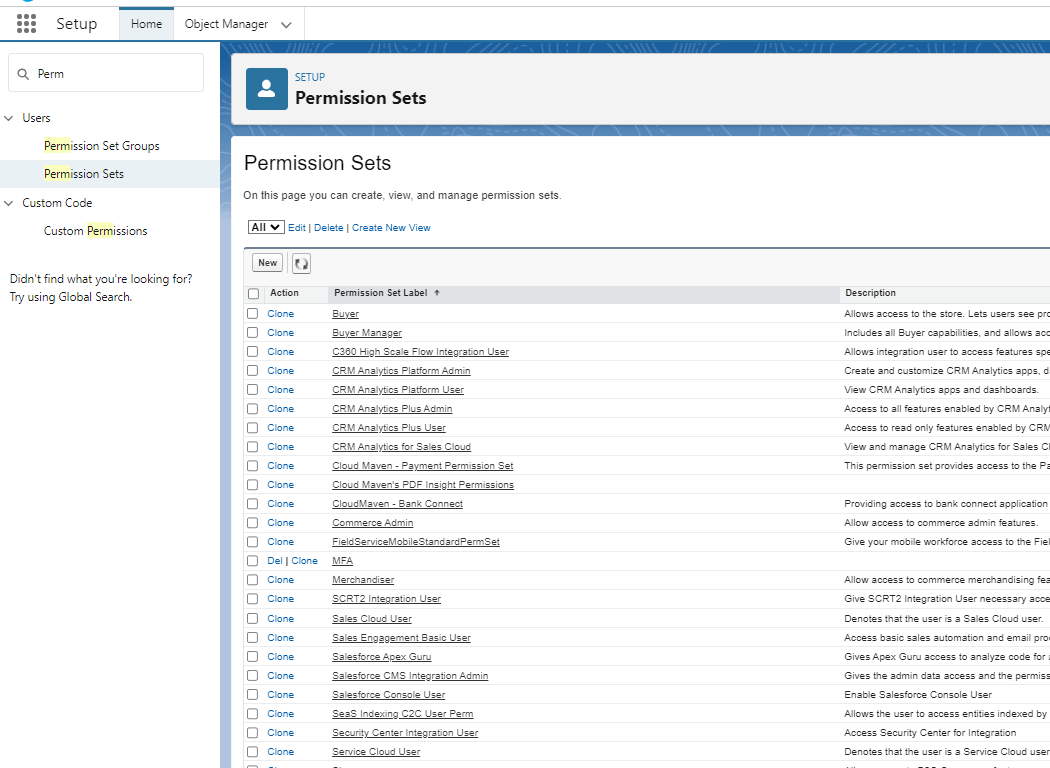
In the quick find box search for Permission Sets.
-
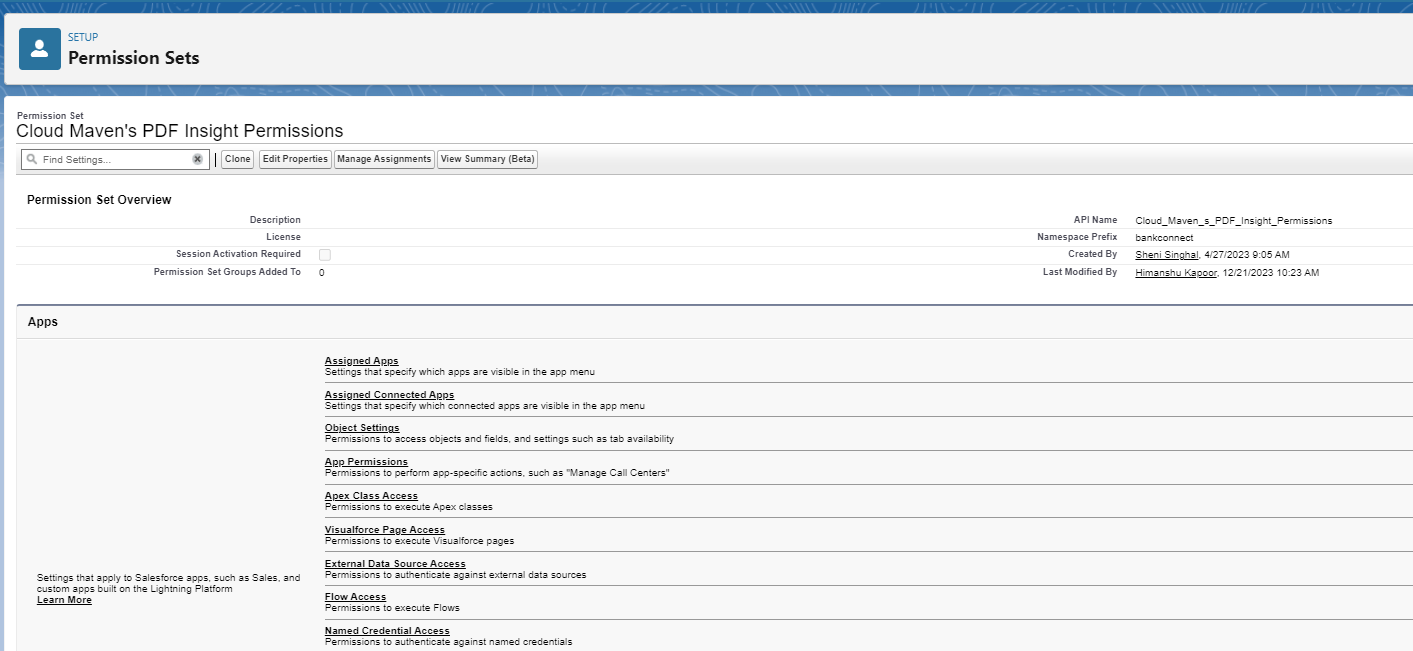
Go to Cloud Maven’s PDF Insight Permissions.
-
Click on Manage Assignments. Select the Users who’ll be using the Document Insights Application.
Step 6 - Update Page Layout
Source Object -
-
Click on the gear icon and go to Edit Page.
-
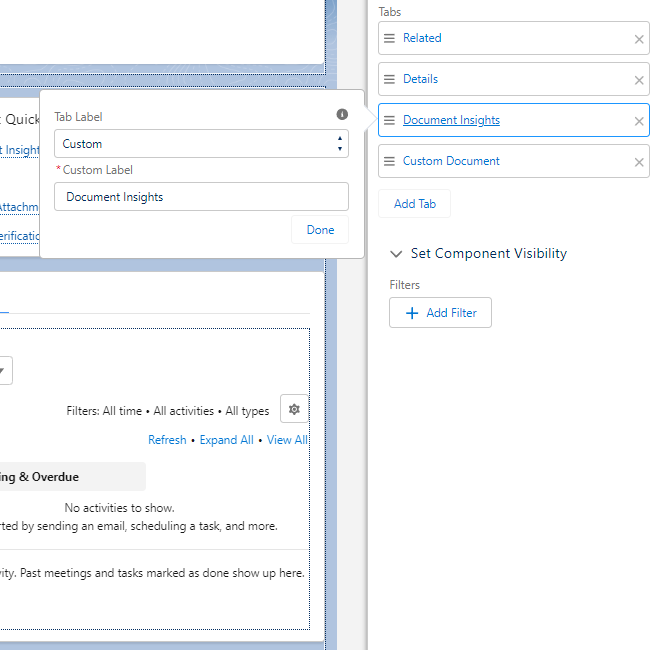
Create a new Tab with Label as “Custom”.
-
Put the value “Document Insights” in the Custom Label, and click on Done.
-
Click on the newly created tab.
-
From the list of components, Drag and Drop “viewPDFAnalytics” component in this tab.
-
Save the Page.
-
Click on the gear icon and go to Setup
-
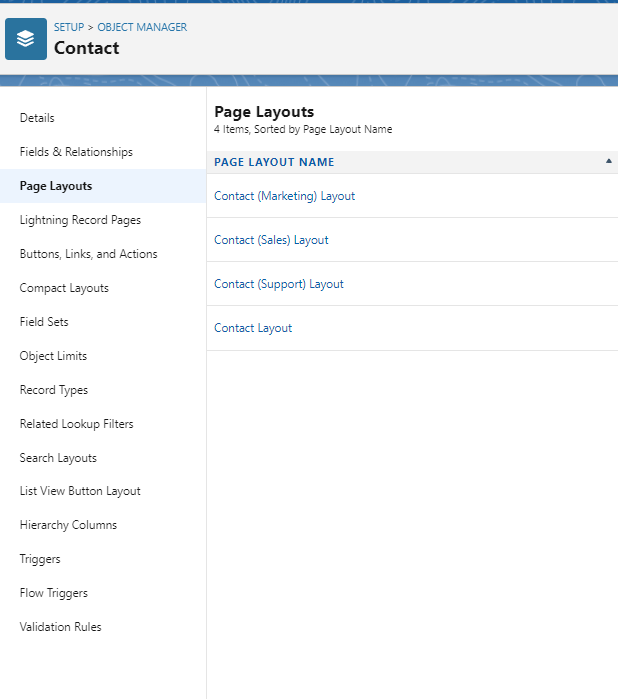
Click on the Object Manager.
-
Select the Source Object, and Go to the Page Layouts.
-
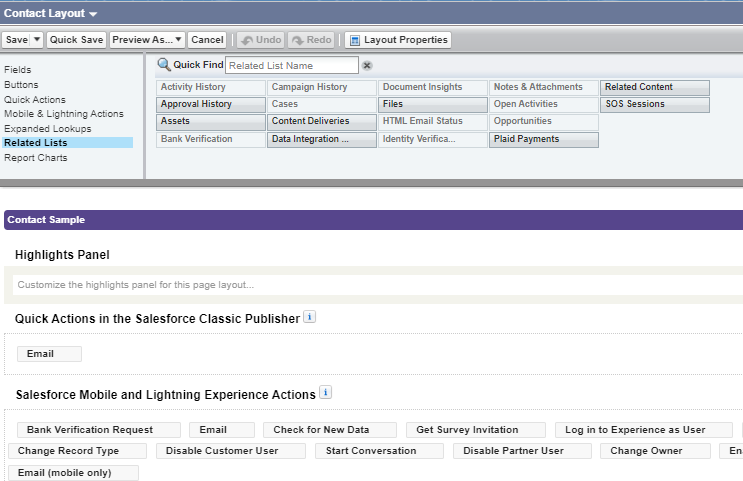
Open a page layout, and click on Related Lists.
-
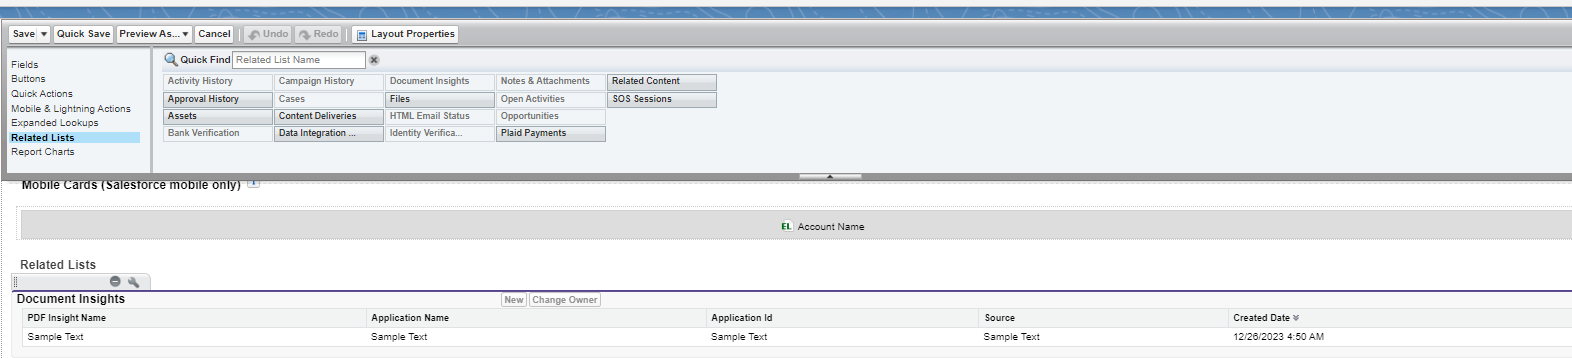
Drag and Drop Document Insights in the Related Lists Section.
-
Click on Save.
Step 7 - Document Types
-
Click on the gear icon and go to setup.
-
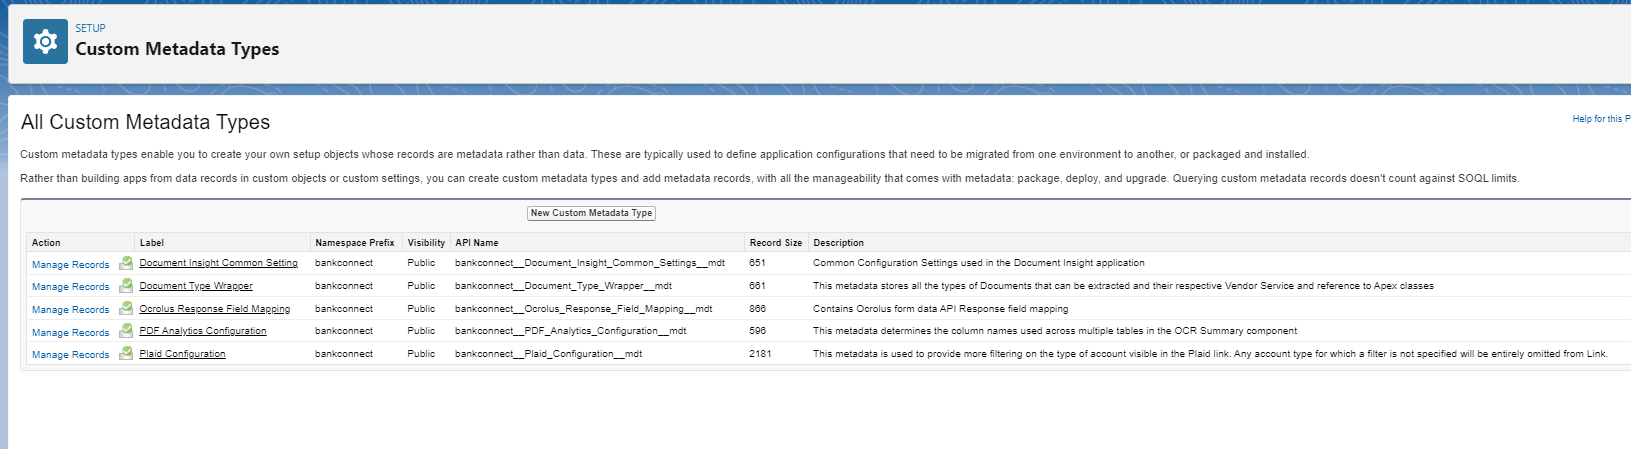
In the quick find box search for Custom Metadata Types.
-
Go to Document Type Wrapper and Click on Manage Records.
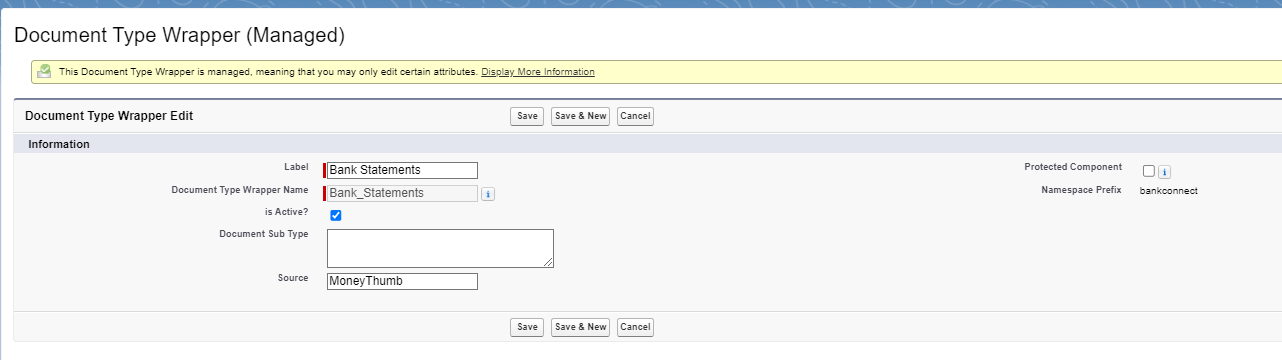
Activate only the following entries and put “MoneyThumb” in the Source of those entries:
-
Bank Statements
-
Credit Card Statements
-
Plaid JSON
Step 8 - Update Credentials
Follow this link to get information about updating credentials.
5. Support & Contact Information
|
Setup and Configuration |
|
|
Production Issue or Report Bug |
|
|
Sales and Partnership |
6. Conclusion
By following this post-installation guide, you have successfully configured the Document Insights in your Salesforce org. The integration enables manual & automated data parsing and improved data management. If any issues arise, consult the support team for further assistance.