
Prerequisites: Make sure to follow Step 4. Post Installation Steps before setting up Bulk QuickBooks Invoicing.
1.1 Creating button for Bulk QuickBooks Invoicing
-
Navigate to Object Manager:
-
Go to "Setup" within your Salesforce instance.
-
Select "Object Manager."
-
Choose source object on which Bulk QuickBooks Sync button will be placed.
-
-
Create a New Action:
-
Within the object's settings, click "Buttons, Links, and Actions."
-
Click the "New Action" button.
-
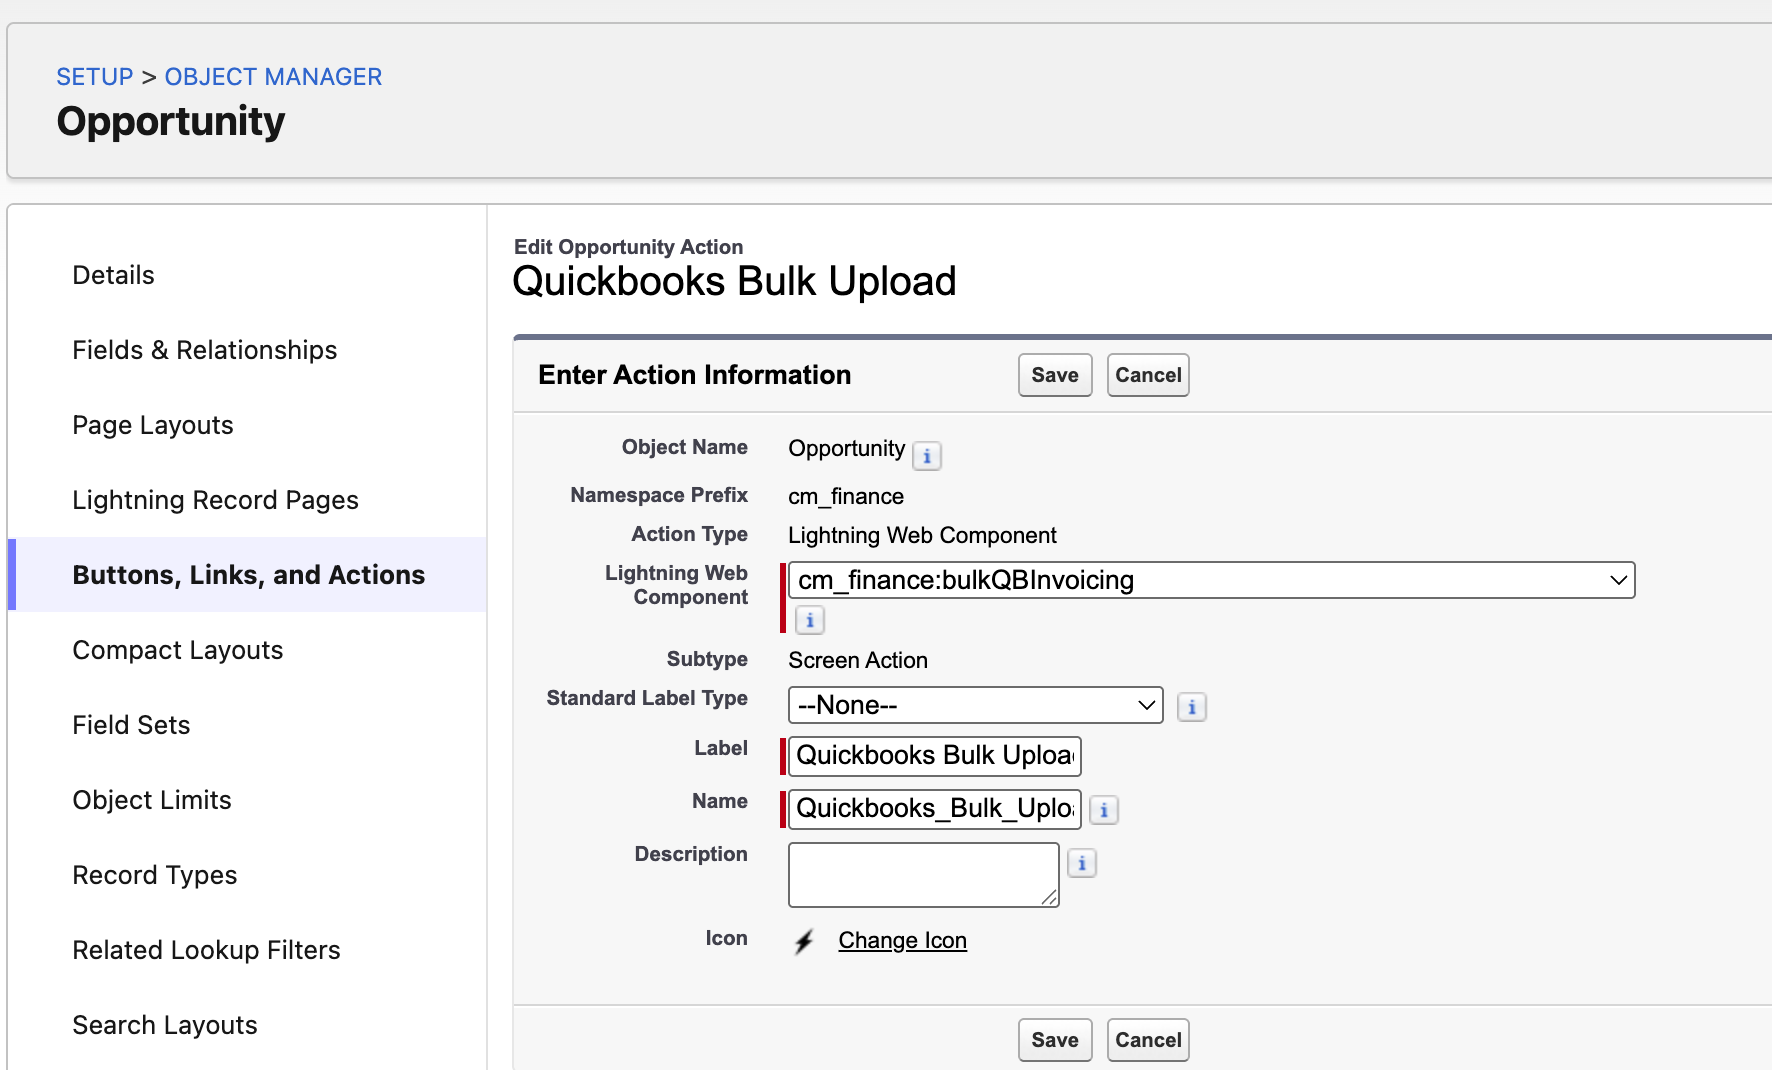
Configure the action with the following details:
-
Action Type: Select "Lightning Web Component."
-
Lightning Web Component: Enter
cm_finance:bulkQBInvoicing. -
Label: Enter "Quickbooks Bulk Upload"
-
-
Click "Save."
-
-
Add the Button to the Page Layout:
-
Navigate back to the selected object's settings.
-
Click "Page Layouts."
-
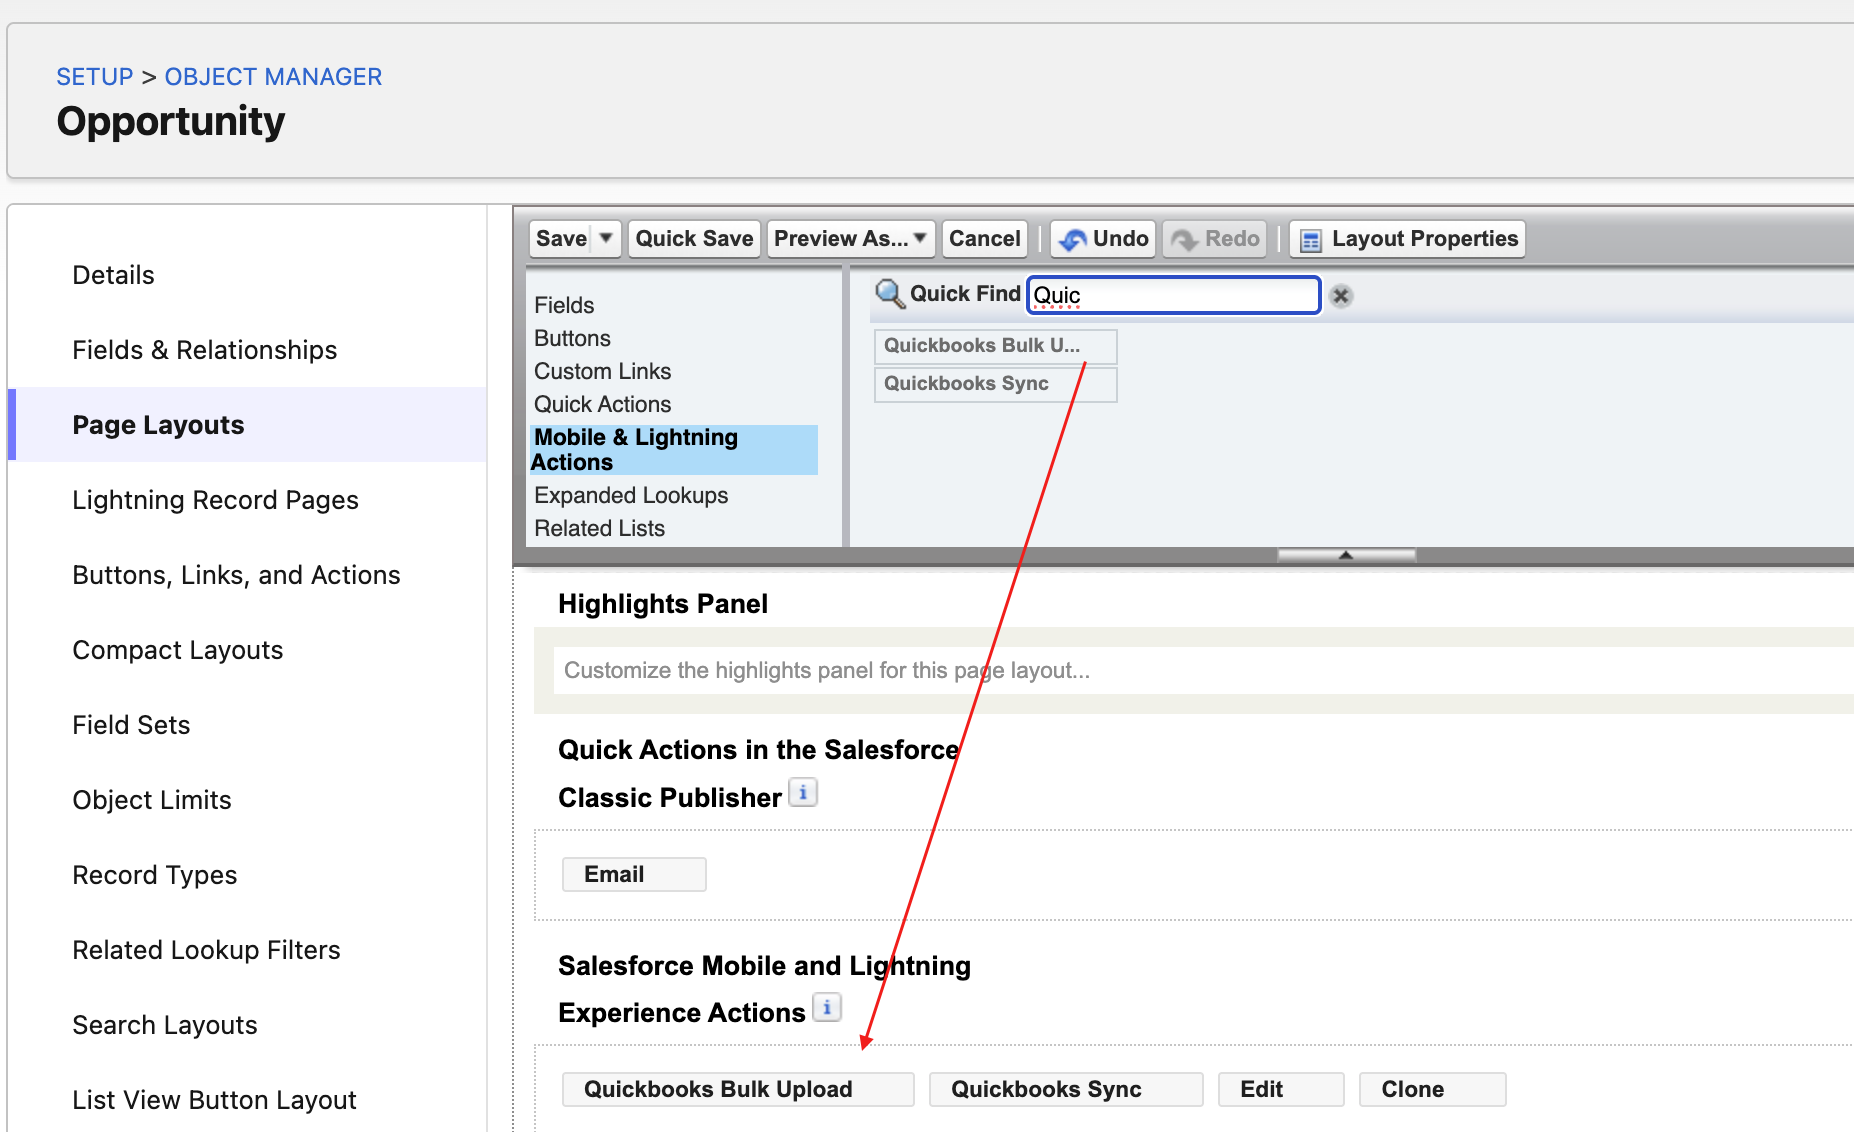
Select the page layout where the button needs to be added.
-
Locate the "Quickbooks Bulk Upload" button within the "Mobile & Lightning Actions" or "Buttons" section.
-
Drag and drop the "Quickbooks Bulk Upload" button onto the desired location on the page layout.
-
Click "Save."
-
2. Support & Contact Information
|
Setup and Configuration |
|
|
Production Issue or Report Bug |
|
|
Sales and Partnership |