
Note: We will be creating a Public site to receive all the web hooks from the Plaid. Since it will be an external User, Please make sure that the external profiles does not have access to any Object or Field permissions.
Note : Check the Webhook URL in the Postman(Application) for every Environment Before Entering the Webhook URL in plaid Credentials.
1. Introduction
BankConnect (in the Salesforce + Plaid integration world) is essentially a connector product that lets your Salesforce org securely link to customers’ bank accounts to retrieve financial data, verify account ownership, and perform related actions — all without manually exchanging bank statements or sensitive credentials.
Click here to discover the full range of features offered by the Bank Connect.
2. Intended Users
-
Salesforce Admins – Responsible for setup and configuration.
-
End Users – Business users who make verification requests.
-
Developers – Those integrating with external systems.
3. Prerequisites
System Requirements
Salesforce Professional, Enterprise, Unlimited, or Developer Edition
User Roles & Permissions
Admin Access – Required for installation and configuration
4. Installation
5. Post-Installation Setup
5.1 Assign the Required Permission Set
-
Navigate to Setup.
-
Use the Quick Find box to search for "Permission Set".
-
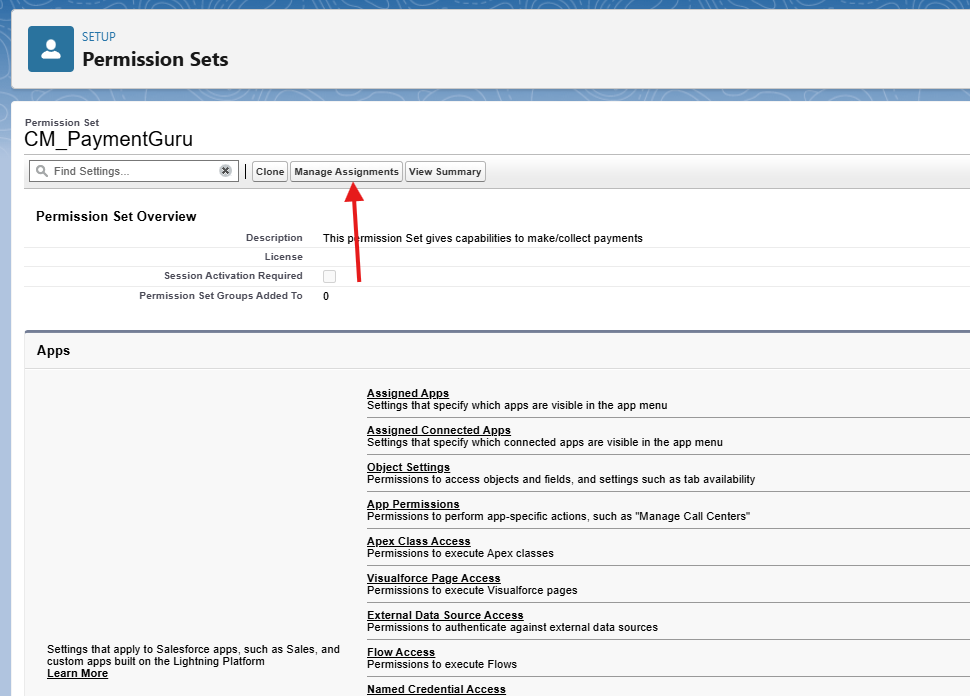
Locate the "Cloud Maven - Bank Connect" permission set from the list.
-
Click on "Manage Assignments".
-
Assign the permission set to the relevant users.
5.2 Create a Salesforce Site
A Salesforce Site is required to securely expose specific Salesforce data and functionality through a custom web interface. It grants limited access to Site Guest Users, allowing them only to view or edit permitted data and complete actions such as signing documents electronically.
-
Navigate to Setup.
-
Use the Quick Find box to search for "Site".
-
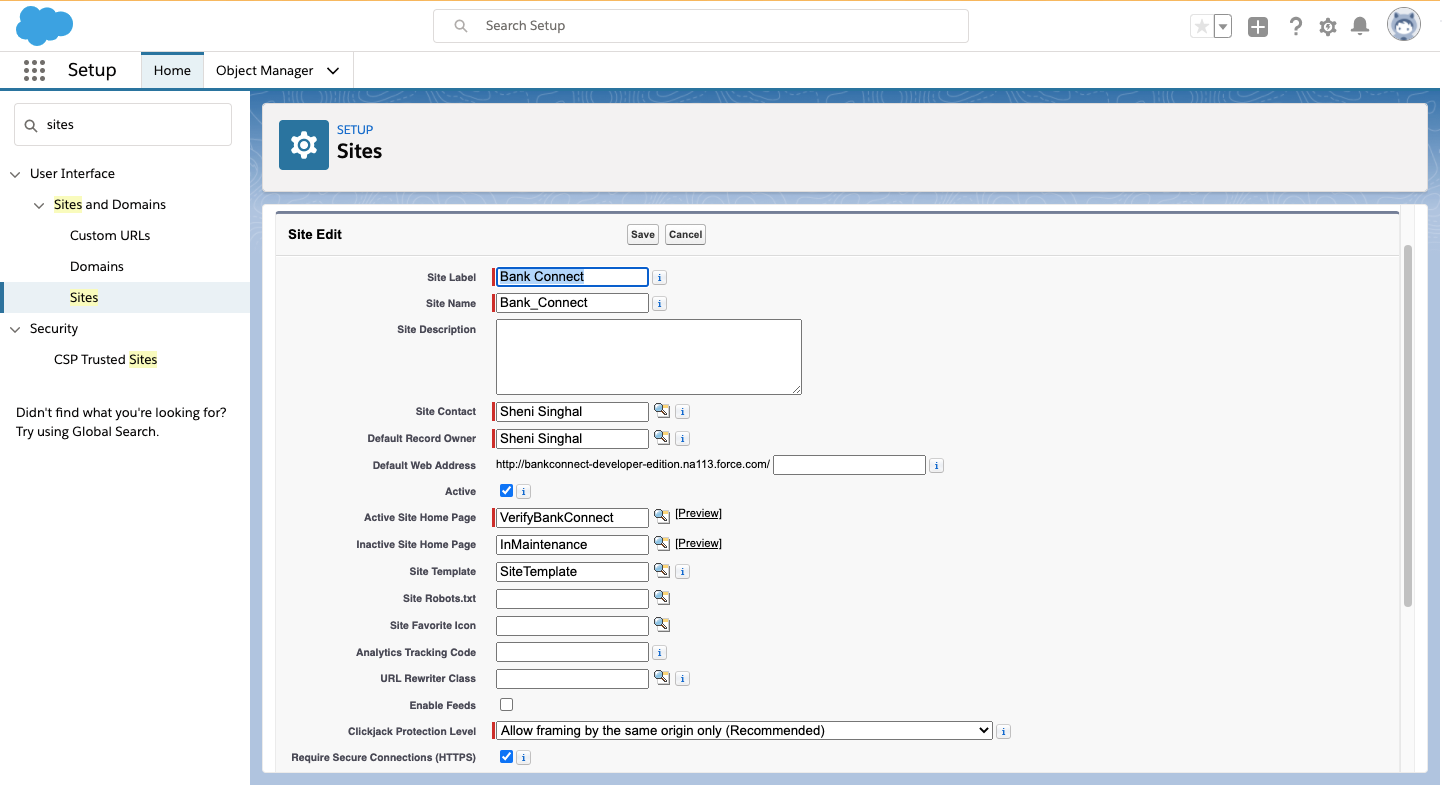
Click "New" to create a Salesforce Site.
-
Enter all required details as depicted in the provided image.
-
Click "Save".
5.3 Grant Required Access to the Site Guest User
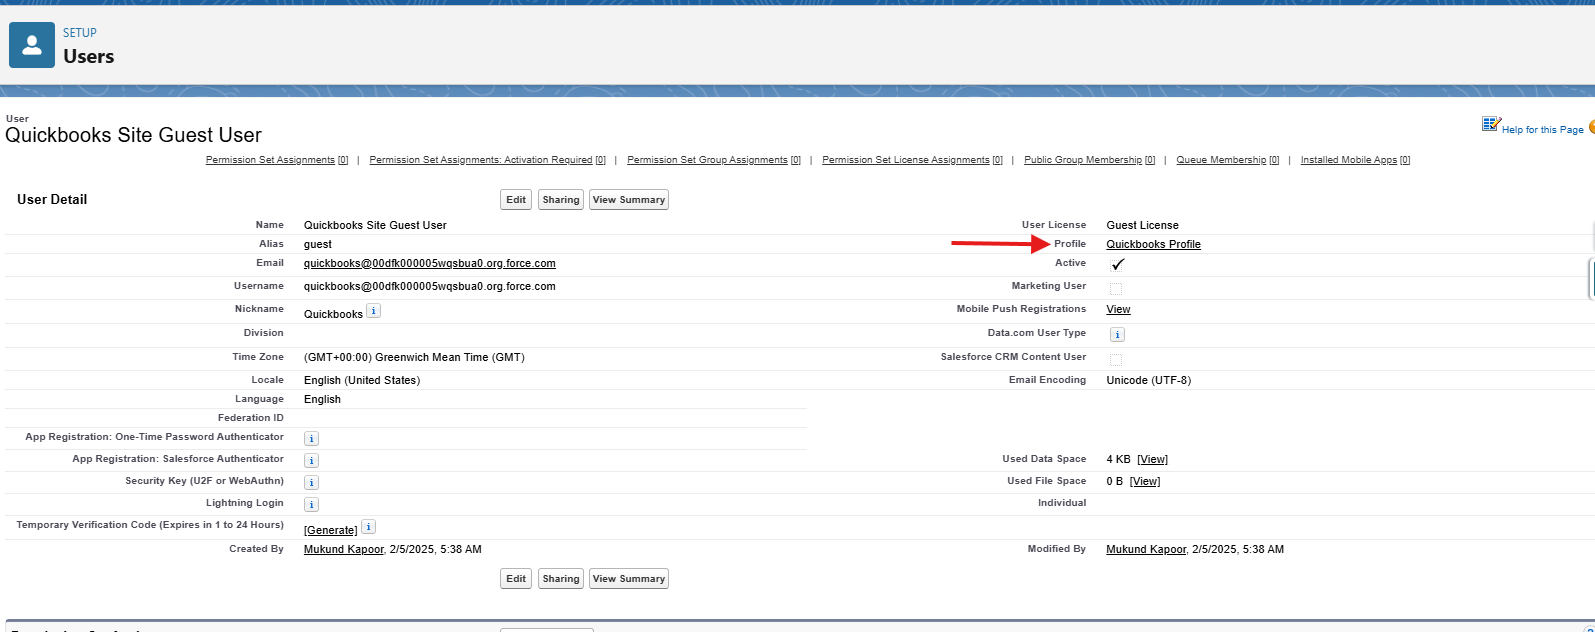
Navigate to Site Guest User Profile.
5.4 Provide access to the following Apex Classes
-
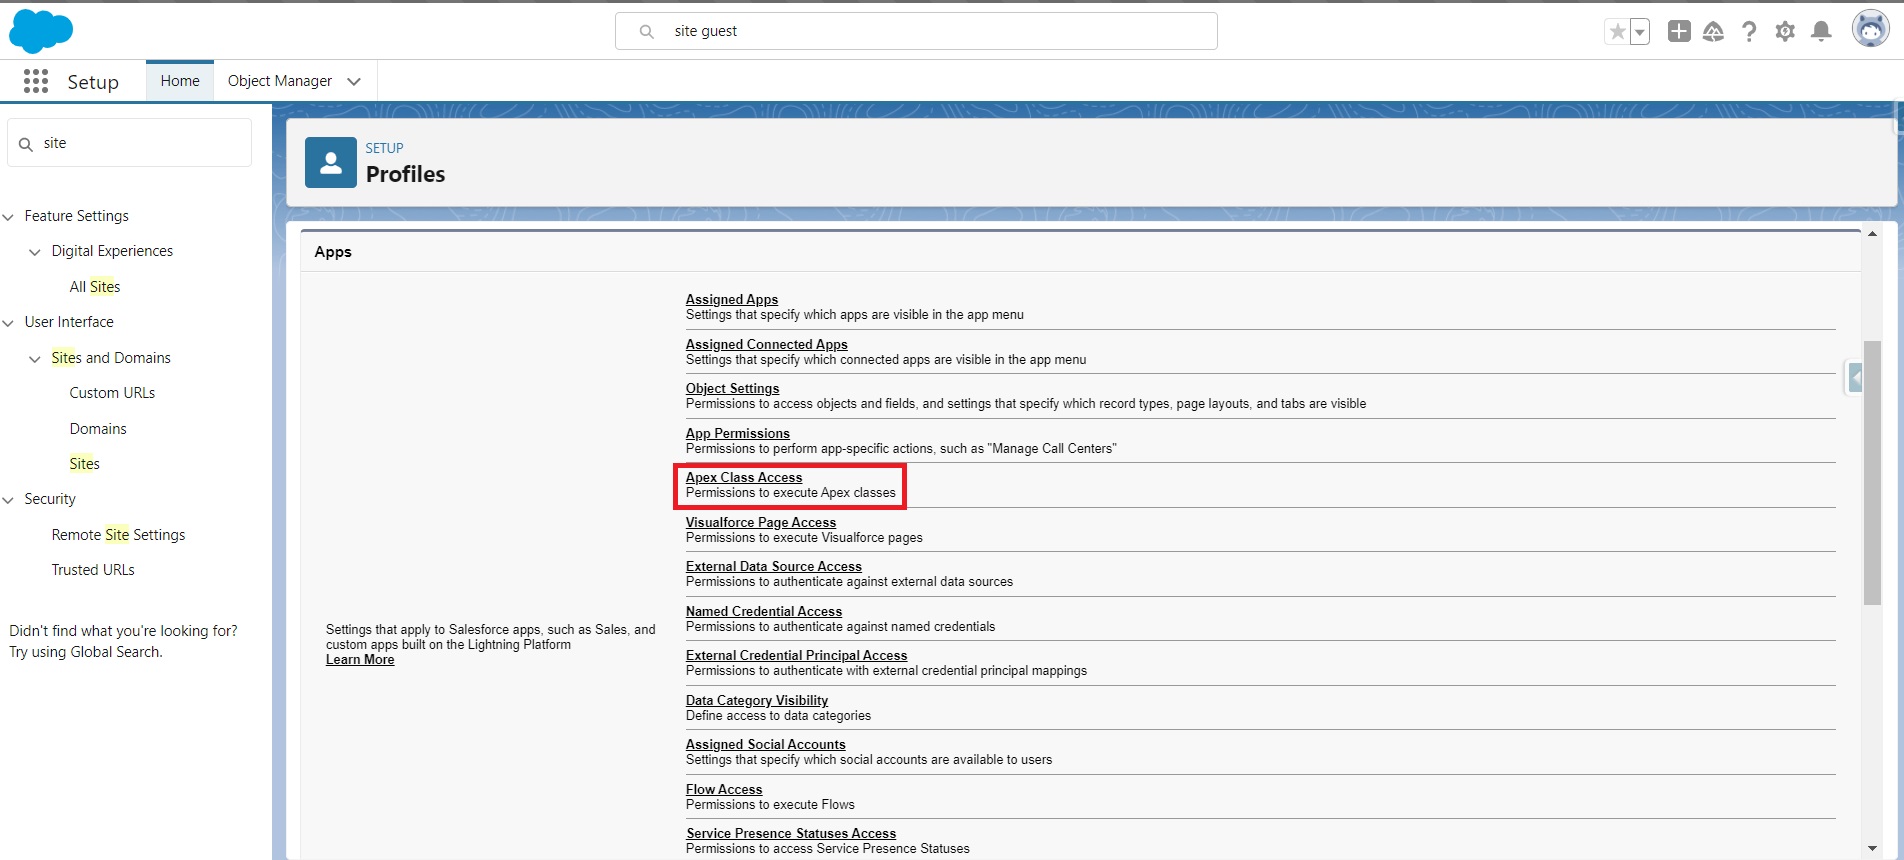
Open the Profile of the Site Guest User.
-
Assign access to the following Apex Classes:
-
bankconnect.WSProductsService -
bankconnect.PlaidCallbackService -
bankconnect.BankVerificationController -
bankconnect.PlaidTransactionsCallBackService
-
Add Enhanced Profile is enabled or not
5.5 Grant Access to Required Visualforce Pages
-
Stay in the Site Guest User Profile.
-
Provide access to the following Visualforce pages:
-
bankconnect.VerifyBankConnect
-
5.6 Configure Lightning Action button on the Page Layout
Required only for objects other than Contact or Lead, since the Lightning actions for these two objects are provided by the managed package.
-
Navigate to Setup.
-
Click on “Object manager”.
-
Navigate to the parent object from which you want to initiate the Bank Verification request.
-
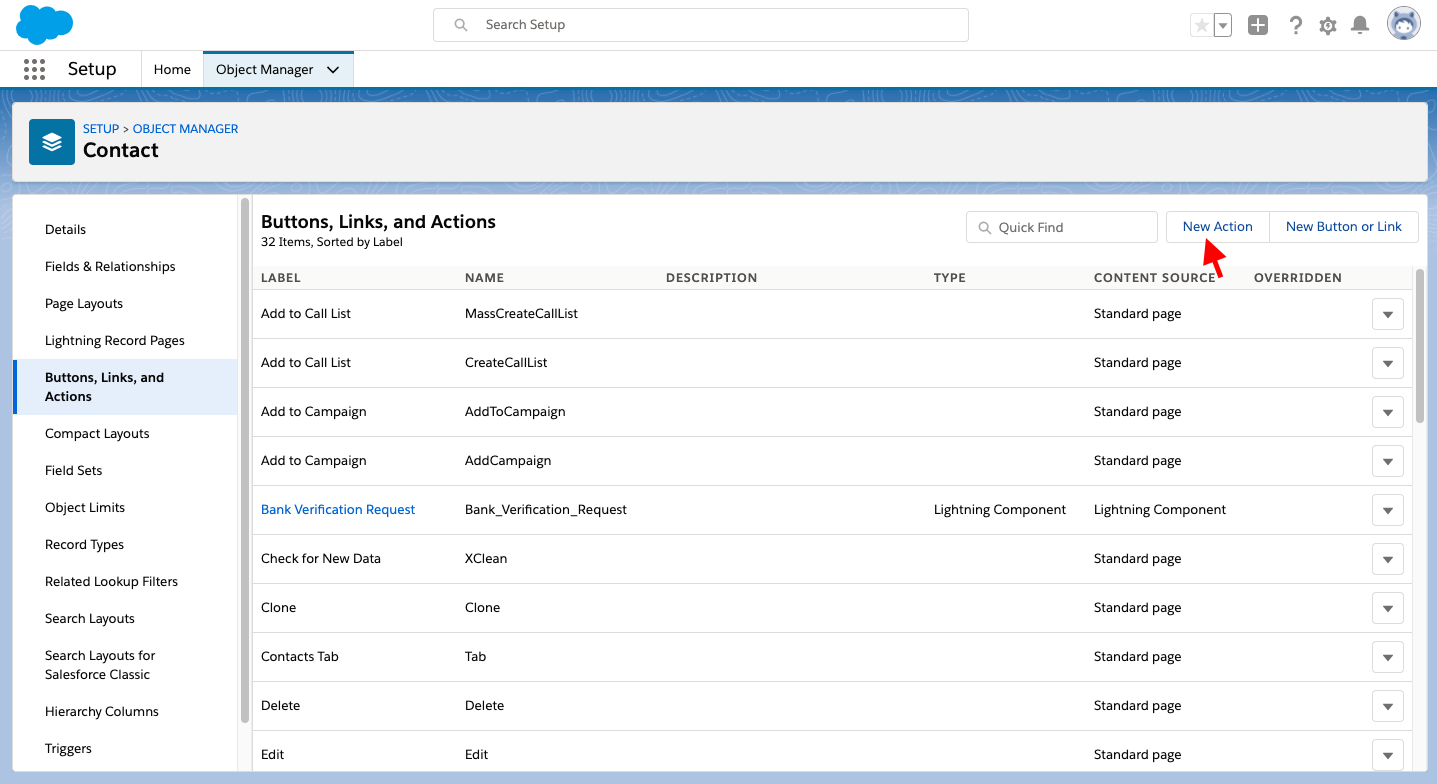
Click on Button Links and Actions.
-
Click on New Action
-
Select and Populate the fields with below Values.
-
Action Type - Lightning Component.
-
Lightning Component - bankconnect: BankVerificationRequest_Aura
-
Height - 400px
-
Standard Label Type - None
-
Label - Bank Verification Request.
-
Name - Bank Verification Request.
-
Update the Page Layout
-
From the Left Panel, Click on Page Layouts
-
Select the Page Layout where you want to place the Request button
-
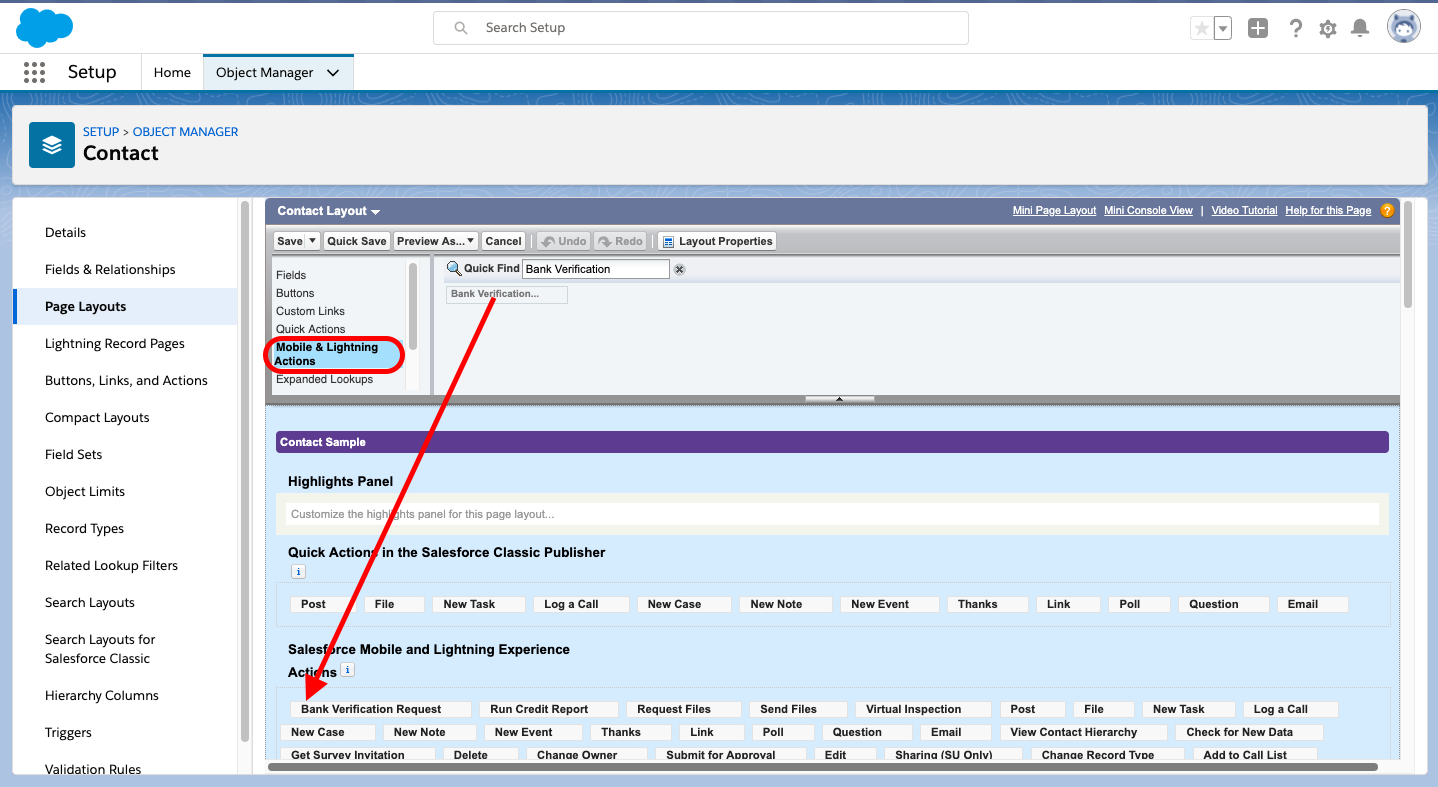
Click on Mobile & Lightning. Actions.
-
Search for Bank Verification in Quick Find.
-
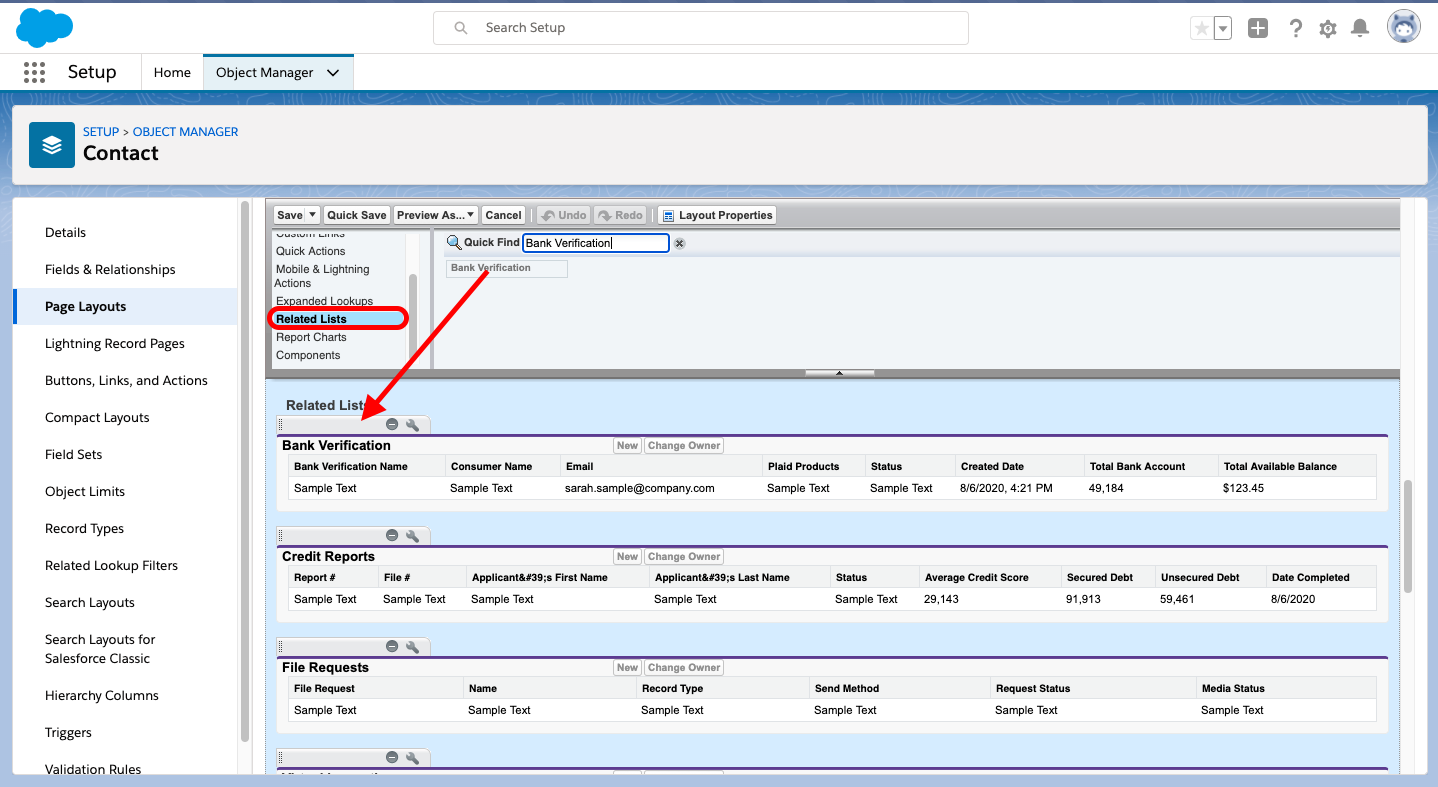
Click on the Related List Section of the Page Layout.
-
In Quick Find search for Bank Verification and Add it to the Related Section
-
Select the fields for the List View. For example you can select the below fields:
-
Consumer Name
-
Email
-
Plaid Products
-
Status
-
Created Date
-
Total Bank Account
-
Total Available Balance
-
-
Click Save.
5.7 Configure Plaid Credentials
Set up Plaid Credentials & Features via ScriptPlease contact the Support Group team to get your Plaid Credentials.
5.8 Set Remote Site Settings
If the Identity Verification product is enabled, make sure to add the following two Remote Site Settings for each environment.
-
Go to Setup in Salesforce.
-
In the Quick Find box, search for Remote Site Settings.
-
Click New Remote Site.
Sandbox:
-
Provide the name in the format Identity_Sandbox
-
Add the Remote Site URL : https://documentary-assets-production-sandbox-cognito-us-west-2.s3.us-west-2.amazonaws.com
-
Check the Active checkbox.
-
Click Save.
Production:
-
Provide the name in the format Identity_Live
-
Add the Remote Site URL : https://documentary-assets-production-live-cognito-us-west-2.s3.us-west-2.amazonaws.com
-
Check the Active checkbox.
-
Click Save.
5.9 Add the Cloud Maven Statistics LWC on the Parent Record Page
Ensure the feature is enabled in the Plaid Credentials; otherwise, the component will display an error message. Please note that the component will show data only for Assets product
-
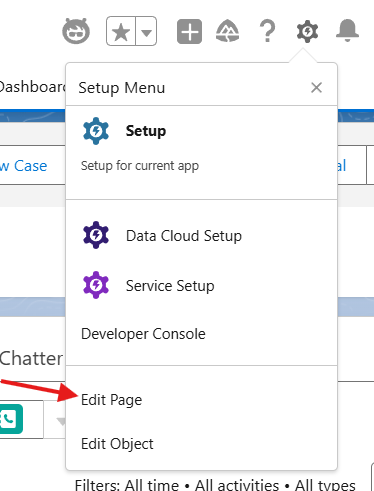
Navigate to the record page → Click the ⚙️ Gear icon → Select Edit Page.
-
In the Component Search box, search for
customPlaidAnalytics. -
Then, drag and drop the Lightning Web Component (LWC) to your desired location on the page layout.
-
Click Save in the top right corner. If this is a new layout or not yet activated, click Activate.
5.10 Configure Classic Email Template
Configure Classic Email Template5.11 Configure Email Templates
-
Go to setup and search Custom Settings
-
Click Manage on Plaid Common Settings.
-
If exist then edit
plaidTemplateNameand set the template name as the value. If it is not Click New and create the setting withplaidTemplateNamelabel.
5.12 Create an Authentication URL field
-
Create a Formula field for the URL that is sent out in an email(On Bank Verification Object).
-
In Formula Field add below formula and make changes to the formula accordingly.
-
Copy the URL of the site.
-
Paste the site URL till force.com.
-
Formula - HYPERLINK("https://cloudmaven-merchantone-apply.cs78.force.com/bankConnect/?bankconnect__plaidId=" + bankconnect__Encrypted_Record_Id__c , "Authentication URL")
5.13 Add Parent Record mapping
-
Click on the Gear Icon ⚙️ and go to setup..
-
In the quick find box search for custom settings.
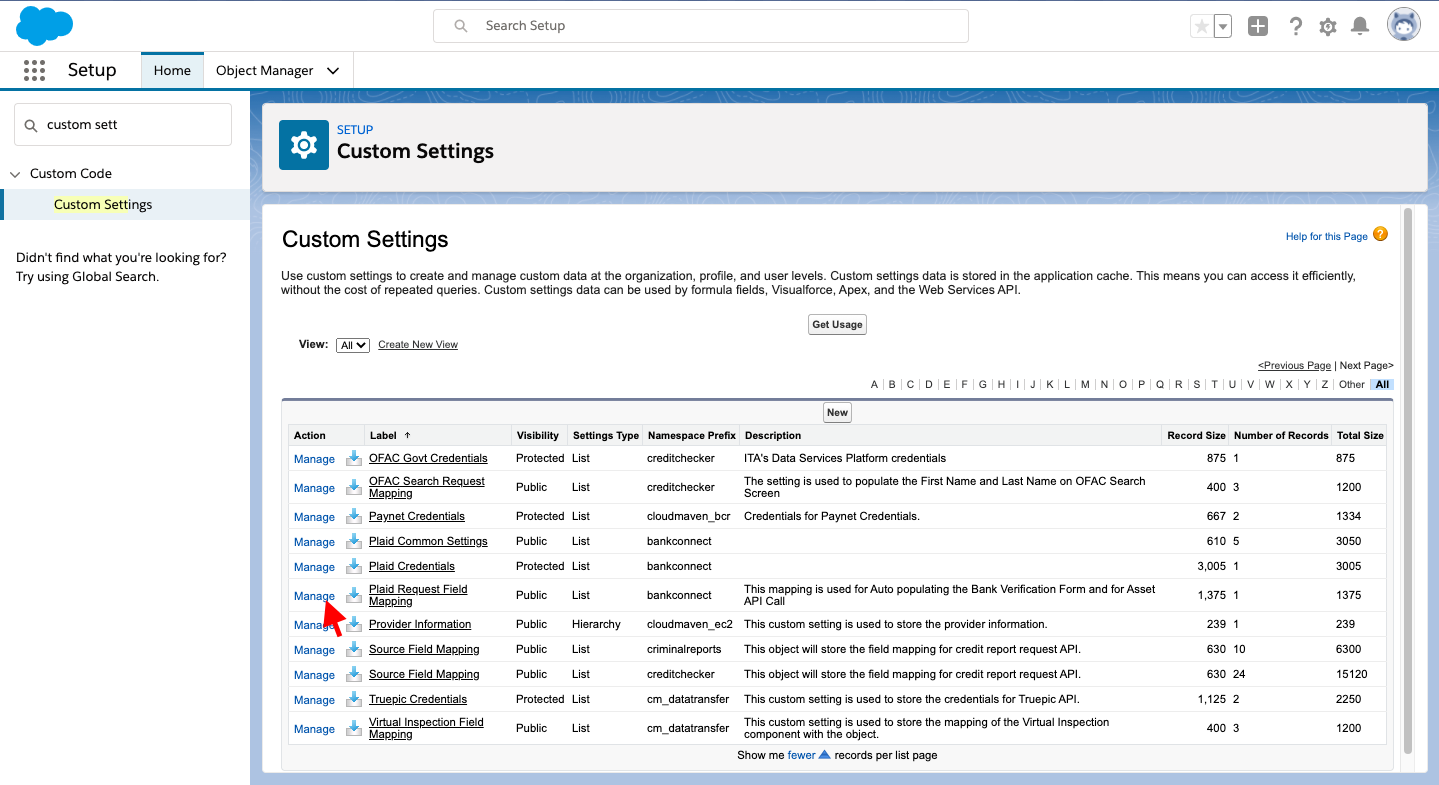
-
Search for Plaid Request Field Mapping custom settings.
-
Click Manage
-
Update the Field Mapping with your Source Object Fields.
-
Here we have taken Contact as our source Object we can choose any Standard or Custom Object as our Source Object.
5.14 Setup Webhook for Identity verification
-
Access the Plaid Dashboard
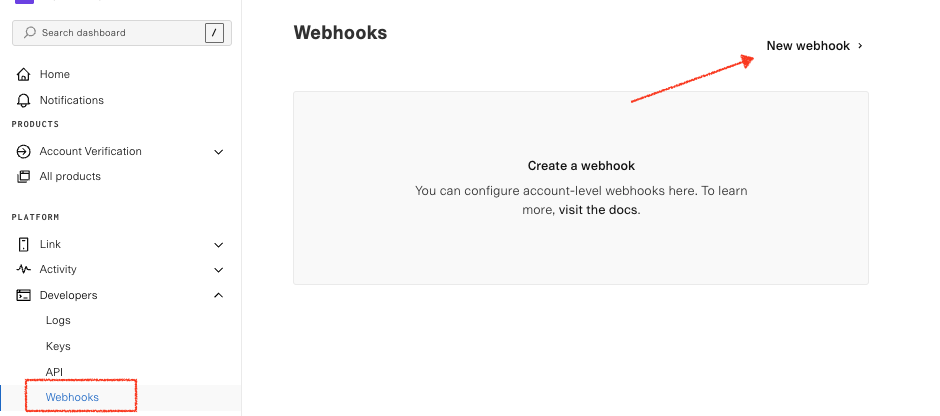
-
Log in to your Plaid account and select Platform->Developers-> Webhooks from the left sidebar.
-
-
Click on New Webhook
-
Select the Event: Identity verification status updated
-
Add the Webhook URL as below:
https://{site Domain}/services/apexrest/bankconnect/Plaid_Callback?
5.15: Configure Account Section in the Plaid portal
The following Link configuration options are commonly used with Auth:
-
Account select: The "Account Select: Enabled for one account" setting configures the Link UI so that the end user may only select a single account. If you are not using this setting, you will need to build your own UI to let your end user select which linked account they want to use to send or receive funds.
5.16: Configure access for Community User
If a component needs to be accessible to a Community User, the relevant Custom Setting must be updated.
Steps:
-
Go to Setup → Custom Settings → Plaid Common Settings.
-
Create a new entry for GuestUsers.
-
In the Value field, enter the UserType(s) that will have access to the component.
-
The entry should always begin with
Guest, followed by the Community UserType(s), separated by commas.
-
Example:
If the Community UserType is CspLitePortal, the entry should be: Guest,CspLitePortal
This ensures that both Guest Users and the specified Community UserType can access the component seamlessly.
5.17: Enable multiple bank authentication in the same requests
Please run the below script to enable multiple bank verification in the Developer Console:
bankconnect.AdminServices.enableMultipleBankFeature( environemnt, true);
Here environment can be either ‘Sandbox’ or ‘Production’
idvtmp_7xKGrzda2Xisd7
🎉 Congratulations! Your application setup is now complete.
6. How to create Identity Template in the Plaid Portal
7. How to Add a CM Representative to Plaid Account
8. Setup Bank Connect via Custom Portal
9. Resend Bank Verification Request to the Customer
10. How to Setup Product Sequencing