
This document explains how to configure and use the Bulk Secure Email functionality directly from a Salesforce List View. It provides step-by-step instructions on enabling the feature, selecting records, and sending messages to multiple recipients at once.
1. Introduction
The goal is to help users streamline outbound communication by leveraging list-based targeting—allowing teams to reach a broader audience efficiently without sending emails one at a time. This guide also covers configuration requirements, permissions, and best-practice recommendations to ensure Bulk Secure Email campaigns are accurate, compliant, and aligned with business communication needs.
2. Code Snippets to send Bulk Secure Emailure Email from List view
Below Code Snippets are for the Contact object. In order to configure on SObject please change the reference of Contact object with the relevant SObject.
2.1 Apex Controller
2.2 Aura Application
2.3 Visual Force Page
3. Create a ‘Send Bulk Secure Email’ button
-
Click on the Gear (⚙️ ) icon and Go to Setup → Object manager
-
Go to the Source Object → Button, Links and Actions
-
Click on ‘New’ button or Link
-
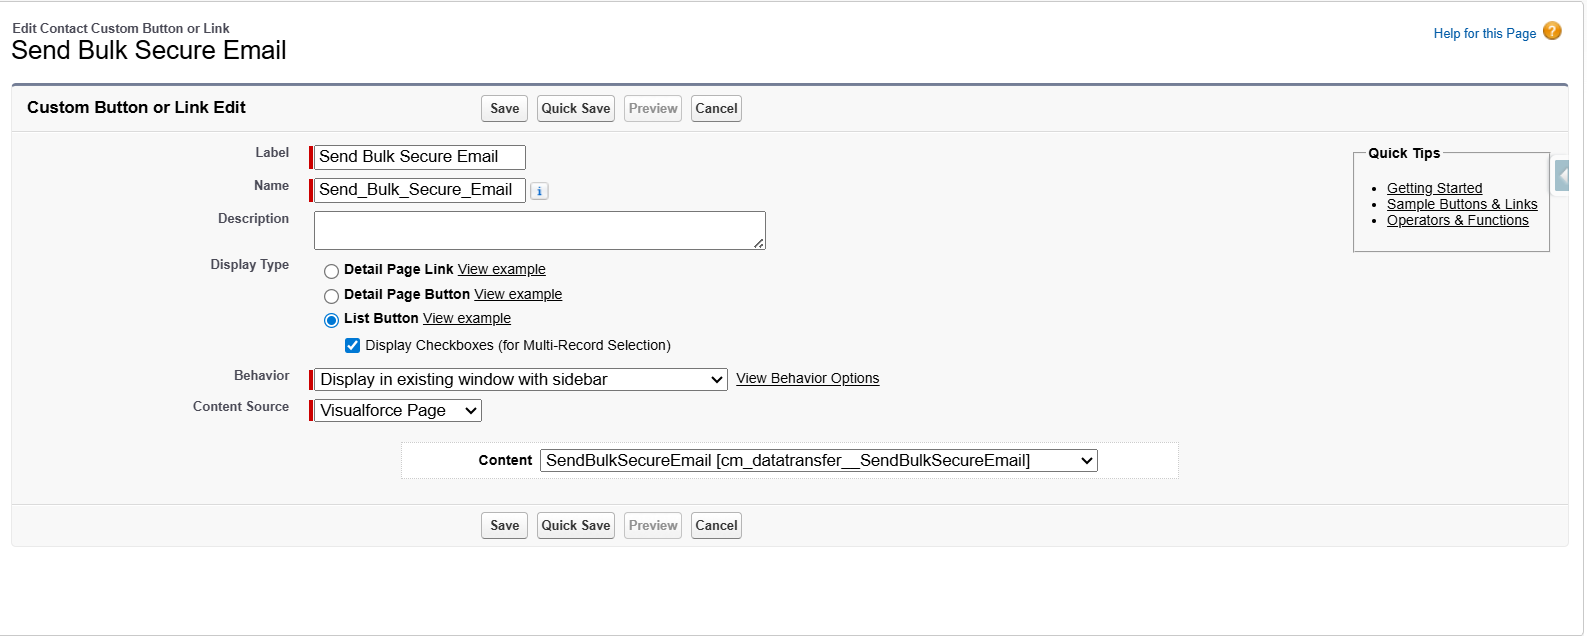
Enter the details as shown in below snapshot and Select the VF Page you have created
-
Click Save.
4. Add it to the List View Page Layout
-
Click on the Gear (⚙️ ) icon and Go to Setup → Object manager
-
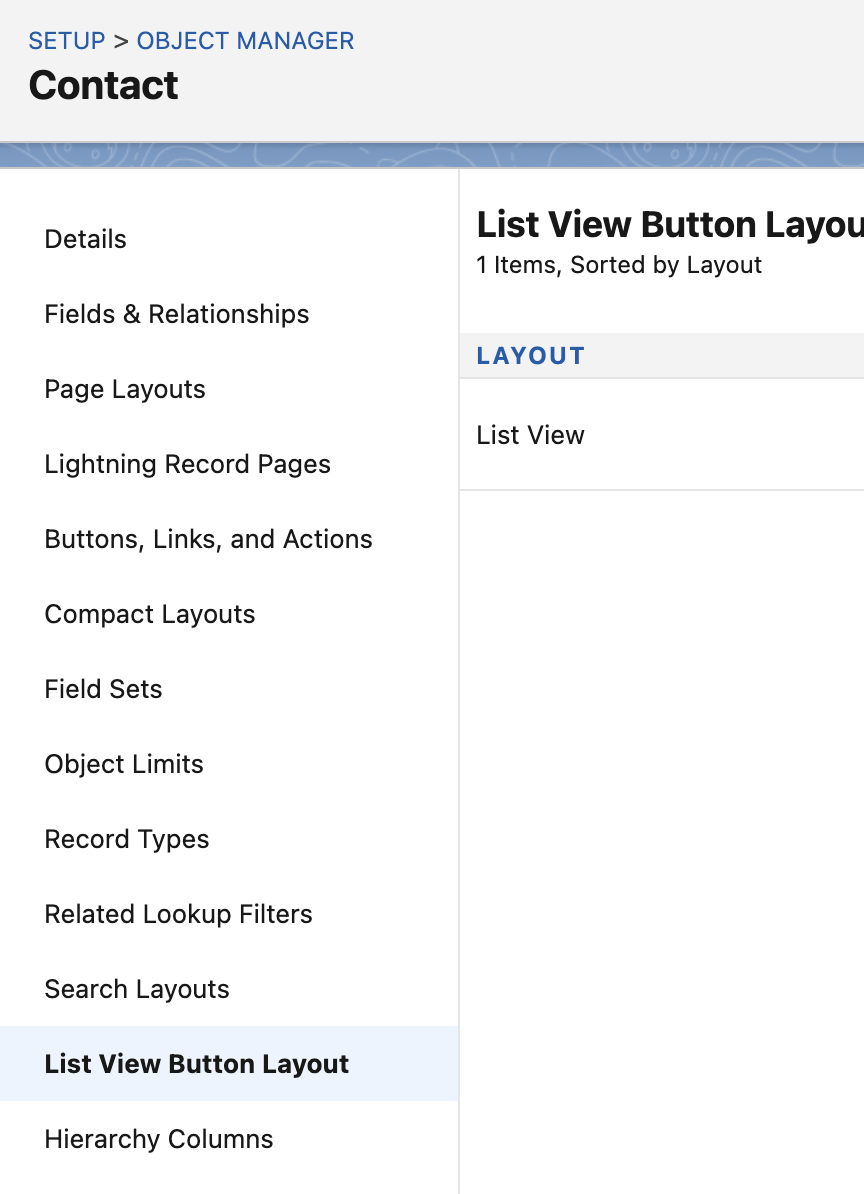
Go to the Source Object → List View Button Layout
-
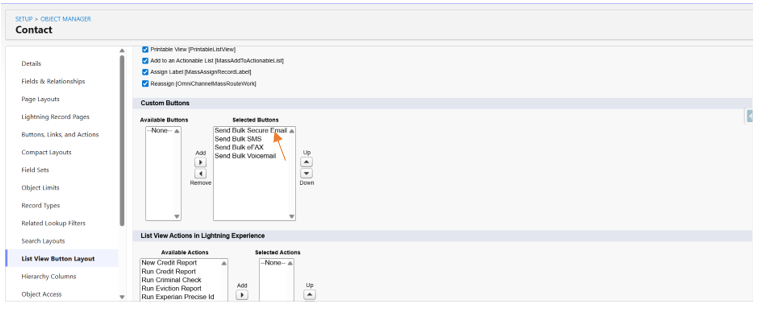
Click on Edit of List View Edit
-
Select Send Bulk Secure Email button from Available Buttons and add it to Selected Buttons.
-
Click Save.
-
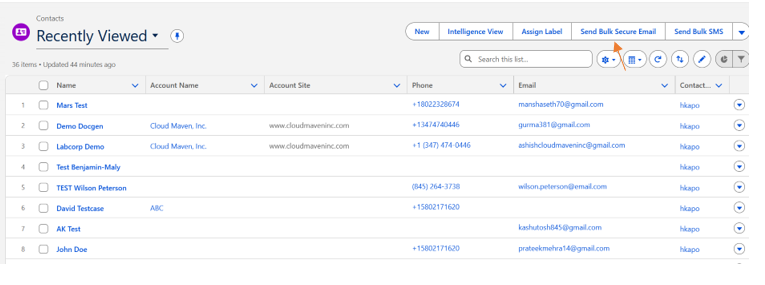
Navigate to the List View of the Source Object. You will see the ‘Send Bulk Secure Email’ button on the right hand side.
5. Update Custom Metadata
-
Click on the Gear (⚙️ ) icon and Go to Setup → Object manager → Search for Custom Metadata
-
Click Manage against Email Configuration
-
Select the entry with the Label that matches with the Source Object name.
-
If there is no entry then create one:
-
Enter the value for Bulk First Name and Bulk Last Name field. This is required at the time of validating if the Email field selected for sending Bulk Email has value or not. The UI will show separate list of Contact with valid and non valid Email addresses.
-
Bulk First Name: This field stores the field on the Source Object that will give us the First name of the Customer.
-
Bulk Last Name: This field stores the field on the Source Object that will give us the Last name of the Customer.
-
-
Click Save.
In case we have list of records where email do not exists, the system will still allow you to send out Emails on the remaining Records.
Currently there is no fallback email field which could be used for sending the Secure Emails.
6. User Guide: How to Send Bulk Secure Emails from List View
How to Send Bulk Secure Email from List View