
Secure File Transport is a native Salesforce AppExchange application enabling users to securely send and receive files directly inside Salesforce, all without requiring passwords, PINs, logins, or external apps. It’s designed for frictionless, encrypted file handling from beginning to end.
Click here to discover the full range of features offered by the Secure File Transport.
Intended Users
-
Salesforce Admins – Responsible for setup and configuration.
-
End Users – End users who receive/upload files
-
Salesforce Users – Responsible for Requesting or Sending Files to End Users
Prerequisites
System Requirements
Salesforce Professional, Enterprise, Unlimited, or Developer Edition
User Roles & Permissions
Admin Access – Required for installation and configuration
Installation
Post-Installation Setup
Assign the License
Every user must be assigned a user license to access the App Secure File Transport . A user's license determines the baseline of features that the user can access. In absense of it, user won't be able to view the Secure File transport app or any the custom object tabs and records.
-
Navigate to Setup.
-
Use the Quick Find or Search Setup box to search for and select the specific user requiring the Secure File Transport license.
-
Click on the user's name to access their detailed user record.
-
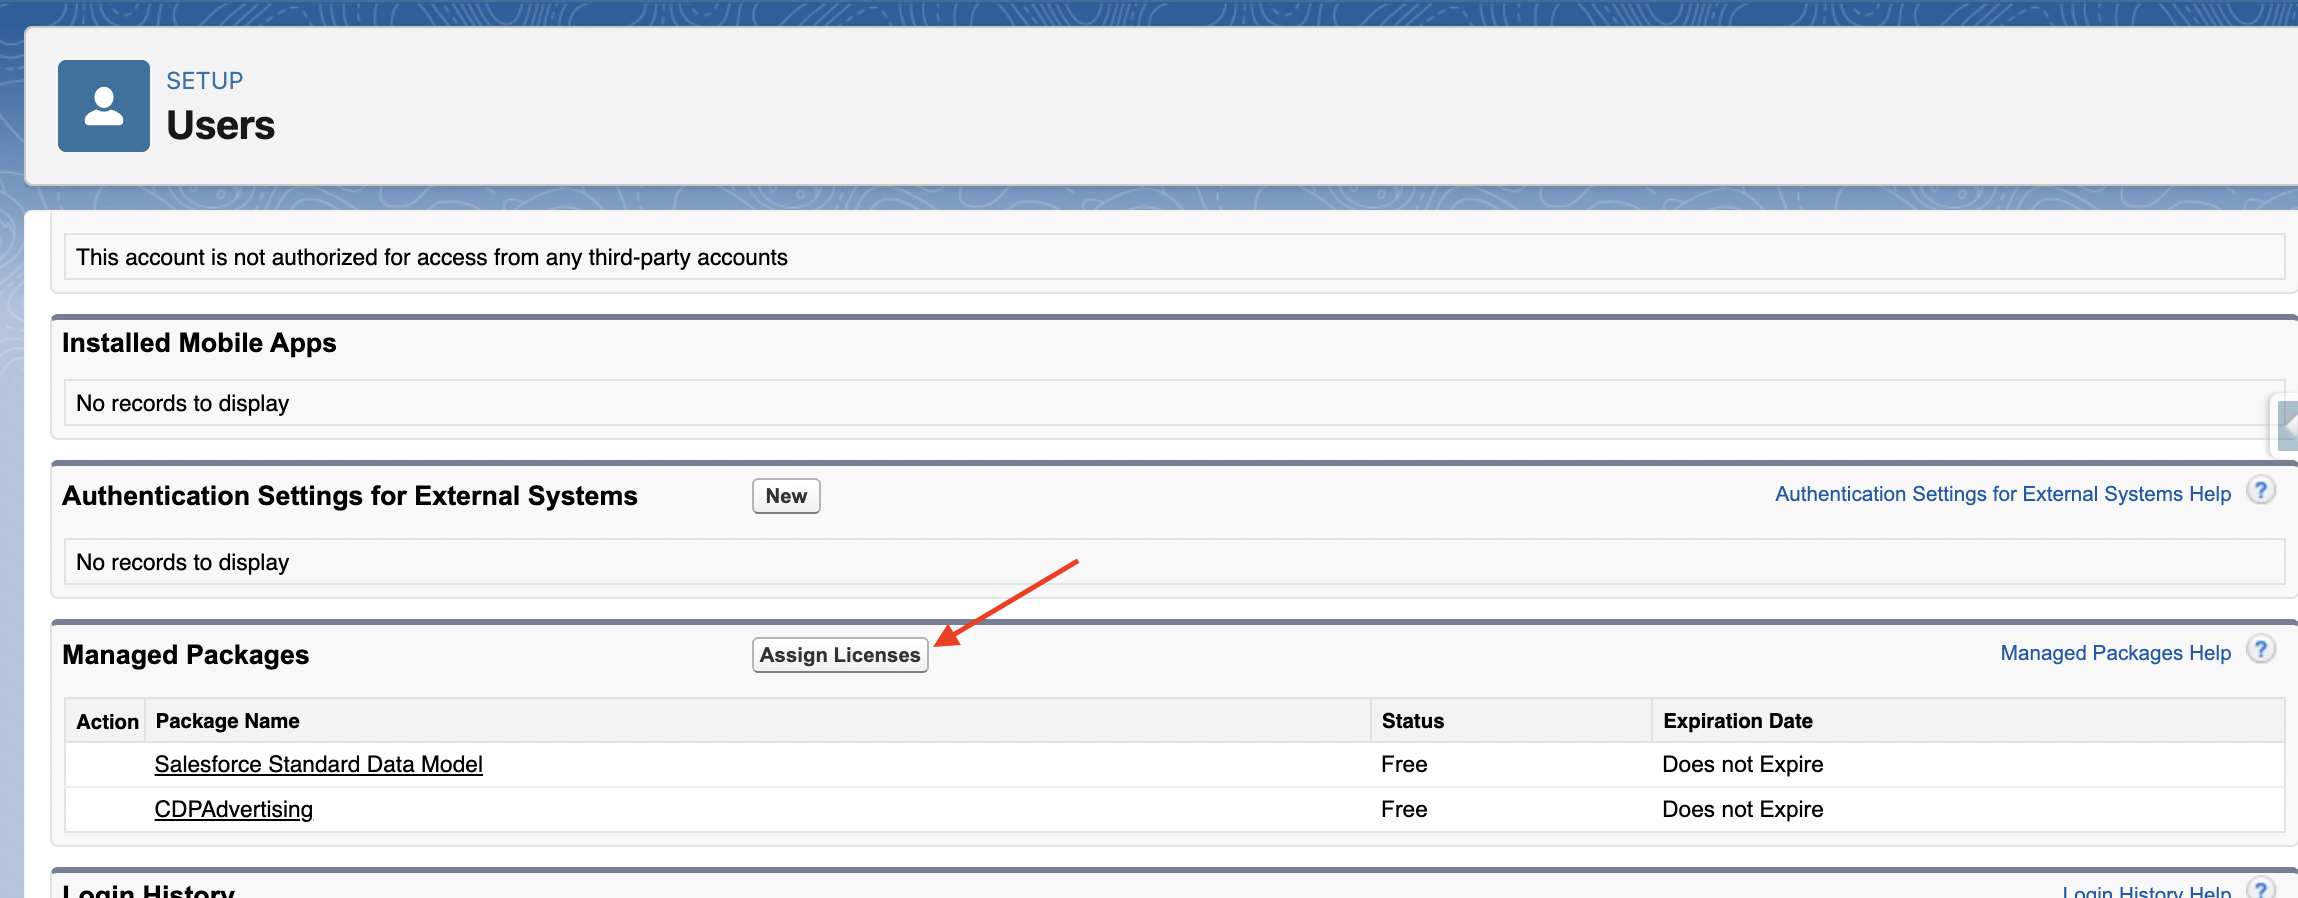
Scroll down the user detail page to locate the "Managed Packages" related list.
-
Click the "Assign Licenses" button associated with the "Managed Packages" section.
-
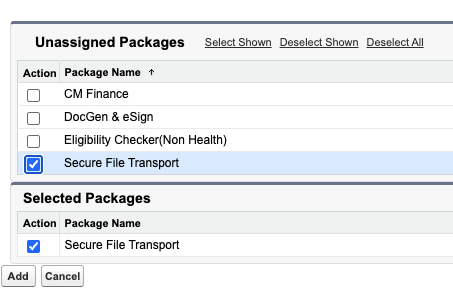
Click the "Add" button to assign the selected "Secure File Transport" license to the user.
Assign the Required Permission Set
-
Navigate to Setup.
-
Use the Quick Find box to search for "Permission Set".
-
Locate the "Cloud Maven - Bank Connect" permission set from the list.
-
Click on "Manage Assignments".
-
Assign the permission set to the relevant users.
Note:
Source Object Field Mapping
This setting will be used to auto-populate the File Request/Send the form with the values from the Source Object. Make an entry in this setting to Map the Field of Source Object(Account, Contacts any Standard or Custom Object) with required parameters.
-
Click on the Gear Icon and go to setup.
-
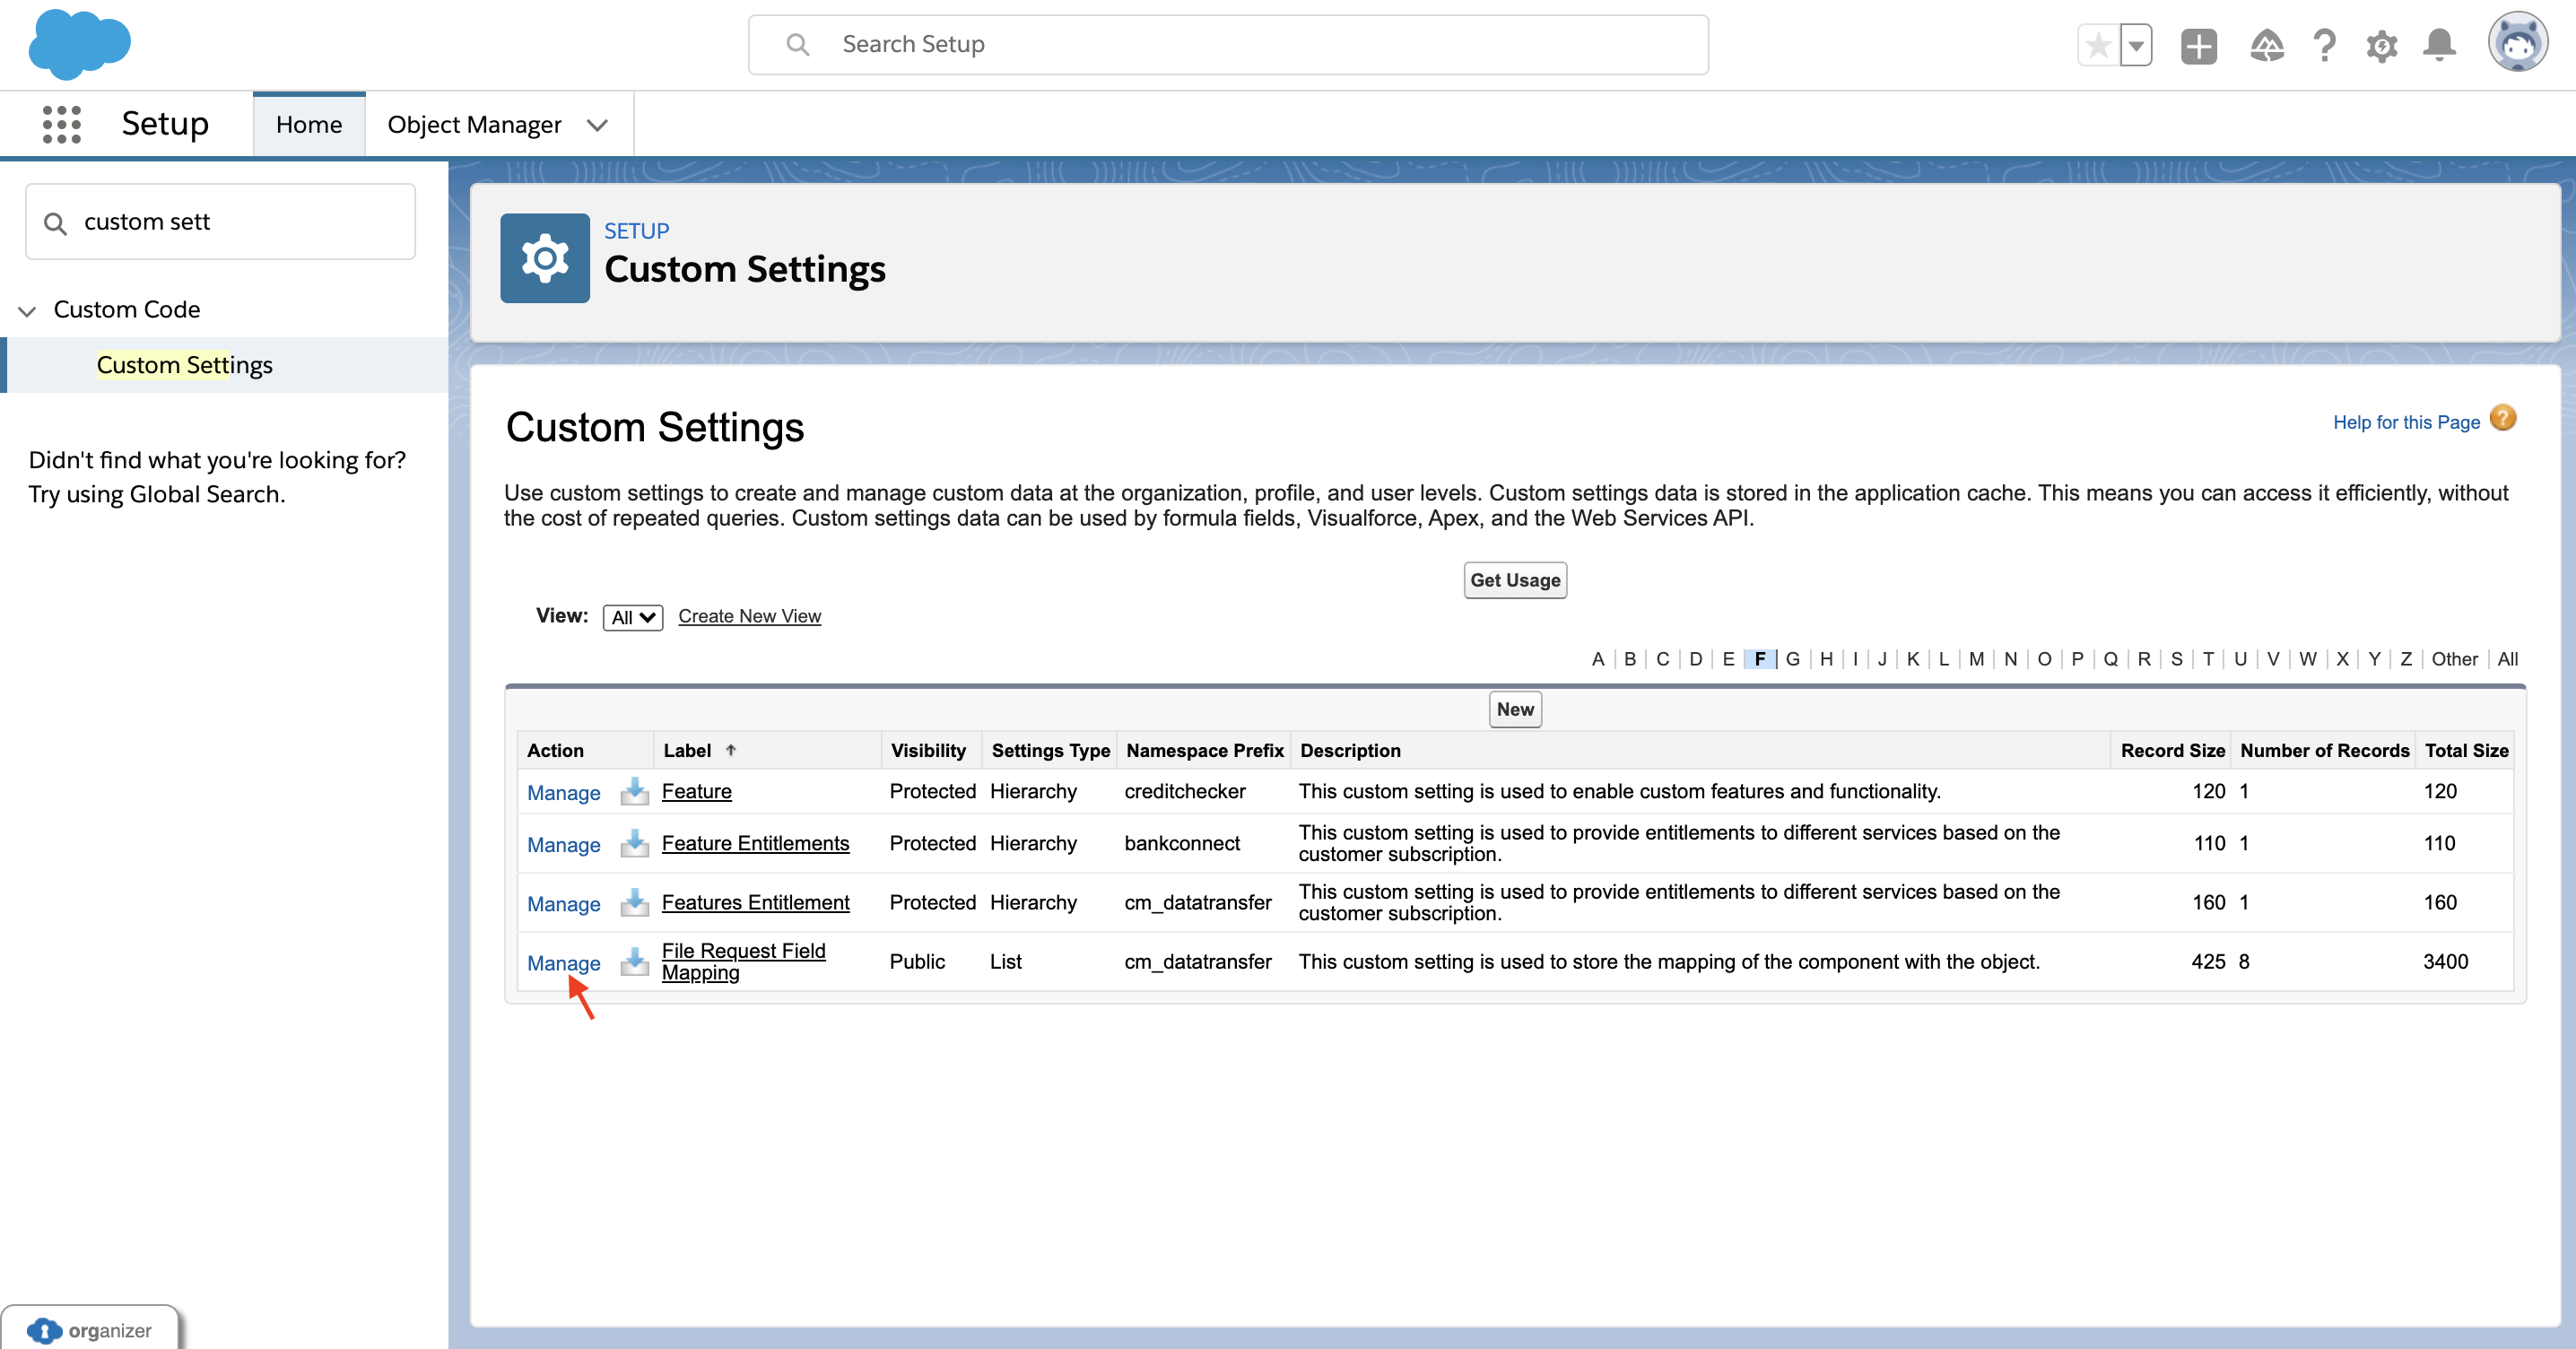
Search for Custom Setting in Quick Find Box.
-
Click on Manage of “File Request Field Mappings”.
-
-
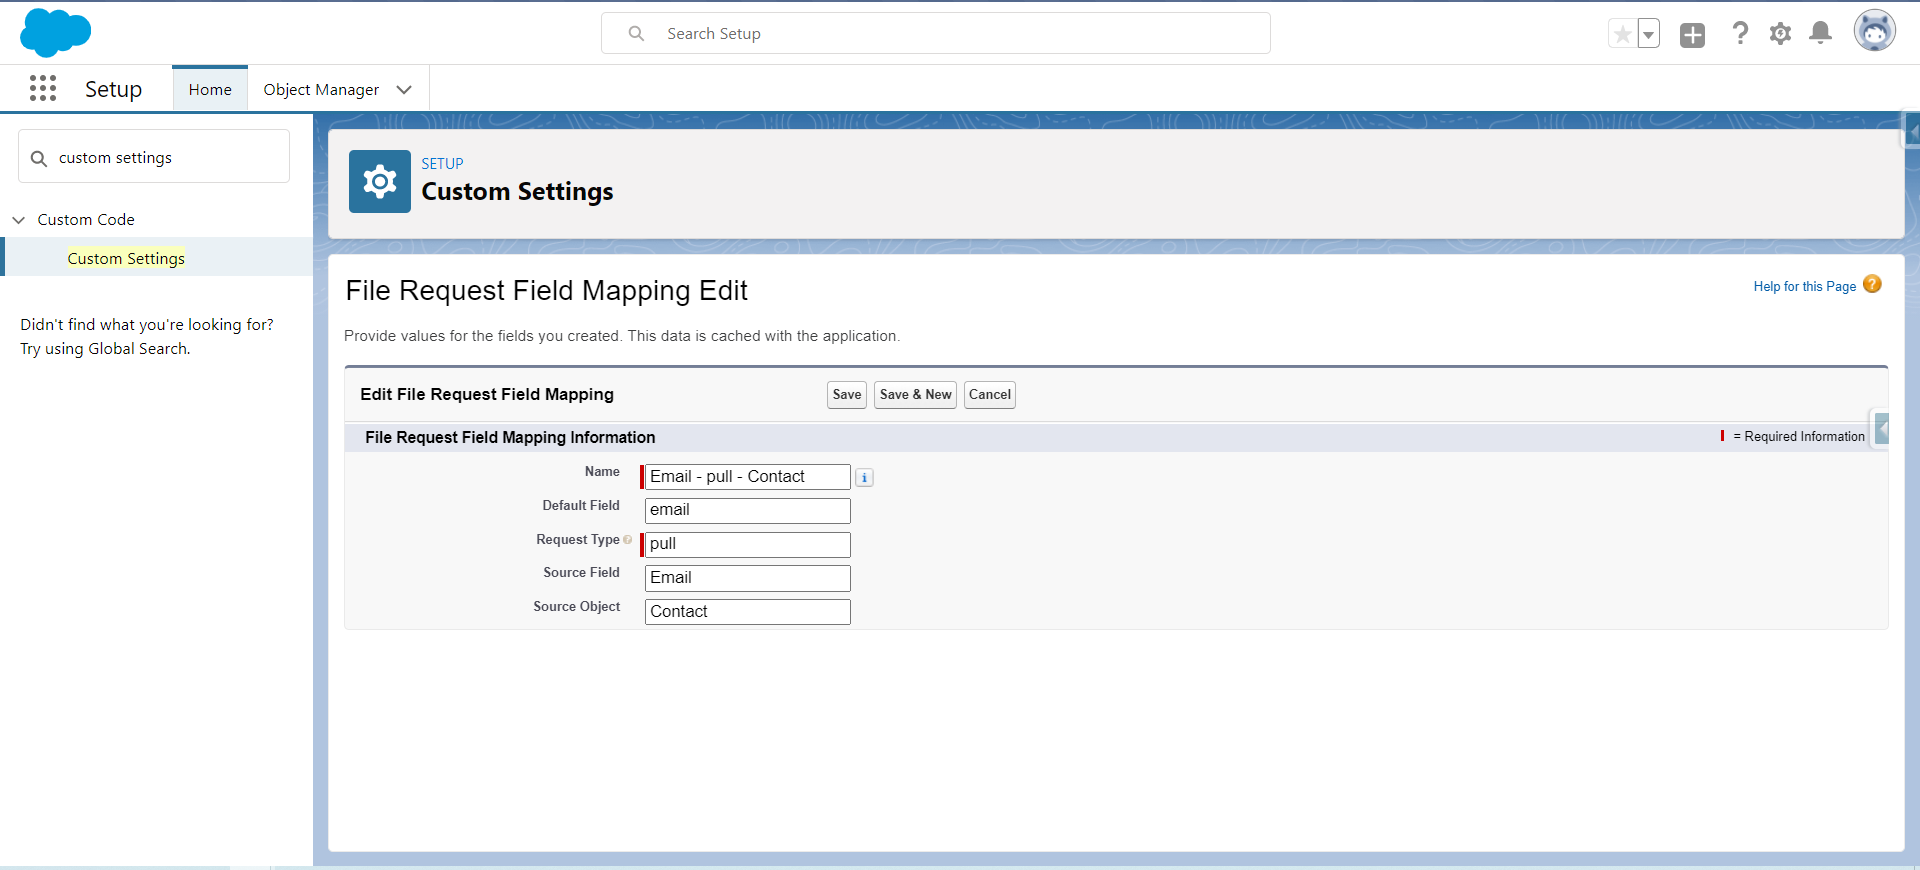
Create below Entries for both push/pull Request Type:
-
First Name
-
Last Name
-
Phone
-
Email
-
-
Click on New to Create New Entry for Pull Request.
-
Click on New to Create New Entry for Push Request.
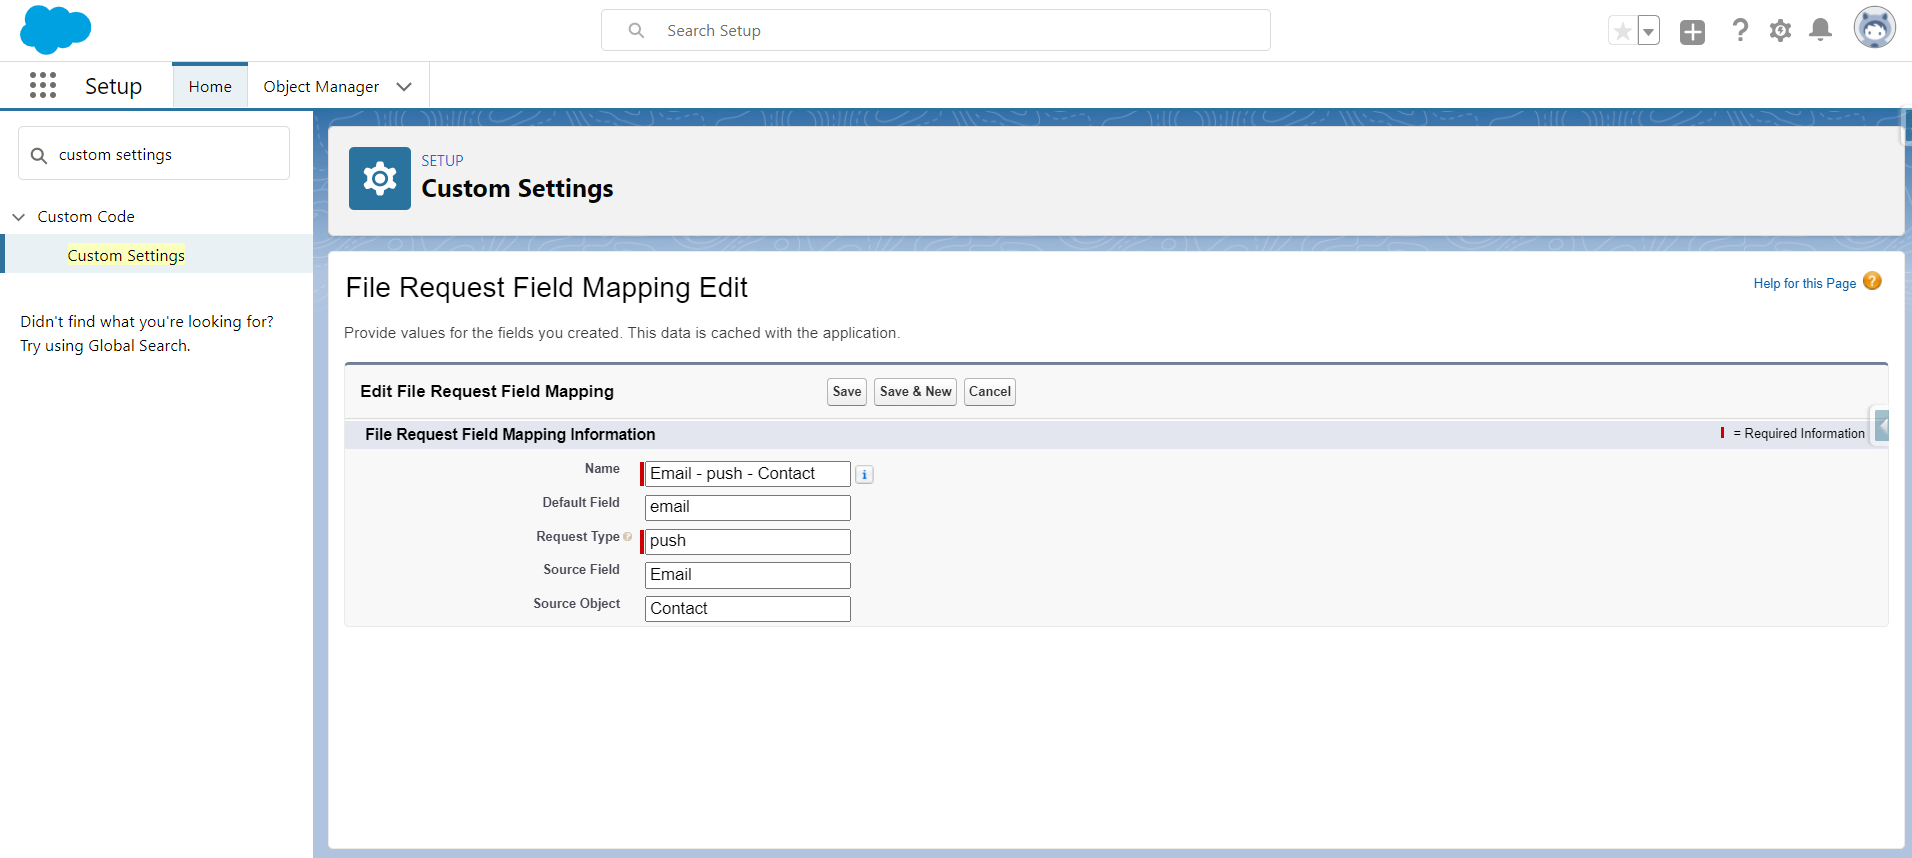
Note: Similarly complete the entries for the above-mentioned fields.
Configure the Common Settings
Navigate to Setup -> Custom Settings -> Data Transfer Settings
Update the below fields as per Requirement
-
RequestByEmail
-
True if request to send/receive documents is made using Email
-
-
RequestByPhone
-
True if request to send/receive documents is made using SMS
-
-
TfaMethod
-
Method to receive the
-
Two-factor authentication Code.
-
Populate the Value with SMS or Email
-
-
TfaRequired
-
True if Two-factor Authentication is Required
-
-
ErrorBatchMessages
-
time,Unavailable,Bad,reset,Server,error,failed
-
-
NextScheduleBatchRunTime
-
Provide the time-frequency to run the batch.
-
For Example - If you want the batch to run in every 2 minutes, Populate the value field with 2.
-
-
ScheduleBatchRequired- True. Before scheduling the batch mark this custom setting as True.
Configure Lightning Action button on the Page Layout
-
Go to your Source Object from Object Manager.
-
Go to Page Layout of your Source Object -> Mobile & Lightning Actions
-
Drag the already existing Request Files and Send Files button on the Object Layout.
-
Save the Record.
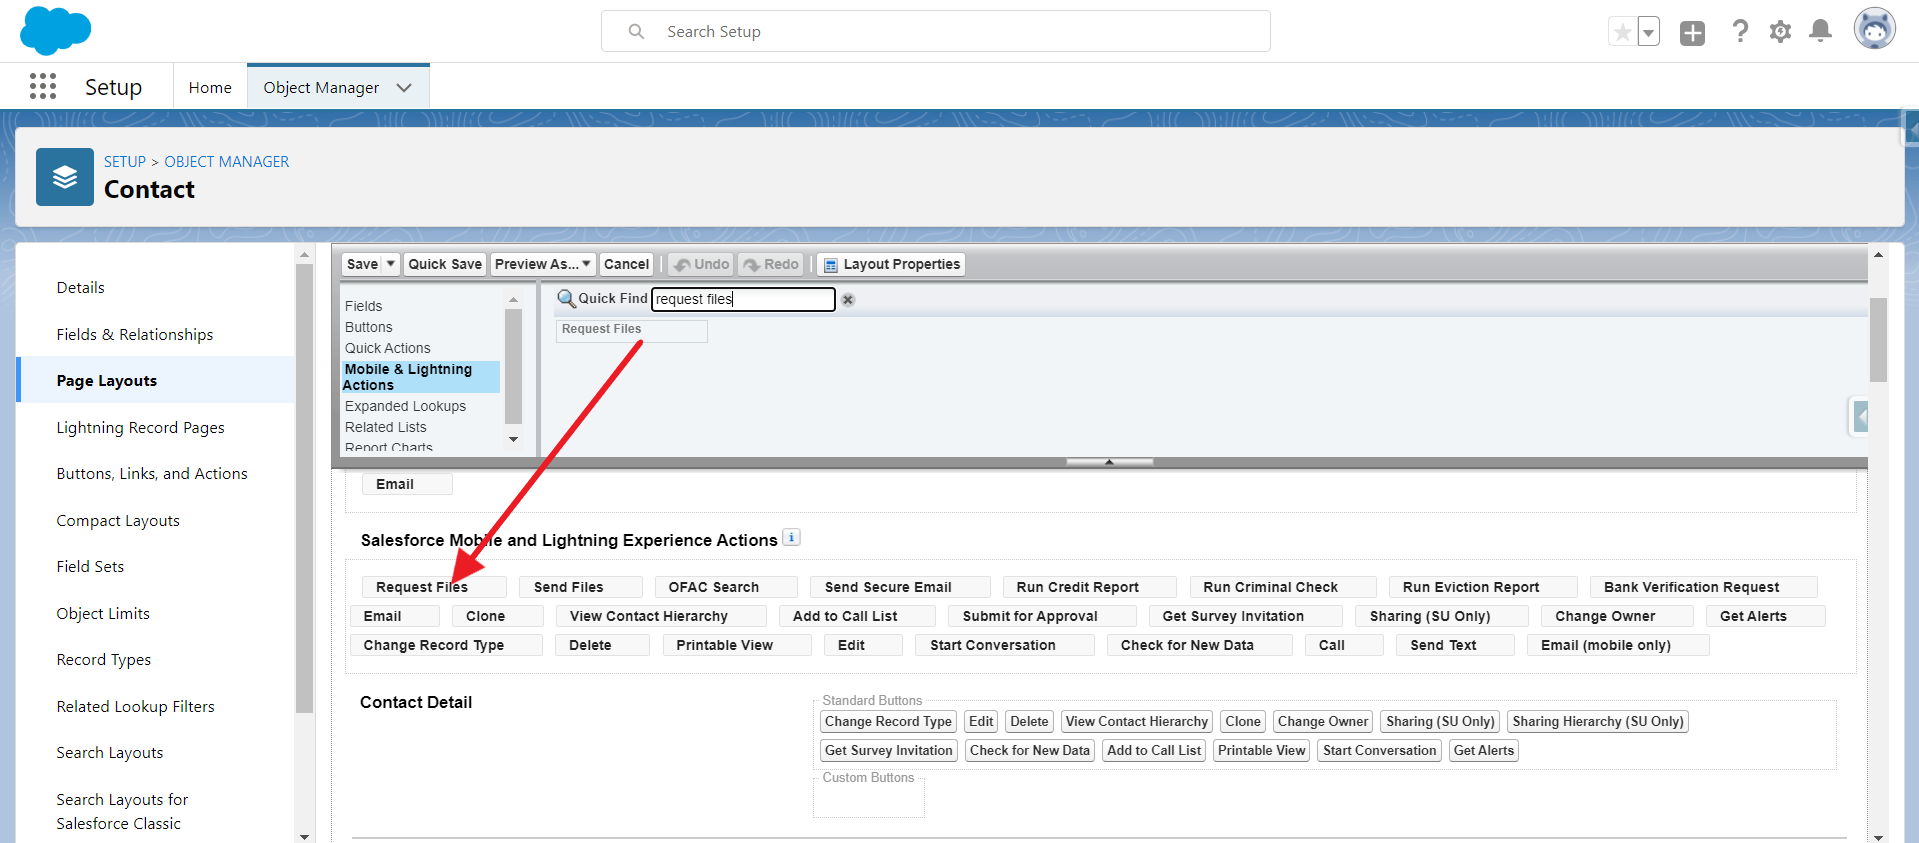
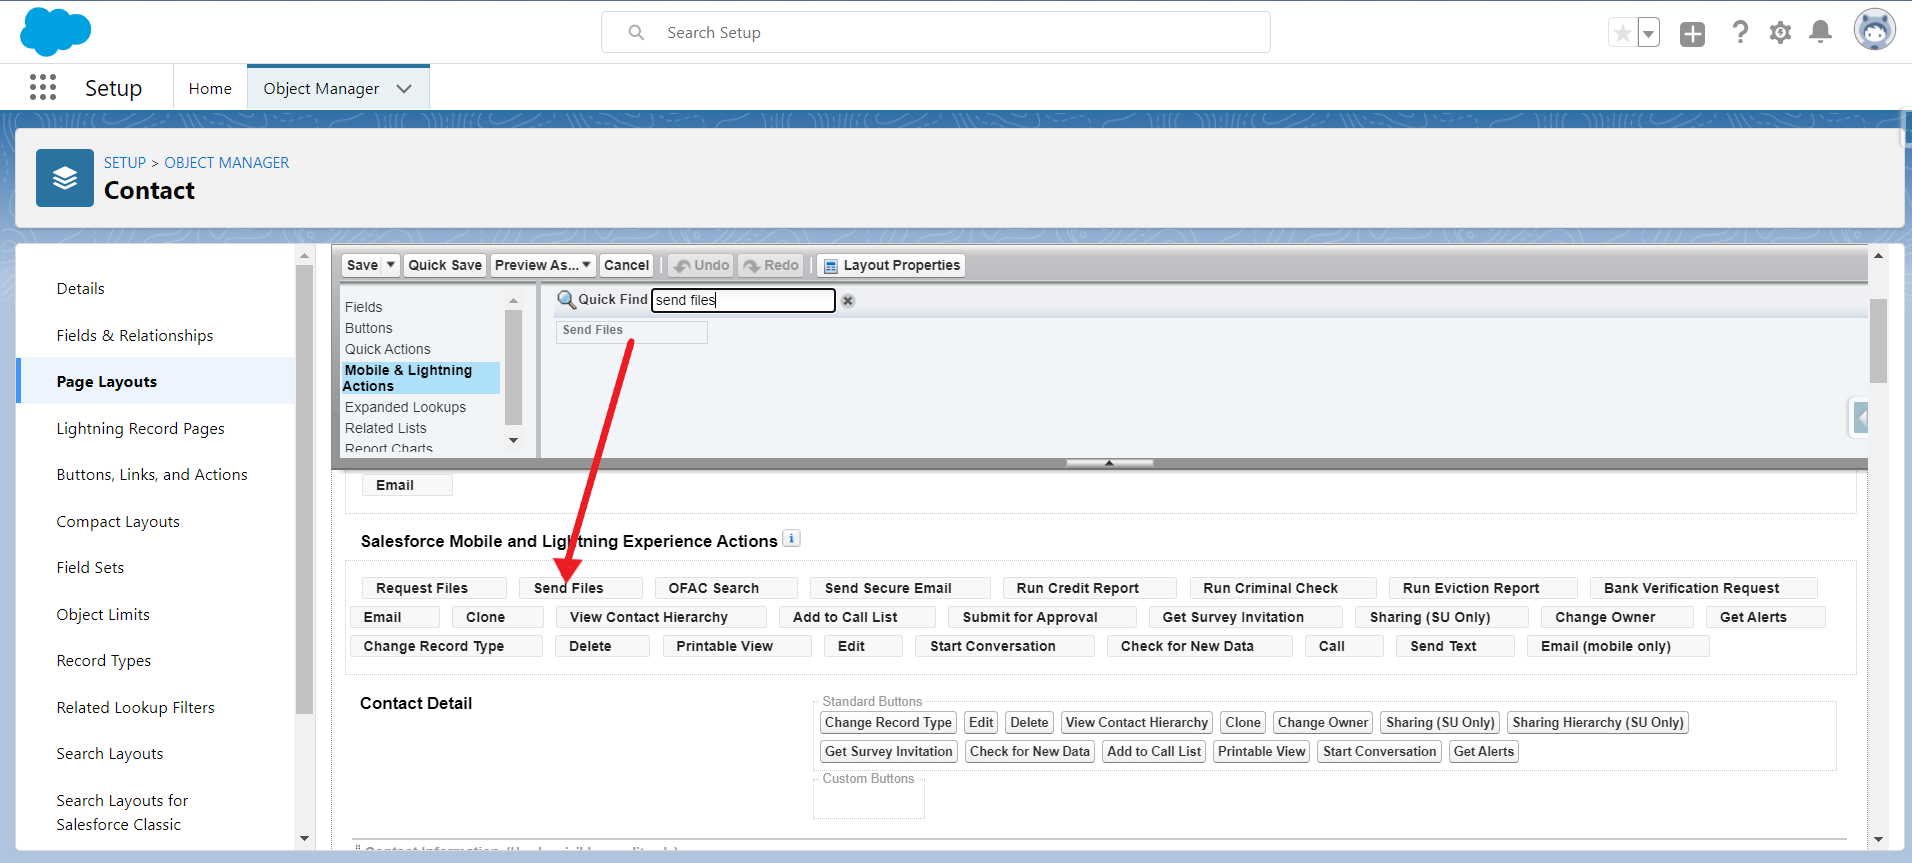
If the Source Object is other than Contact/Lead or Account, please follow the below steps to create a button
-
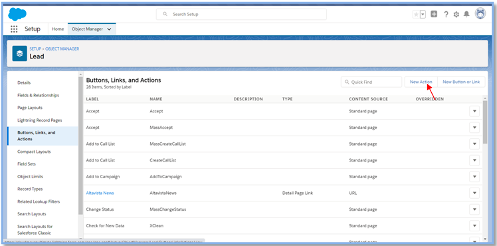
Go to Button, Links, and Action from Source Object
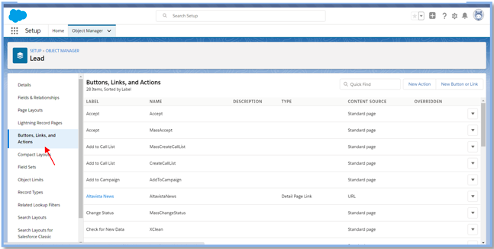
-
Click on New Action.
-
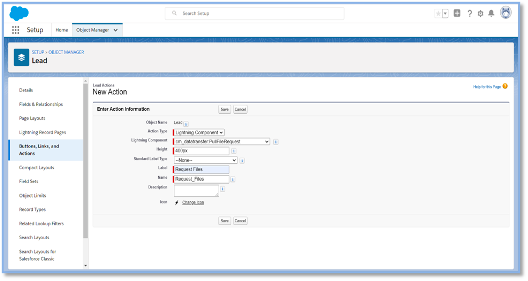
Create an Action for Request files. Please see the image for the reference.
-
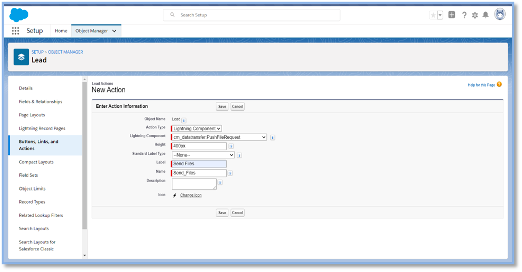
Similarly, create an Action for Send Files. See the image for the reference.
· Click Save.
-
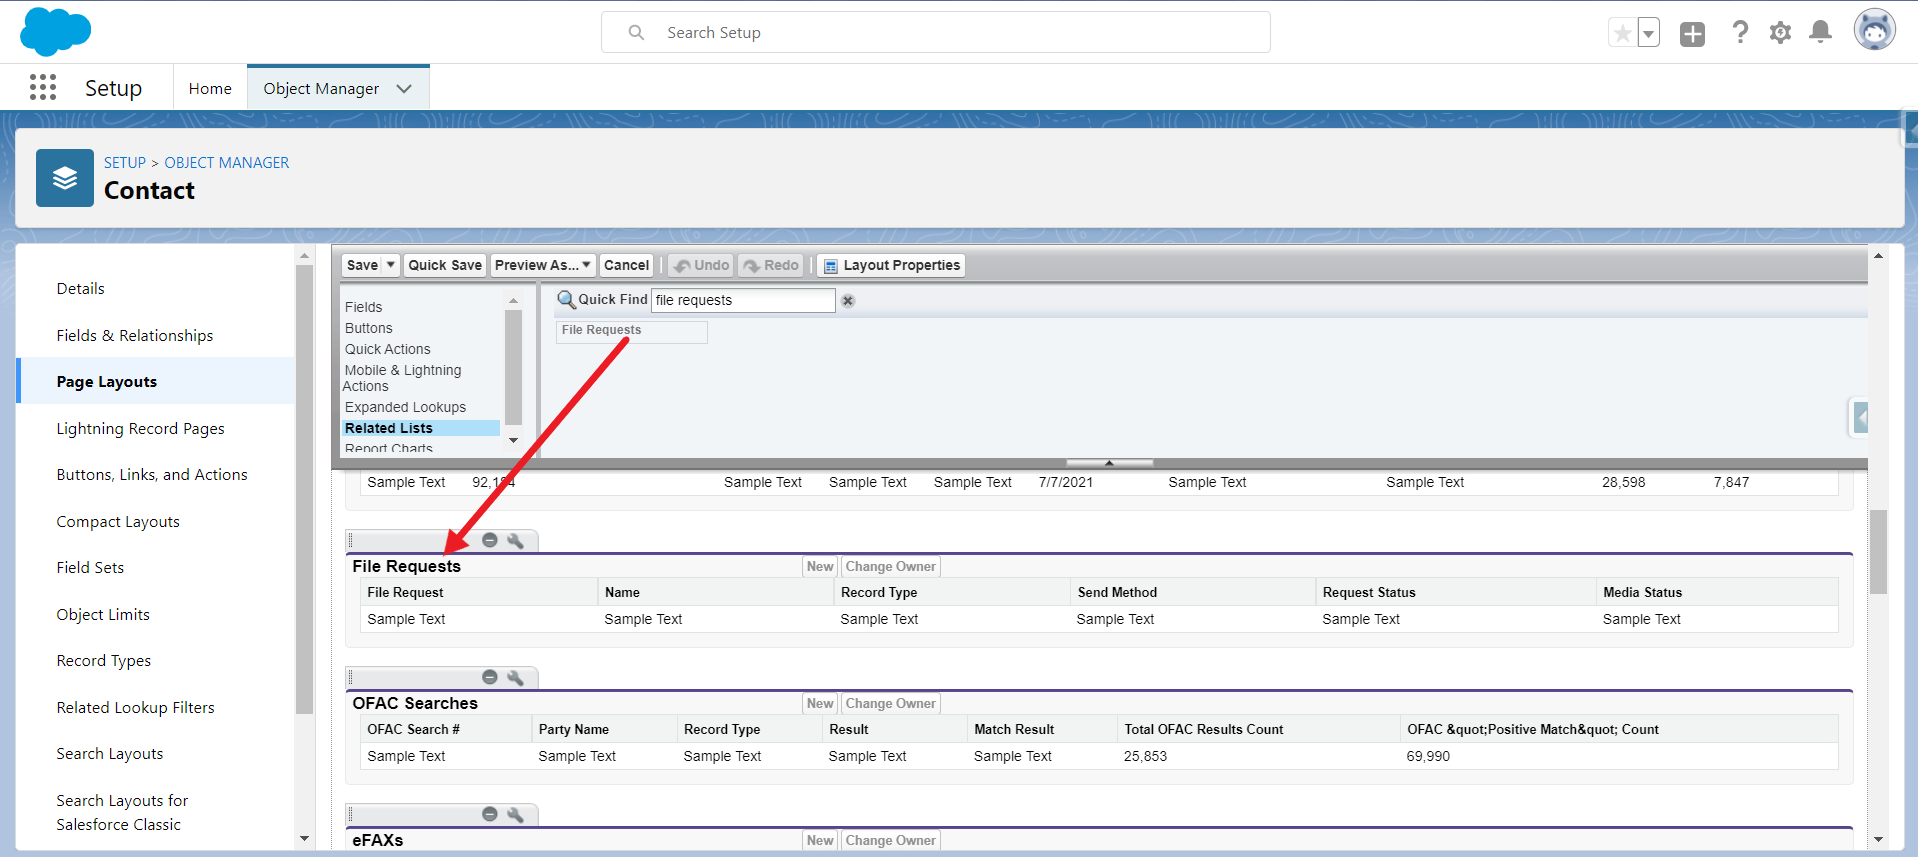
Add the Related List on the Page Layout.
Adding Lightning Component on Lightning Record Pages.
-
From Setup go to Object Manager.
-
Search for your Source Object From which business will run Secure File Transport.
-
Click on the Lightning Record Page Section
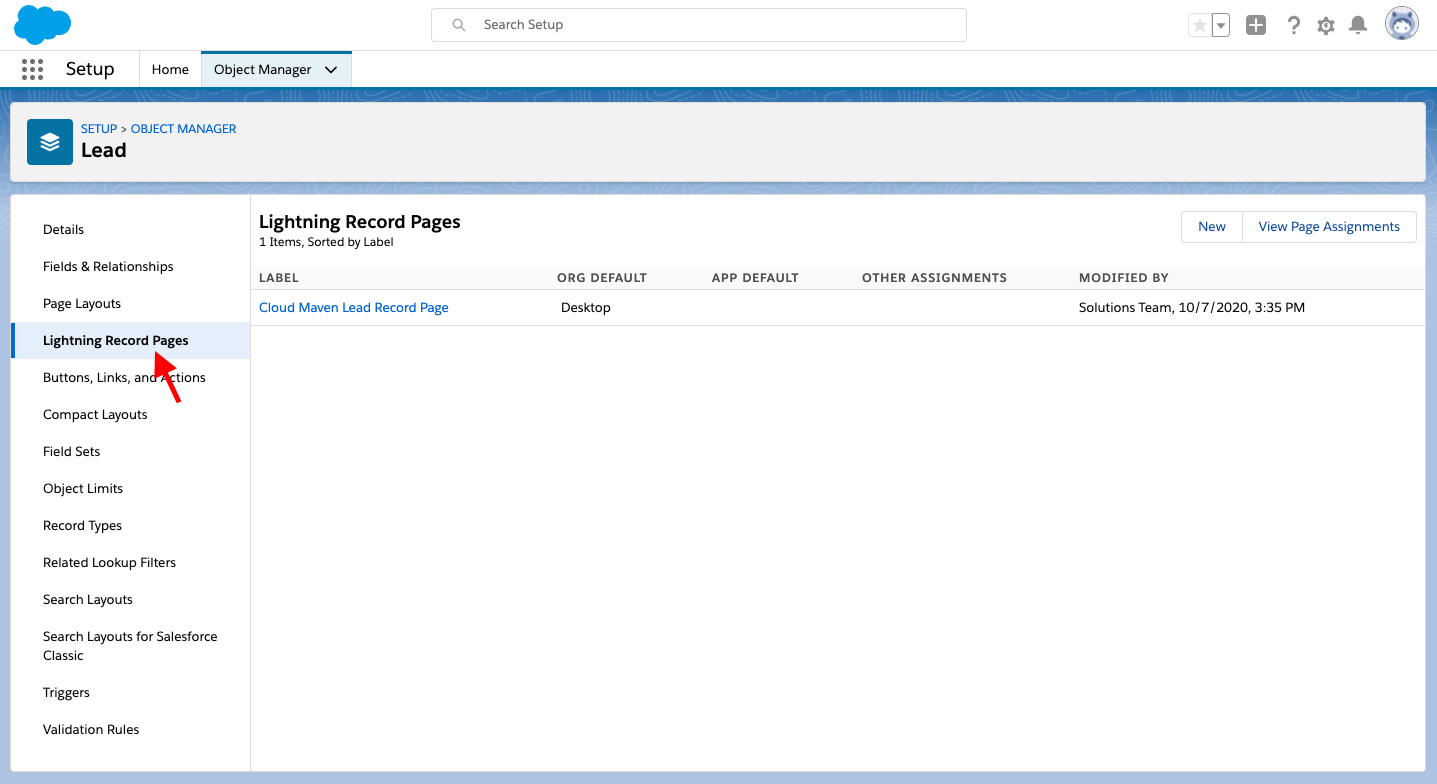
-
Select the Record Page.
-
Click Edit.
-
Search for displayMedialist Component in the Quick Find box.
-
Drag the Component to the Record Page.
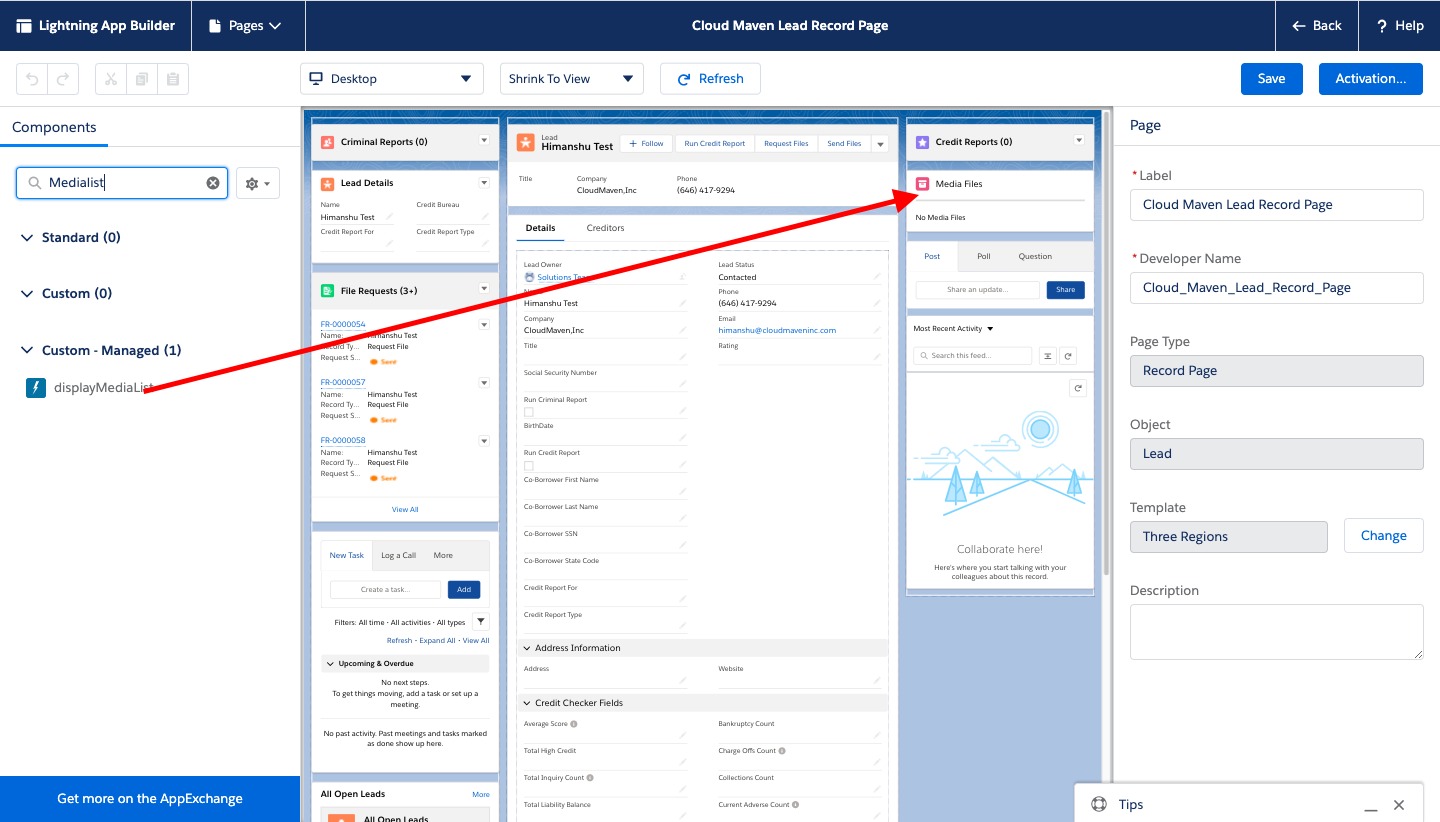
-
Click Save.
Create Secure File Templates
Click here for step by step instructions on how to create and manage secure file templates.
Schedule the Status Batch
Click here for detailed steps on scheduling the batch responsible for updating the File Request Status. The batch can be configured based on your requirements and is responsible for pulling in the media uploaded by the end user.