
This document outlines the process for initiating an Identity Verification workflow. It explains how to:
-
Select the appropriate Plaid products based on business requirements
-
Enter the required customer information accurately
-
Configure product-specific settings to ensure successful verification
Using Identity Verification, you can verify identification documents, phone numbers, name, date of birth, ID numbers, addresses, and more.
1. Log In to Salesforce
➡ Access your Salesforce org with the appropriate credentials.
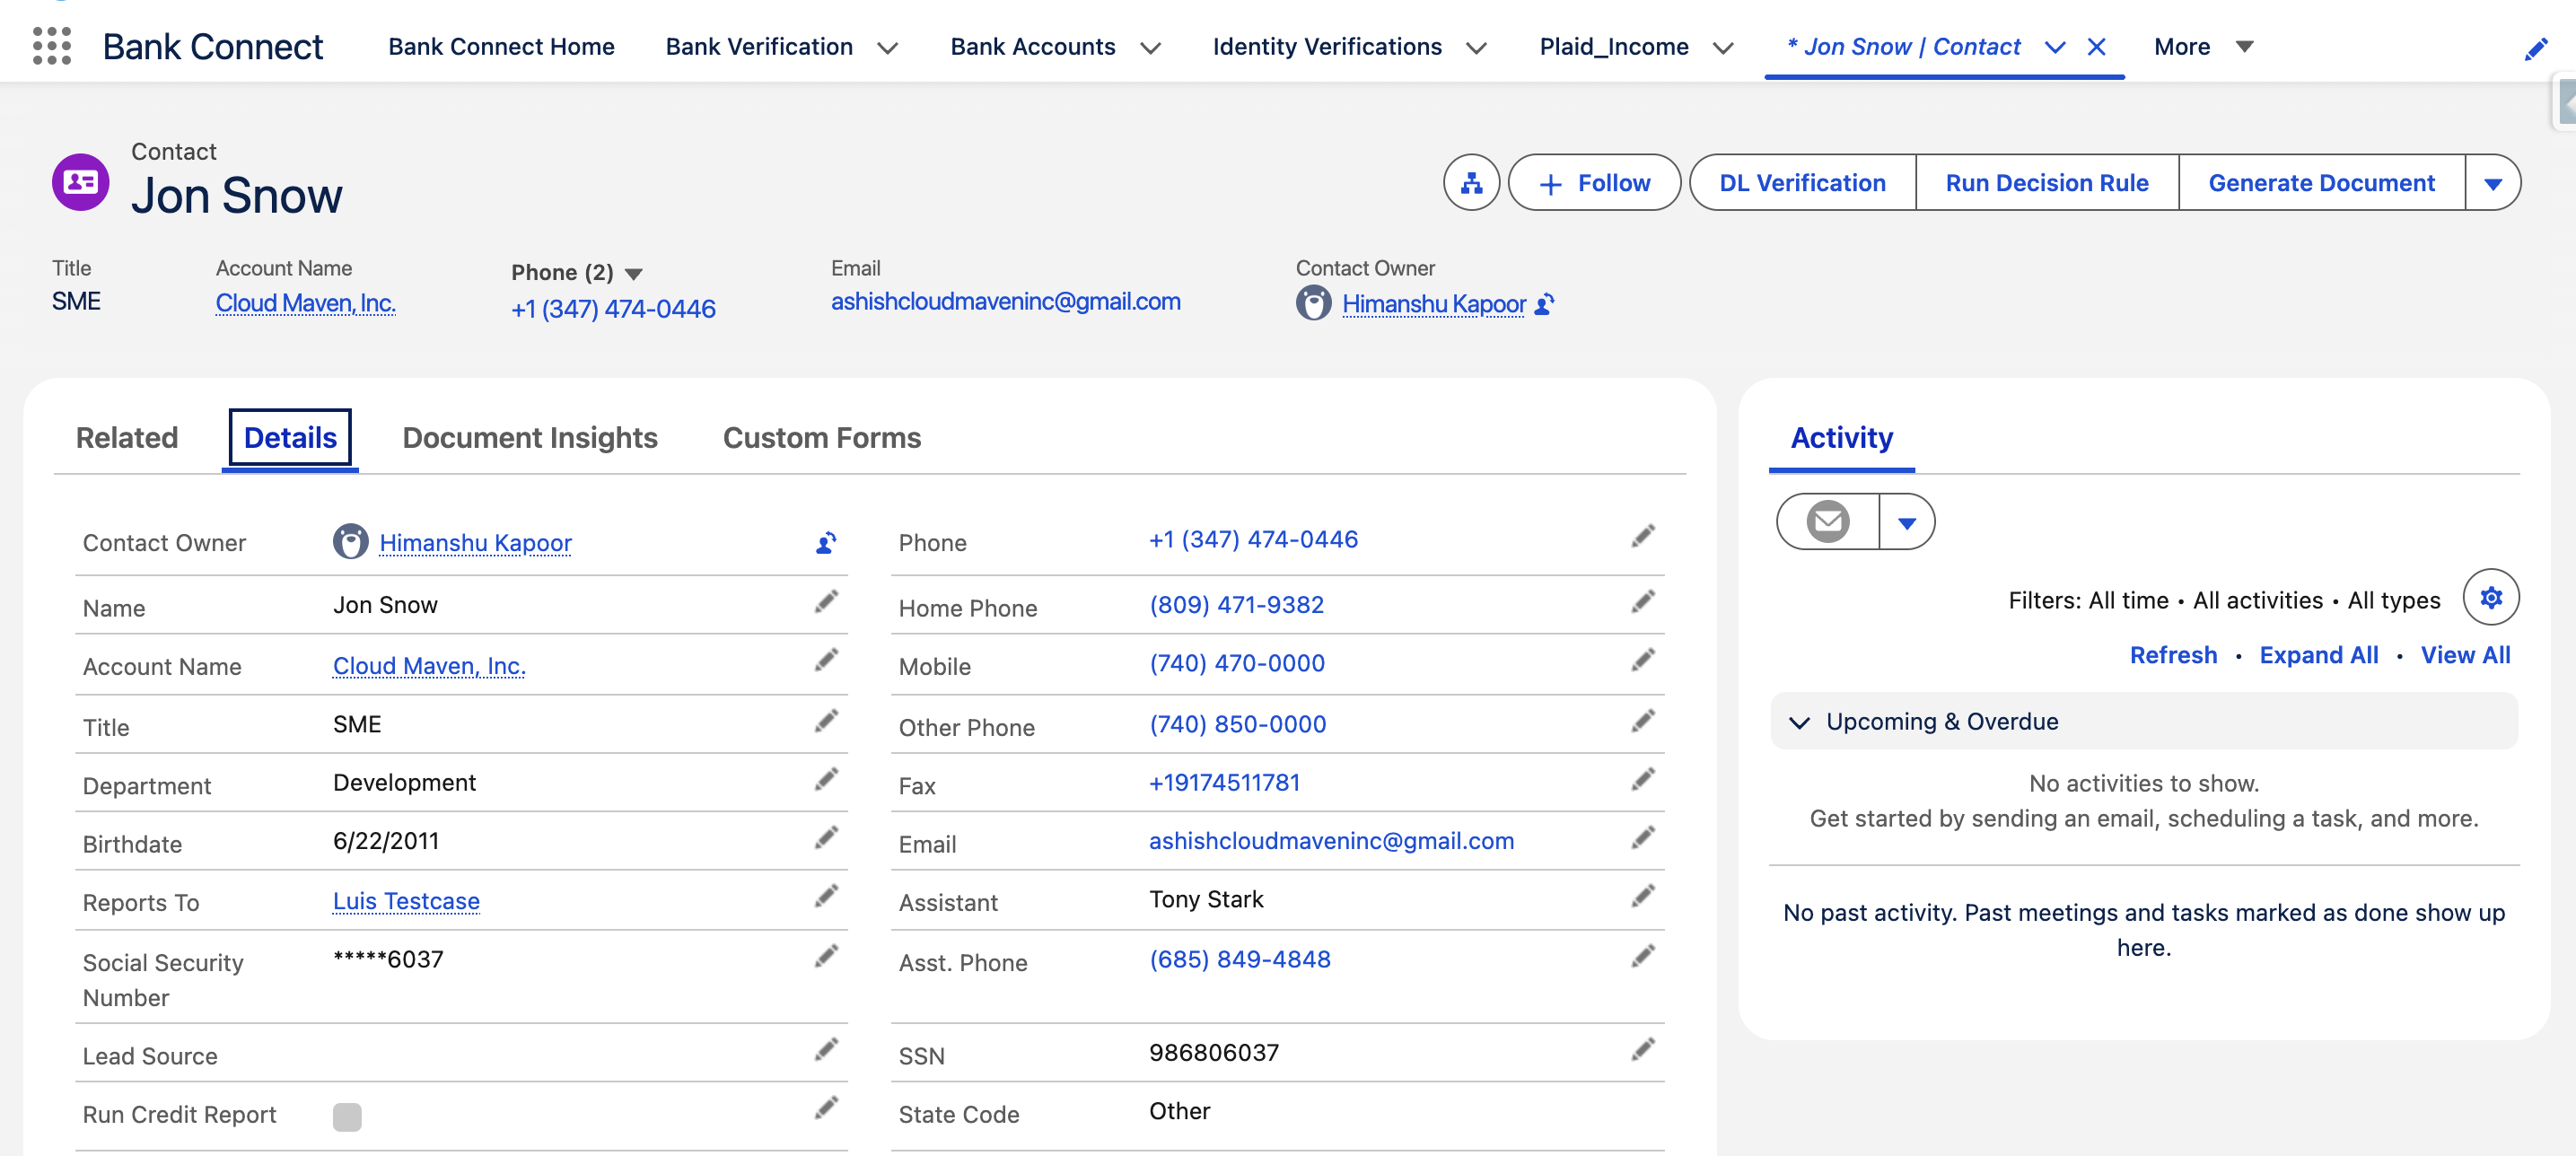
2. Navigate to the Source Record
Open existing record or create a new one
3. Launch the Verification Screen
Run Bank Verification Request from button
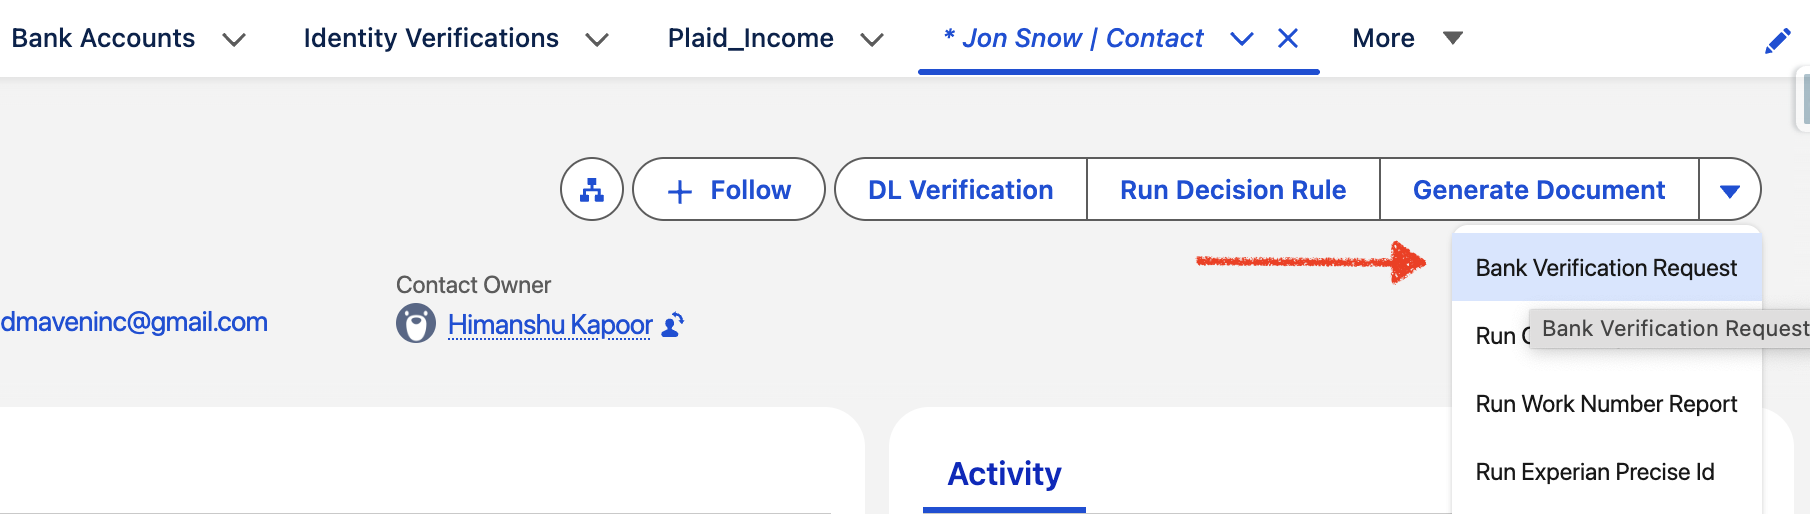
A new screen/component will open, displaying the request form
4. Configure the Search
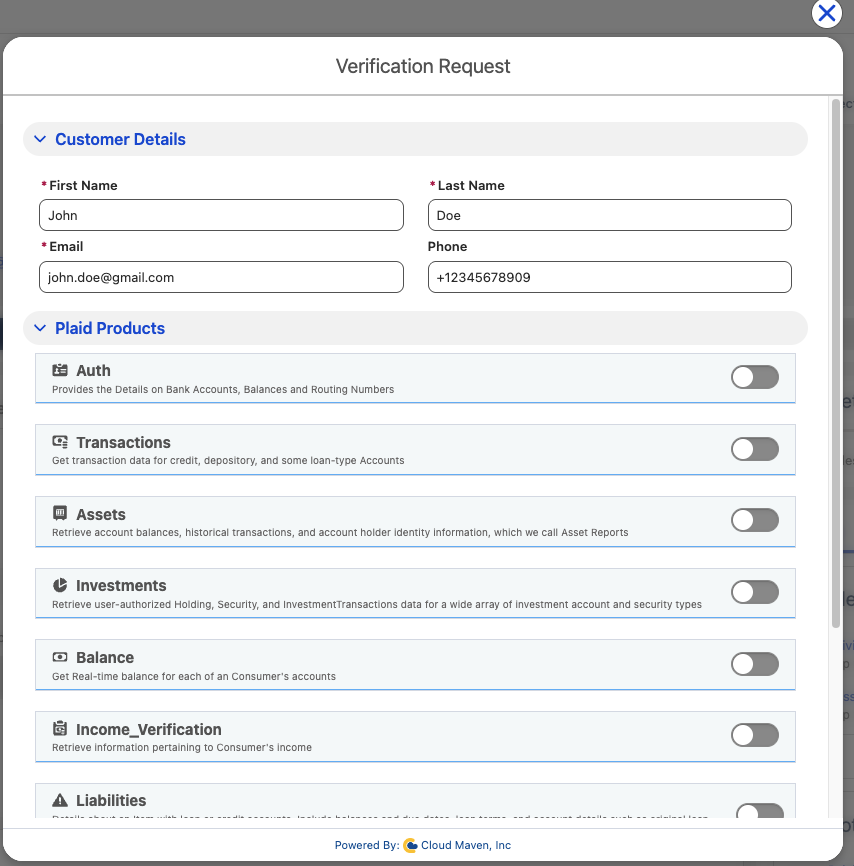
Review data within Bank Verification Request Component
4.1 Review and update auto-filled fields
-
Fields in the search form will be automatically populated using data from the Source Object.
-
The values are mapped via Custom Setting.
-
You can edit or override these fields as needed.
-
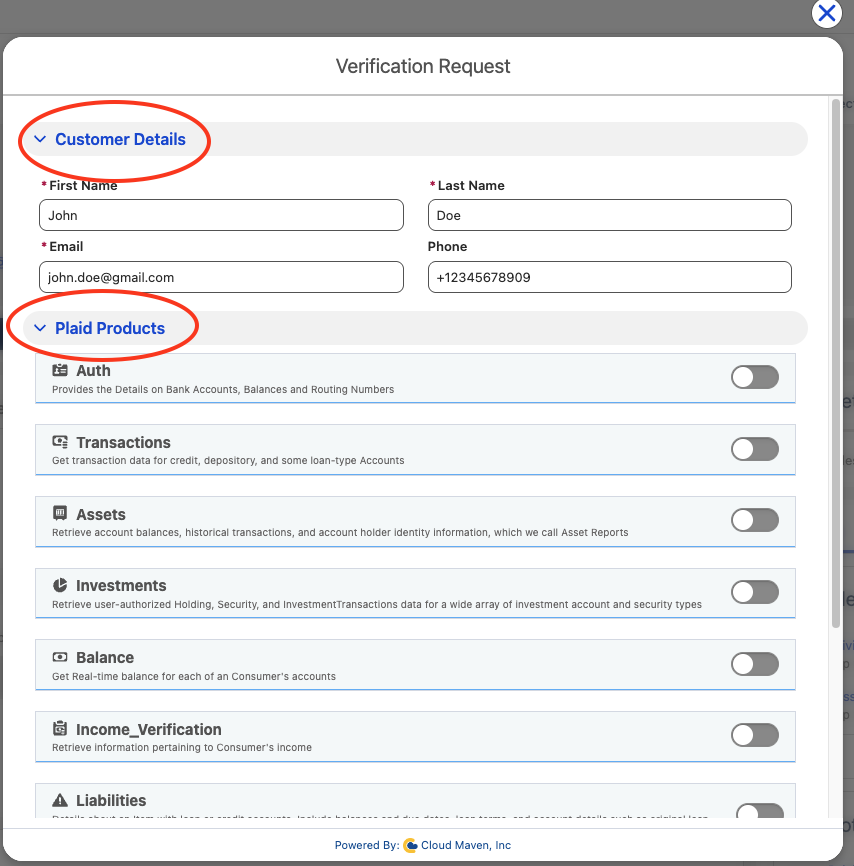
The screen includes two sections: Customer Details and Plaid Products.
You can switch between these tabs to view and edit the corresponding details for each type.
4.2 Customer Details
Please verify the following details:
-
Name
-
Email address
-
Phone number (required if you plan to send an SMS to the customer for the verification request)
4.3 Selecting the Products
-
Select Identity Verification on the Component
5. Initiate the Request
Initiating the Request for running Identity Verification
Once all mandatory fields are filled, click the Submit button to initiate the verification request.

Congratulations ! You have successfully created a Identity Verification Request !!!! 🎉
6. Authentication from Customer
-
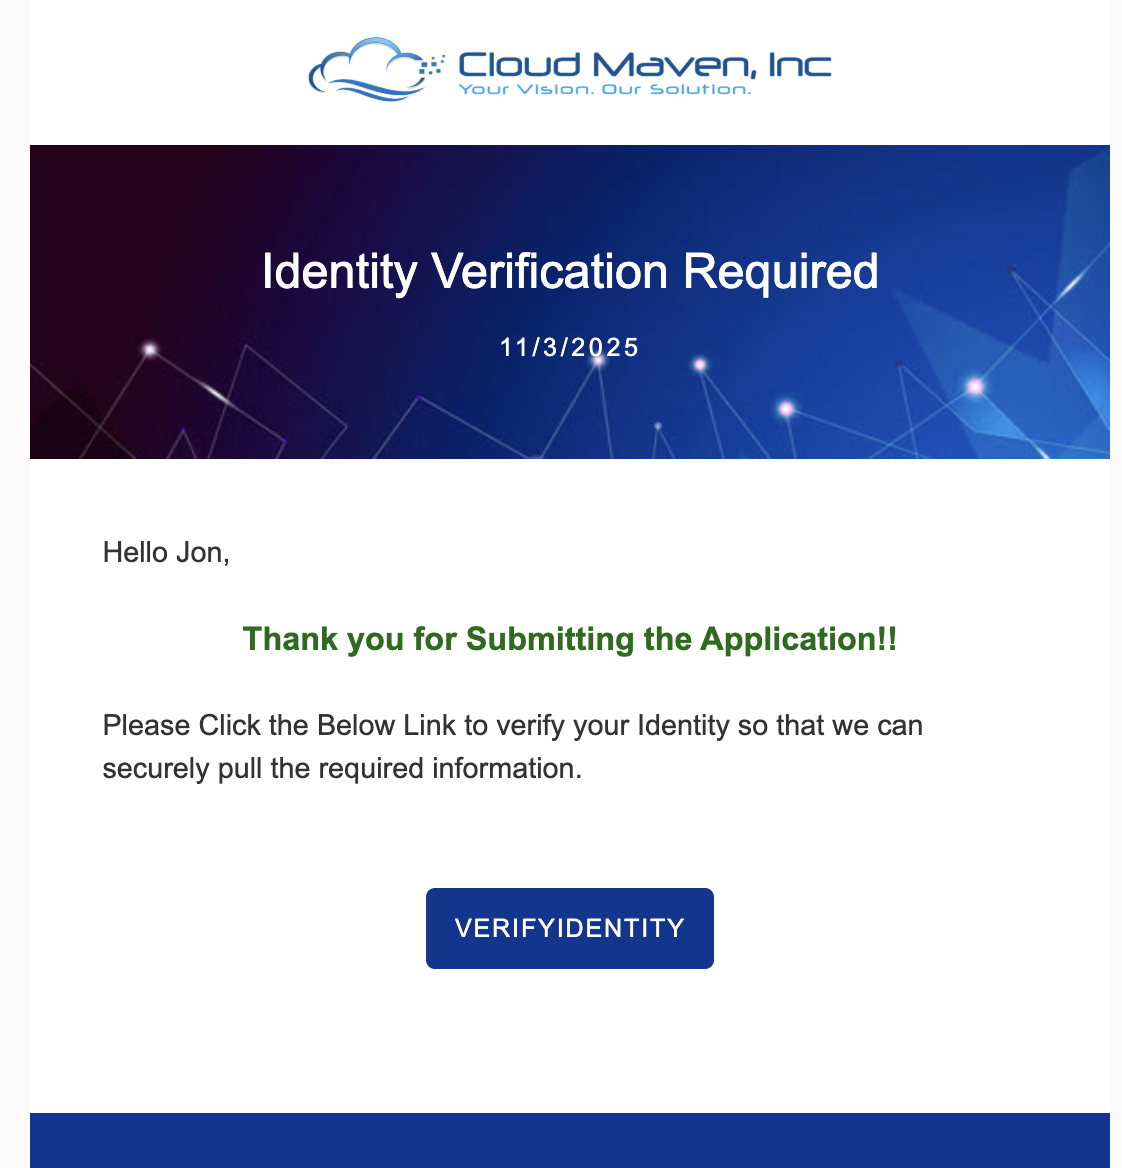
The customer will receive an email, which can be white-labeled and is managed within Salesforce.
-
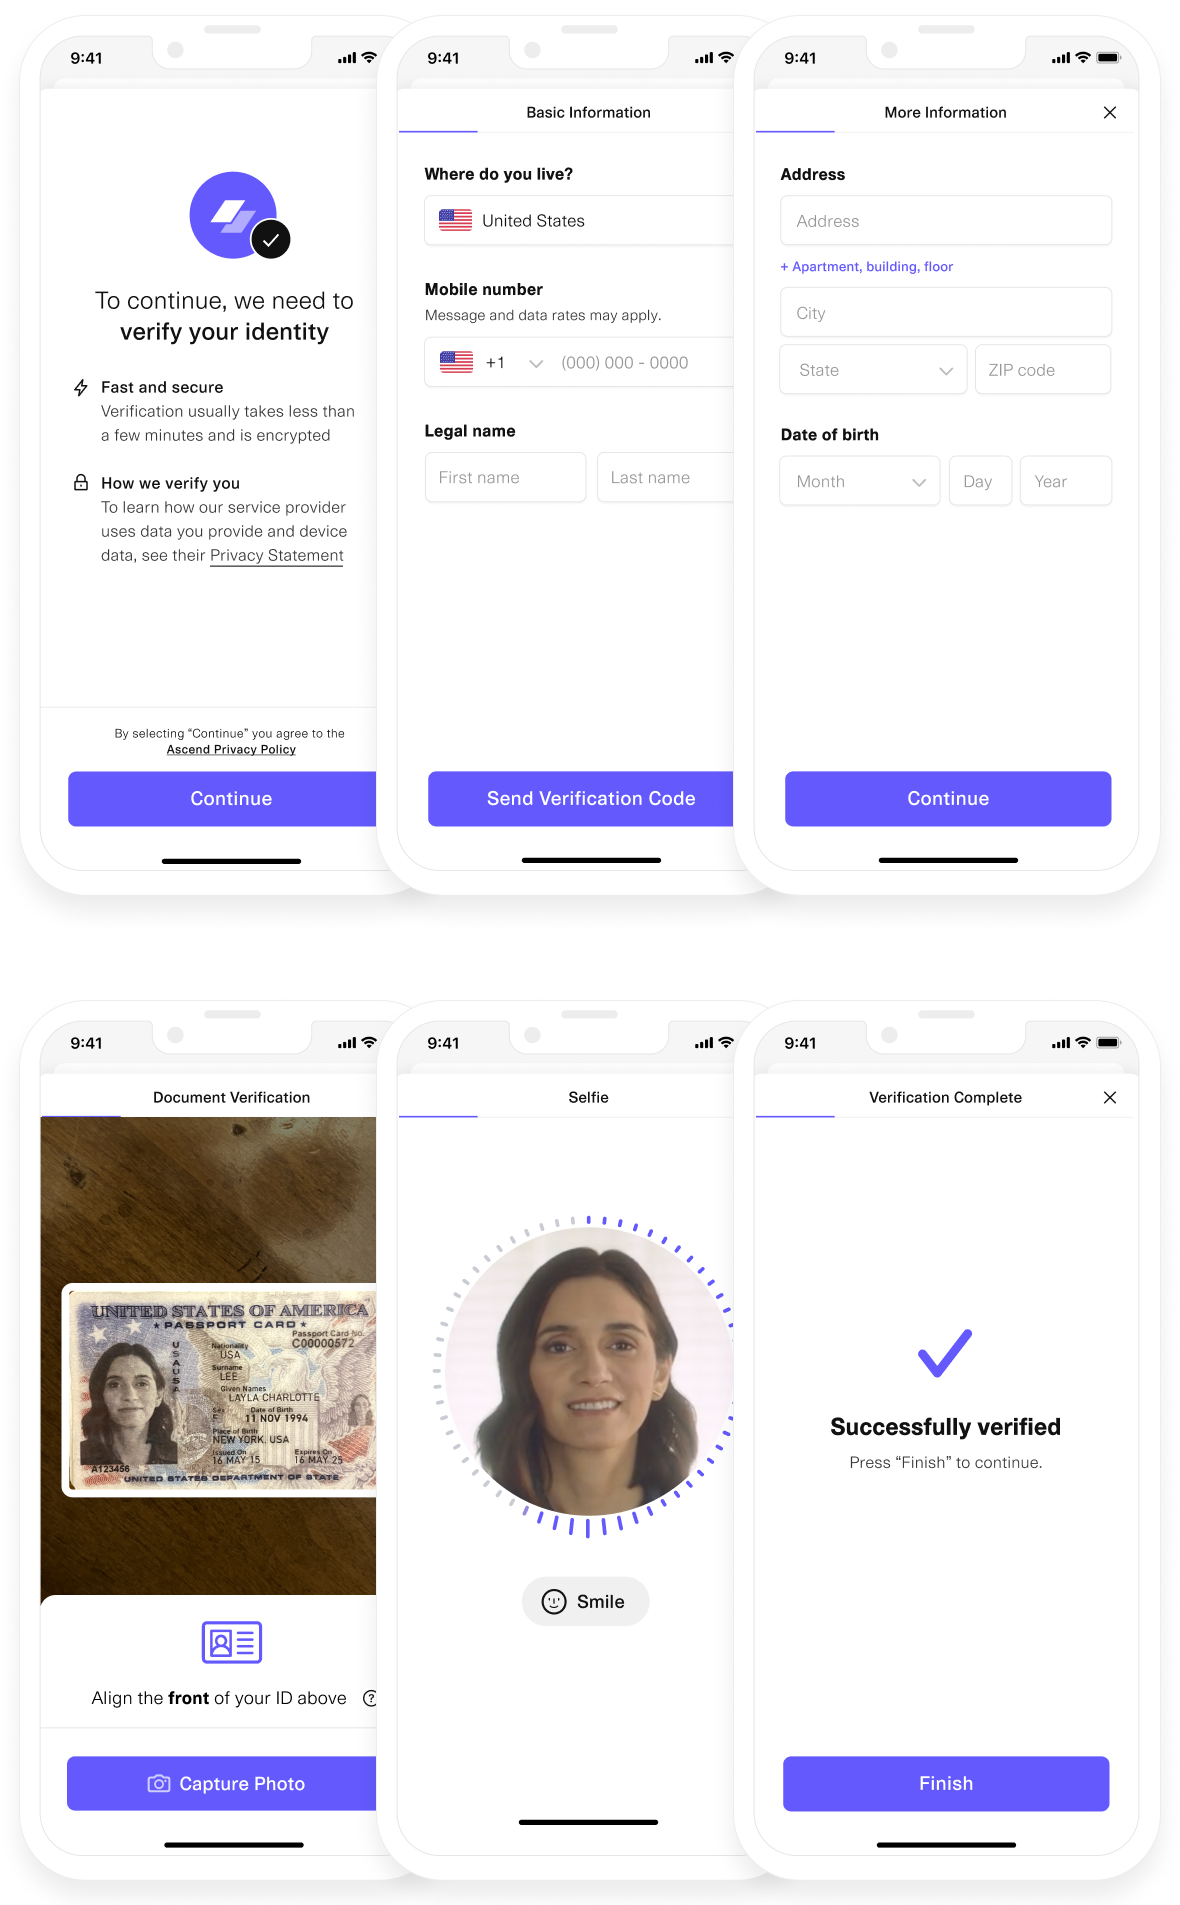
Upon clicking the Verify Identity button, the Plaid toolkit will be launched. The customer will then:
-
Enter their Basic Information.
-
Take a selfie if IDV template is enabled for it
-
Upload Documents as required.
8. Review Results
➡ Please refer to the detailed guide here: