
Overview
This guide walks you through the essential configuration steps required after installing the app in your Salesforce organization. Proper setup ensures that the Adverse Media Search and Monitor functionalities work seamlessly across standard and custom objects.
Ad-hoc Search Field Mapping
Step 1: Access Custom Metadata
Navigate to Setup in your Salesforce Org.
Search for Custom Metadata Types.
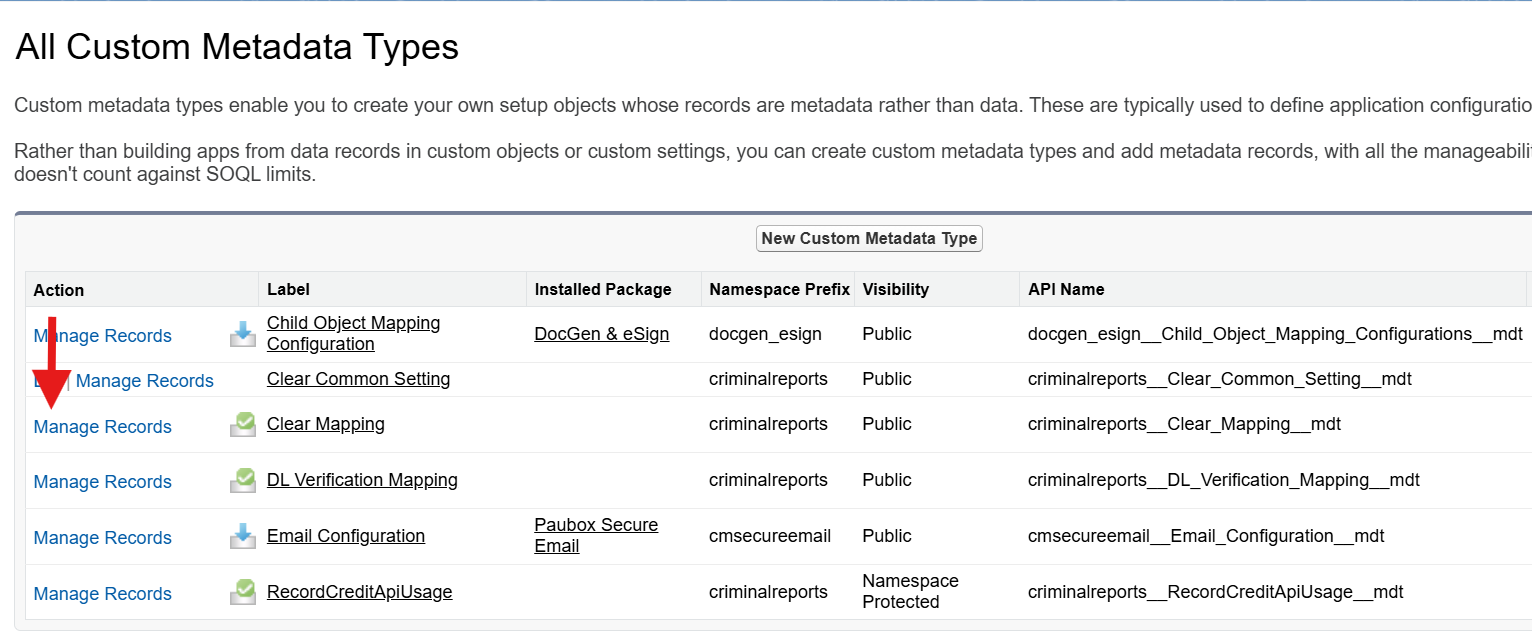
Open the metadata type named Clear Mapping and click Manage Records.
Step 2: Add or Edit Mapping Entries
Default entries for Account and Contact are already available.
If you're configuring a custom object, click New to create a new mapping entry.
Step 3: Basic Mapping Details
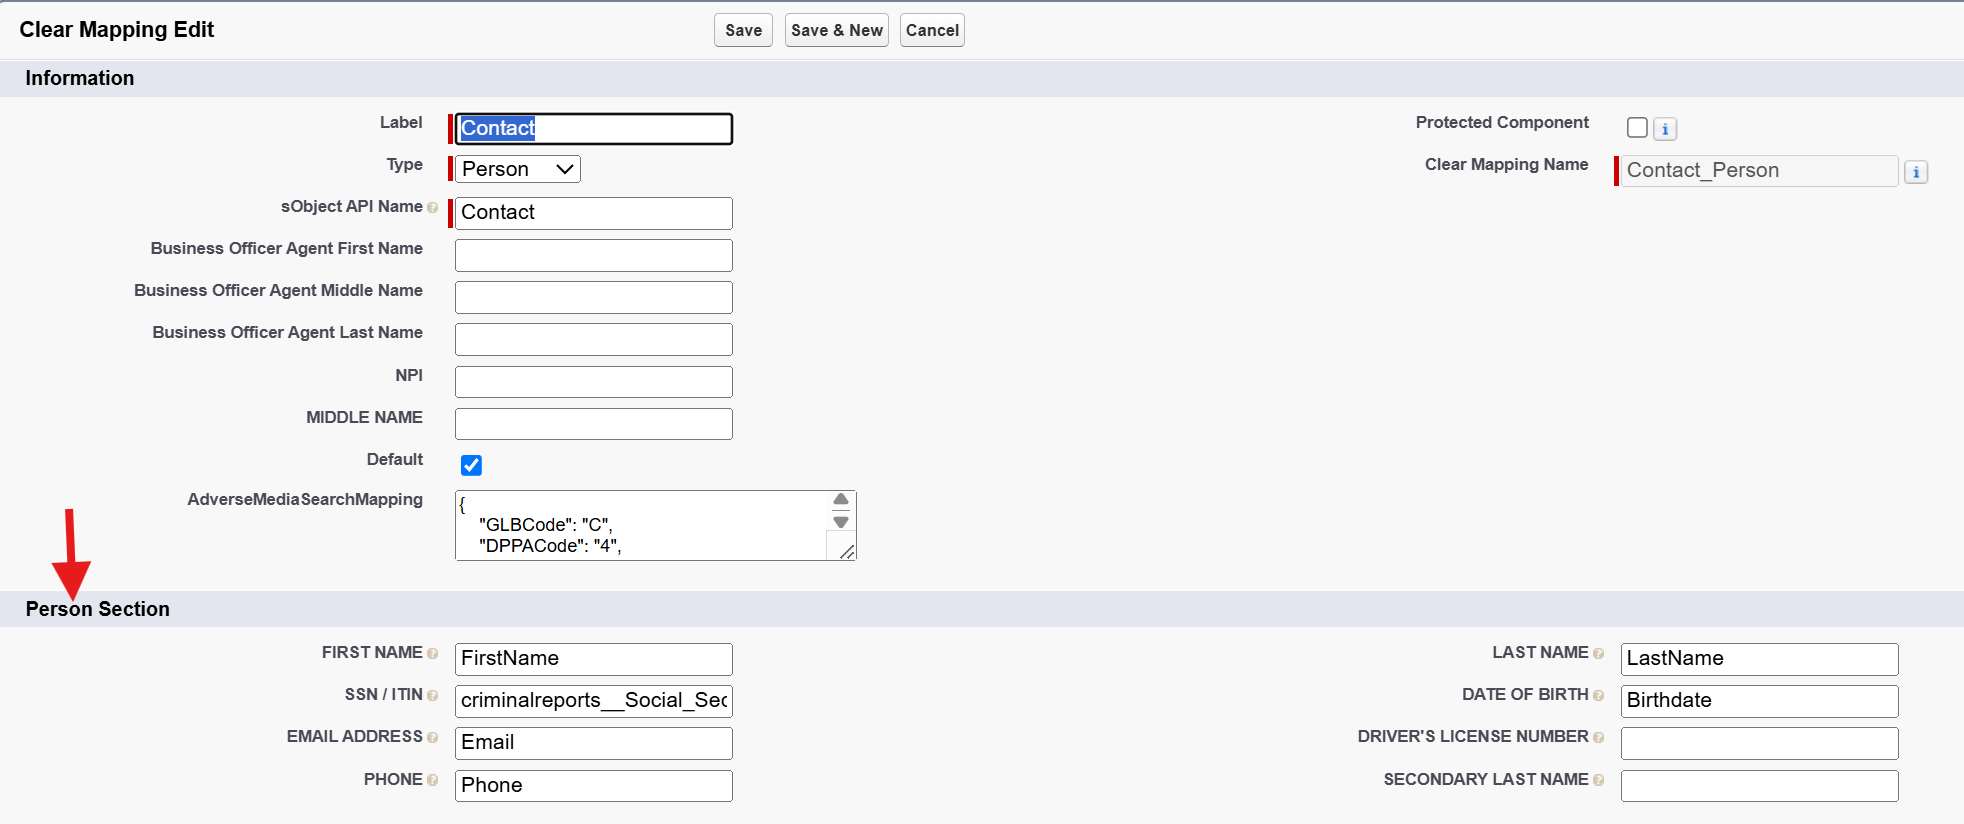
Label: Use the API name of the object (e.g., Contact, Account).
Type Field: Specify the entity type – Person or Business.
Step 4: Configure Default Picklist Values
In the Adverse Media Search Mapping fields: Set default values for:
GLB Code
DPPA Code
Voter Code
You can also predefine values for:
Sanction
Politically Exposed Person
State-Owned Entity
Step 5: Person Field Mapping
In the Person section: Map fields such as:
First Name → API Name (e.g., FirstName)
Last Name → API Name (e.g., LastName)
This ensures pre-population in the Adverse Media Search Component for Person records.
Step 6: Business Field Mapping
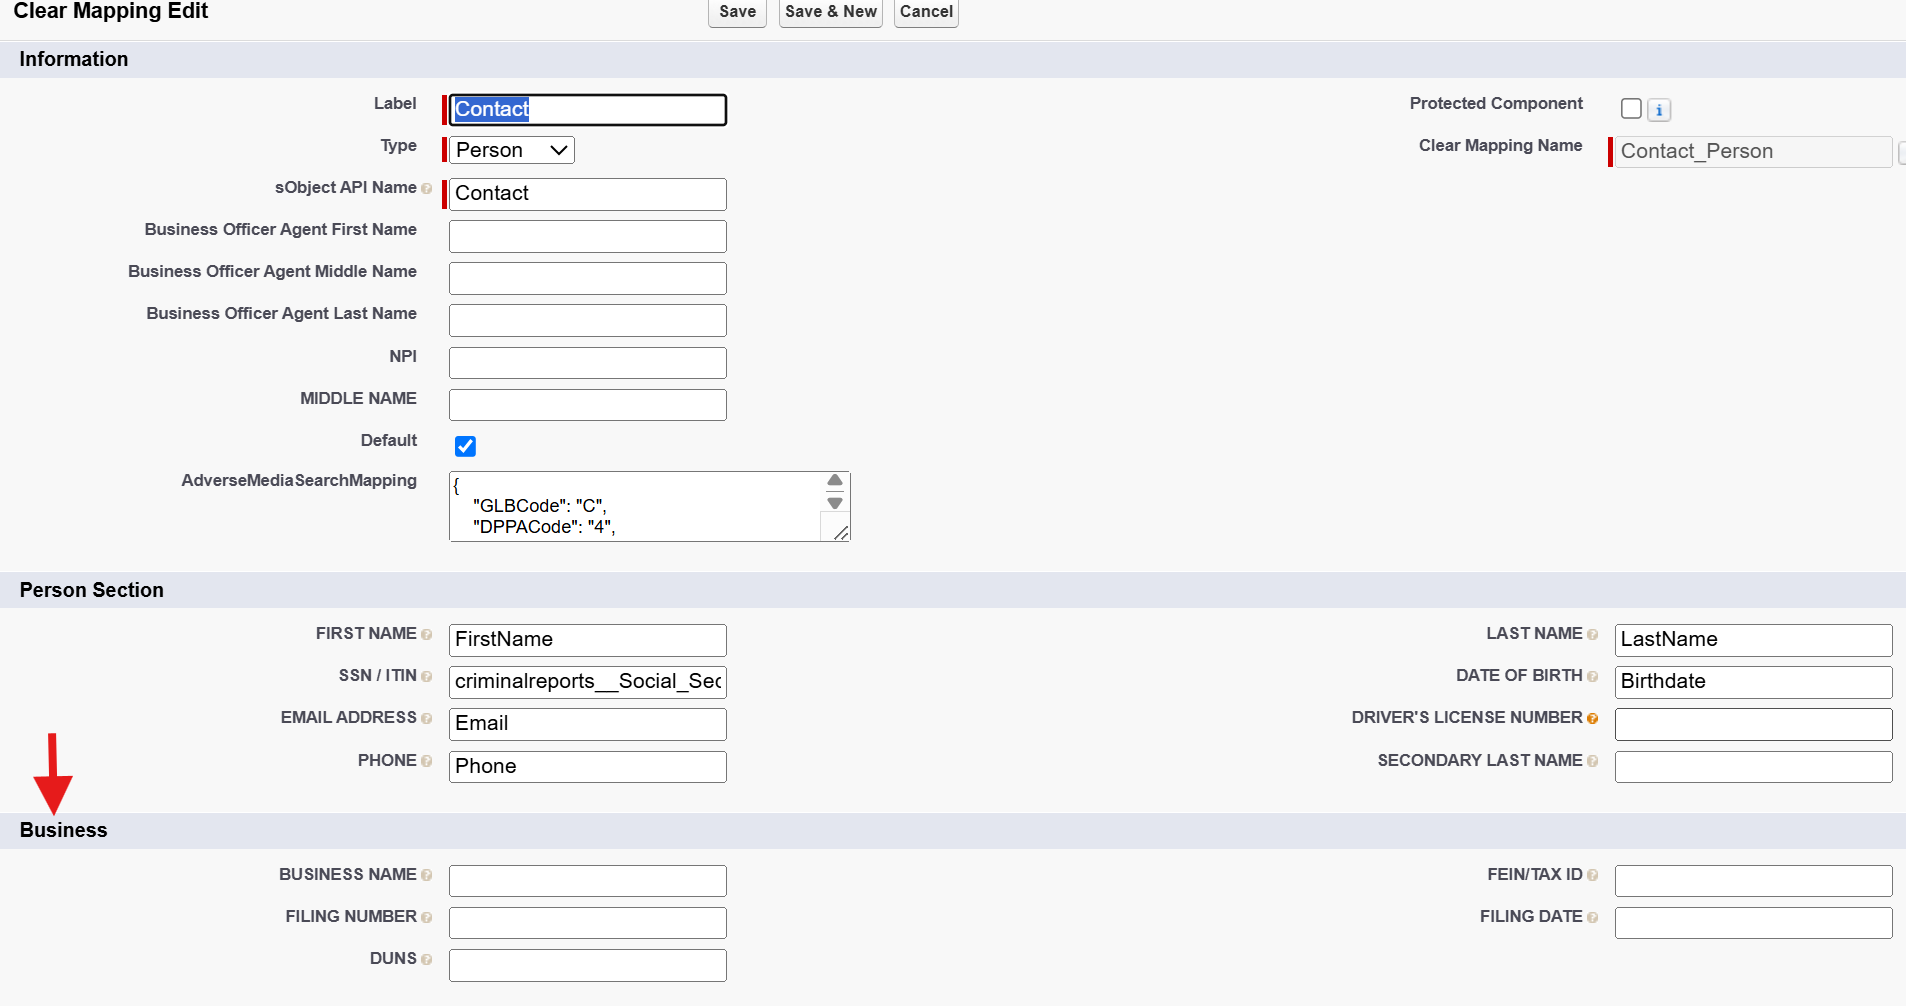
In the Business section: Map fields such as:
Business Name → API Name (e.g., Name in Account)
This populates data when conducting a search for Business entities.
Step 7: Address Field Mapping
Map the address fields from your source object:
|
Field |
Example Mapping |
|
Street Address |
|
|
State/Province |
|
|
City |
|
|
Country |
|
Example: For Contact, MailingStreet maps to Street Address.
Step 8: Enable Default Checkbox
Ensure the Default checkbox is checked.
This allows automation for Adverse Media Searches.
Mark it as true for either Person or Business, based on your entity type.
Default Date Settings
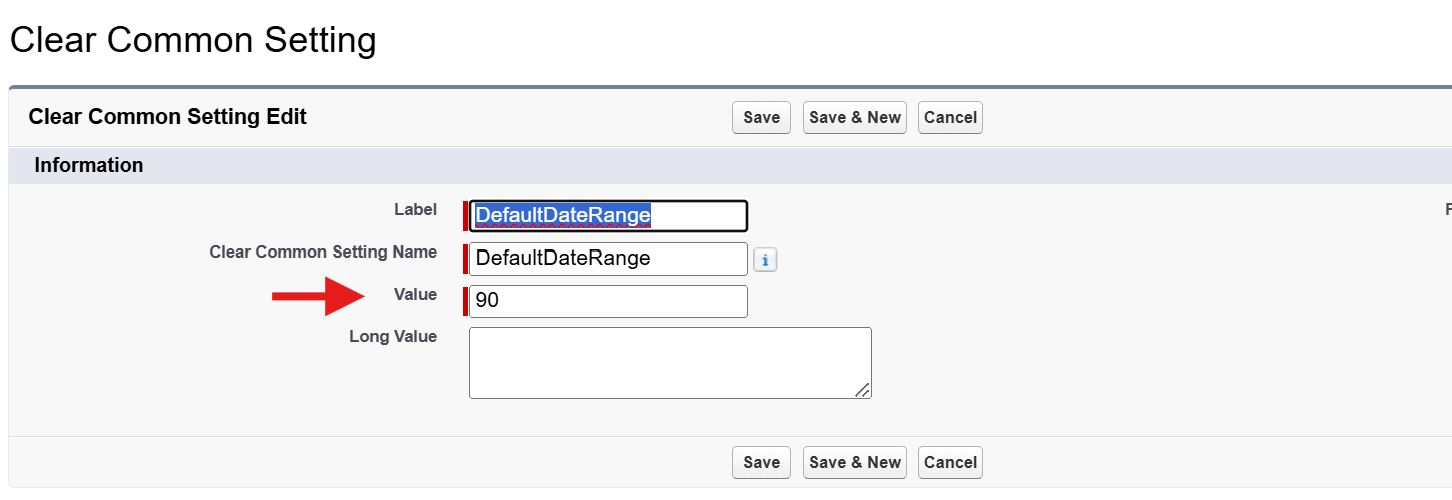
Step 1: Open Clear Common Setting
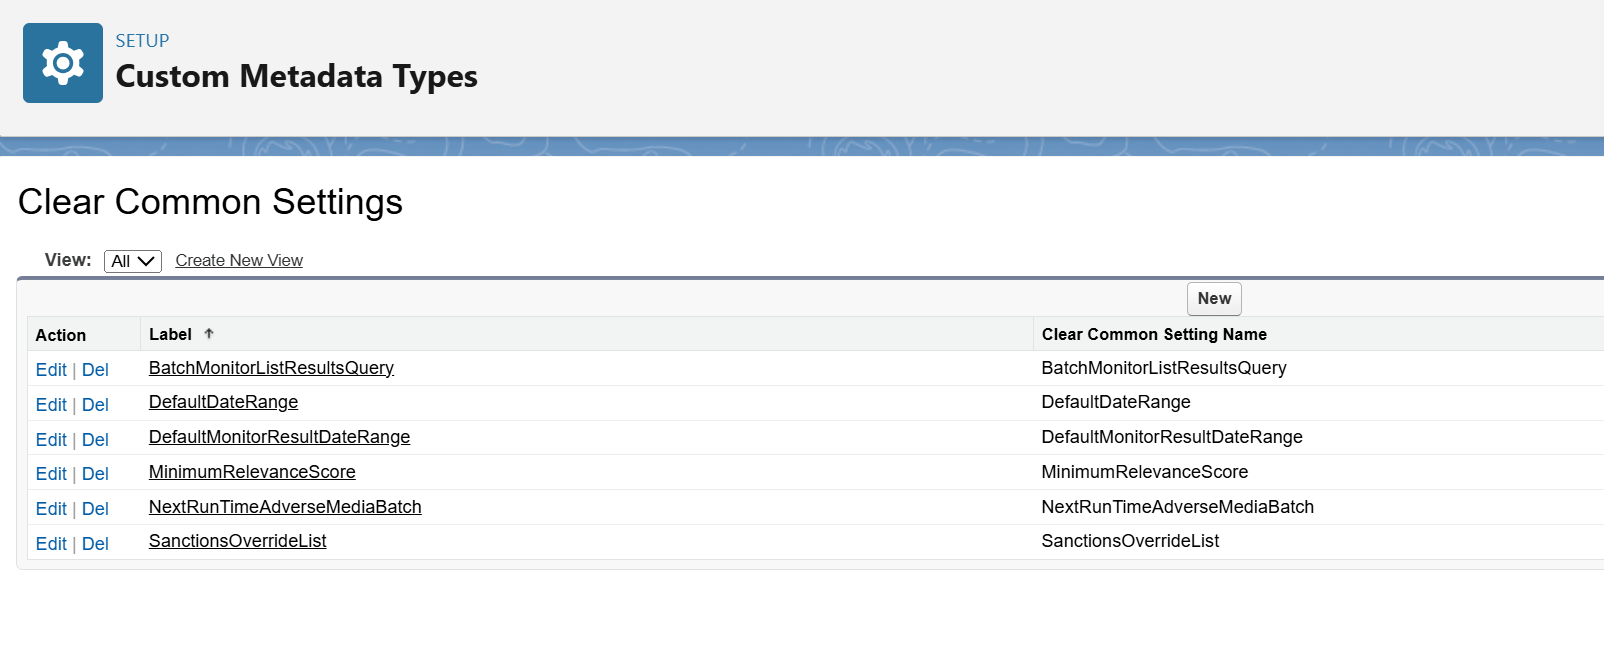
Go to the Clear Common Setting custom metadata type.
Find the entry named Default Date Range Setting.
Step 2: Configure Date Range Logic
In the Value field, enter an integer (e.g., 30).
This defines the date offset.
The Article End Date defaults to today.
The Article Start Date is calculated as N days before the end date.
Example: If Value = 30 → Start Date = Today – 30 days
Add Adverse Media Search Button to Source Object
Step 1: Open Object Manager
Go to Setup > Object Manager.
Select the source object (e.g., Contact, Account, or custom object).
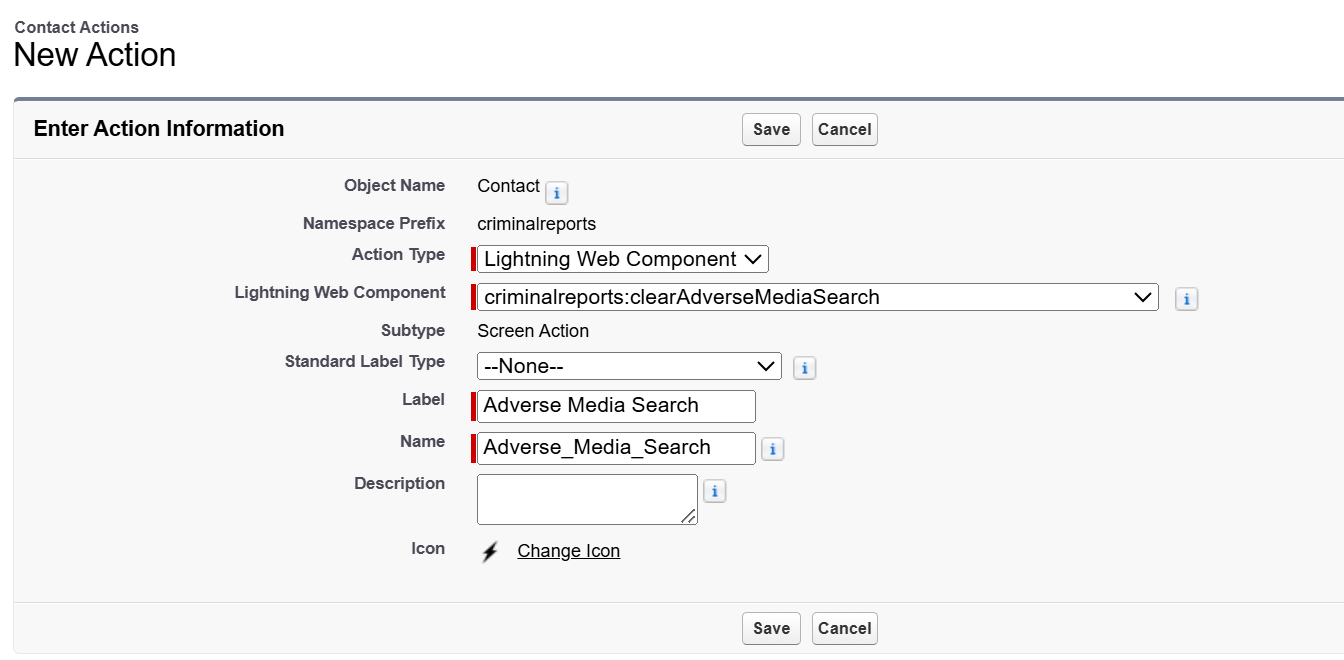
Step 2: Create a New Action
Go to the Buttons, Links, and Actions section.
Click New Action.
Step 3: Configure Action
Action Type: Select Lightning Web Component.
Lightning Web Component Name: Choose clearAdverseMediaSearch.
Label: Give the action a name like Adverse Media Search.
Step 4: Add Action to Page Layout
Save the action.
Go to the Page Layouts section of the object.
Open the layout where you want to place the button.
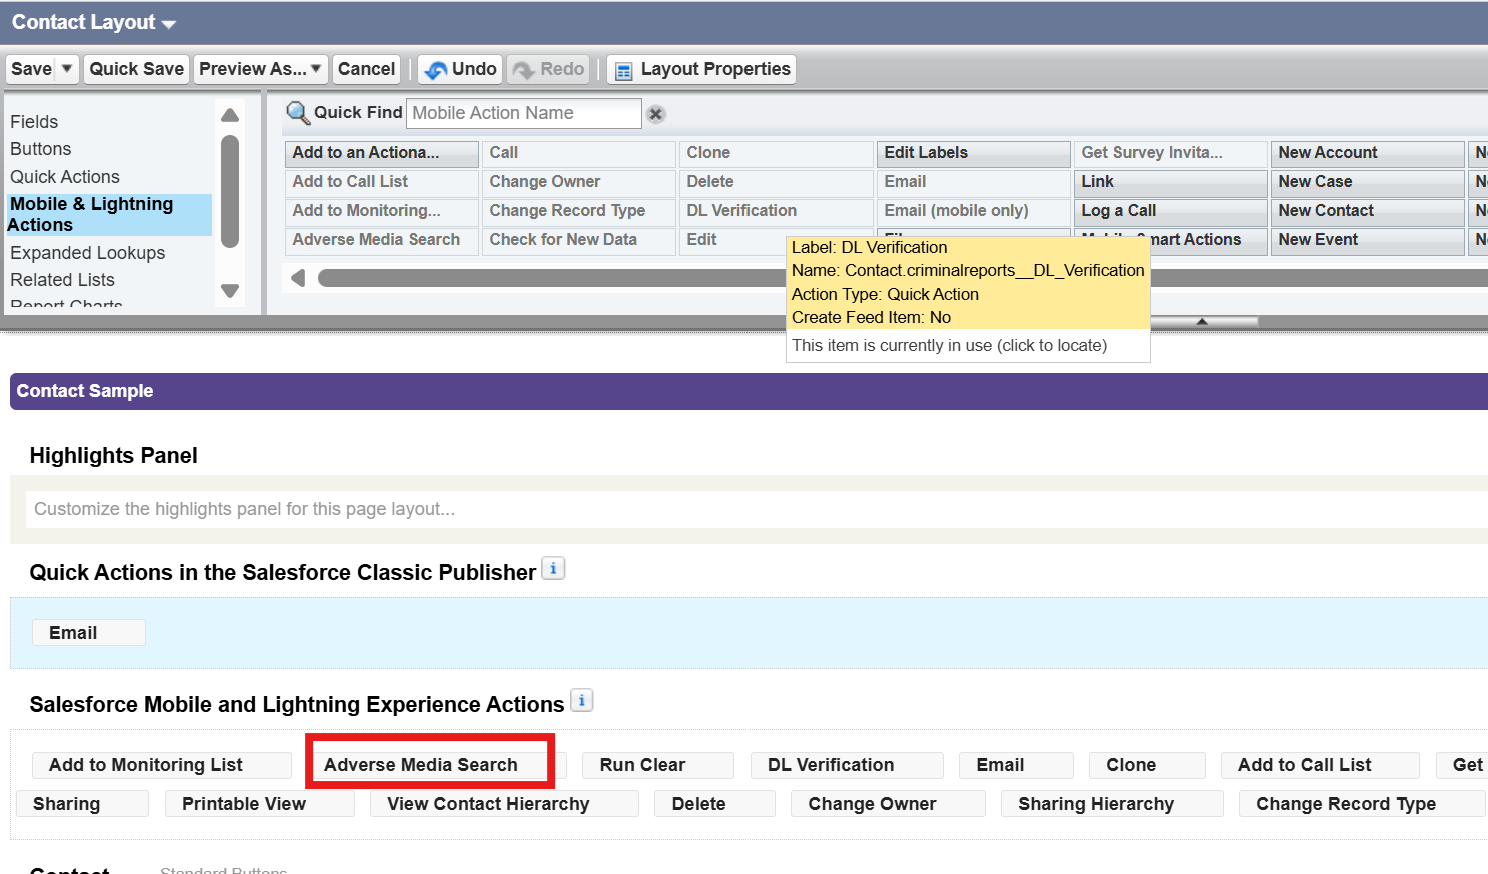
Step 5: Add to Salesforce Mobile & Lightning Experience Actions
Drag the newly created action to the Salesforce Mobile and Lightning Experience Actions section.
Save the layout.
Now the Adverse Media Search button is available on the record page for your selected object.
Configure Custom Settings: Thomson Reuters API (Internal Use Only)
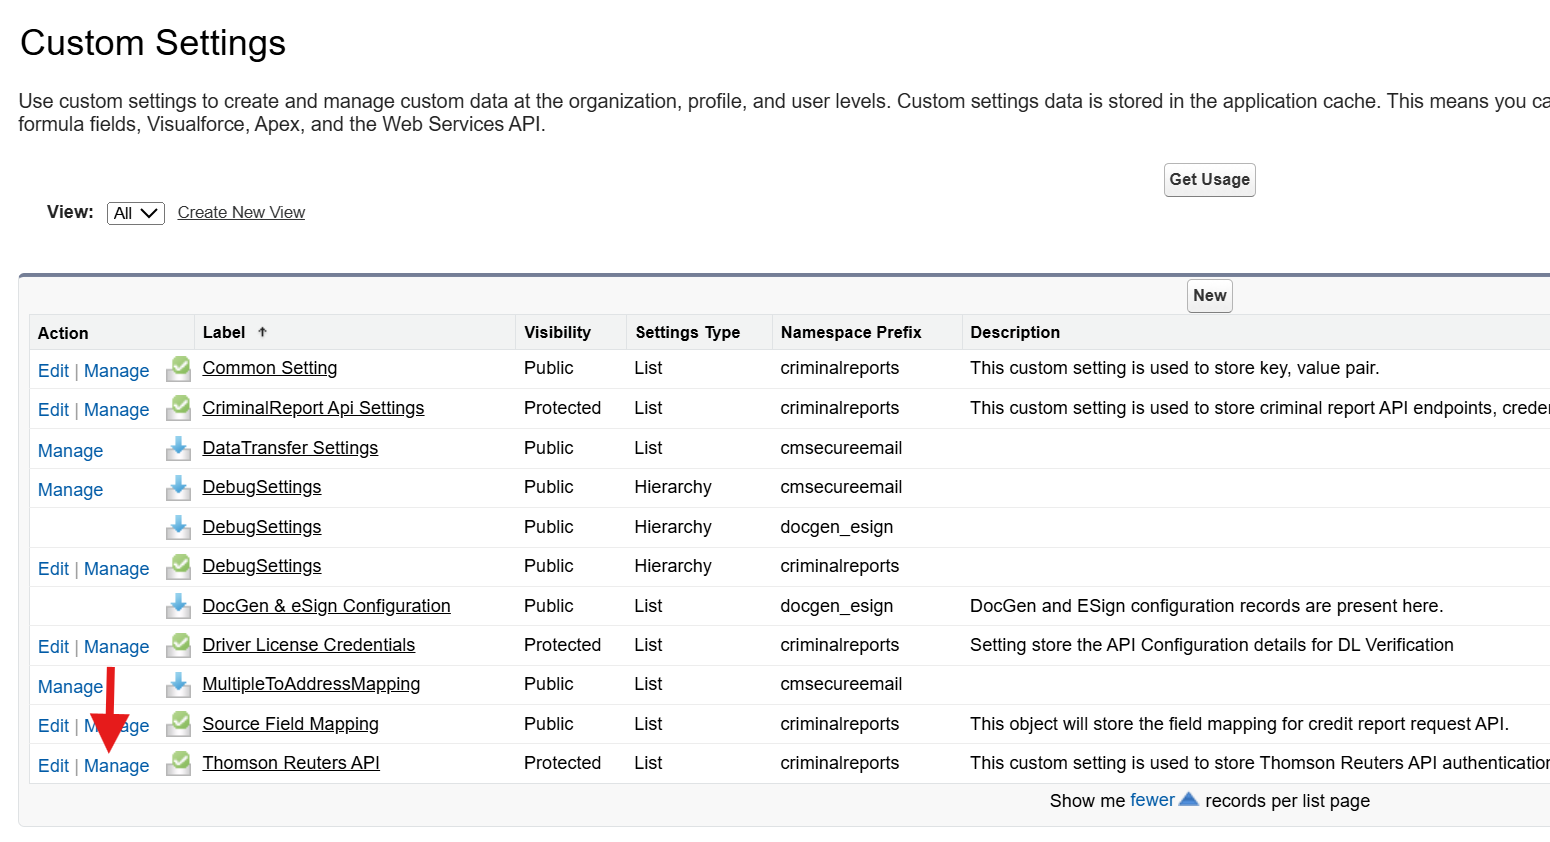
Go to Setup > Quick Find > Custom Settings
Click Manage next to Thomson Reuters API
Click New and fill in the fields
|
Field |
Value |
|---|---|
|
Base URL |
|
|
Adverse Media Search Endpoint for id |
|
|
Adverse Media Search Result |
|
|
Adverse Media Monitor Endpoint for id |
|
|
Adverse Media Monitor Endpoint |
|
|
Certificate Name |
|
Save the record after completing all fields.
Create Remote Site Setting (If Not Present)
-
Go to Setup > Quick Find > Remote Site Settings

-
If not already present, click New Remote Site
-
Name:
TR_Clear_API -
URL:
https://s2s.beta.thomsonreuters.com -
Active: ✅
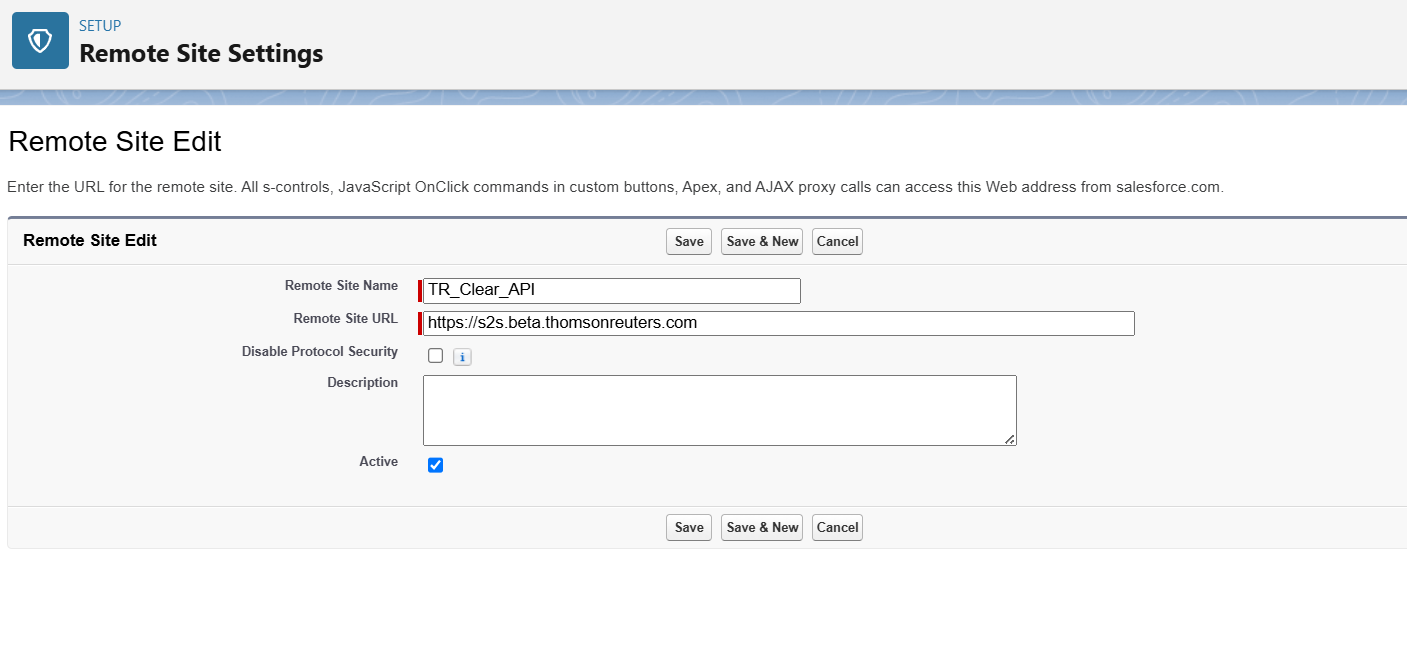
-
-
Save the setting.
Credentials Setup
To set up the credentials, you will first need to obtain the certificate from the Client. Once you have the certificate, follow the steps below to upload it to your Salesforce org.
https://cloudmaven.atlassian.net/wiki/external/ZjgzNWJhNWZhOGVhNDEwNTg3MWE2ZTNkODU3YjE2YmU
Batch Automation Scheduling Details (If Automation is Required)
This is just an example query using the Account object. Be sure to replace it with the source object used in your setup. flag is a condtional field to pick records.
String sQuery = 'SELECT ID FROM Account WHERE flag__c = true';
BatchAdverseMediaSearch oBatch = new BatchAdverseMediaSearch(sQuery);
Database.executeBatch(oBatch);
Note:
The batch is scheduled to run periodically based on the configuration defined in Custom Metadata.
When the batch is scheduled for the first time, it retrieves the interval (in minutes) from a Custom Metadata record named Clear Common Setting. This metadata contains a field called NextRunTimeAdverseMediaBatch, which specifies the execution frequency for each object type.
The value is stored in a JSON format, for example:
{
"Account": 50,
"Contact": 15
}
In this example:
The batch for Account records runs every 50 minutes
The batch for Contact records runs every 15 minutes
This configuration allows dynamic control over how frequently the batch executes for different objects, without changing the code.
Summary
-
The Adverse Media Search form will automatically pre-fill based on the mapped metadata.
-
A button will appear on the source object record pages to launch the search.
-
Default values and date ranges are pre-set for a seamless search experience.
-
The app is now ready for use with both Ad-hoc and Automated Adverse Media Searches.