
Overview
Thomson Reuters CLEAR is a powerful investigative platform designed for risk management, identity verification, and due diligence. CLEAR integrates authoritative data sources, public records, and proprietary analytics to streamline investigations, prevent fraud, and drive informed decision-making. Typical use cases include criminal background checks, enhanced Know Your Customer (KYC) processes, and compliance screenings.
This guide provides a clear step-by-step walkthrough for integrating CLEAR into your Salesforce org using Cloud Maven’s Criminal Checker managed package.
Prerequisites
Before proceeding with the setup, ensure you have the following:
-
User must have administative permission to install and configure applications.
-
CLEAR Credentials
-
Username
-
Password
-
API Access Info (if applicable)
-
-
Definition Names
-
The CLEAR integration team will provide you with the definition names for each data category.
-
-
Certificate File
-
Format:
.jks(Java KeyStore) -
If you receive a
.p12(PKCS12) certificate instead, you must convert it to.jksusing the link below.
-
https://cloudmaven.atlassian.net/wiki/external/NTJjNzhlZWNjZGQ5NDg3Yzk3MjhmOGMwNzczZTU5Y2I
Application Configuration & Setup Steps
3.1 Install the Criminal Checker Package
-
Download and install the latest Criminal Checker package in your target Salesforce Org.
3.2 Setting Up Connection with CLEAR Credentials
This section guides you through the process of configuring your Salesforce connection with Thomson Reuters CLEAR. You’ll use your CLEAR-specific credentials to securely establish communication.
Click the following link to begin the setup process:
https://cloudmaven.atlassian.net/wiki/external/ZjgzNWJhNWZhOGVhNDEwNTg3MWE2ZTNkODU3YjE2YmU
The following steps will enable your users to run Confirm ID, Risk Inform, and Adverse Media checks directly from Salesforce using the CLEAR integration.
To support automation, these steps must be completed first, as they allow users to initiate checks on-demand.
3.3 Create "Run Clear ID Confirm" Button on Source Object
-
Navigate to Setup > Object Manager
-
Select your source object (e.g., Account)
-
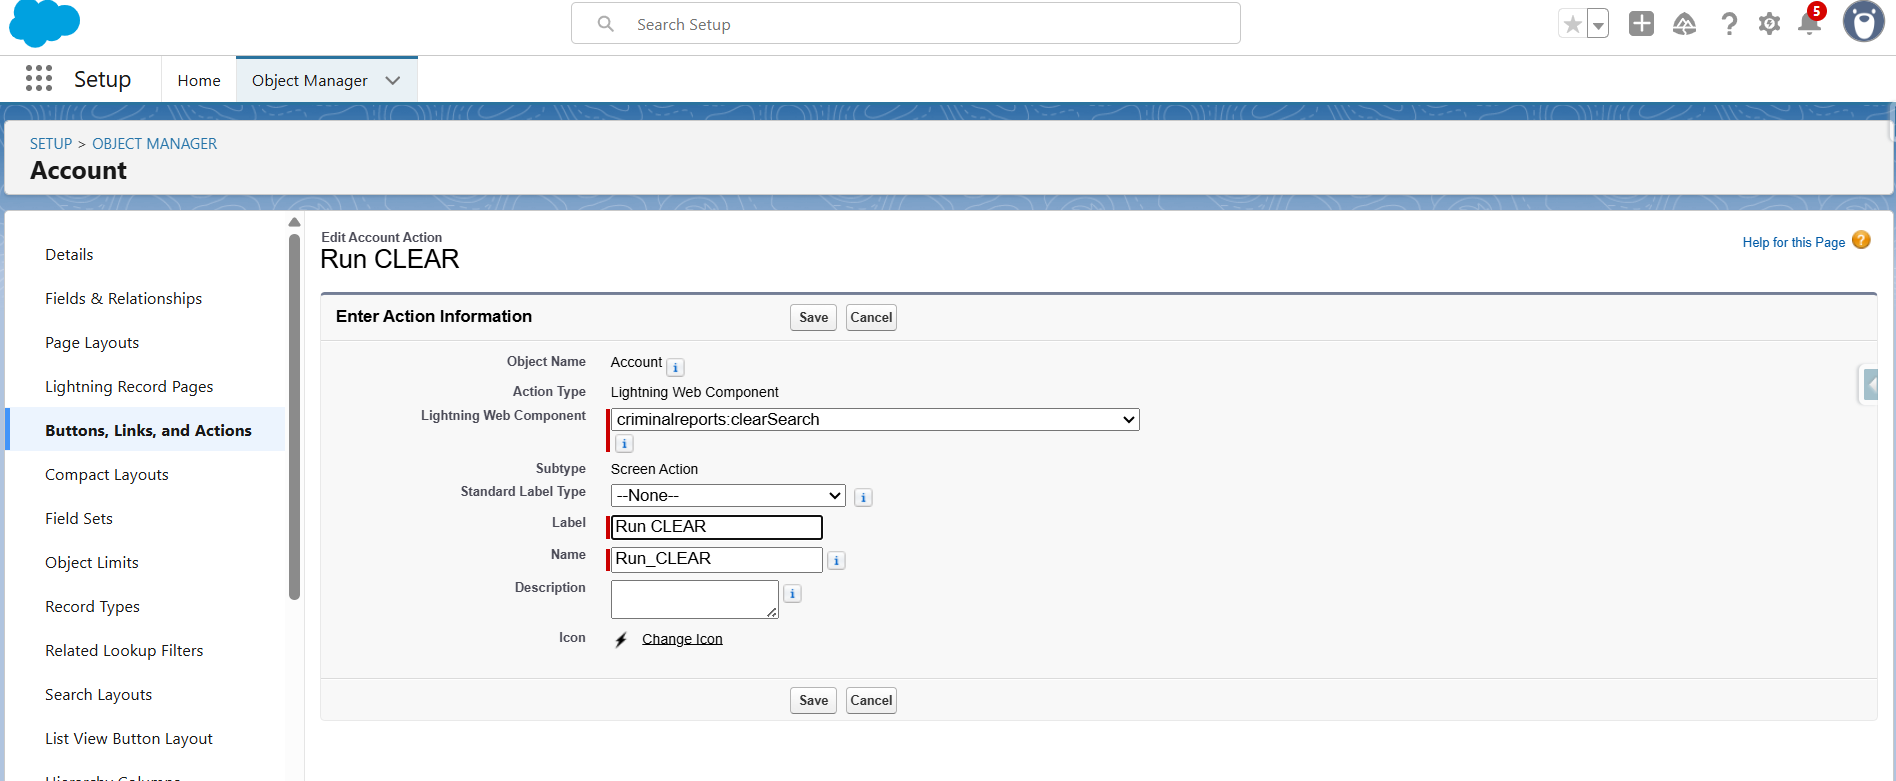
Go to Buttons, Links, and Actions > New Action
-
Action Type: Lightning Web Component
-
Lightning Component:
criminalreports:clearSearch -
Label: Run Clear ID Confirm
-
-
Save the action.
3.4 Add "Run Clear ID Confirm" Button to Page Layout
-
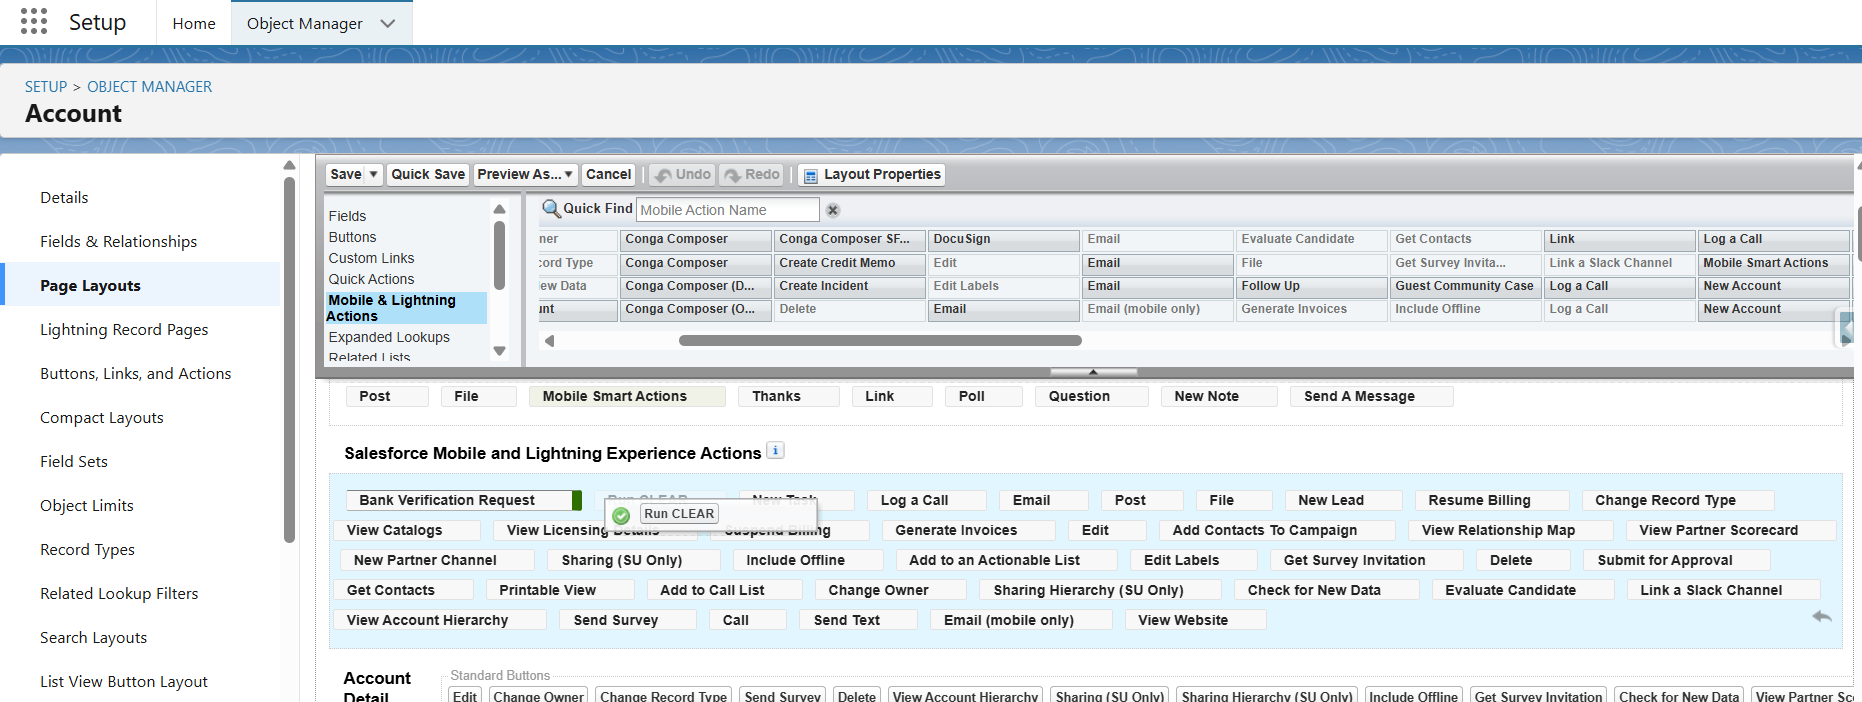
Go to Page Layouts under the same object.
-
Select the active layout.
-
Drag the Run Clear button into the Salesforce Mobile and Lightning Experience Actions section.
-
Save the layout.
3.5 Add Related Lists
-
While still in the page layout editor:
-
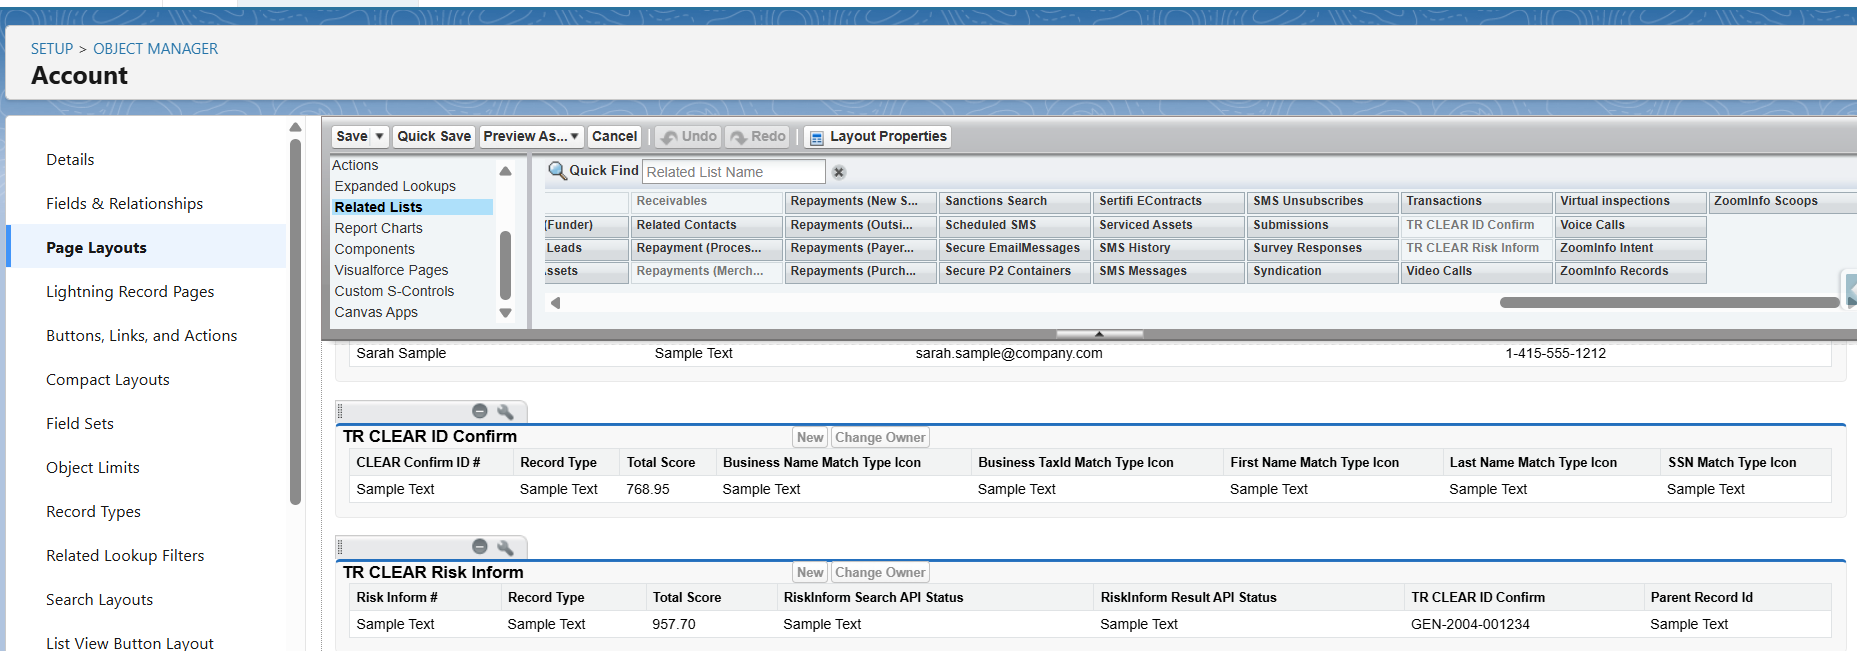
Go to Related Lists
-
Drag and drop the following related lists:
-
TR Clear ID Confirm
-
TR Clear Risk Inform
-
-
-
Save the layout.
3.6 Configure Custom Metadata: Clear Mapping
-
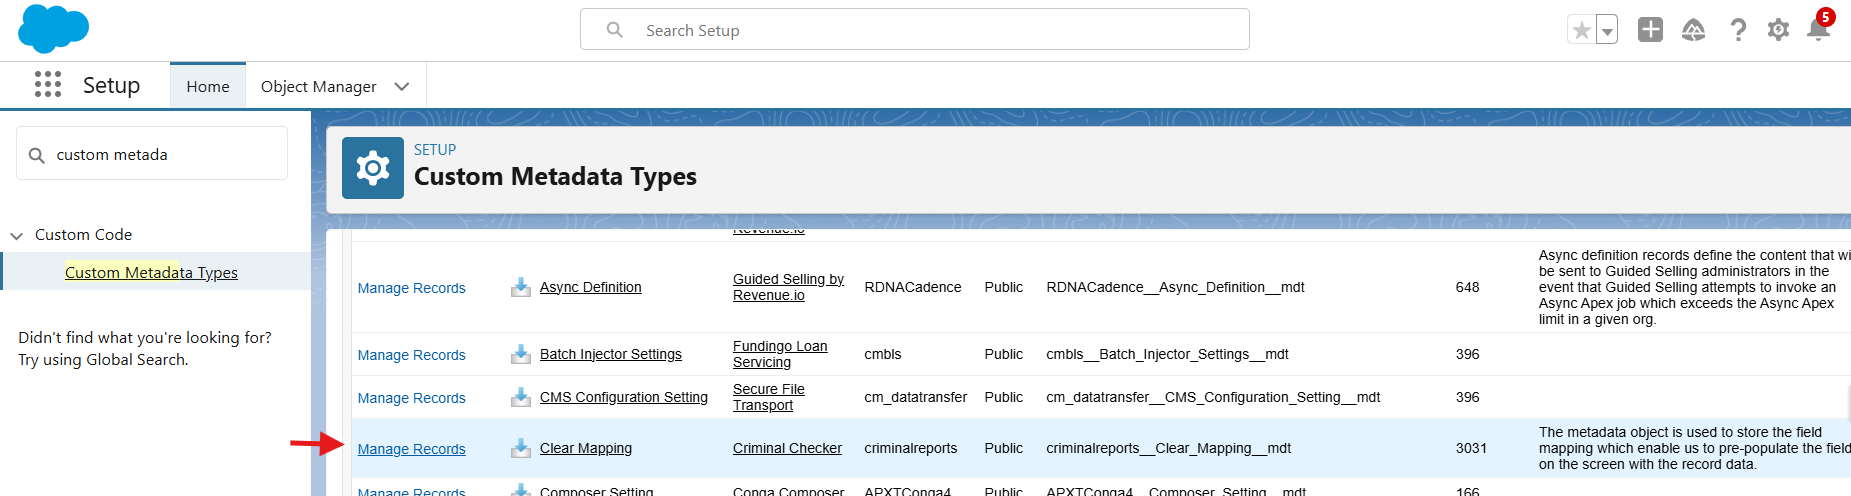
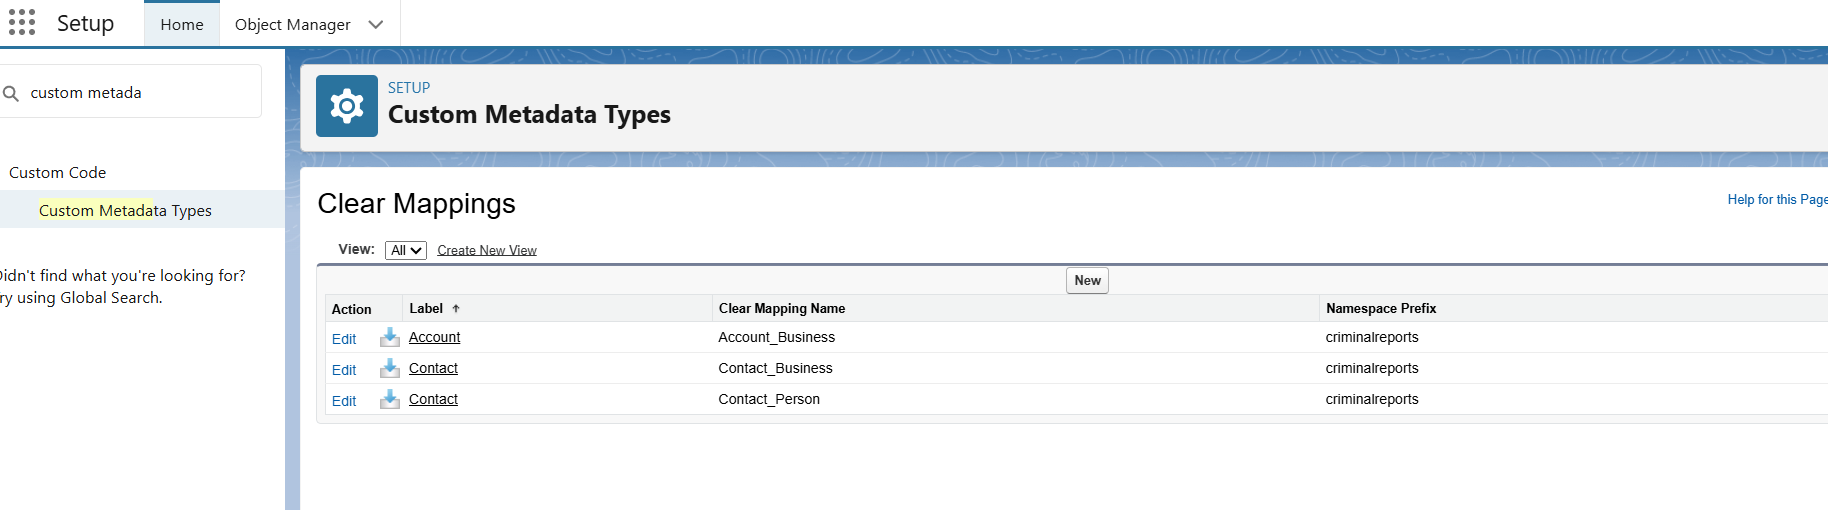
Go to Setup > Quick Find > Custom Metadata Types
-
Click Manage Records for Clear Mapping
-
Either select an existing source object or create a new one
-
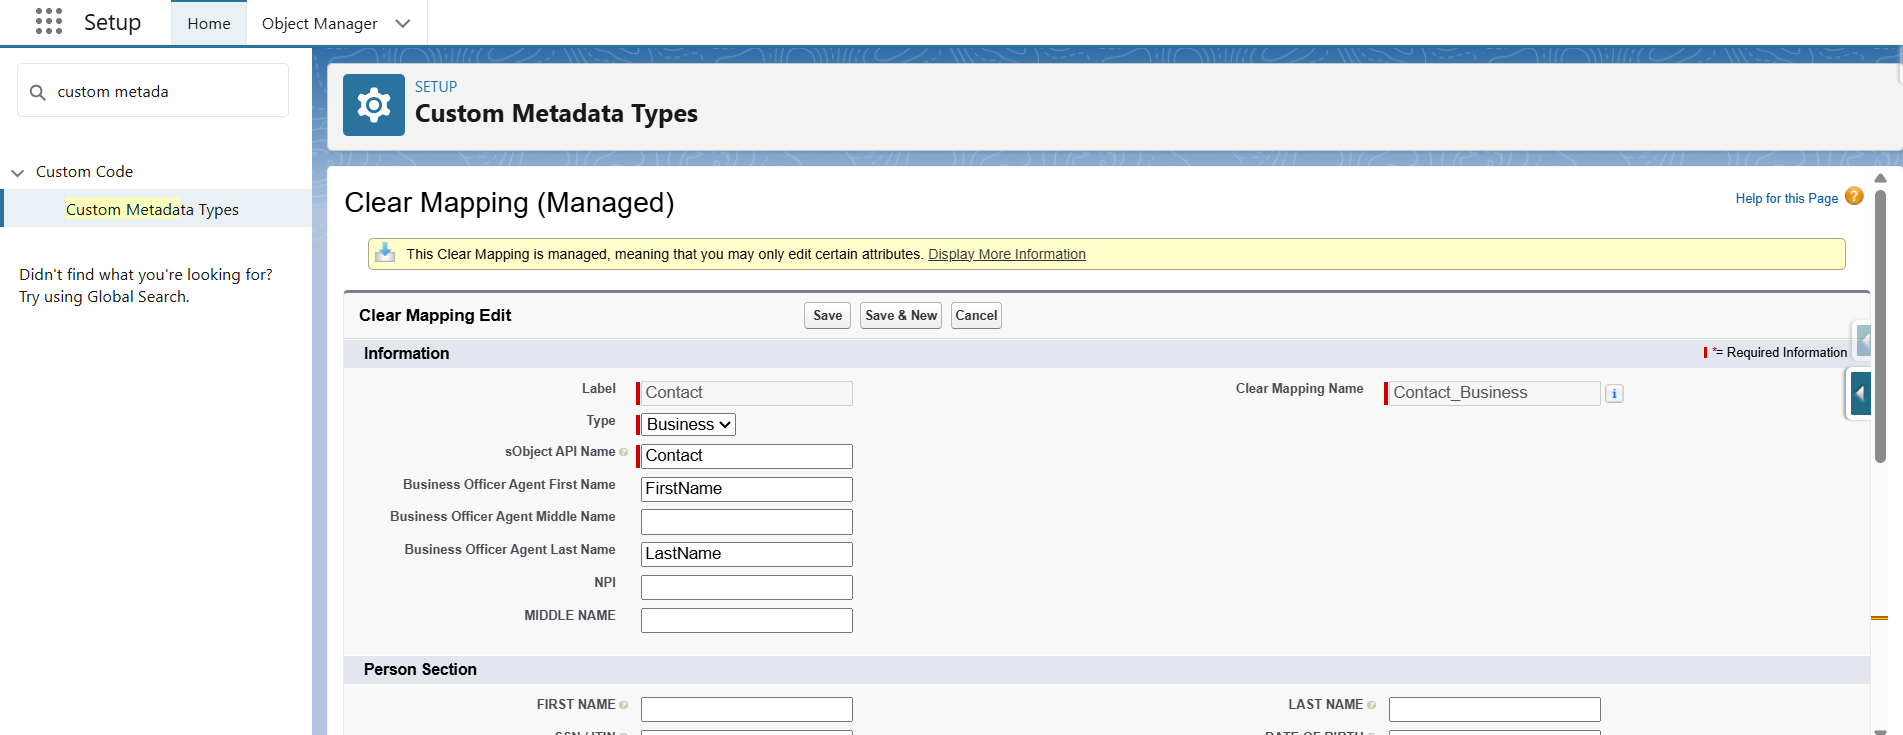
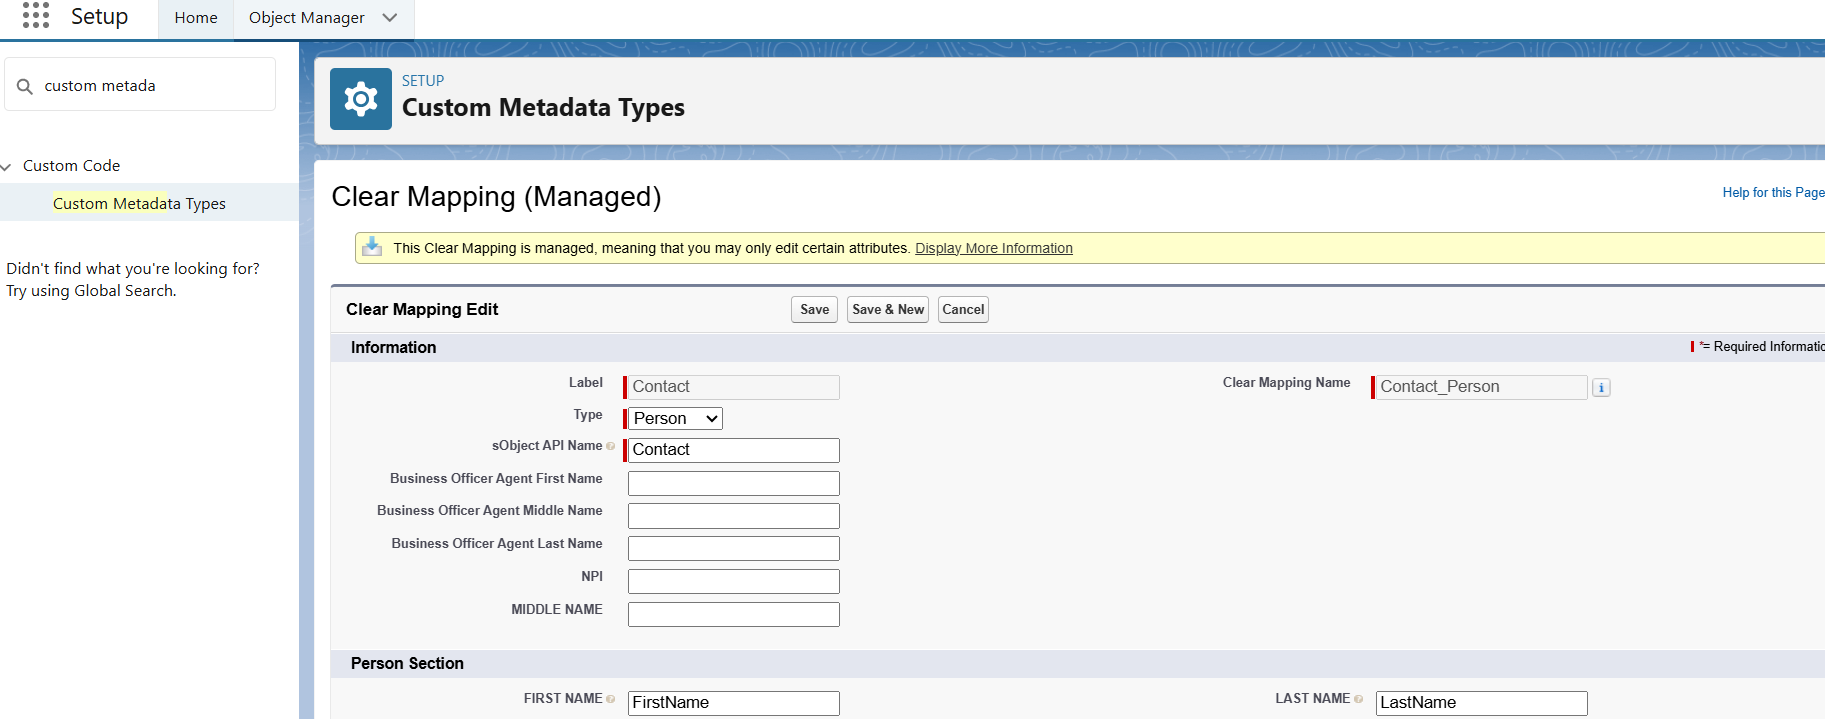
Set:
-
Type: Business or Person
-
-
Field Mapping: Map the fields from your object to CLEAR requirements
3.7 Create Remote Site Setting (If Not Present)
-
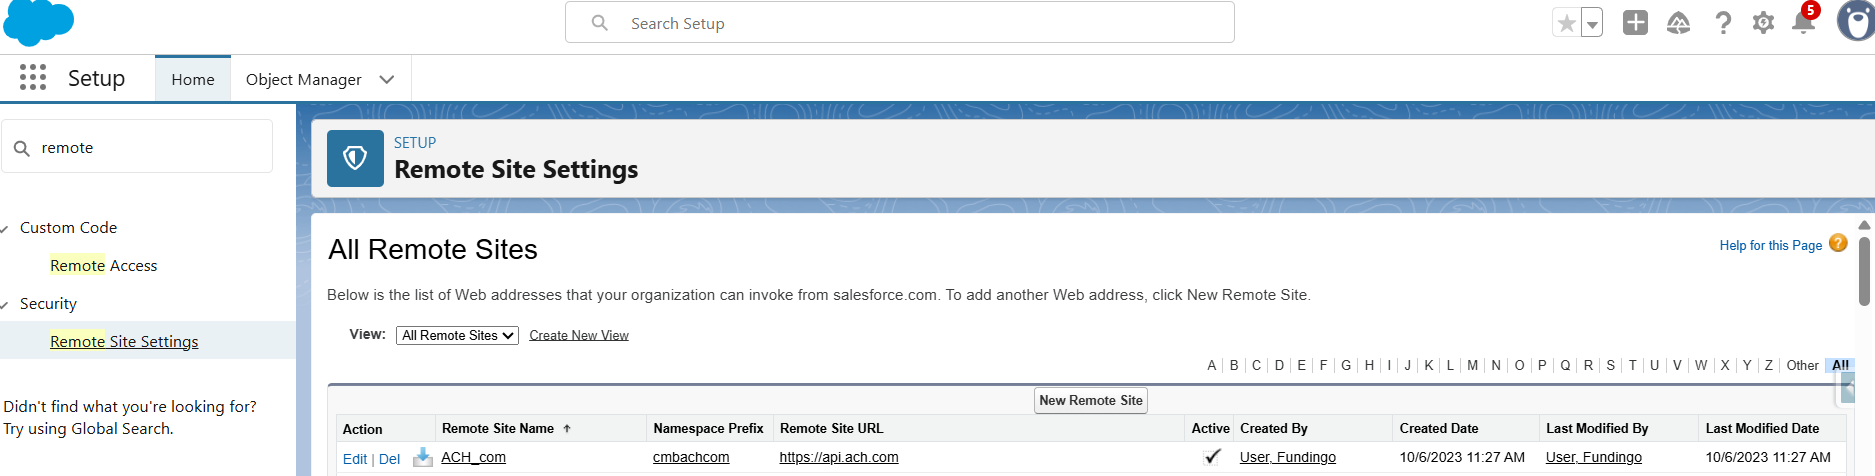
Go to Setup > Quick Find > Remote Site Settings
-
If not already present, click New Remote Site
-
Name:
TR_Clear_API( you can provide any unique name) -
URL:
https://s2s.beta.thomsonreuters.com or https://s2s.thomsonreuters.com -
Active: ✅
-
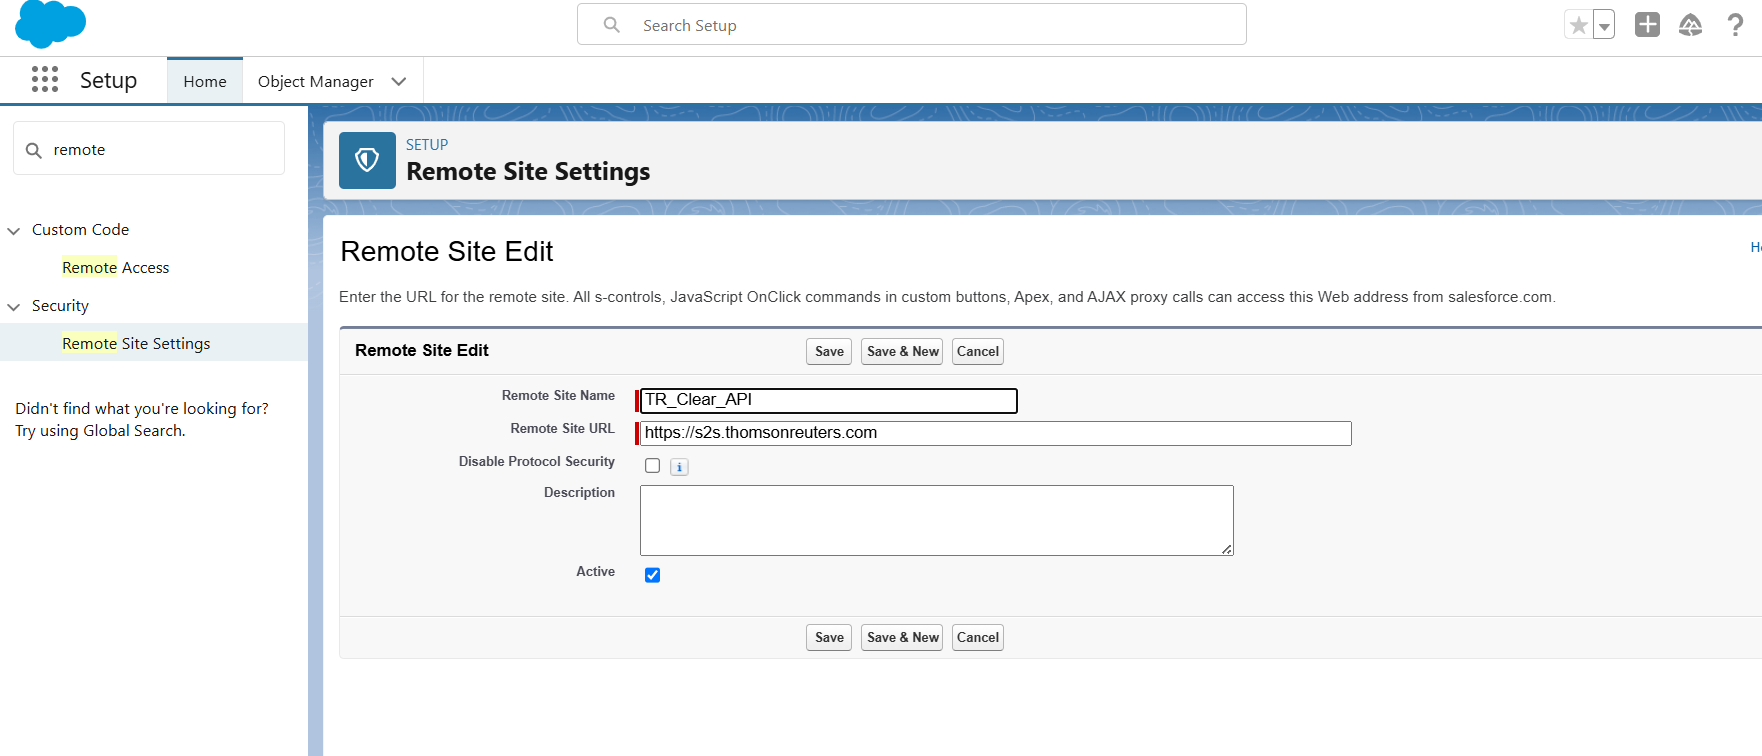
-
Save the setting.