Overview
This guide explains how to generate documents from Salesforce records using predefined templates, preview and modify documents, merge or split files, and send documents for eSignature. It also covers the complete signer experience and how to track document workflows, audit logs, signer information, and signed documents within Salesforce.
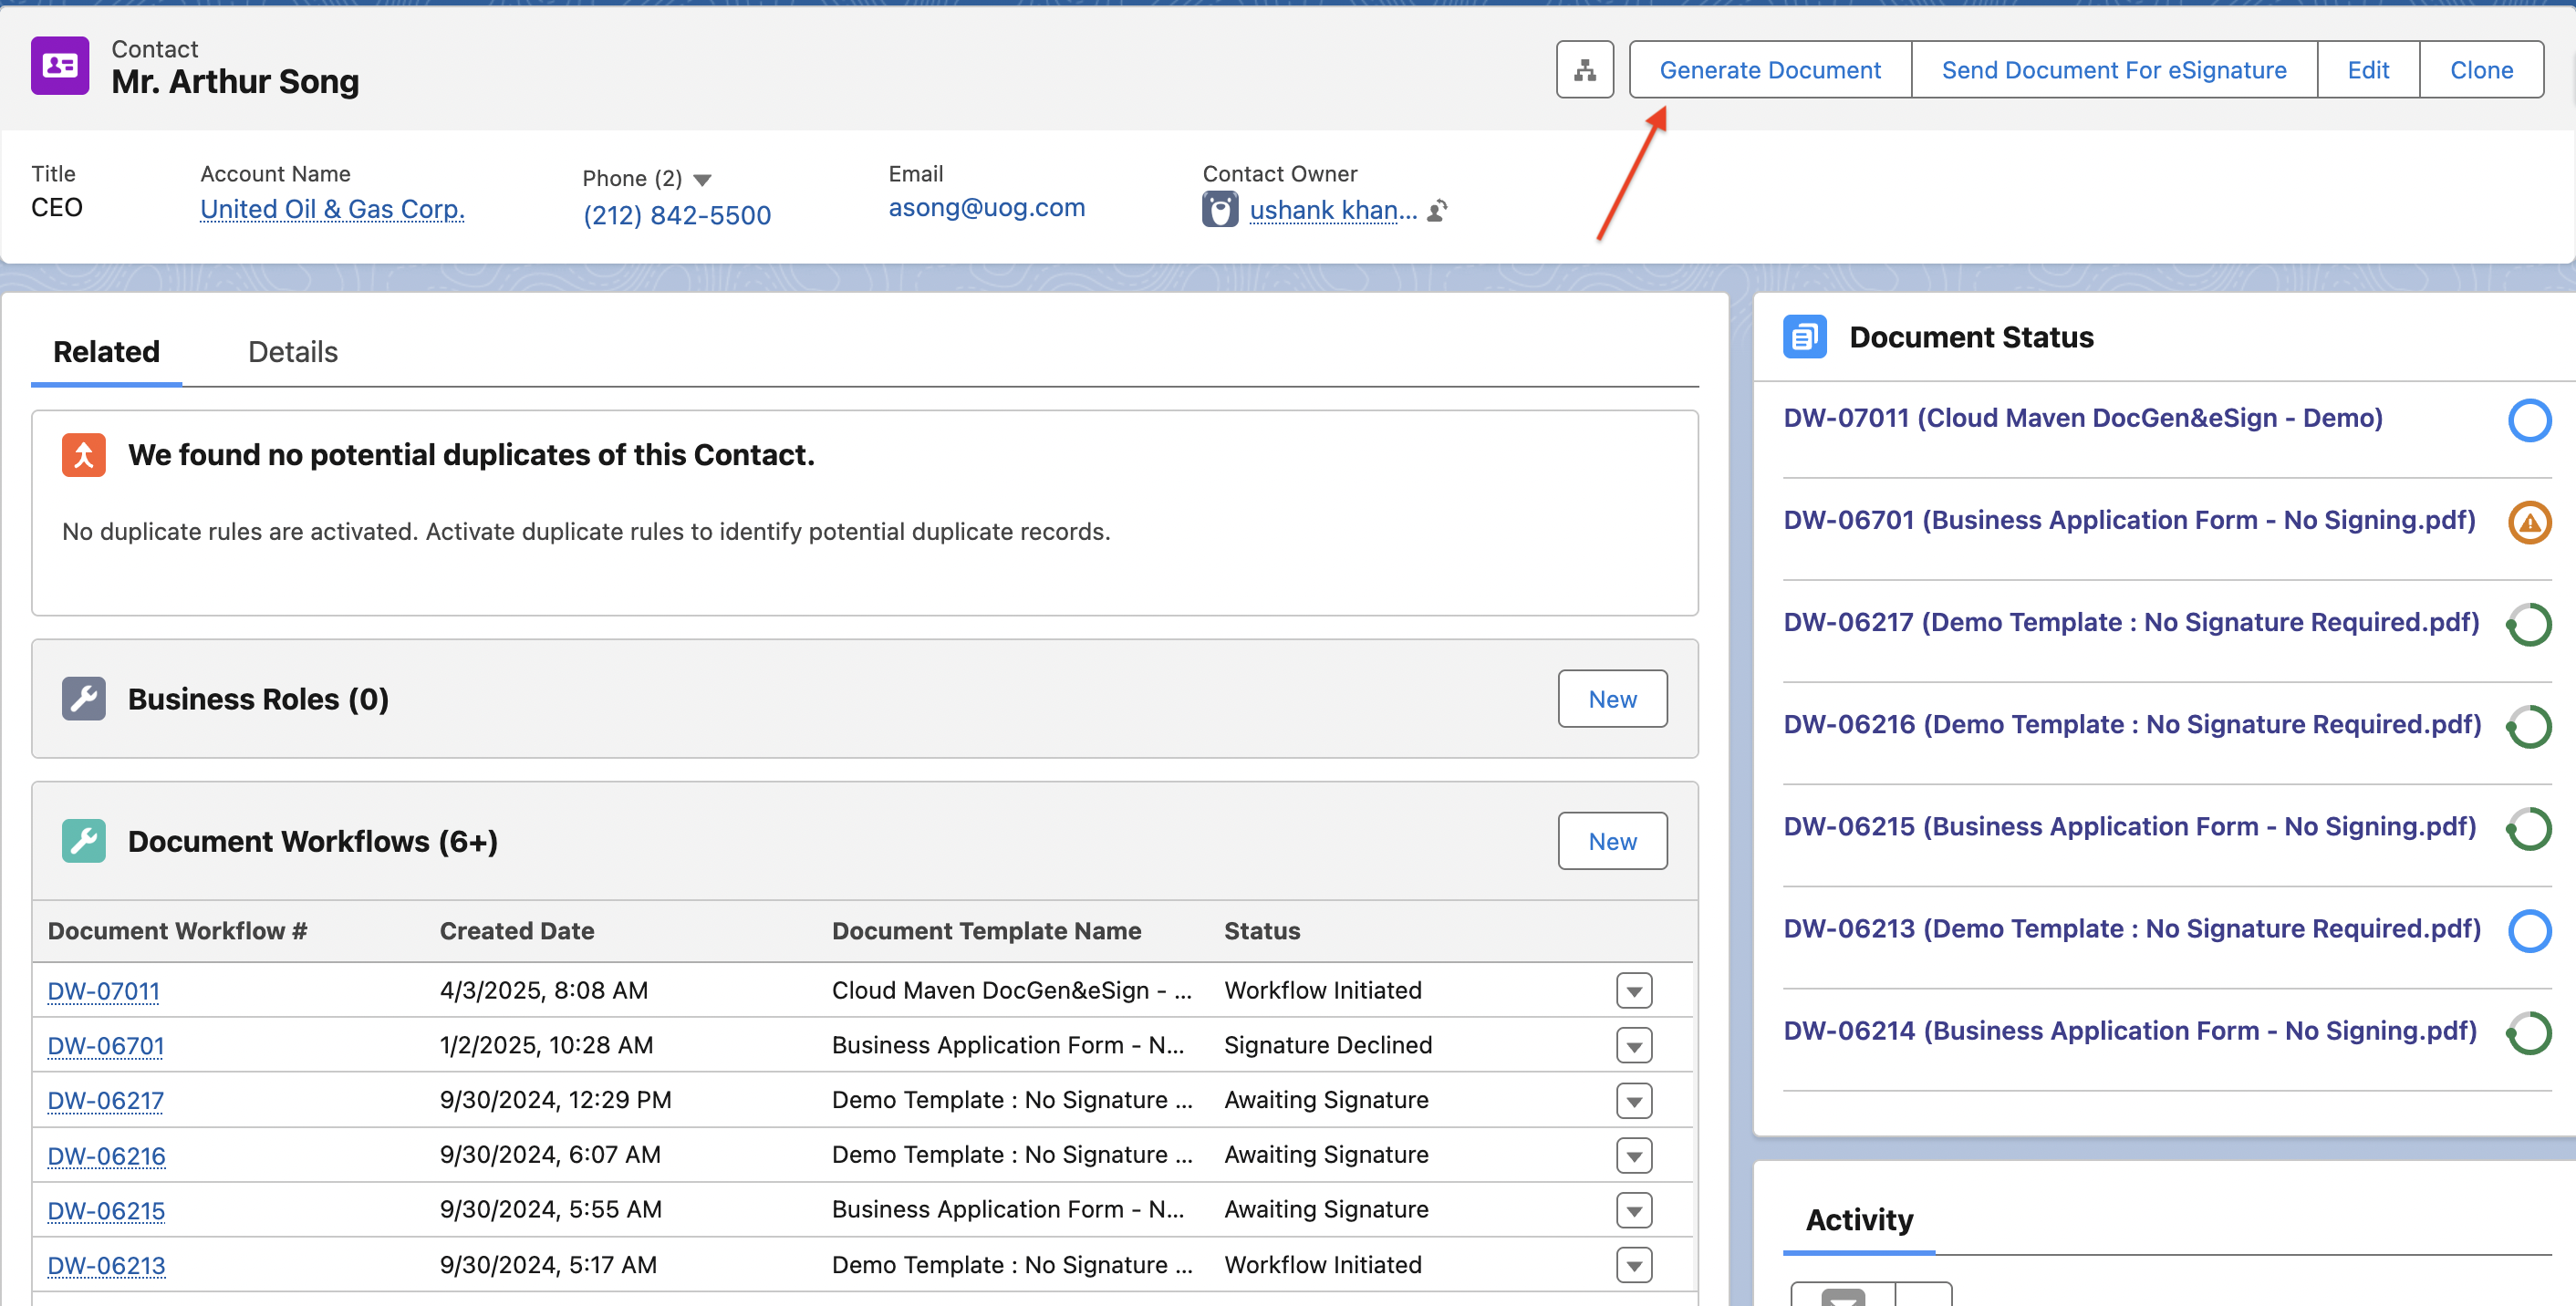
Access the Source Record
-
Navigate to the relevant Salesforce record from which you want to generate the document.
-
The selected record serves as the source record, providing the data that will be merged into the selected document template.
-
Click Generate Document.
Select a Document Template
-
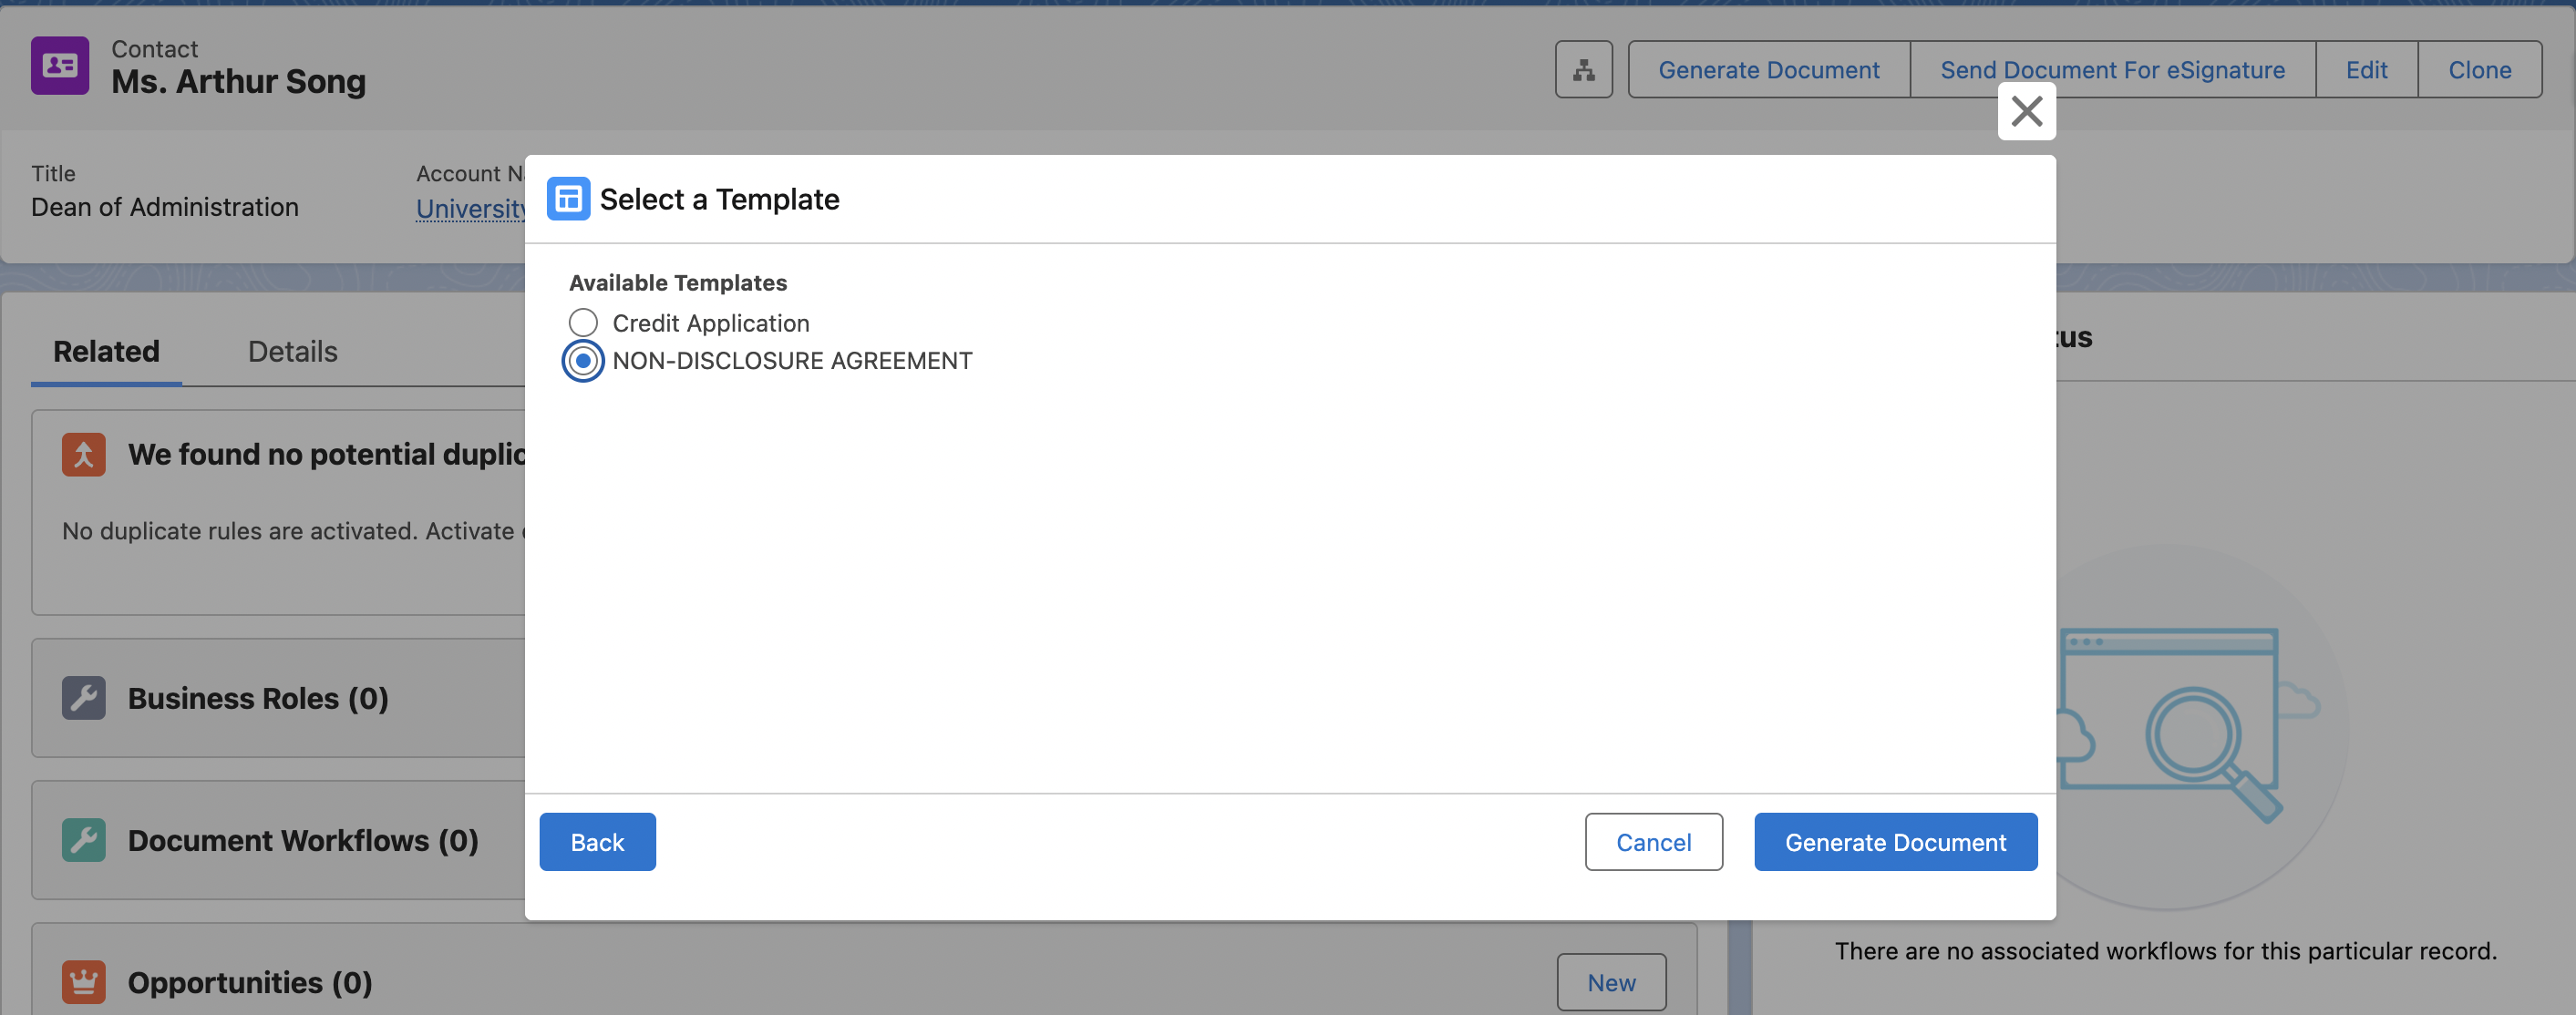
From the list of available document templates, select the appropriate template for your use case.
-
Click Generate Document to proceed.
Preview the Document
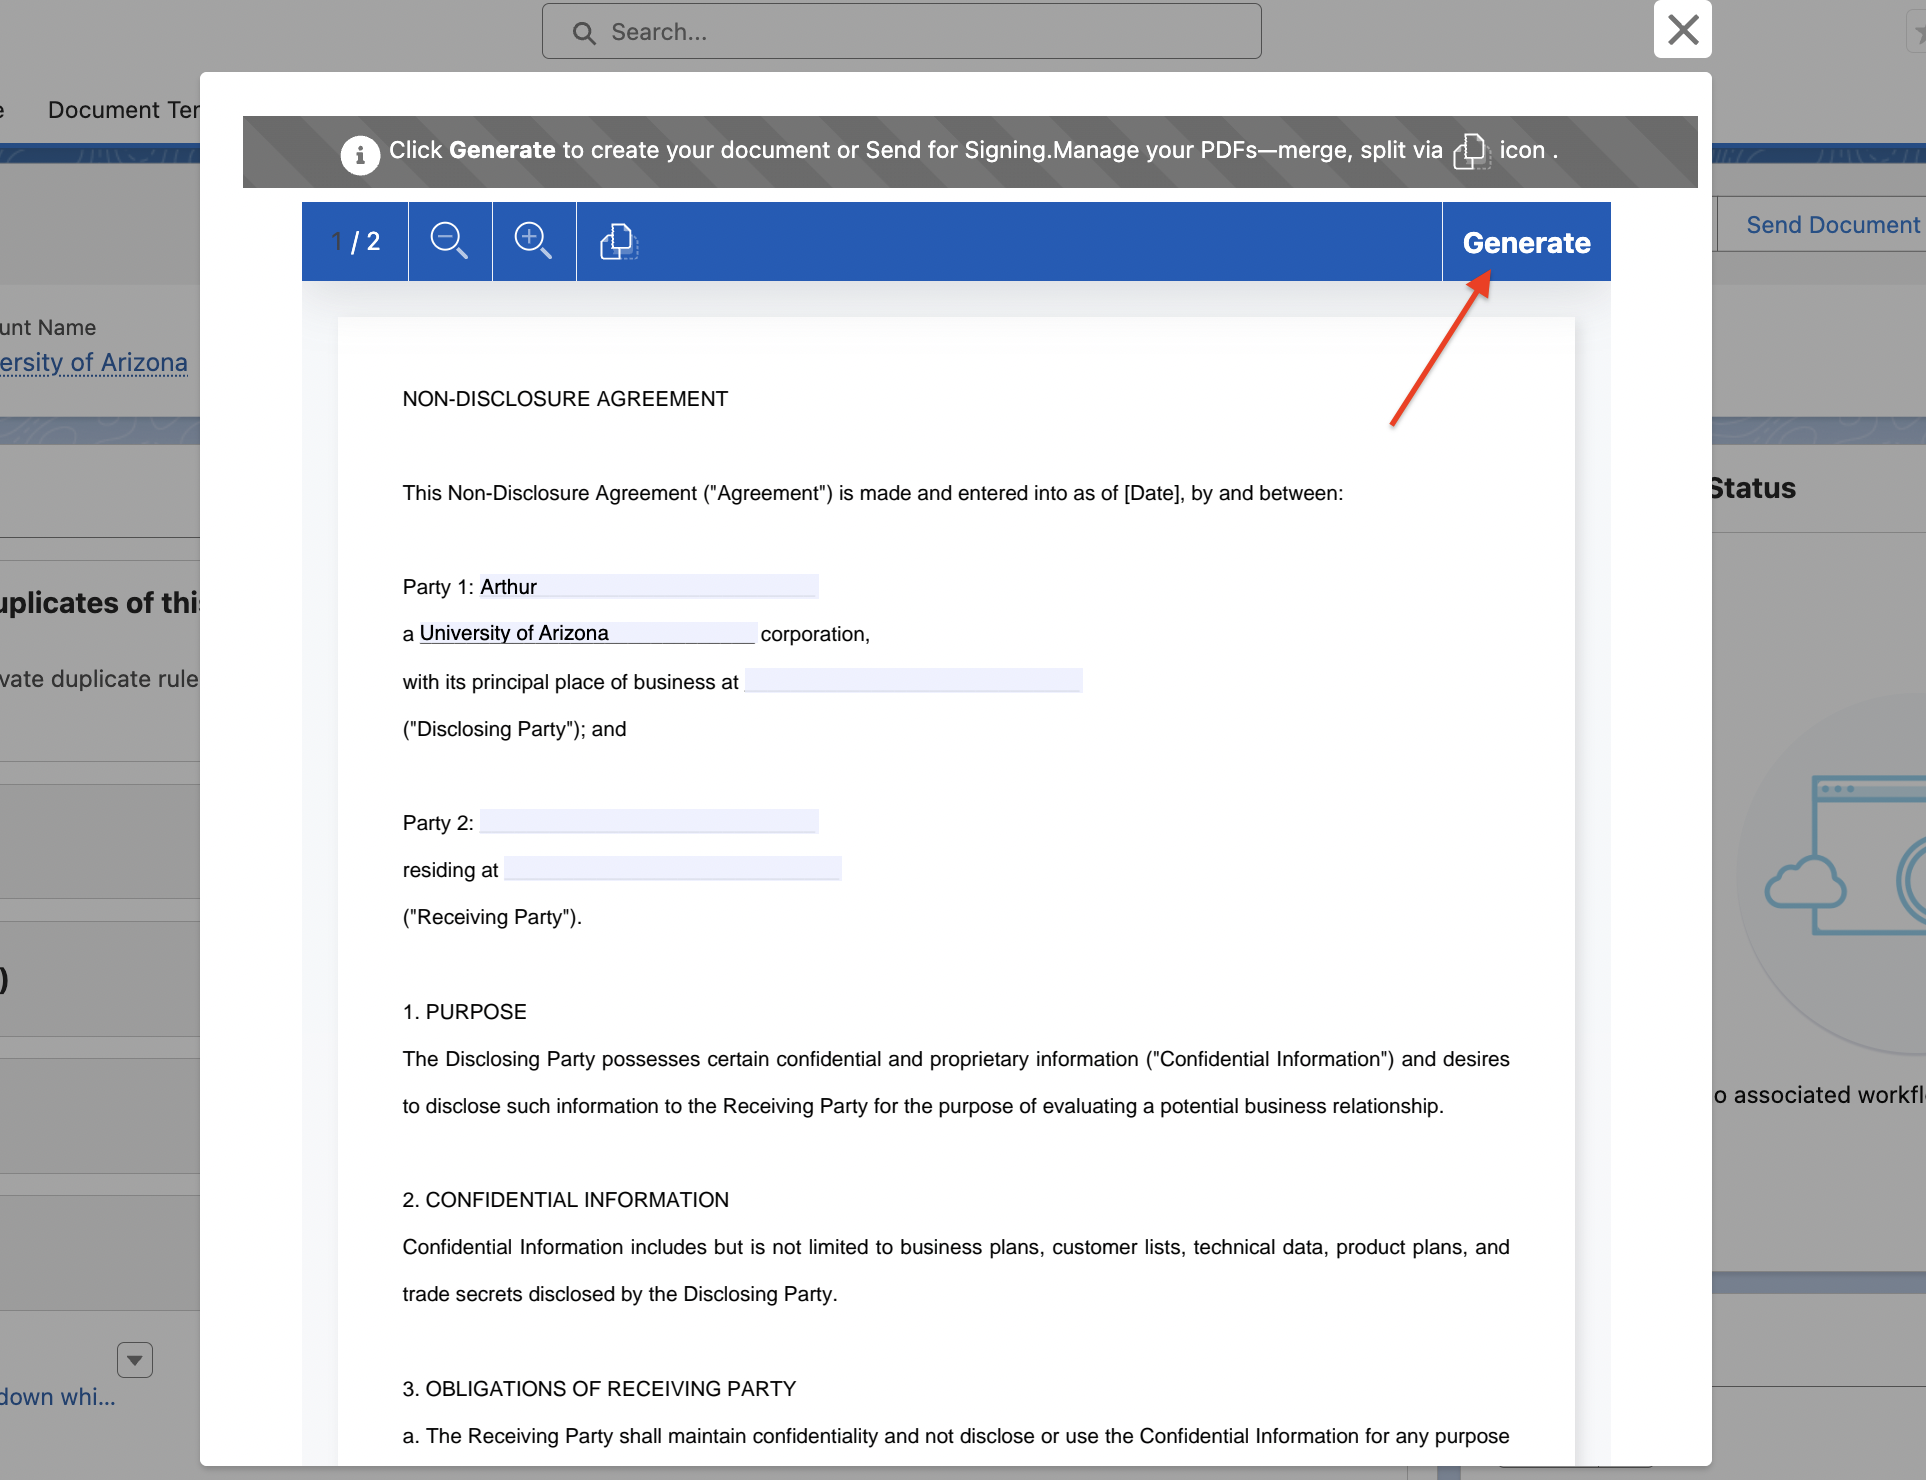
Before generating or sending the document for eSignature, you can preview and modify the document. The preview screen provides several options for managing the document.
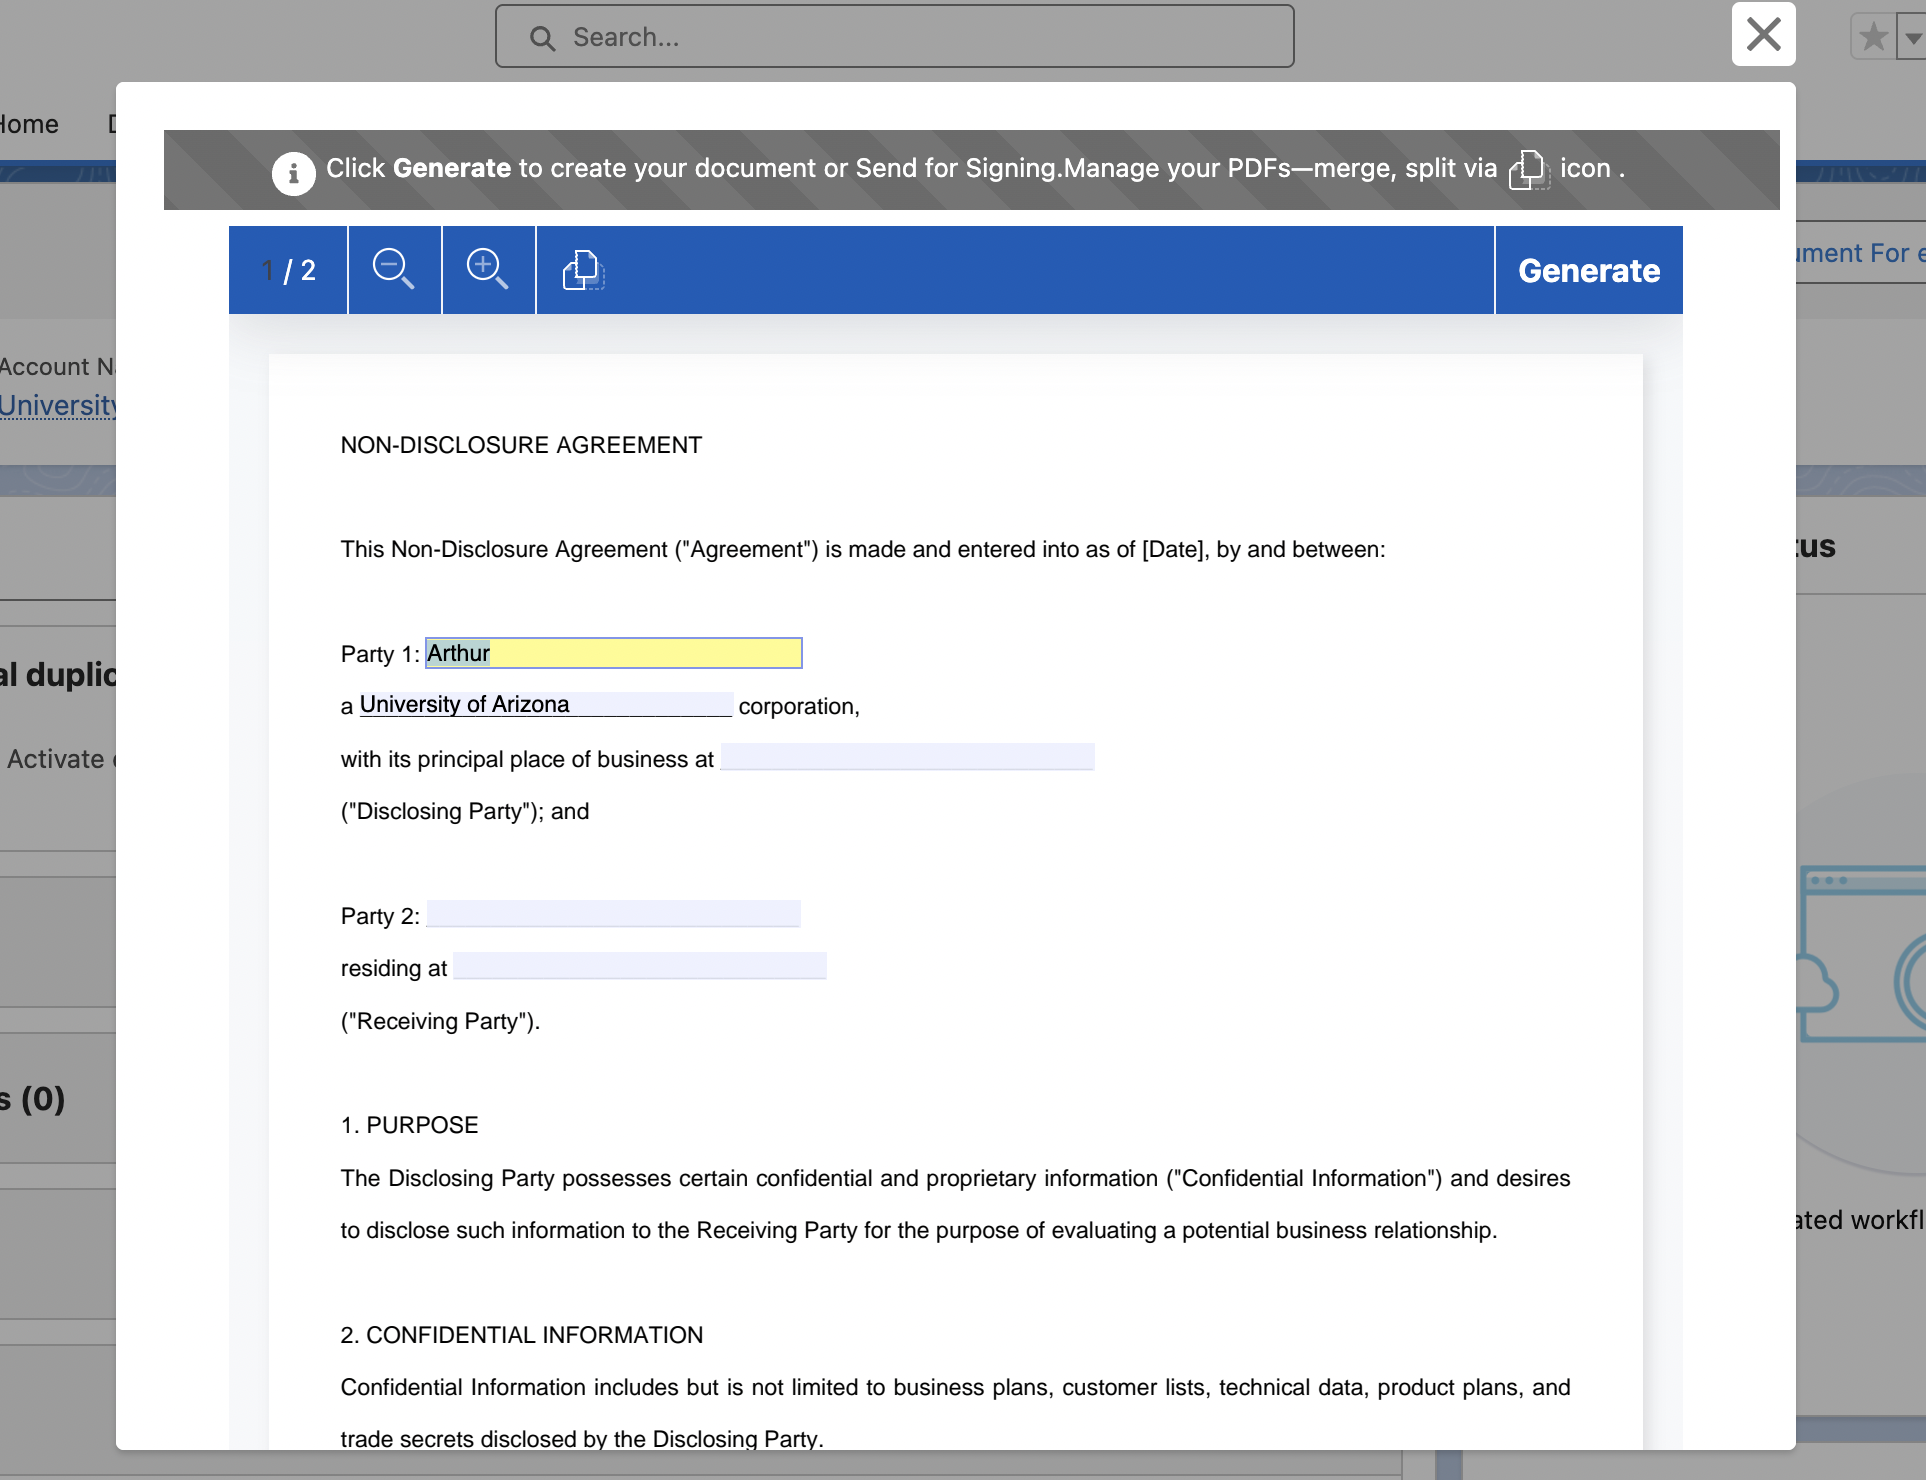
3.1 Manipulate Document Fields
You can review and modify the available document fields directly from the document preview screen, based on the fields configured in the document template.
3.2 Merge Documents
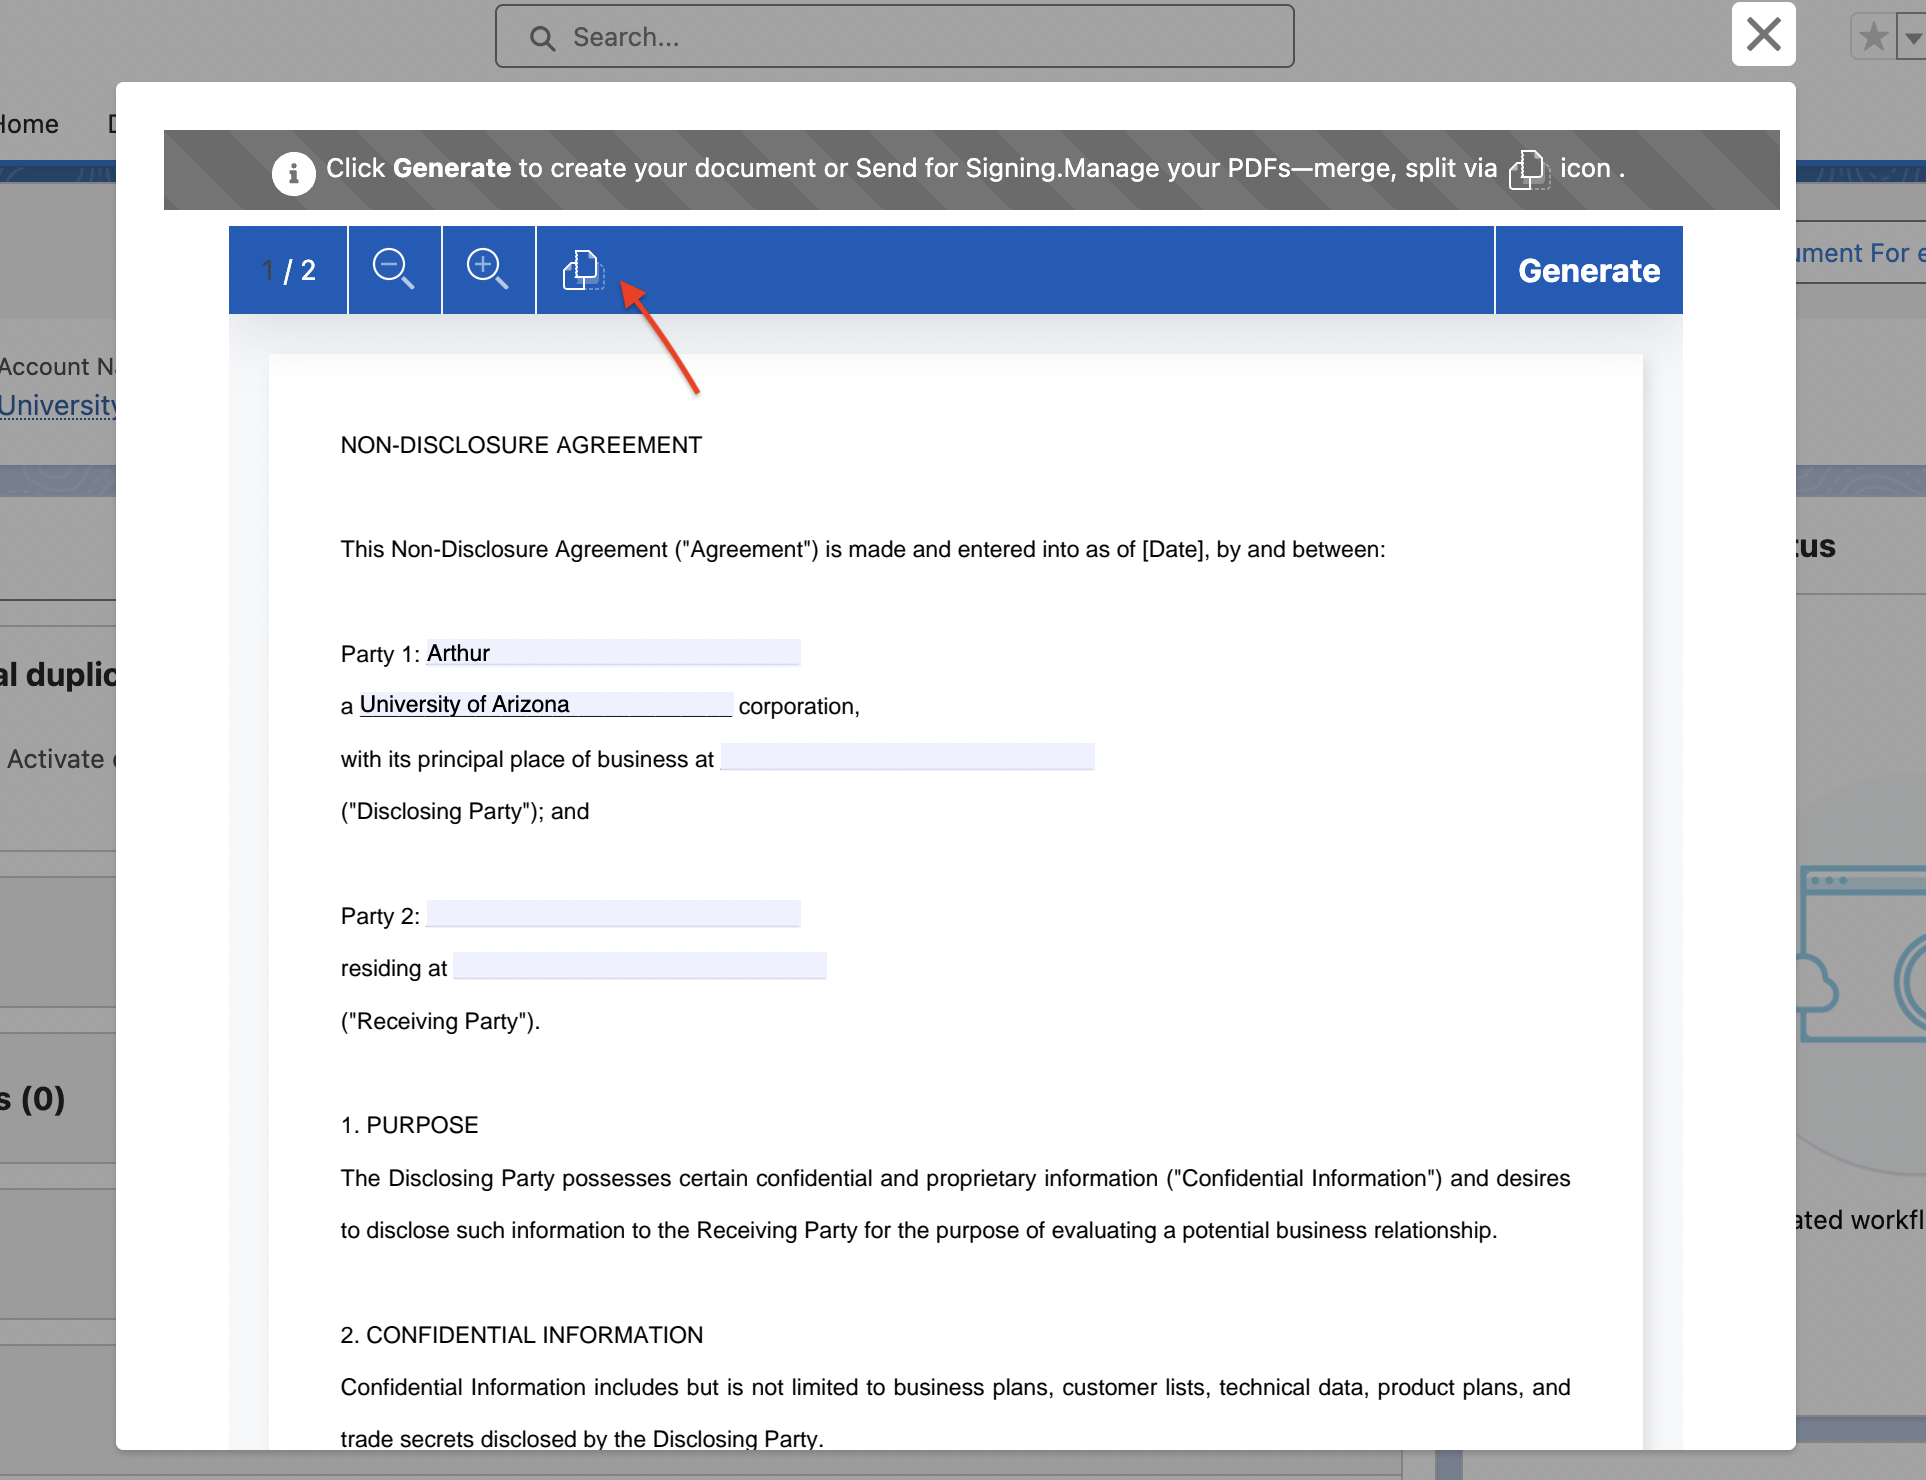
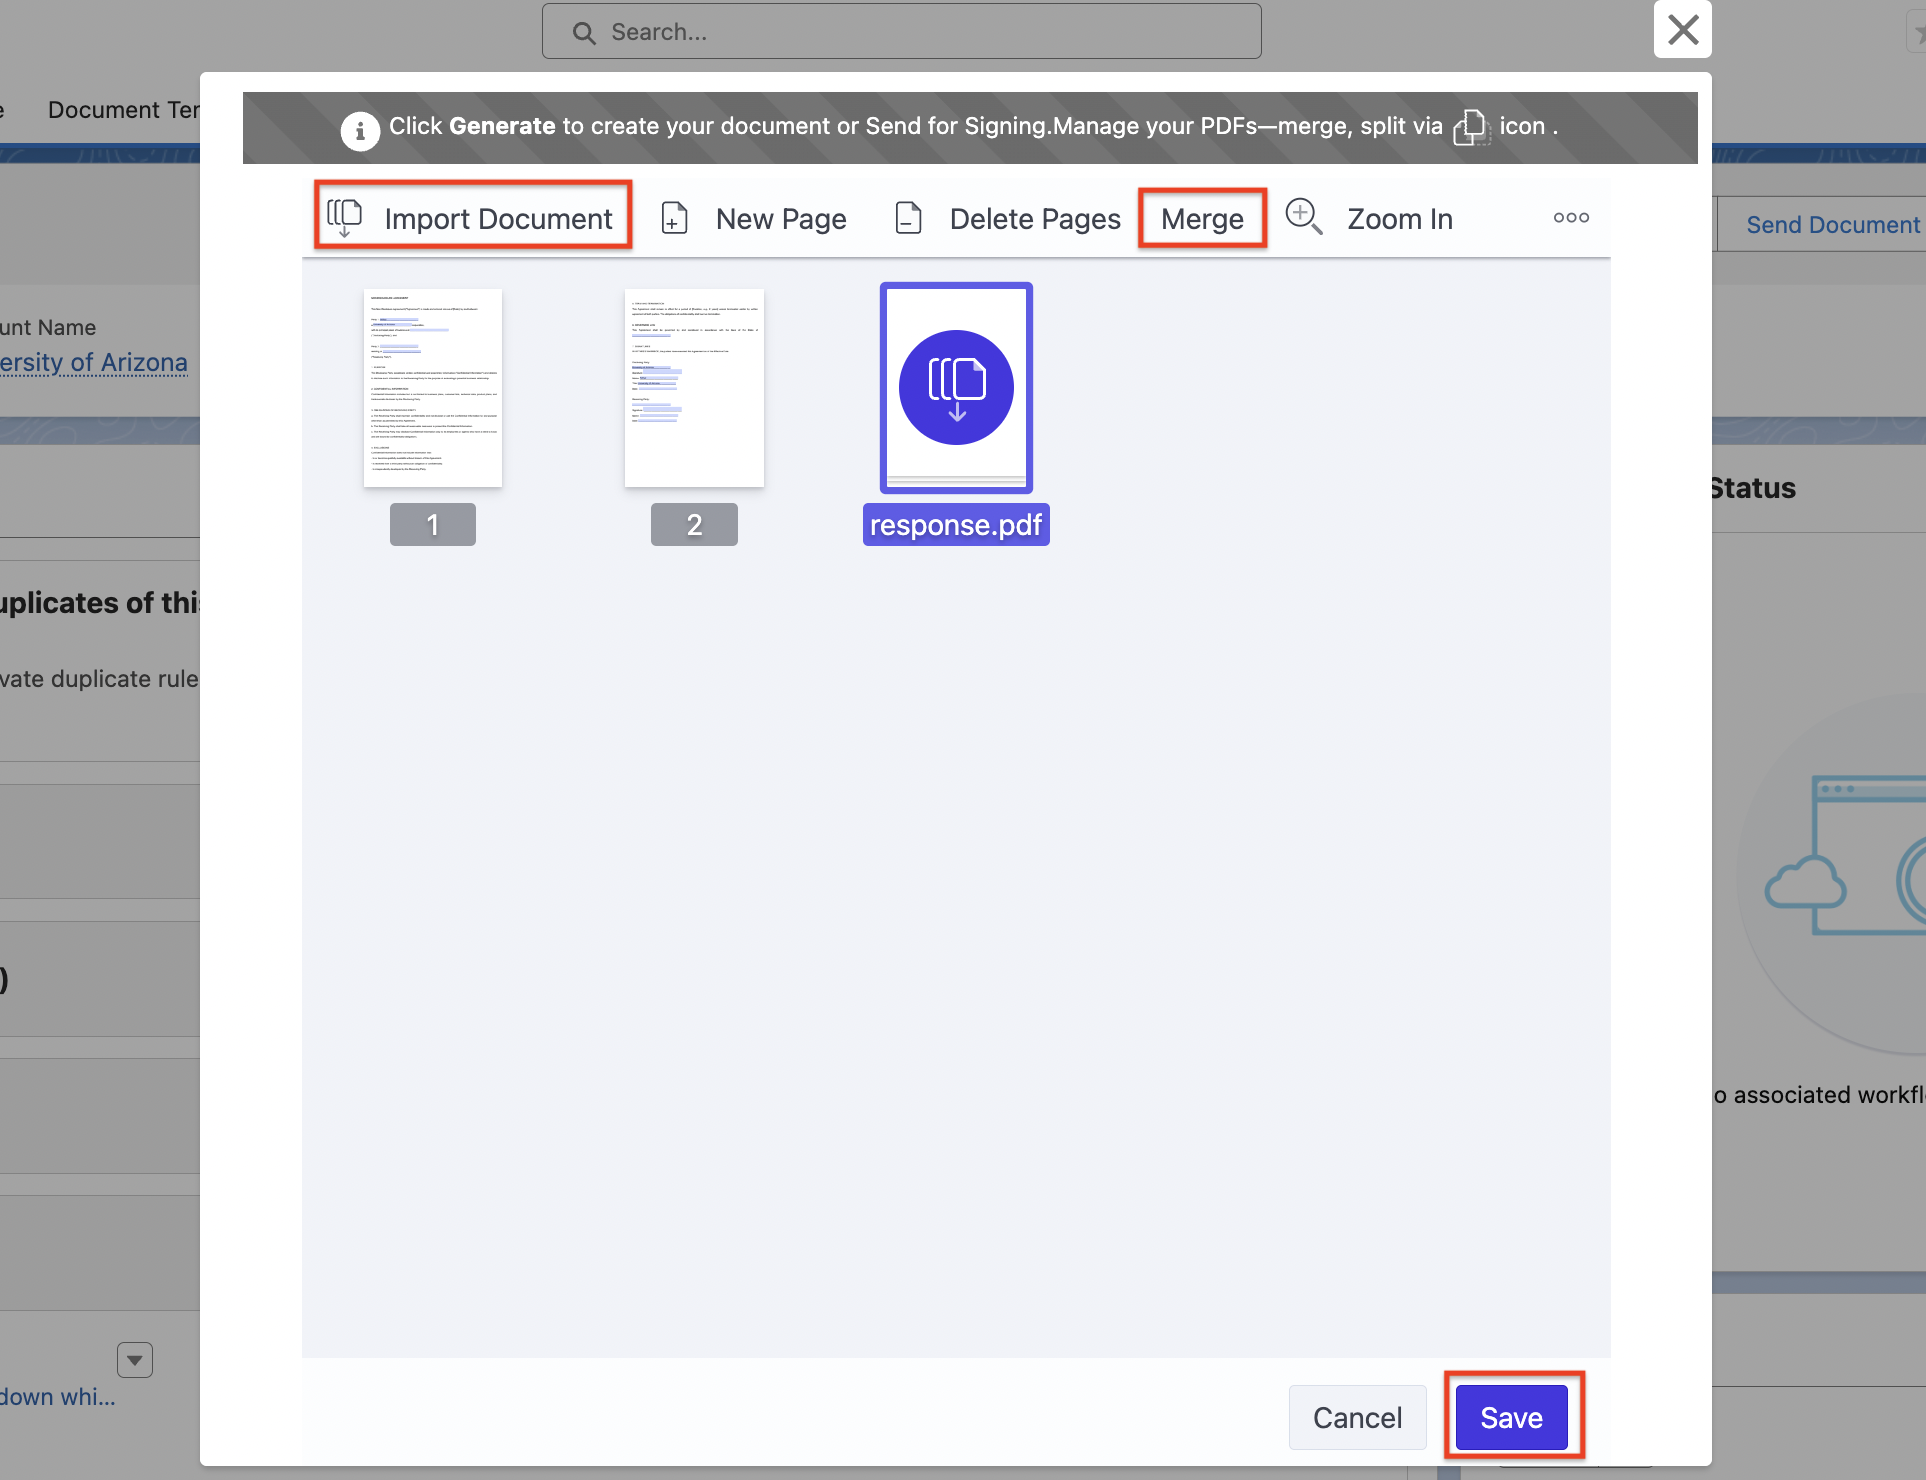
You can combine multiple documents into a single document using the Merge/Split option available on the preview screen.
-
Click the Merge/Split icon.
-
Click Import Document to upload a document from your local machine.
-
Click Merge to select additional documents available on the current Salesforce record.
-
Arrange the documents as required.
-
Click Save to apply the changes and view the updated document.
3.3 Split Documents
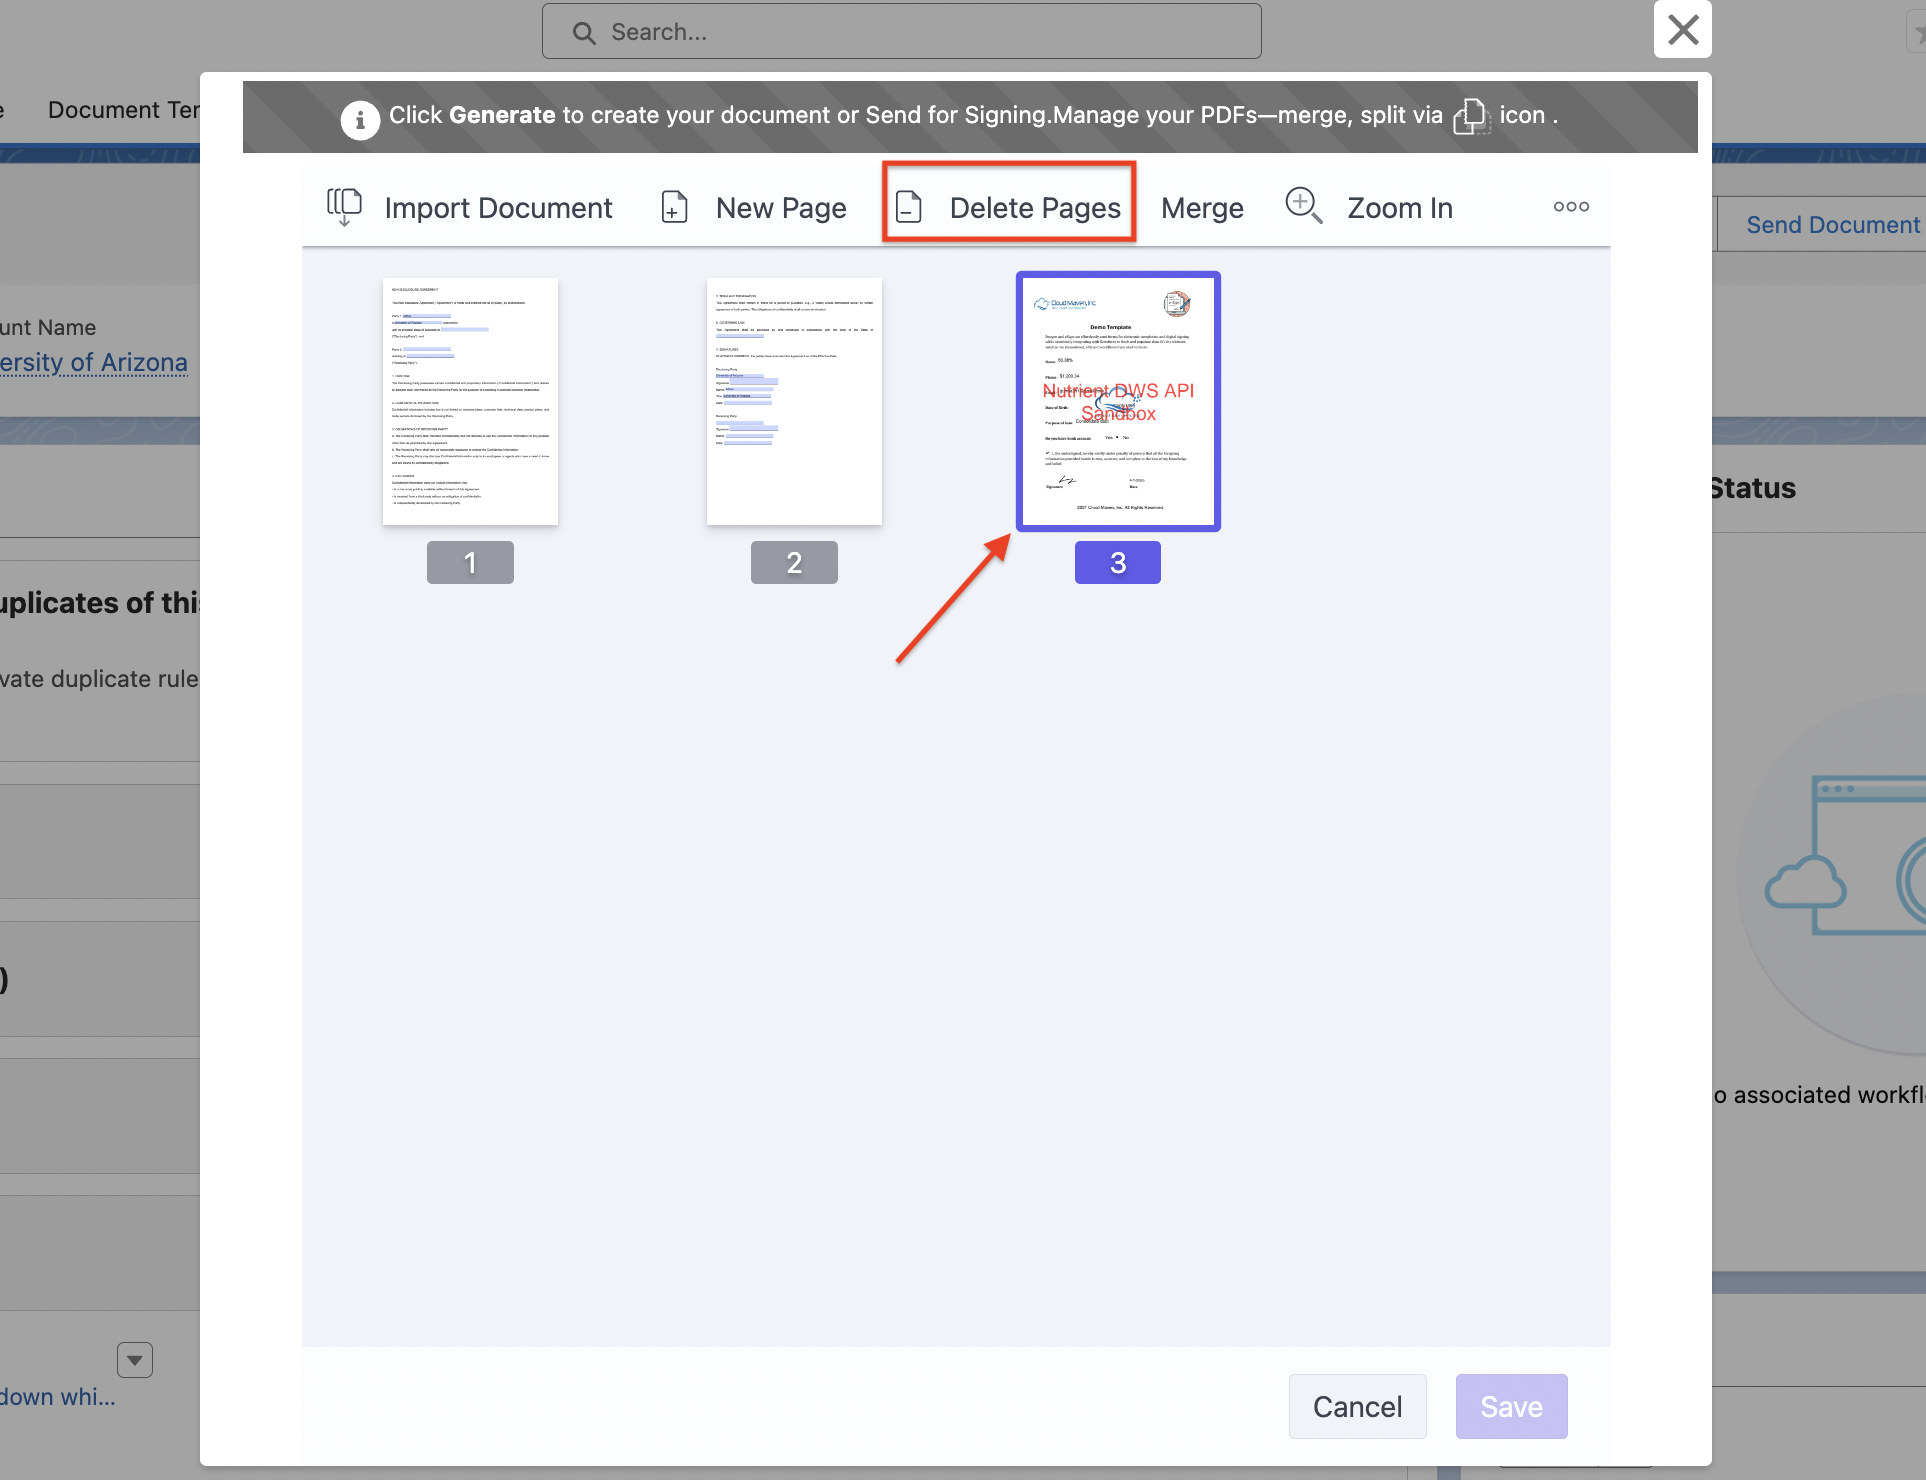
You can remove specific pages from the generated document using the Merge/Split option.
-
Click the Merge/Split icon on the preview screen.
-
Select the pages you want to remove.
-
Click Delete Pages.
-
Click Save to apply the changes and view the updated document.
Generate the Document
After reviewing and finalizing the document, click Generate to create the final document.
Document Workflow Creation
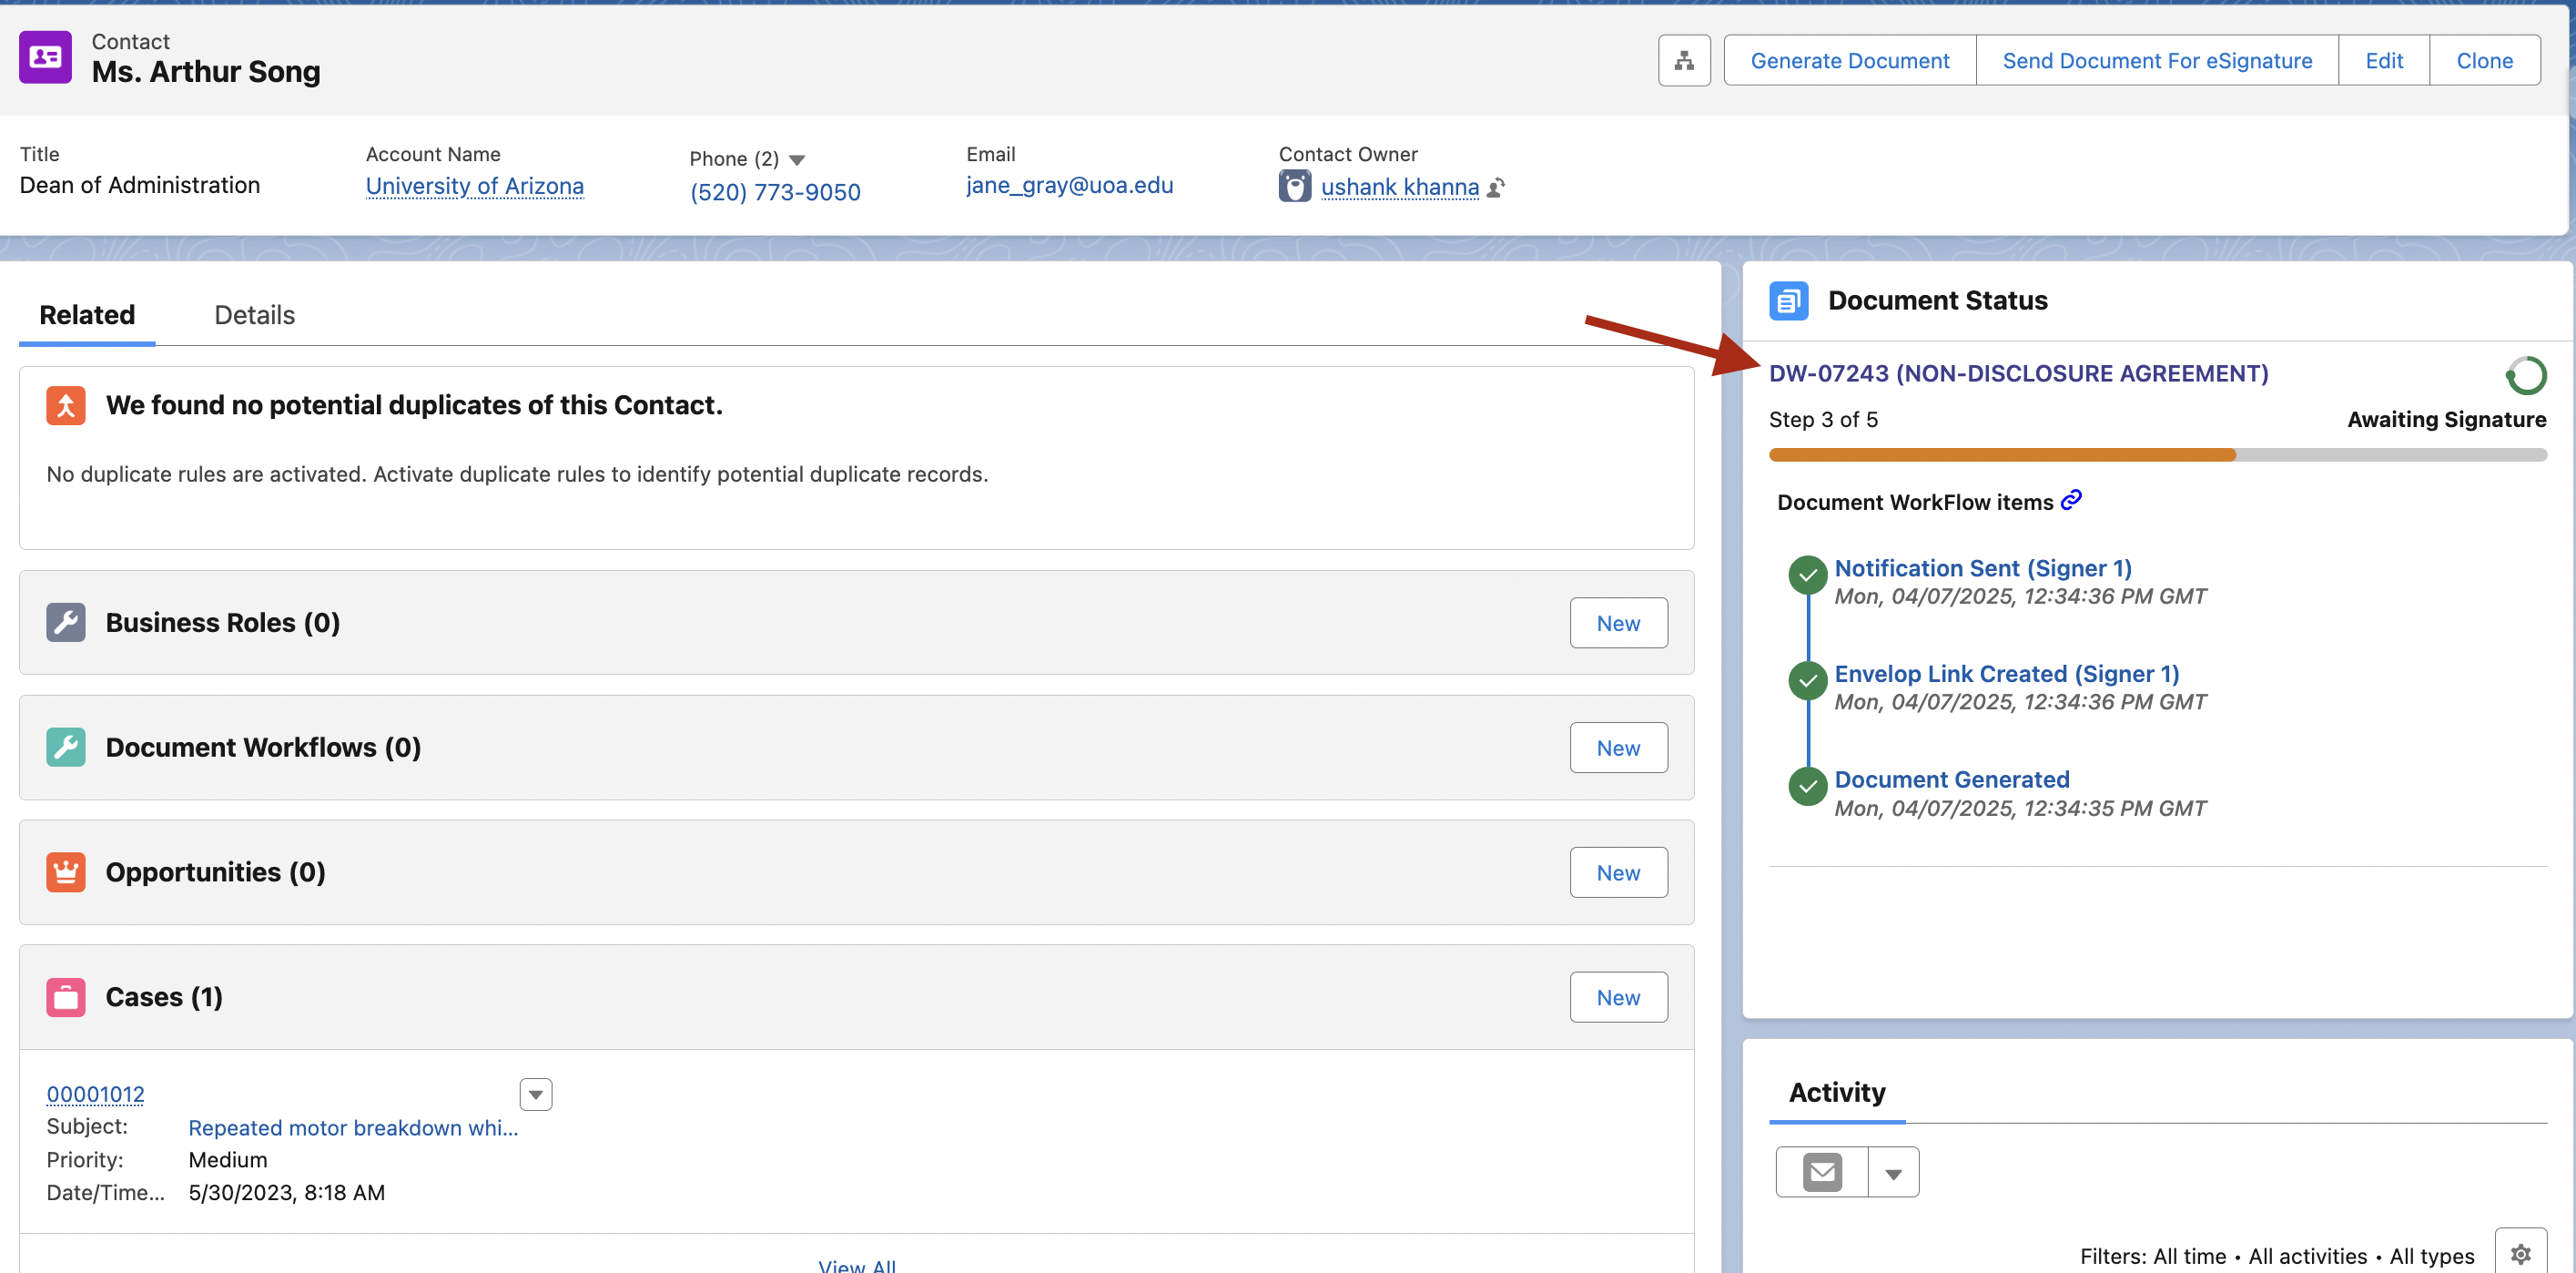
Once the Generate button is clicked, the document workflow is created and processed based on the configuration of the selected document template.
5.1 Document Workflow Record
A new Document Workflow record is automatically created in Salesforce to track the document generation and signing process.
5.2 Document Configured for eSignature
If the document template is configured for eSignature:
-
An envelope link is automatically generated.
-
The document is routed to the designated signer.
-
The signer receives an invitation to review and sign the document.
5.3 Document Generation Only
If eSignature is not configured and the document only needs to be generated:
-
The document workflow is marked as Completed.
-
The generated document is saved in Salesforce for future reference or further action.
User Signing Experience
6.1 Signing Invitation
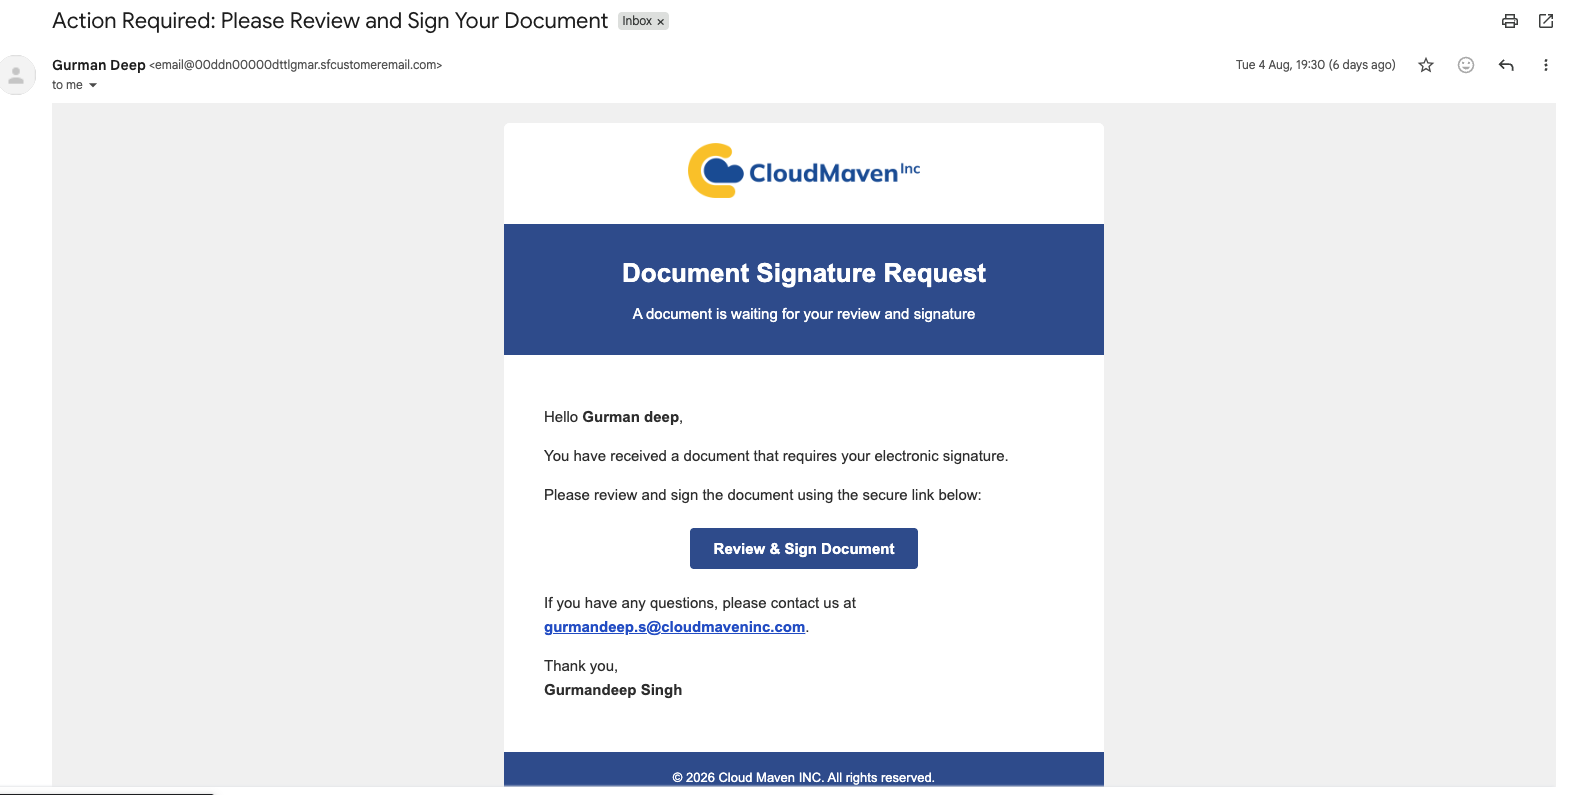
The signer receives a personalized invitation to sign through the configured communication channel, such as email or SMS.
The invitation can be fully white-labeled and may include:
-
Organization logo
-
Brand colors
-
Custom messaging
-
Secure signing link
The signer can click the secure signing link to access the signing portal.
6.2 Access the Signing Portal
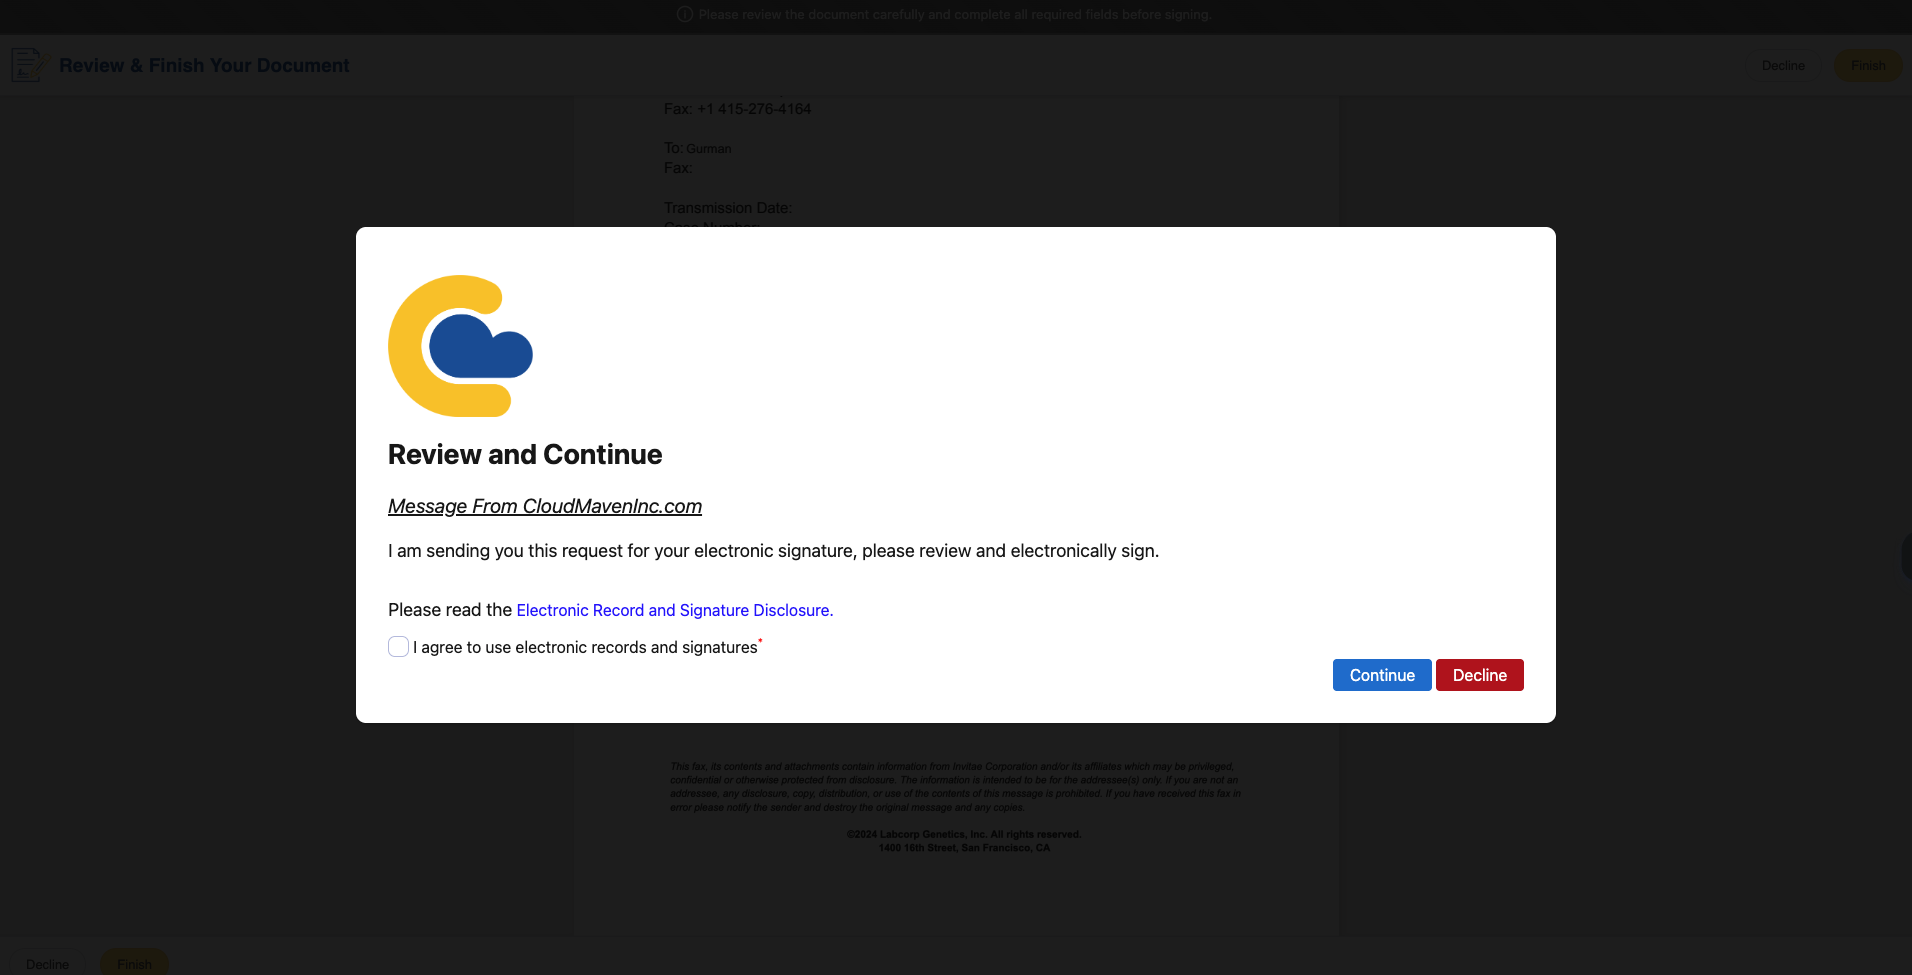
After clicking the signing link, the signer is redirected to a secure, browser-based signing interface.
Multi-Factor Authentication (MFA) using a One-Time Password (OTP) can be enabled for additional security. When enabled, the signer must verify their identity using an OTP sent to their configured email address or phone number.
No application download or account login is required, providing a seamless signing experience.
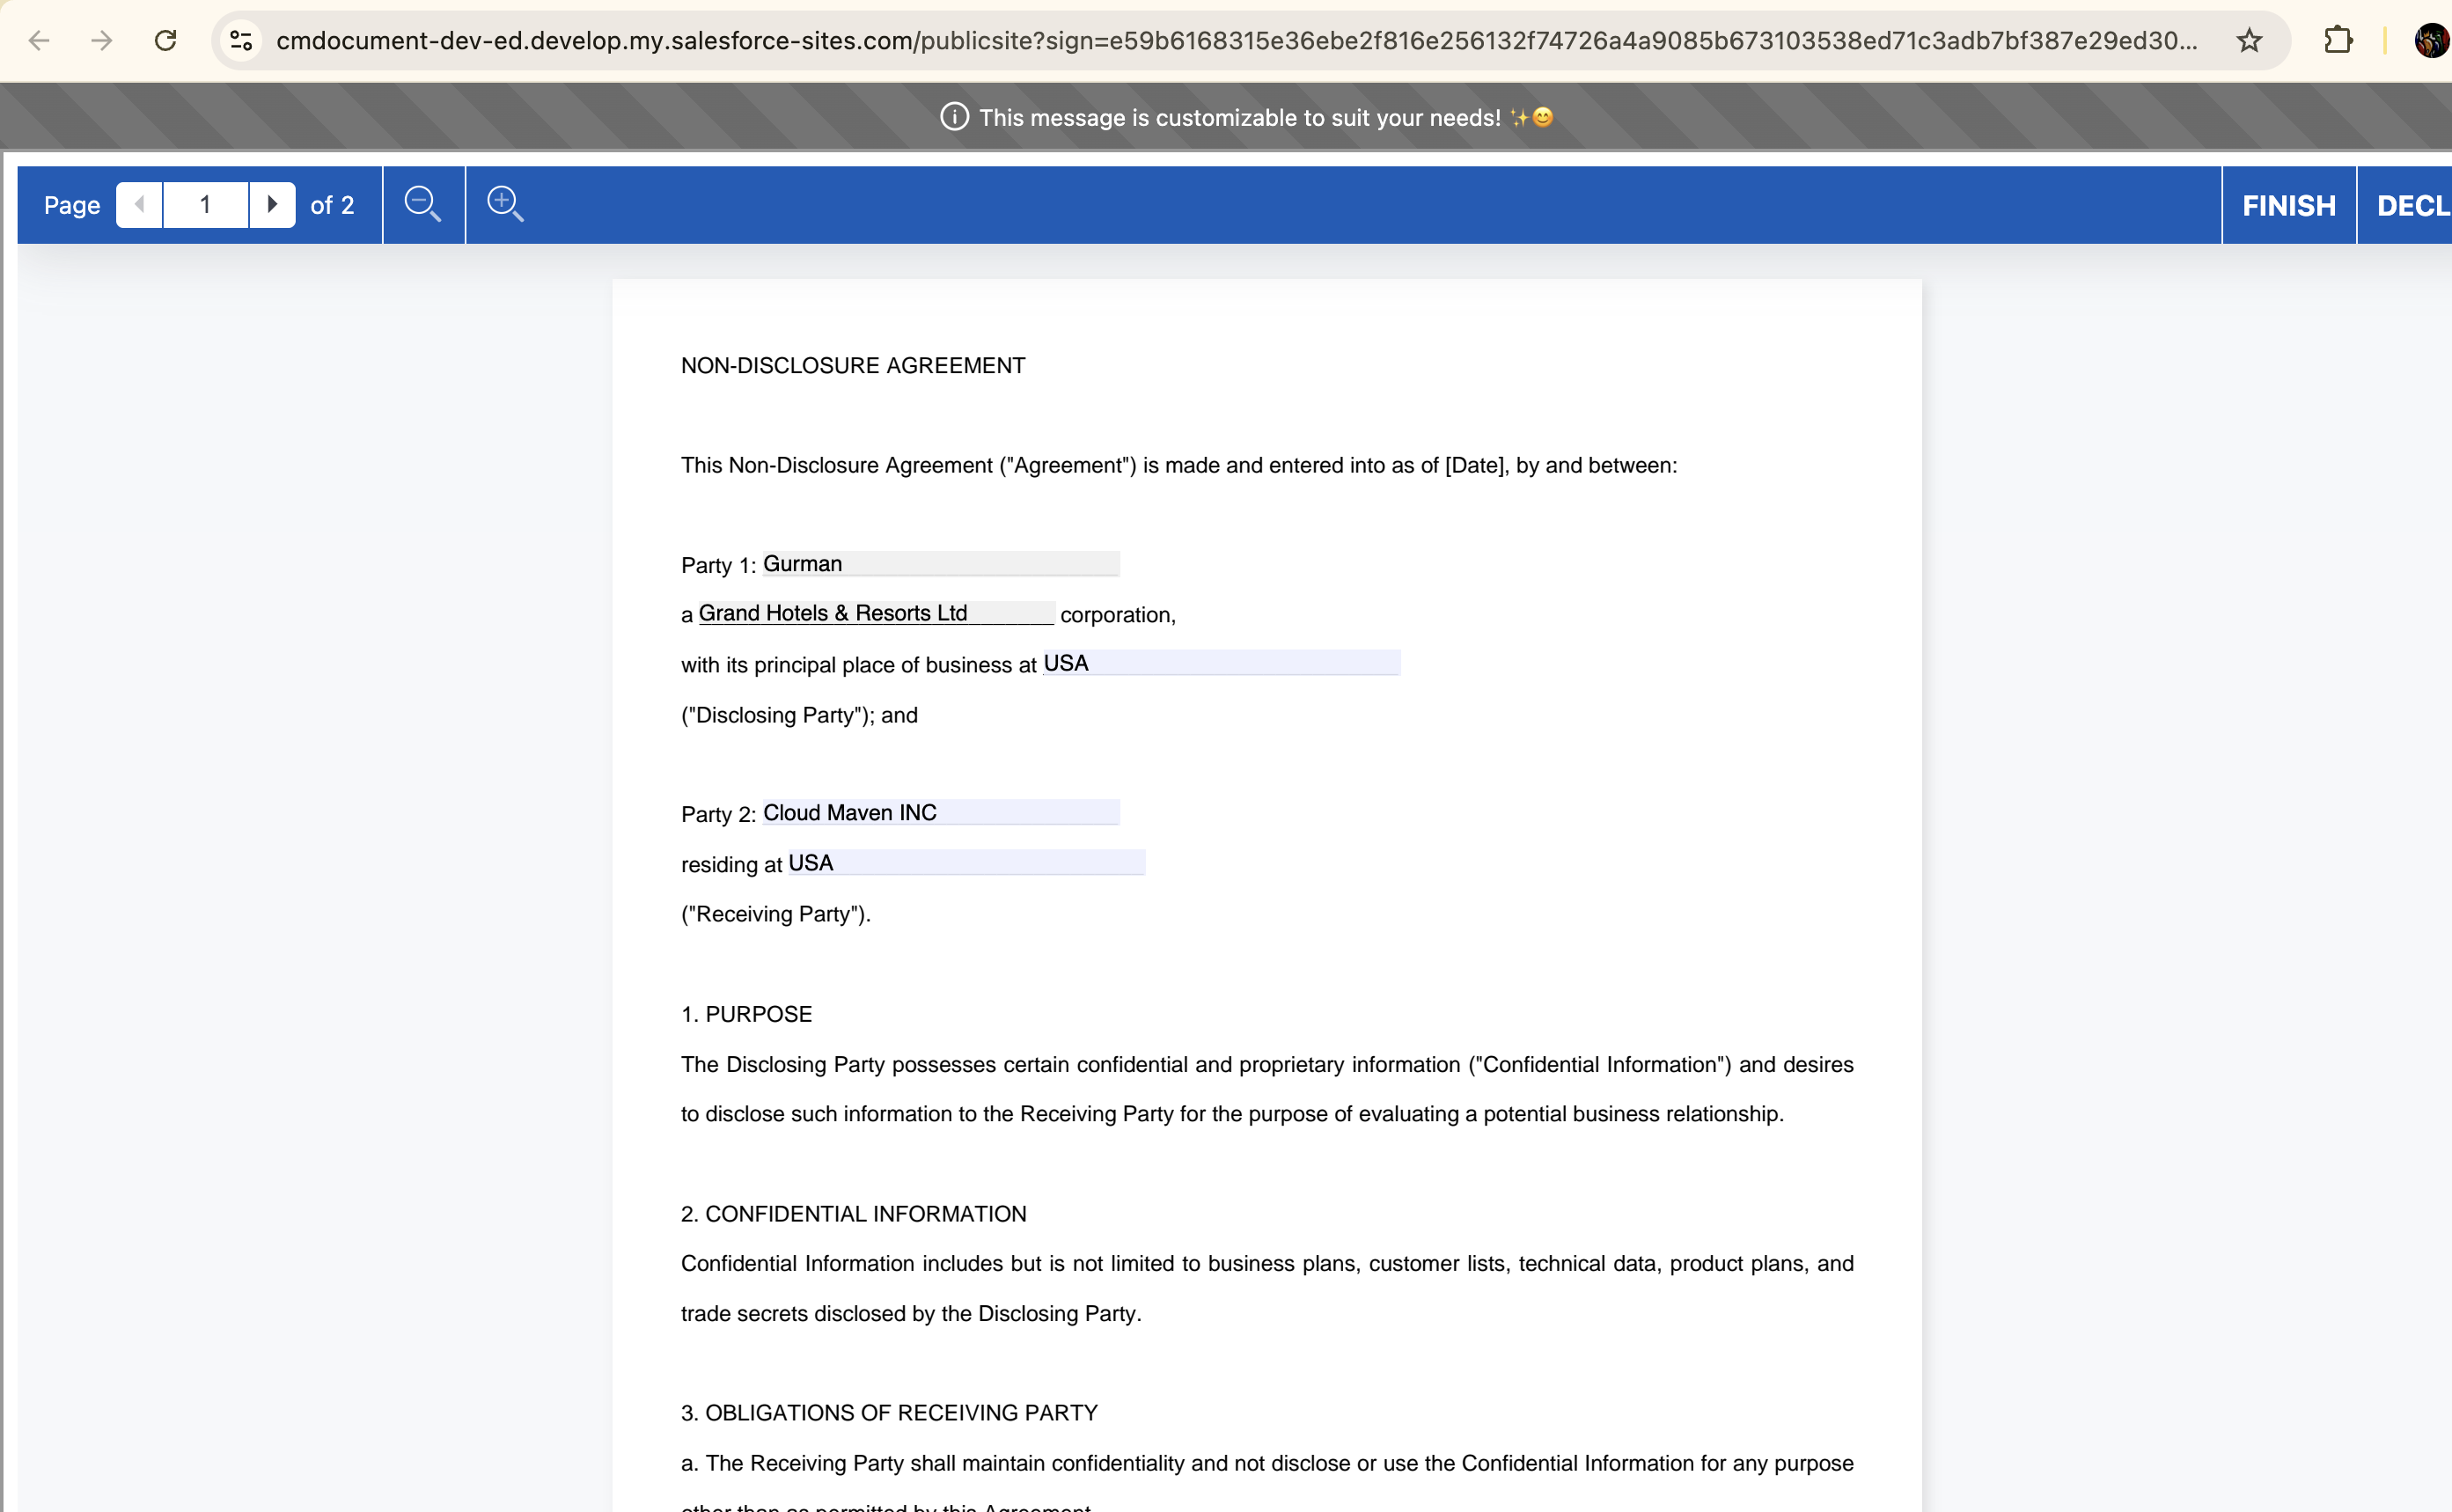
6.3 Review the Document
The signer can review the document before completing the signing process.
Depending on the document configuration:
-
The signer can update fields within the document.
-
Updated field values can optionally be written back to the corresponding Salesforce records.
6.4 Apply the Signature
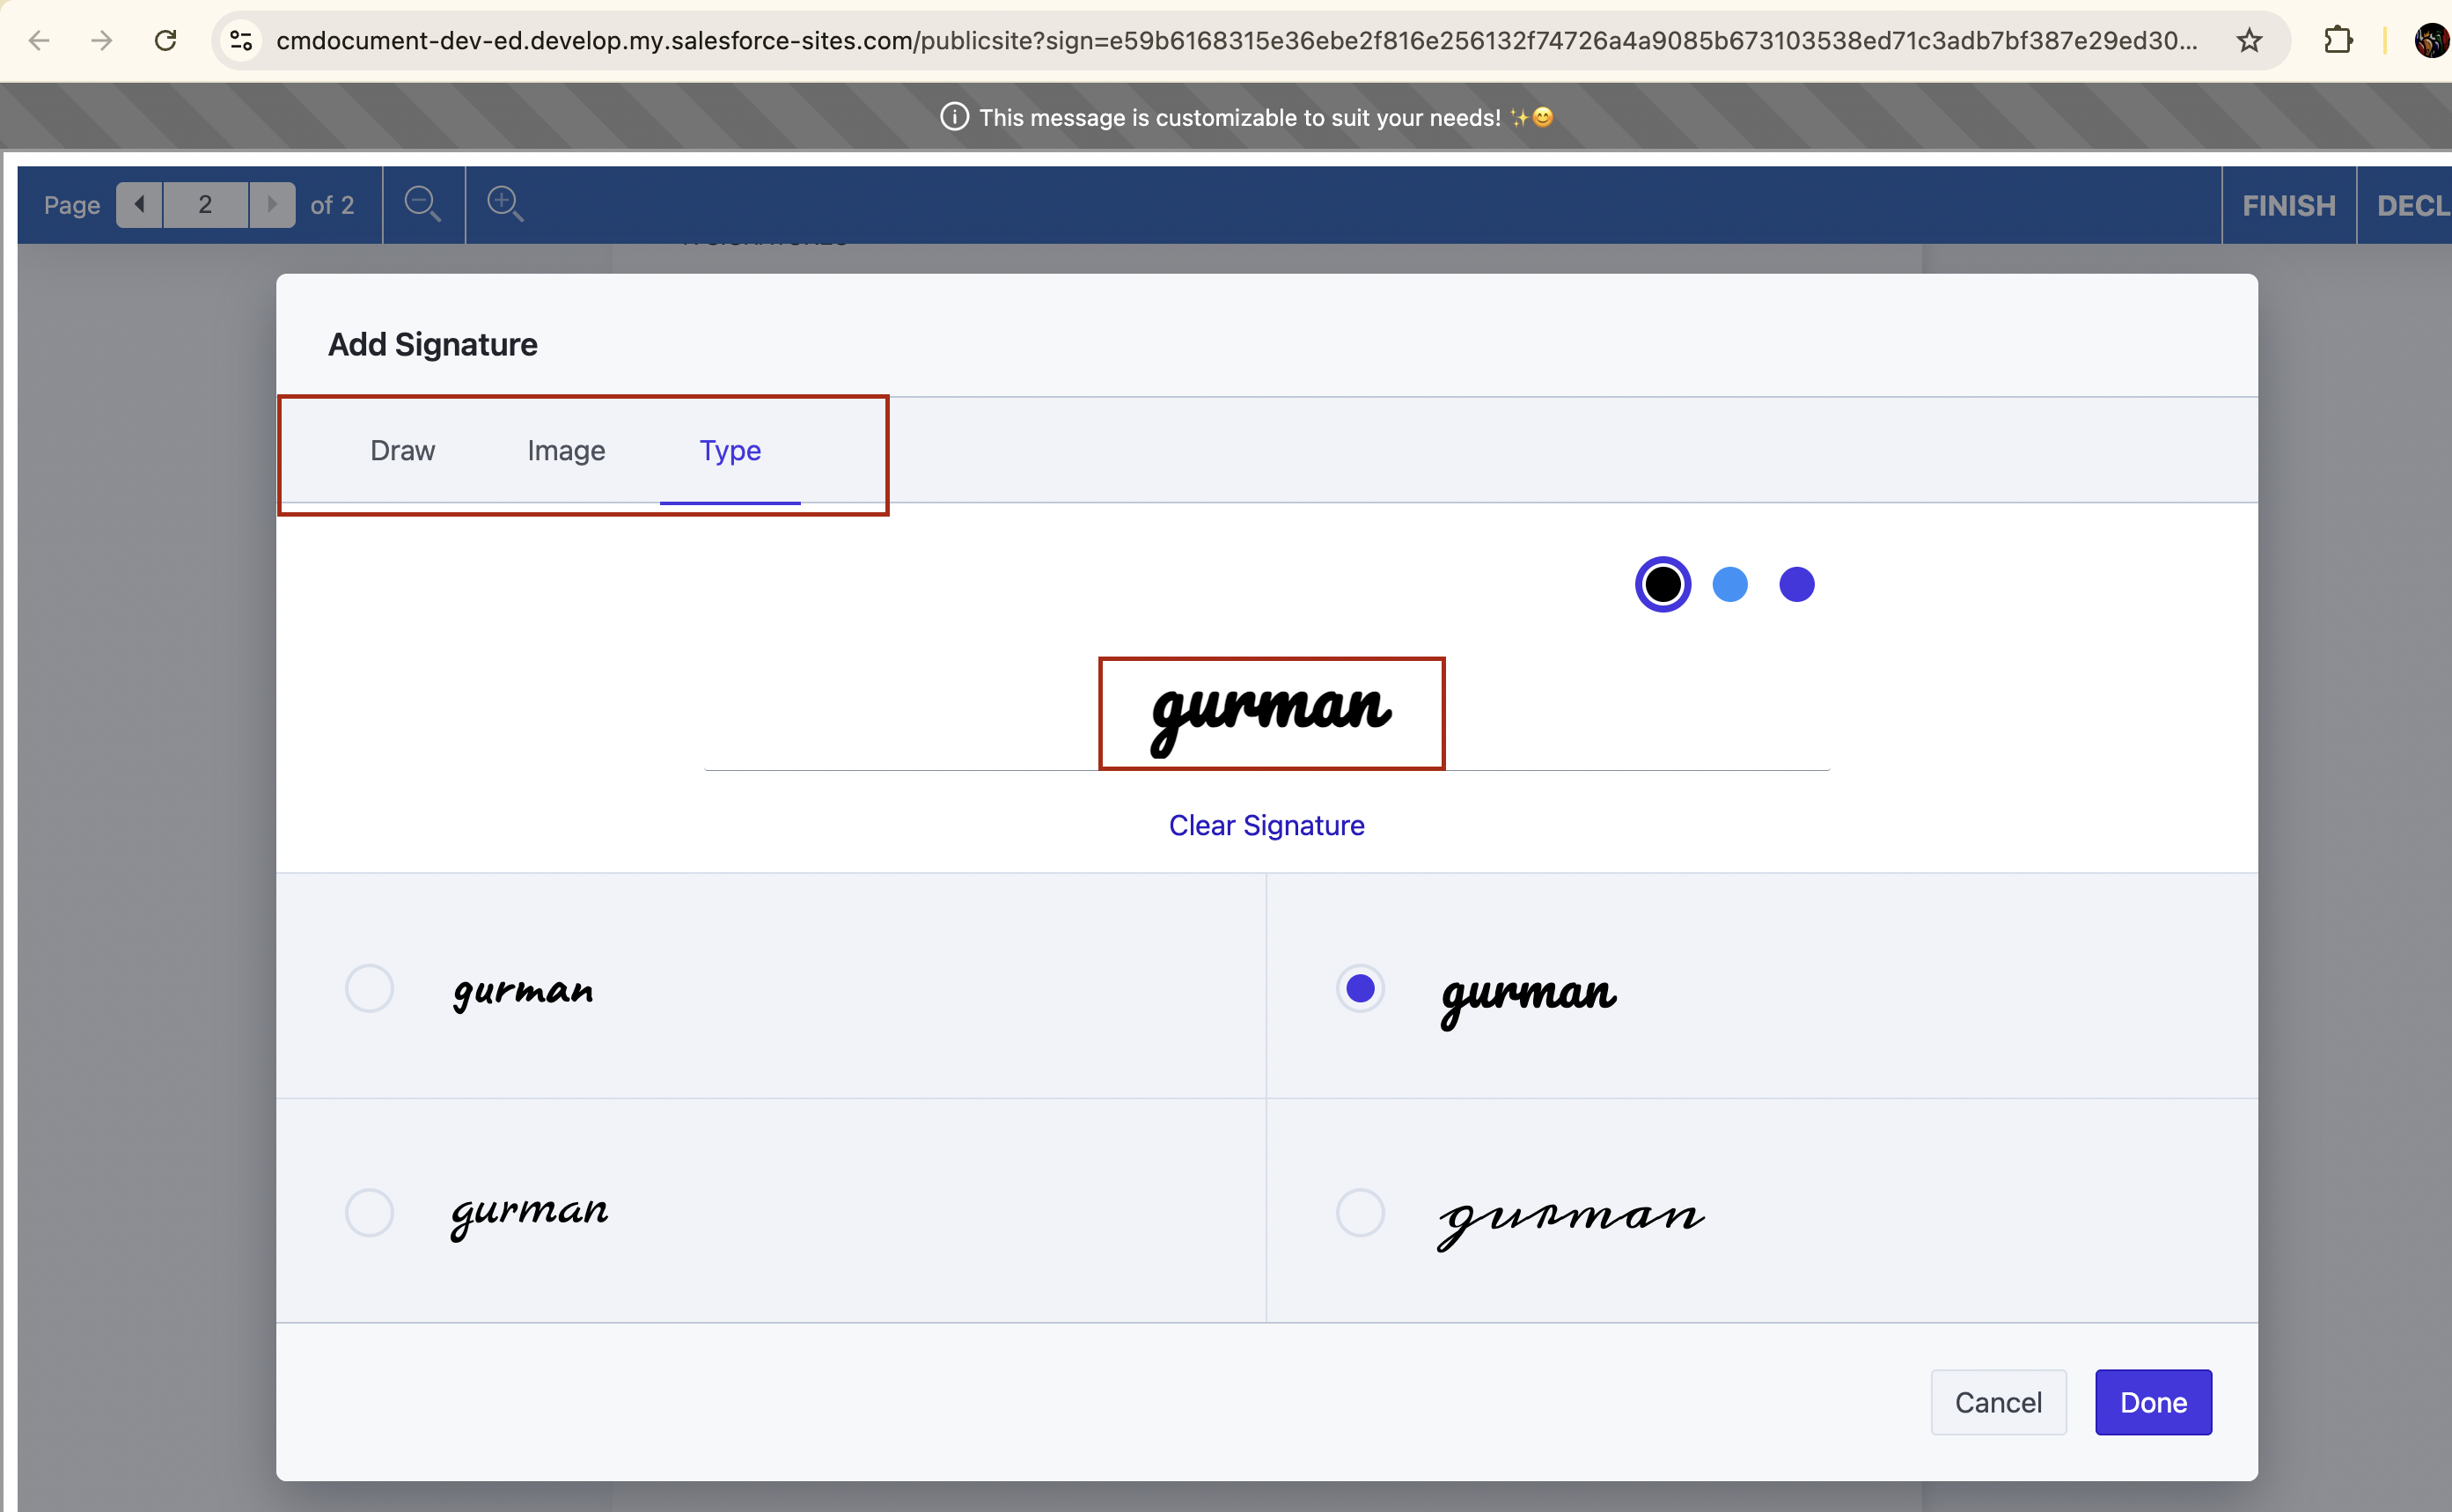
The signer is guided through each required signature field.
Depending on the configuration, the signer can apply a signature using:
-
Typed Signature – Enter their name and select a signature font.
-
Drawn Signature – Draw their signature using a mouse, touch screen, or other supported input device.
-
Uploaded Signature – Upload an image of their signature, if enabled.
All required signature fields and mandatory document fields must be completed before the signer can proceed.
6.5 Complete the Signing Process
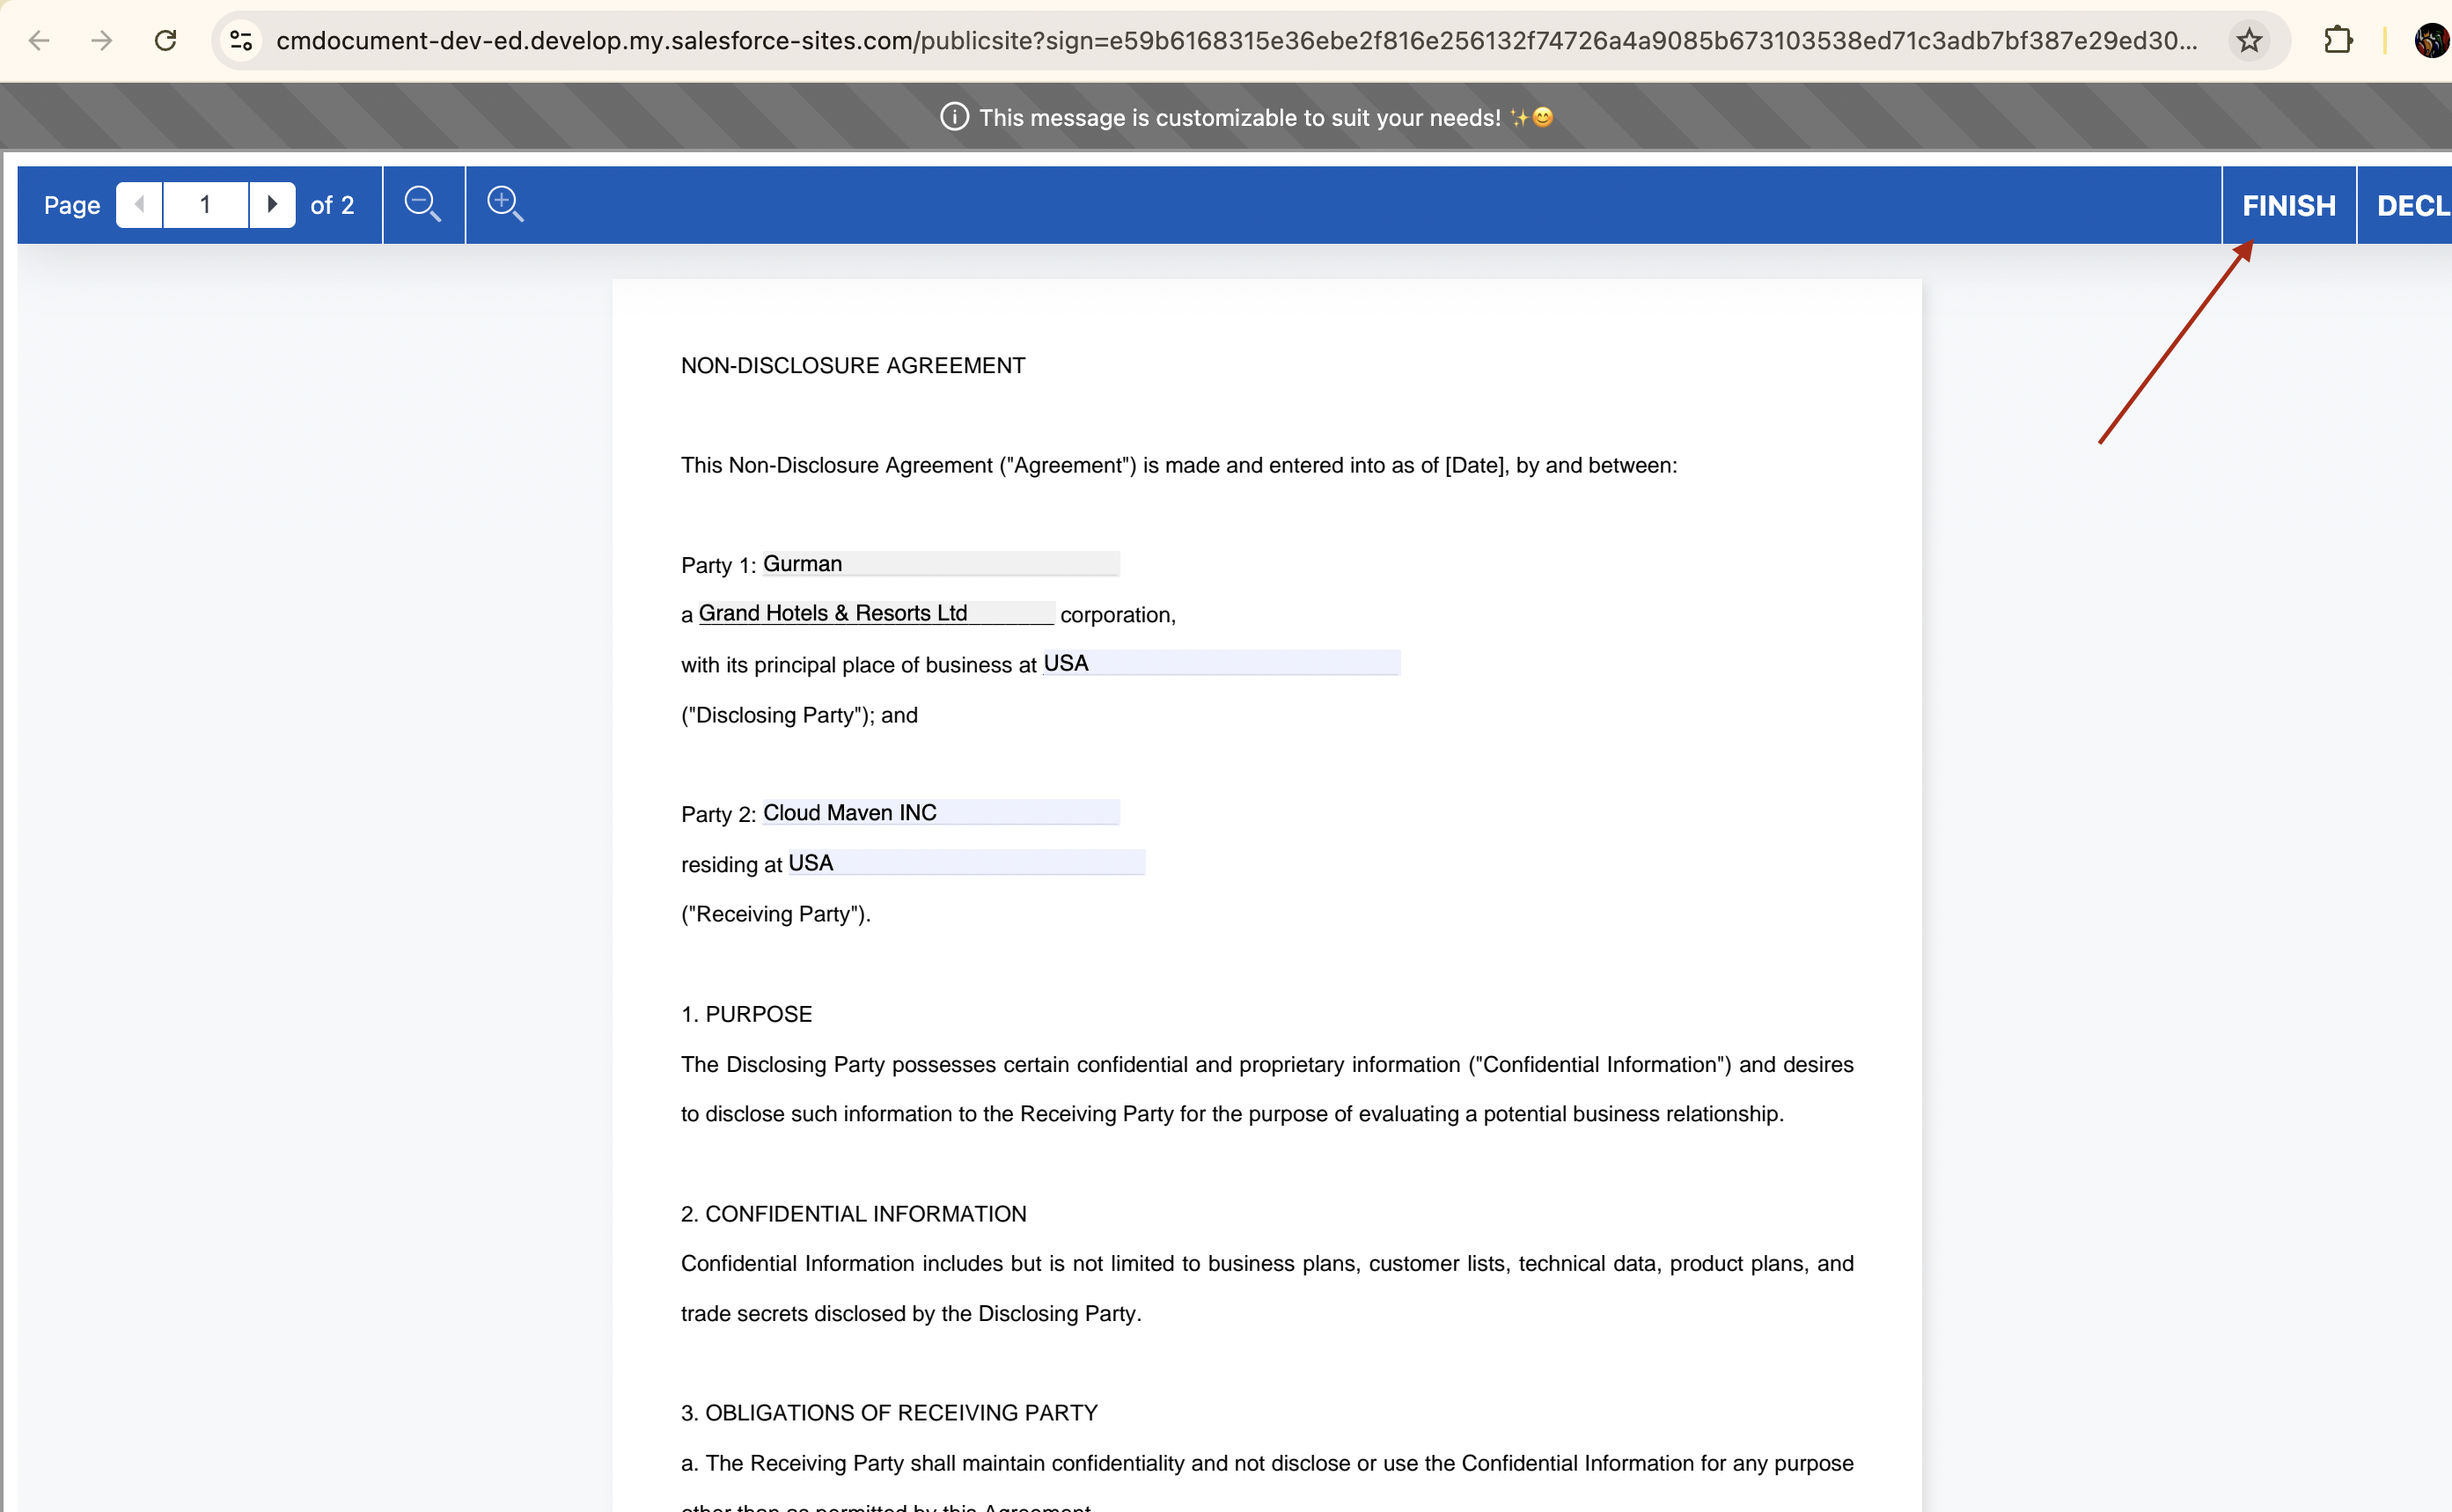
After completing all required signature fields and other mandatory fields, the signer clicks Finish to complete their signing step.
6.6 Next Signer Notification
If the document requires multiple signers, the next signer in the configured signing sequence is automatically notified.
The next signer follows the same process starting from Step 6.1 – Signing Invitation.
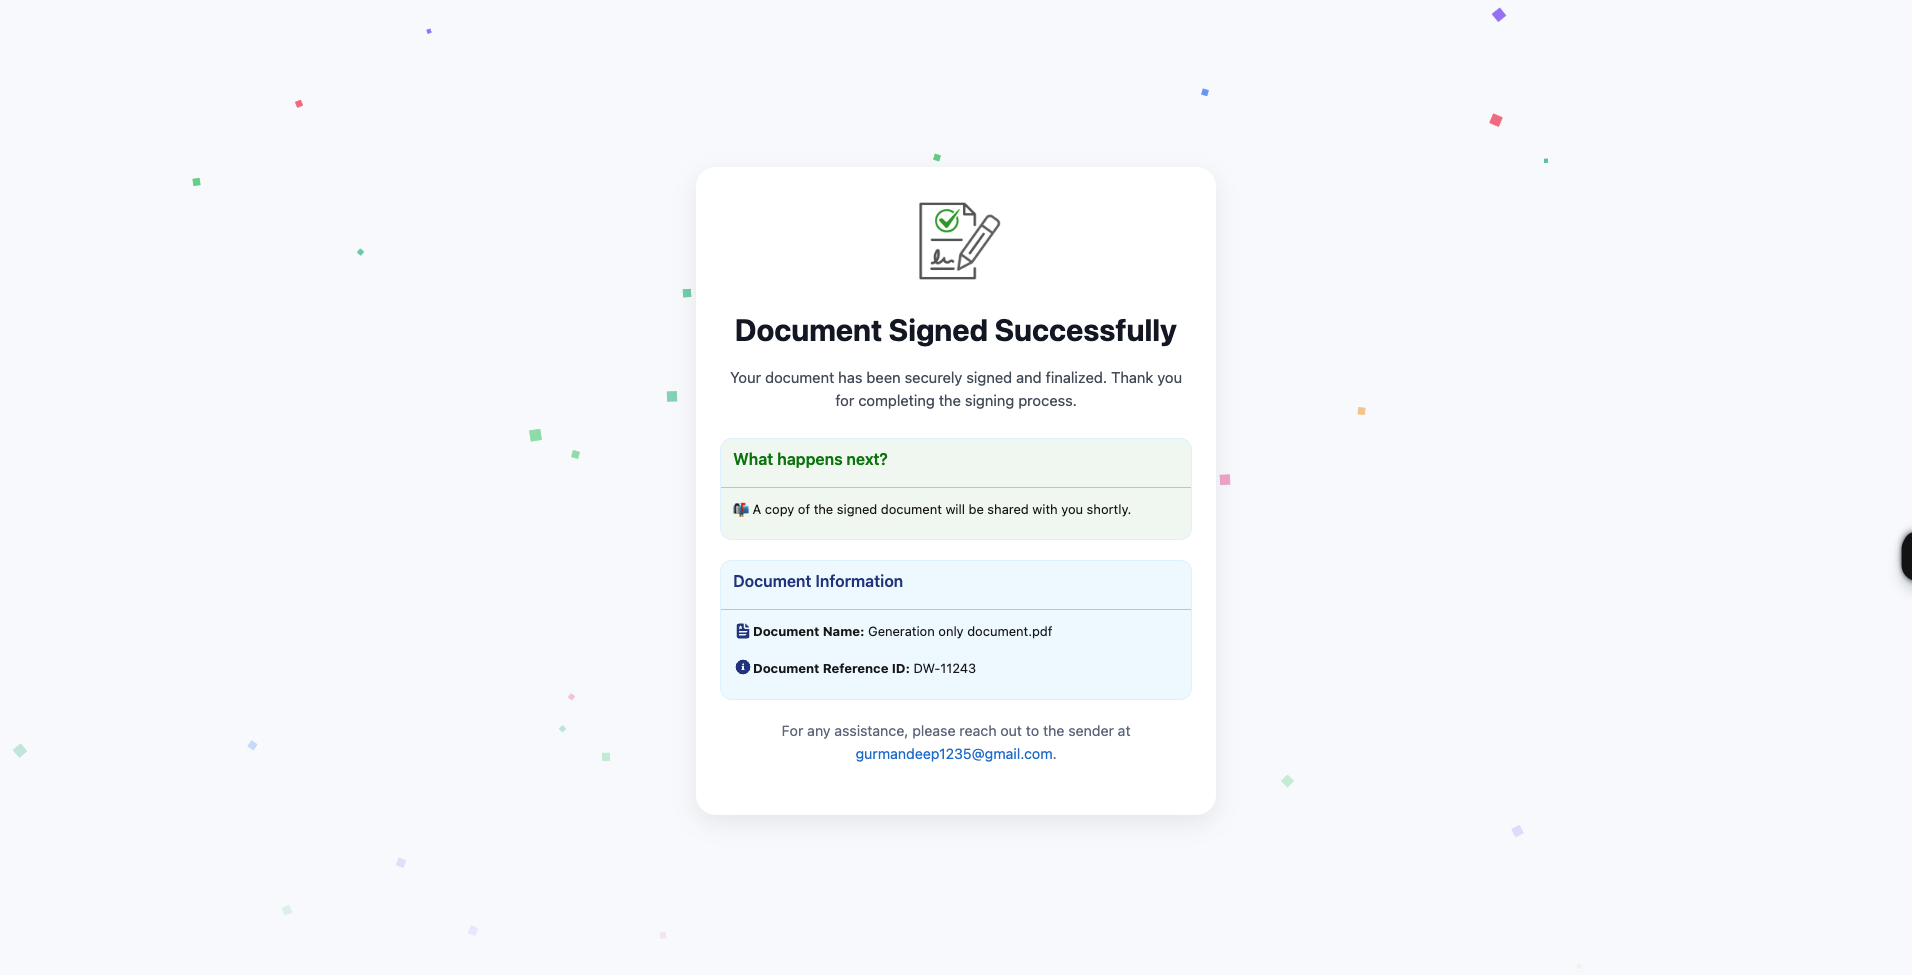
6.7 Signing Completion and Salesforce Update
Once all required signers have completed their signing steps:
-
The Document Workflow is automatically marked as Completed in Salesforce.
-
The completed document can be attached to the related Salesforce record.
-
Signing status and timestamps are recorded.
-
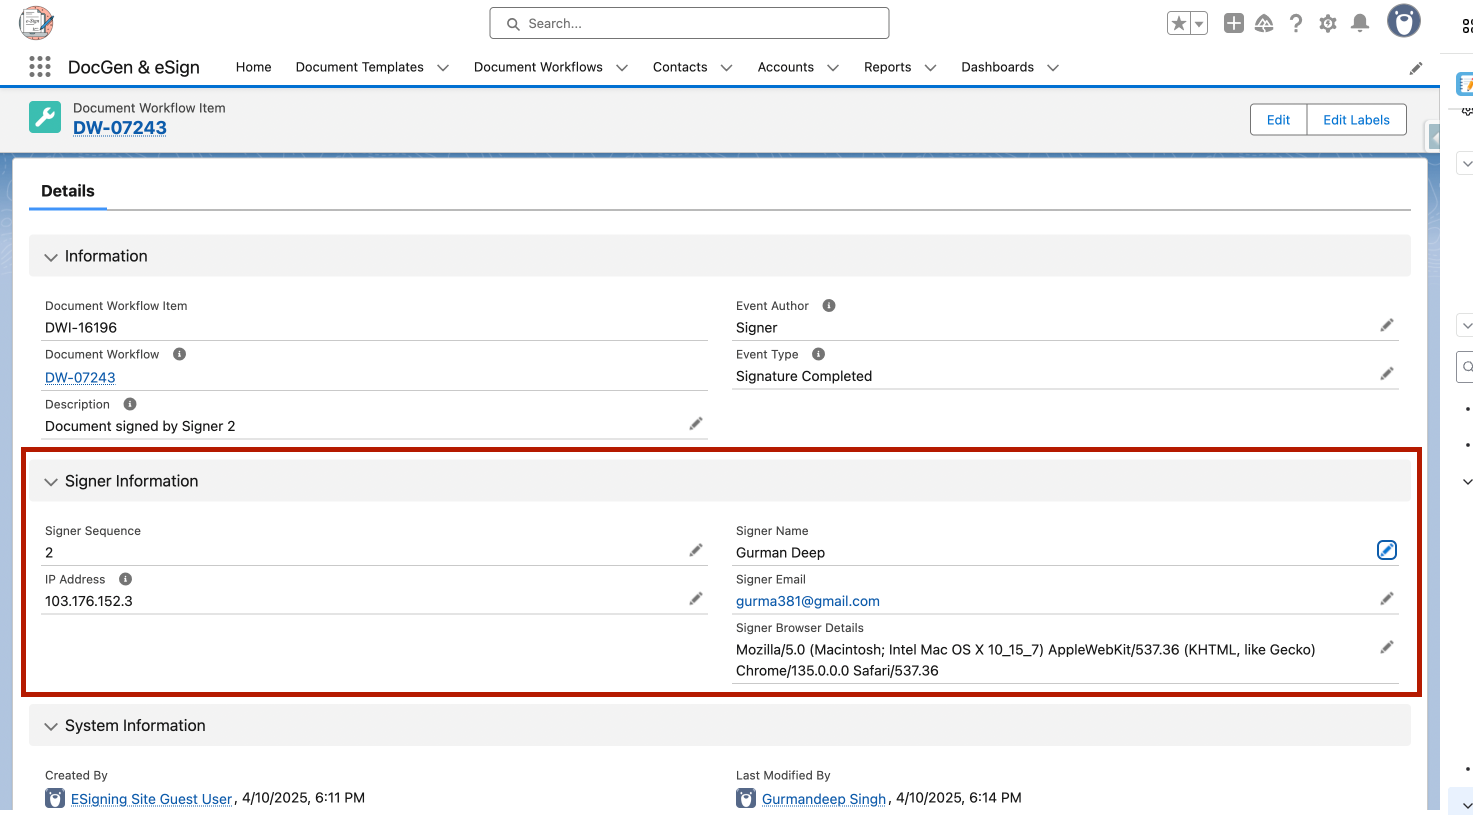
Signer IP addresses and other relevant signing information can be captured.
-
An audit trail is maintained for tracking and compliance purposes.
Salesforce View After Signing
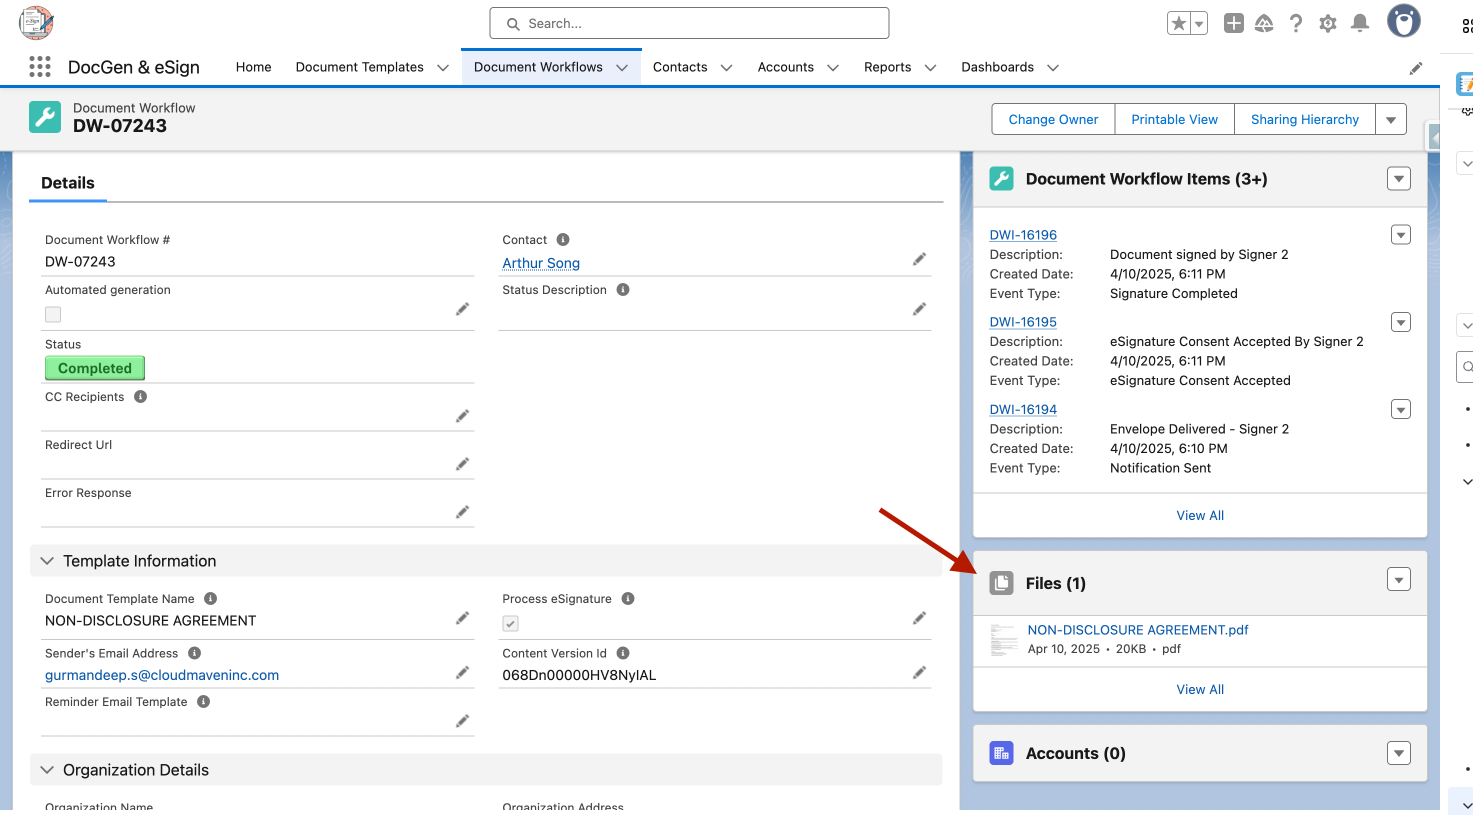
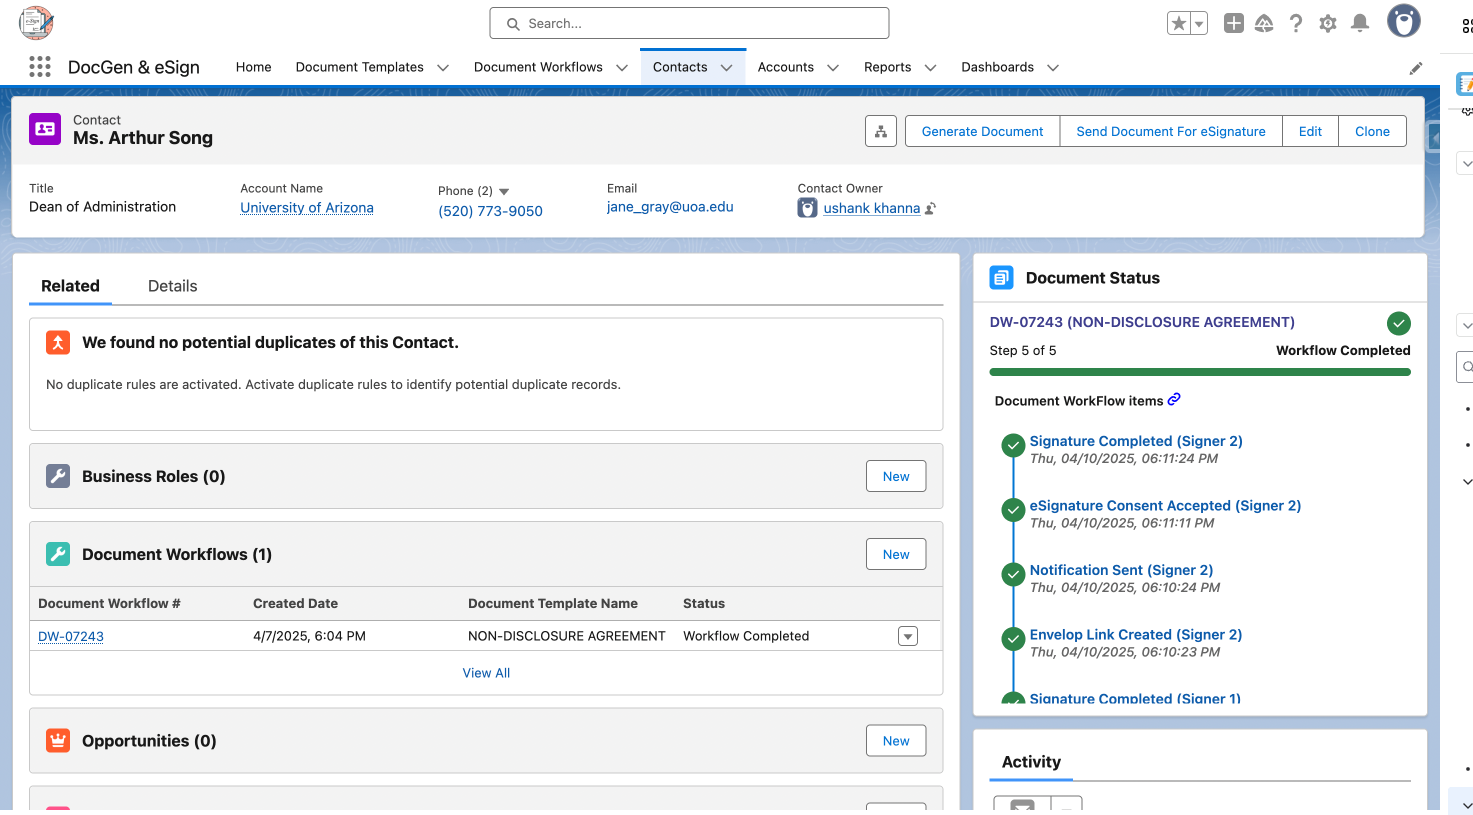
After the signing process is completed, the signing information and generated documents are available in Salesforce.
7.1 Document Workflow Completion
The Document Workflow record is marked as Completed after all required signers have successfully completed the signing process.
If an error occurs during document generation or signing, the corresponding error details are displayed in the Error Response field.
7.2 Audit Logs
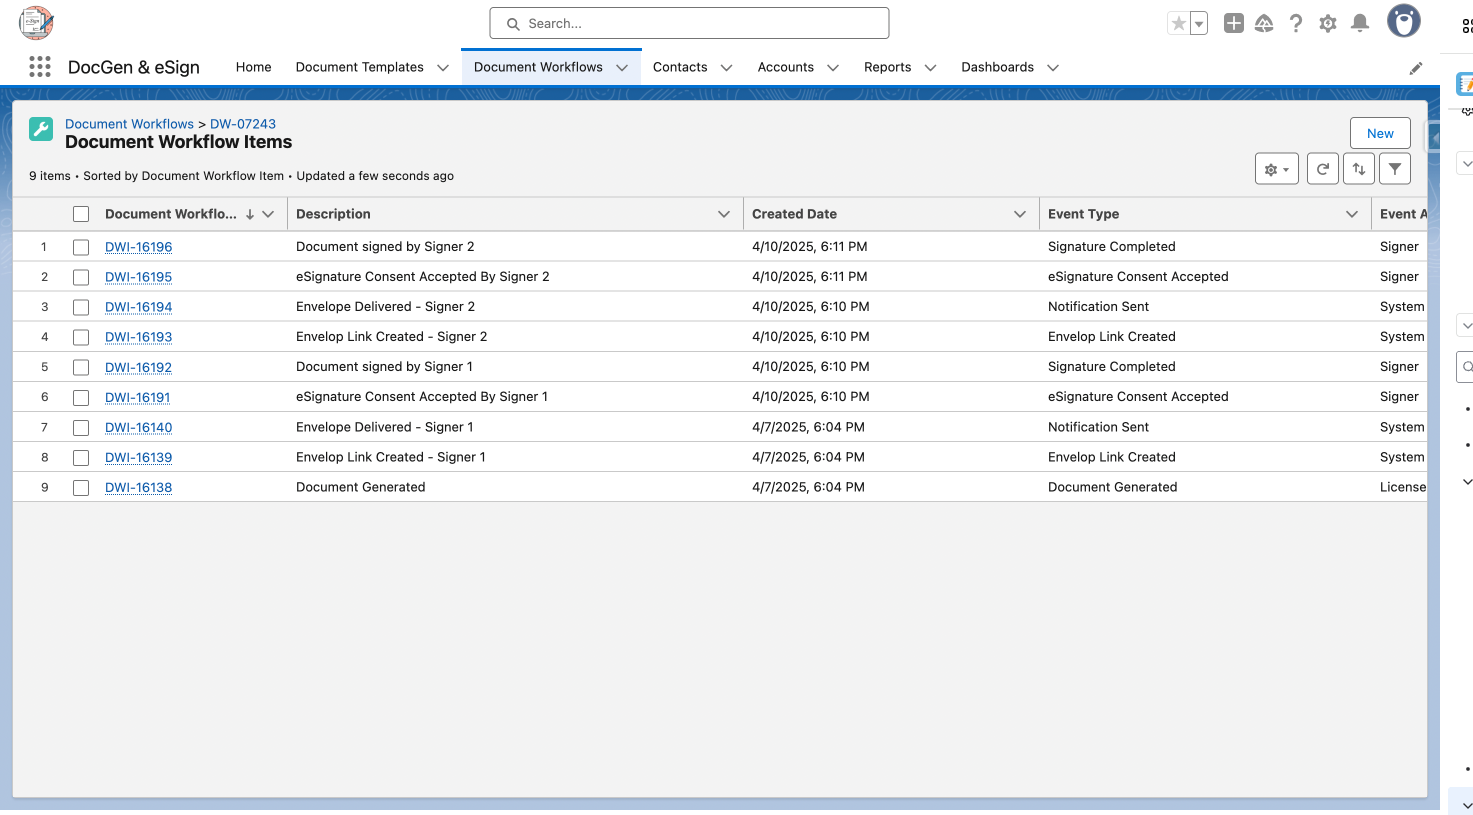
A comprehensive Audit Log is generated to maintain a traceable history of the document signing process.
The audit log can capture information such as:
-
Signer actions
-
Signing timestamps
-
IP addresses
-
Browser information
-
Signing status
-
Other relevant signing events
The audit information is securely stored in Salesforce and can be used for compliance, auditing, and document tracking purposes.
Document Workflow Item Records
Document Workflow Item records provide information about the individual documents and signing activities associated with the workflow.
Signer Information
Signer information is maintained for each signer involved in the document workflow, including their signing sequence and status.
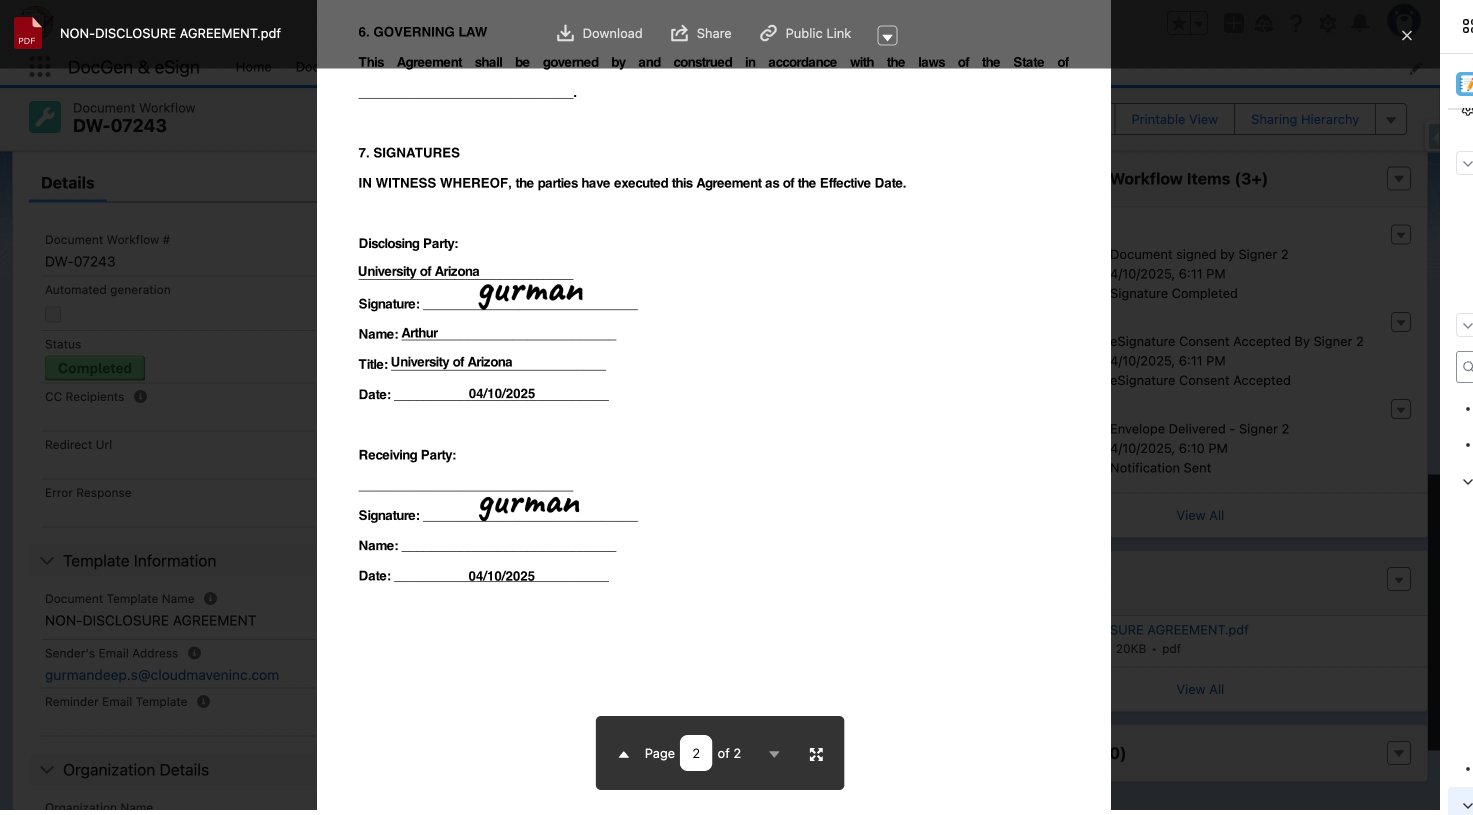
7.3 Signed Document
Once the signing process is successfully completed, the final signed document is securely stored and attached to the Document Workflow record.
The signed document can be accessed from Salesforce for:
-
Review and reference
-
Record keeping
-
Compliance purposes
-
Future document management
This ensures that the completed and signed version of the document remains associated with its corresponding document workflow.