
Overview
This guide explains how business users can send a document for eSignature or Digital Signature directly from a Salesforce record without using a predefined Document Template.
Users can upload a new document or select an existing Salesforce File, configure the recipients, prepare the document for signing, and send it directly from Salesforce.
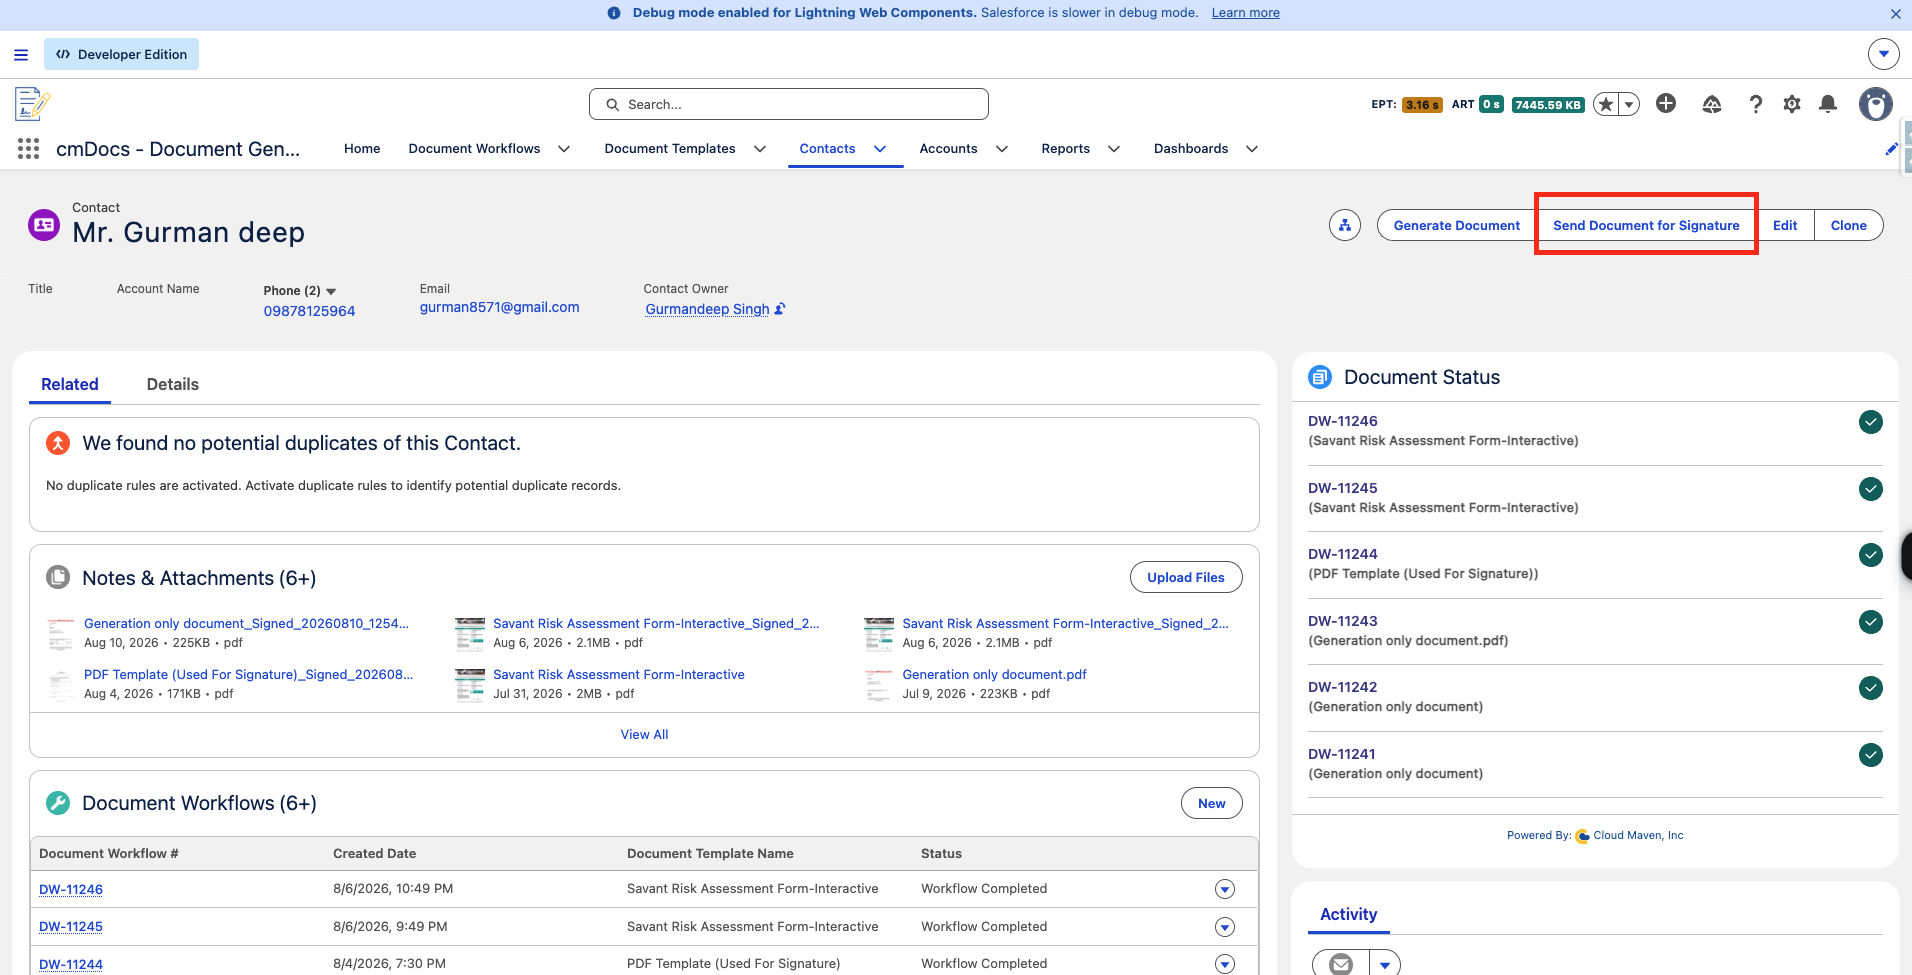
Access Send Document for eSignature
The Send Document for eSignature action must be available on the Salesforce record page.
Once configured by your Salesforce administrator, users can access the action directly from supported records such as Account, Opportunity, Application, or other configured objects.
To start the process:
-
Open the required Salesforce record.
-
Click Send Document for eSignature.
-
The DocGen & eSign document preparation page opens in a new tab.
-
Follow the steps to select the document, configure signers, prepare the document, and send it for signing.
Select or Upload the Document
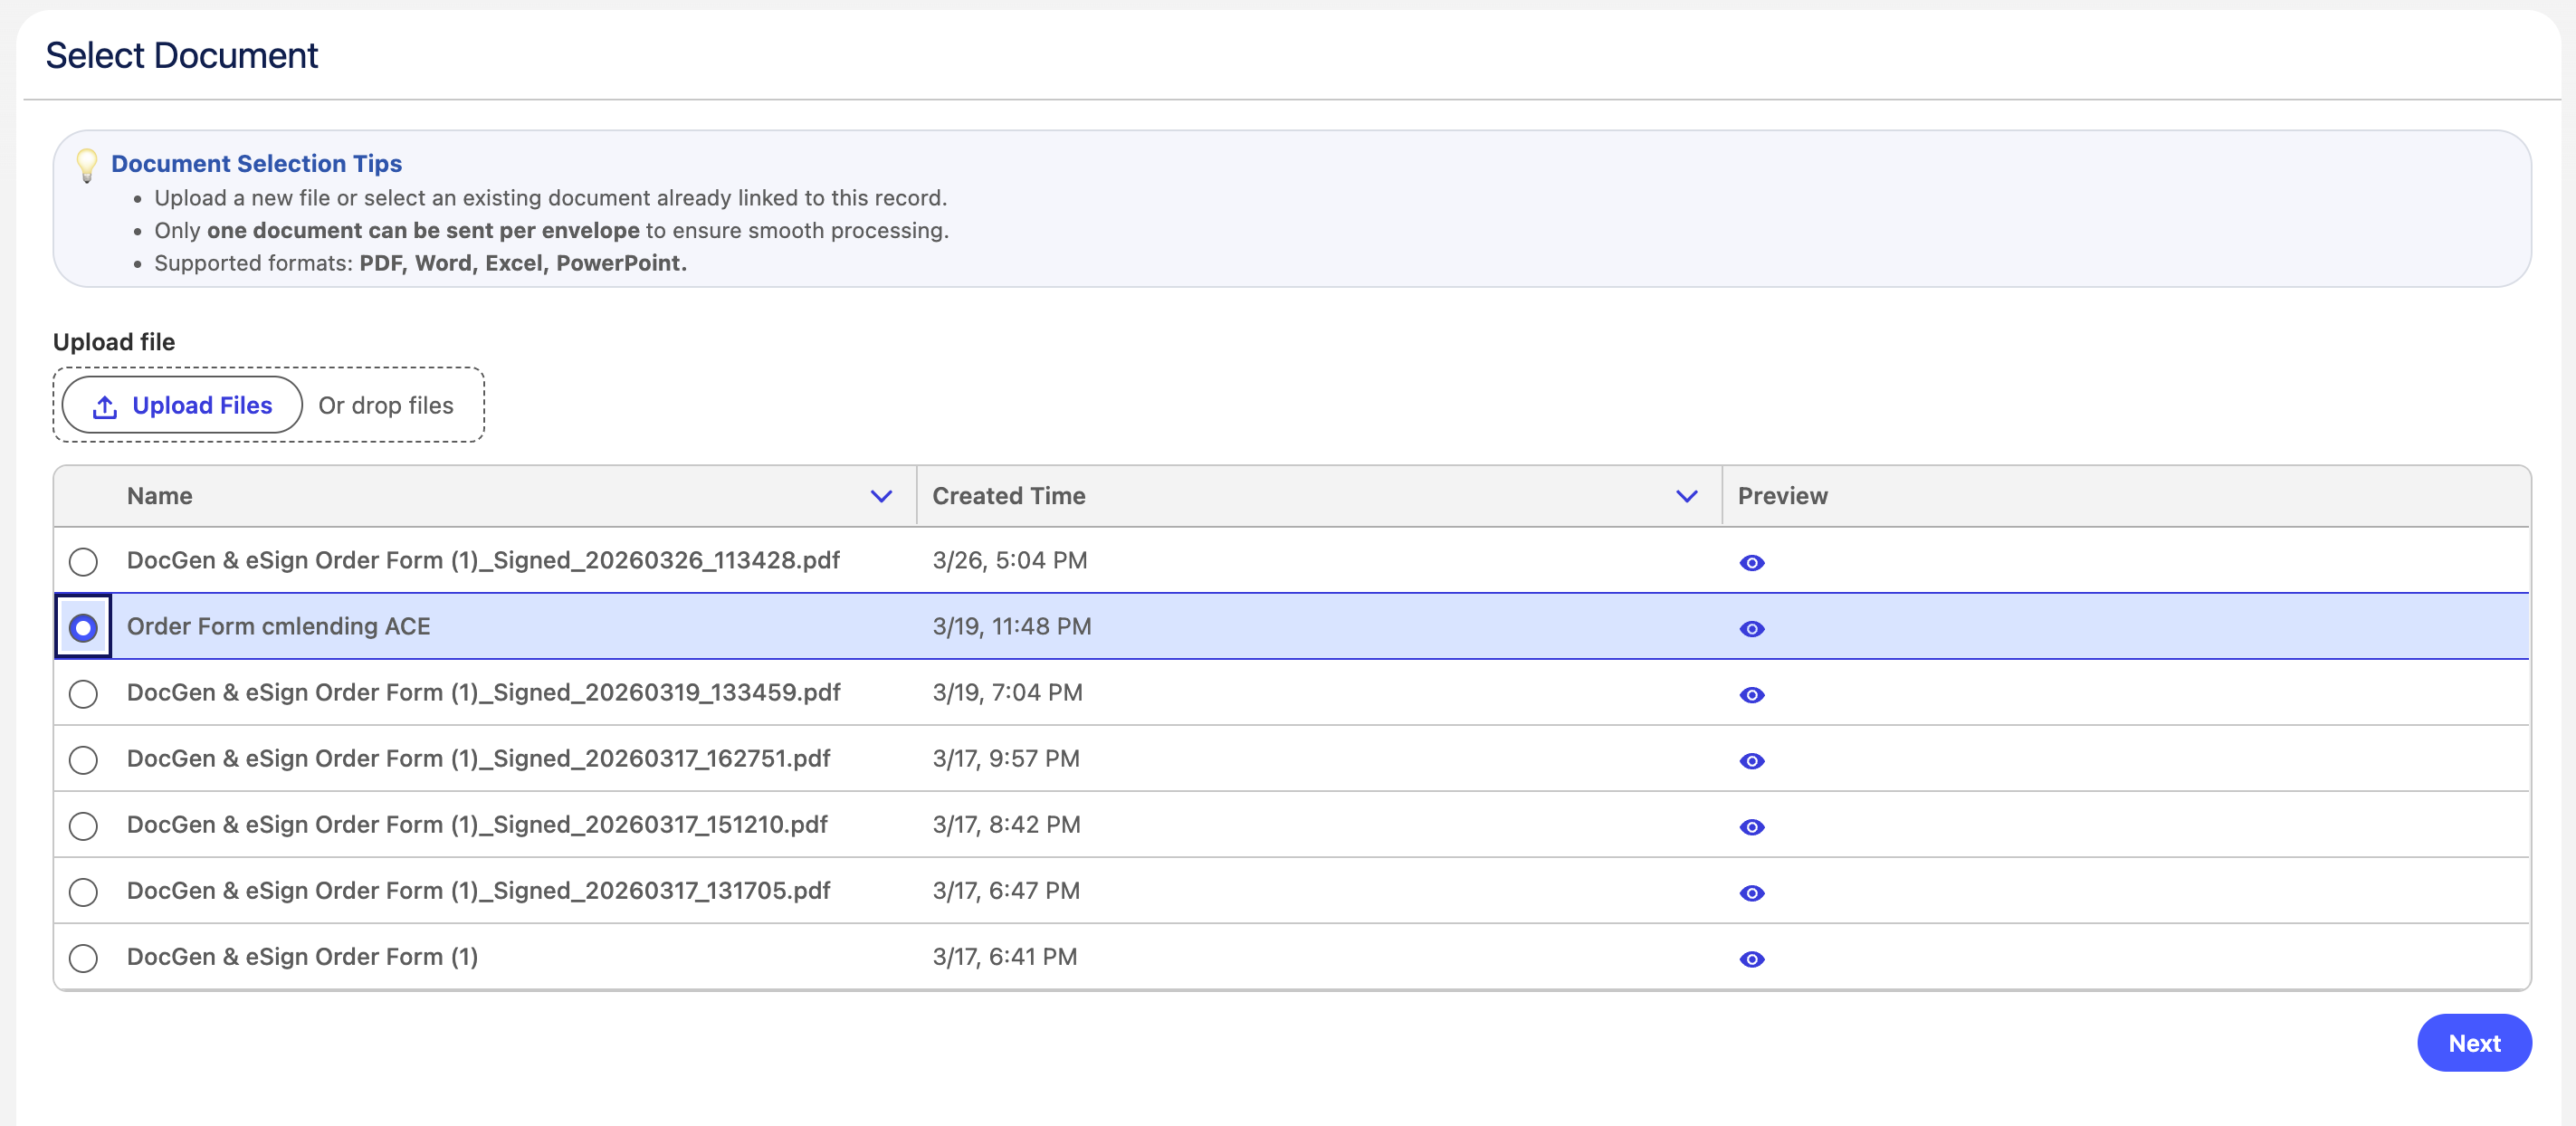
The first step is to select the document that you want to send for signing.
You can either:
-
Upload a document from your computer.
-
Select an existing Salesforce File associated with the record.
This allows you to send documents for signing without first creating a Document Template.
Example
You may use this option when you already have a completed:
-
Loan agreement
-
Contract
-
Application
-
Disclosure
-
Authorization form
-
Other business document
that needs to be signed.
Once the document is selected, proceed to configure the recipients.
Configure Signers
Add the people who need to sign the document.
For each signer, provide the required information, such as:
-
Name
-
Email Address
-
Signing Order, when sequential signing is required
Signing Order
If multiple people need to sign the document, you can define the order in which they receive the document.
For example:
Signer 1 → Signer 2 → Signer 3
Signer 2 will receive the document only after Signer 1 completes their signing action.
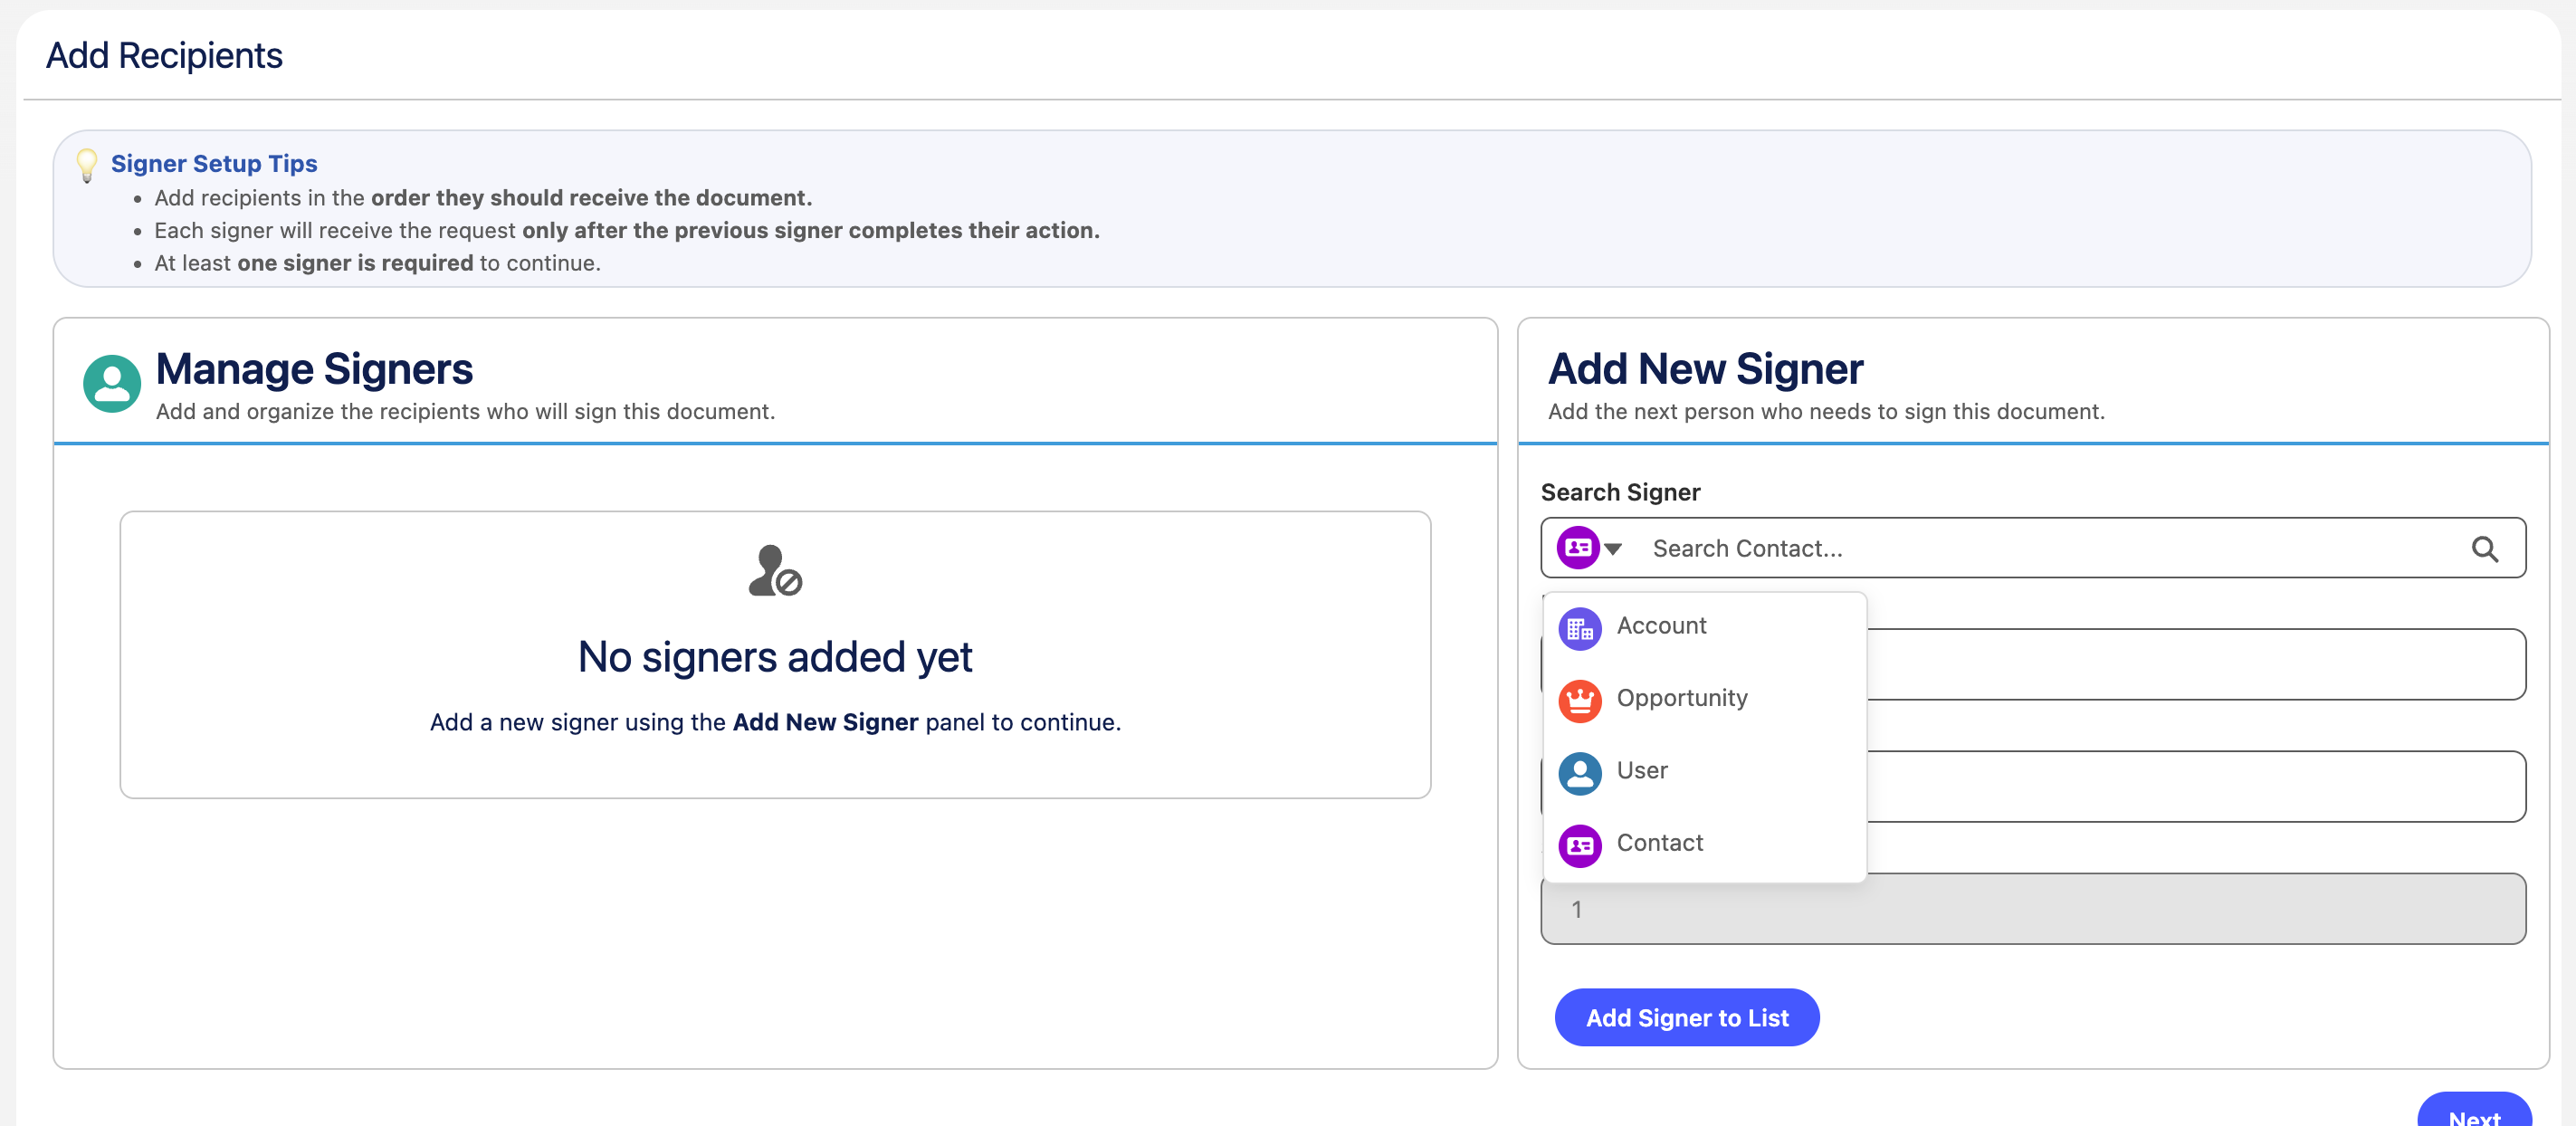
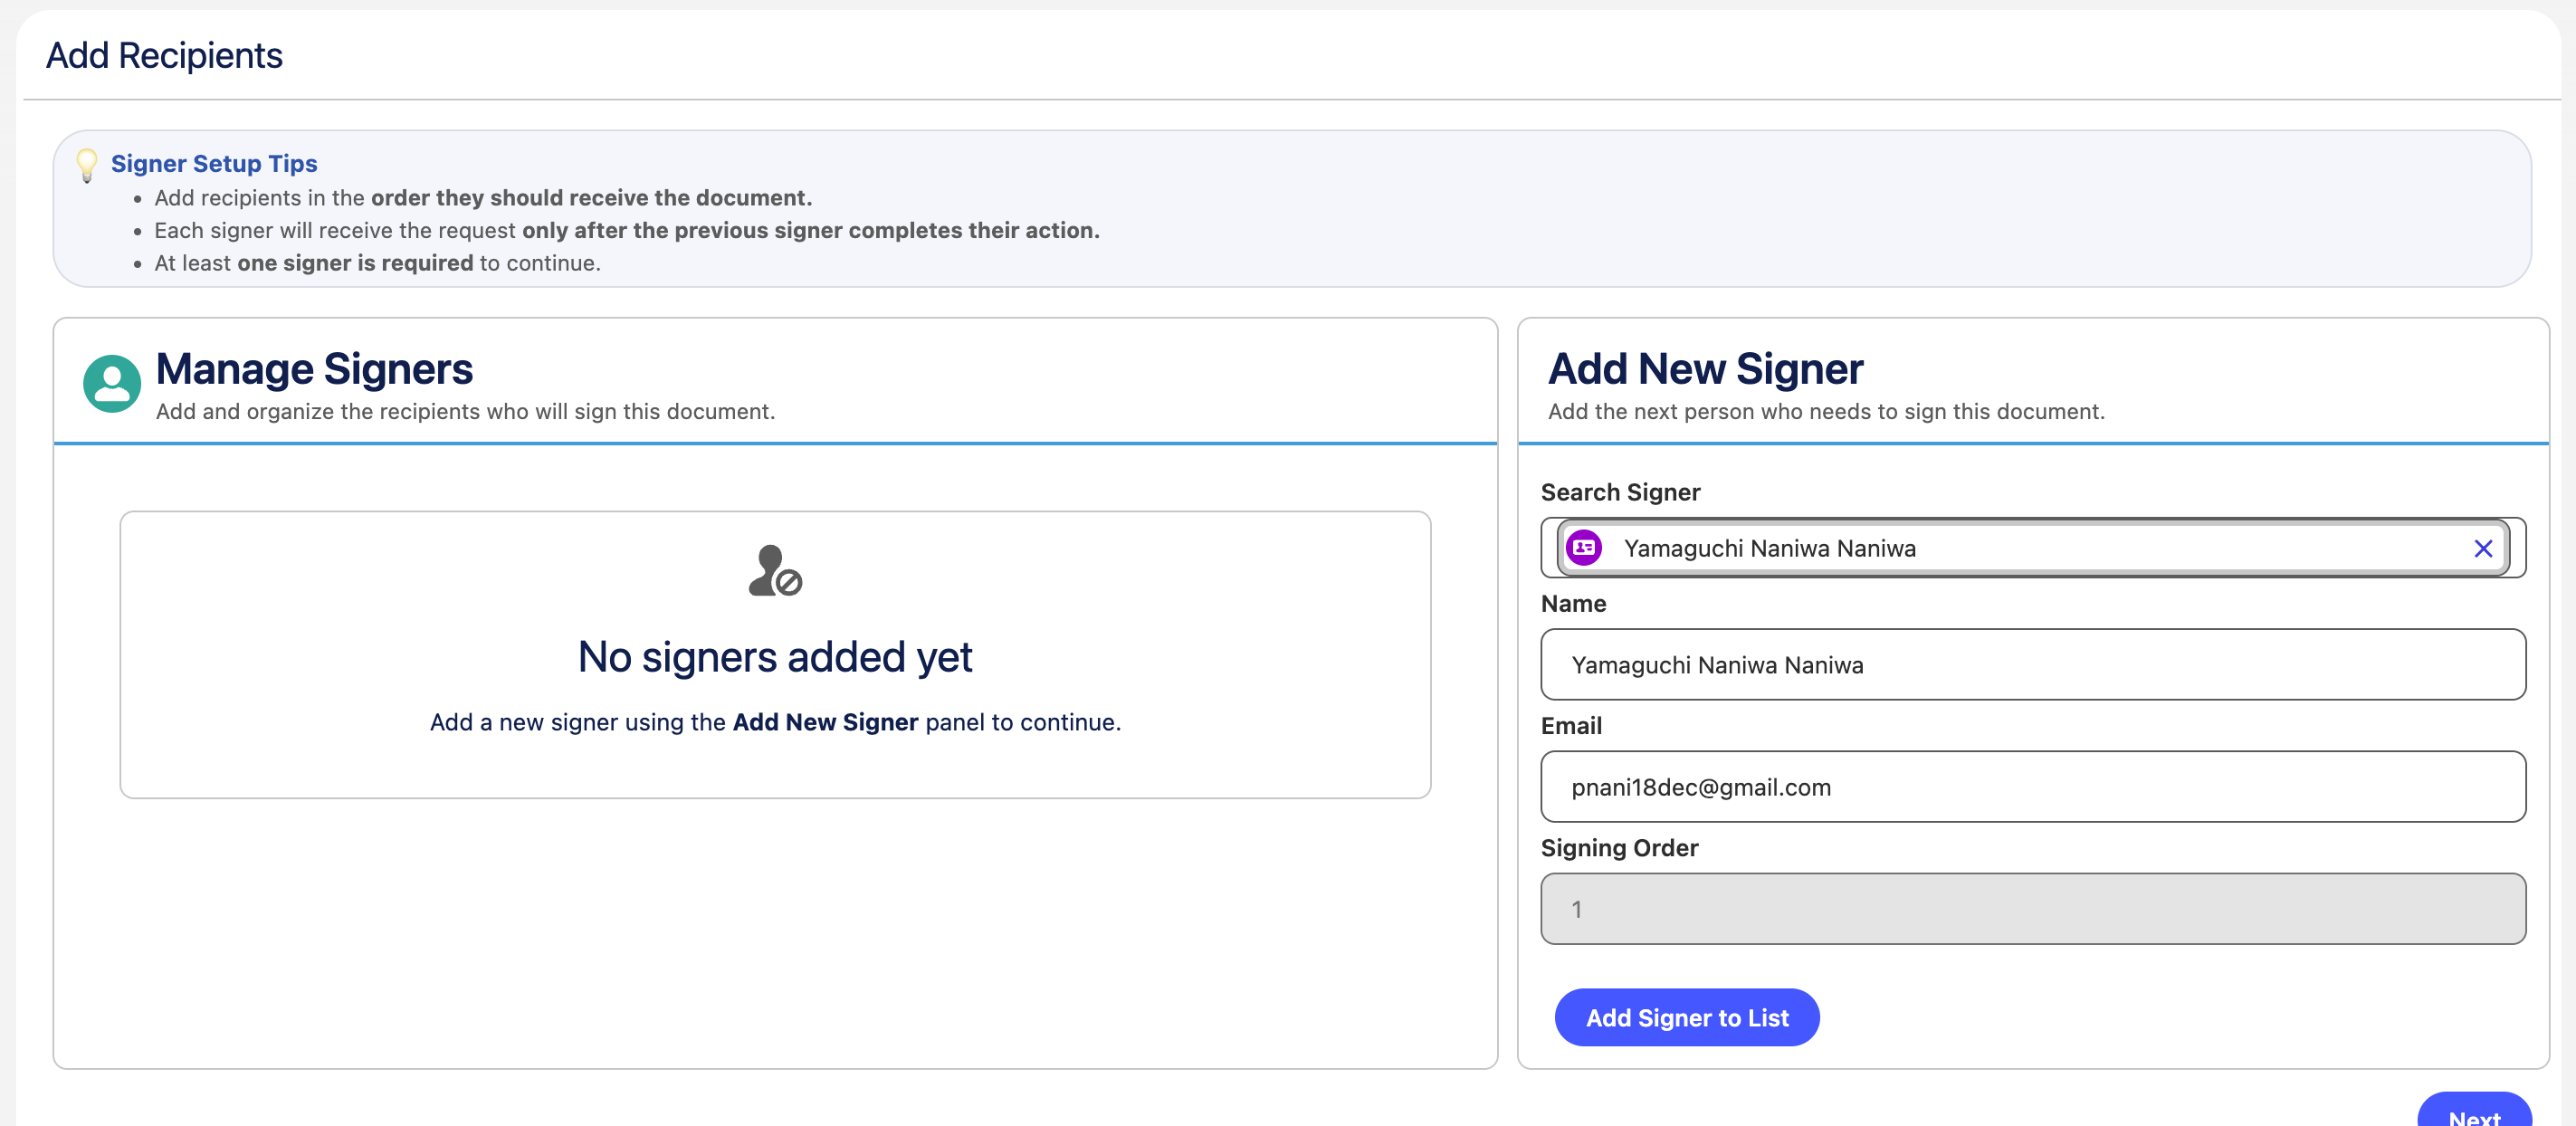
Note: The way signer information is retrieved or pre-populated may be configured based on your organization's business requirements.
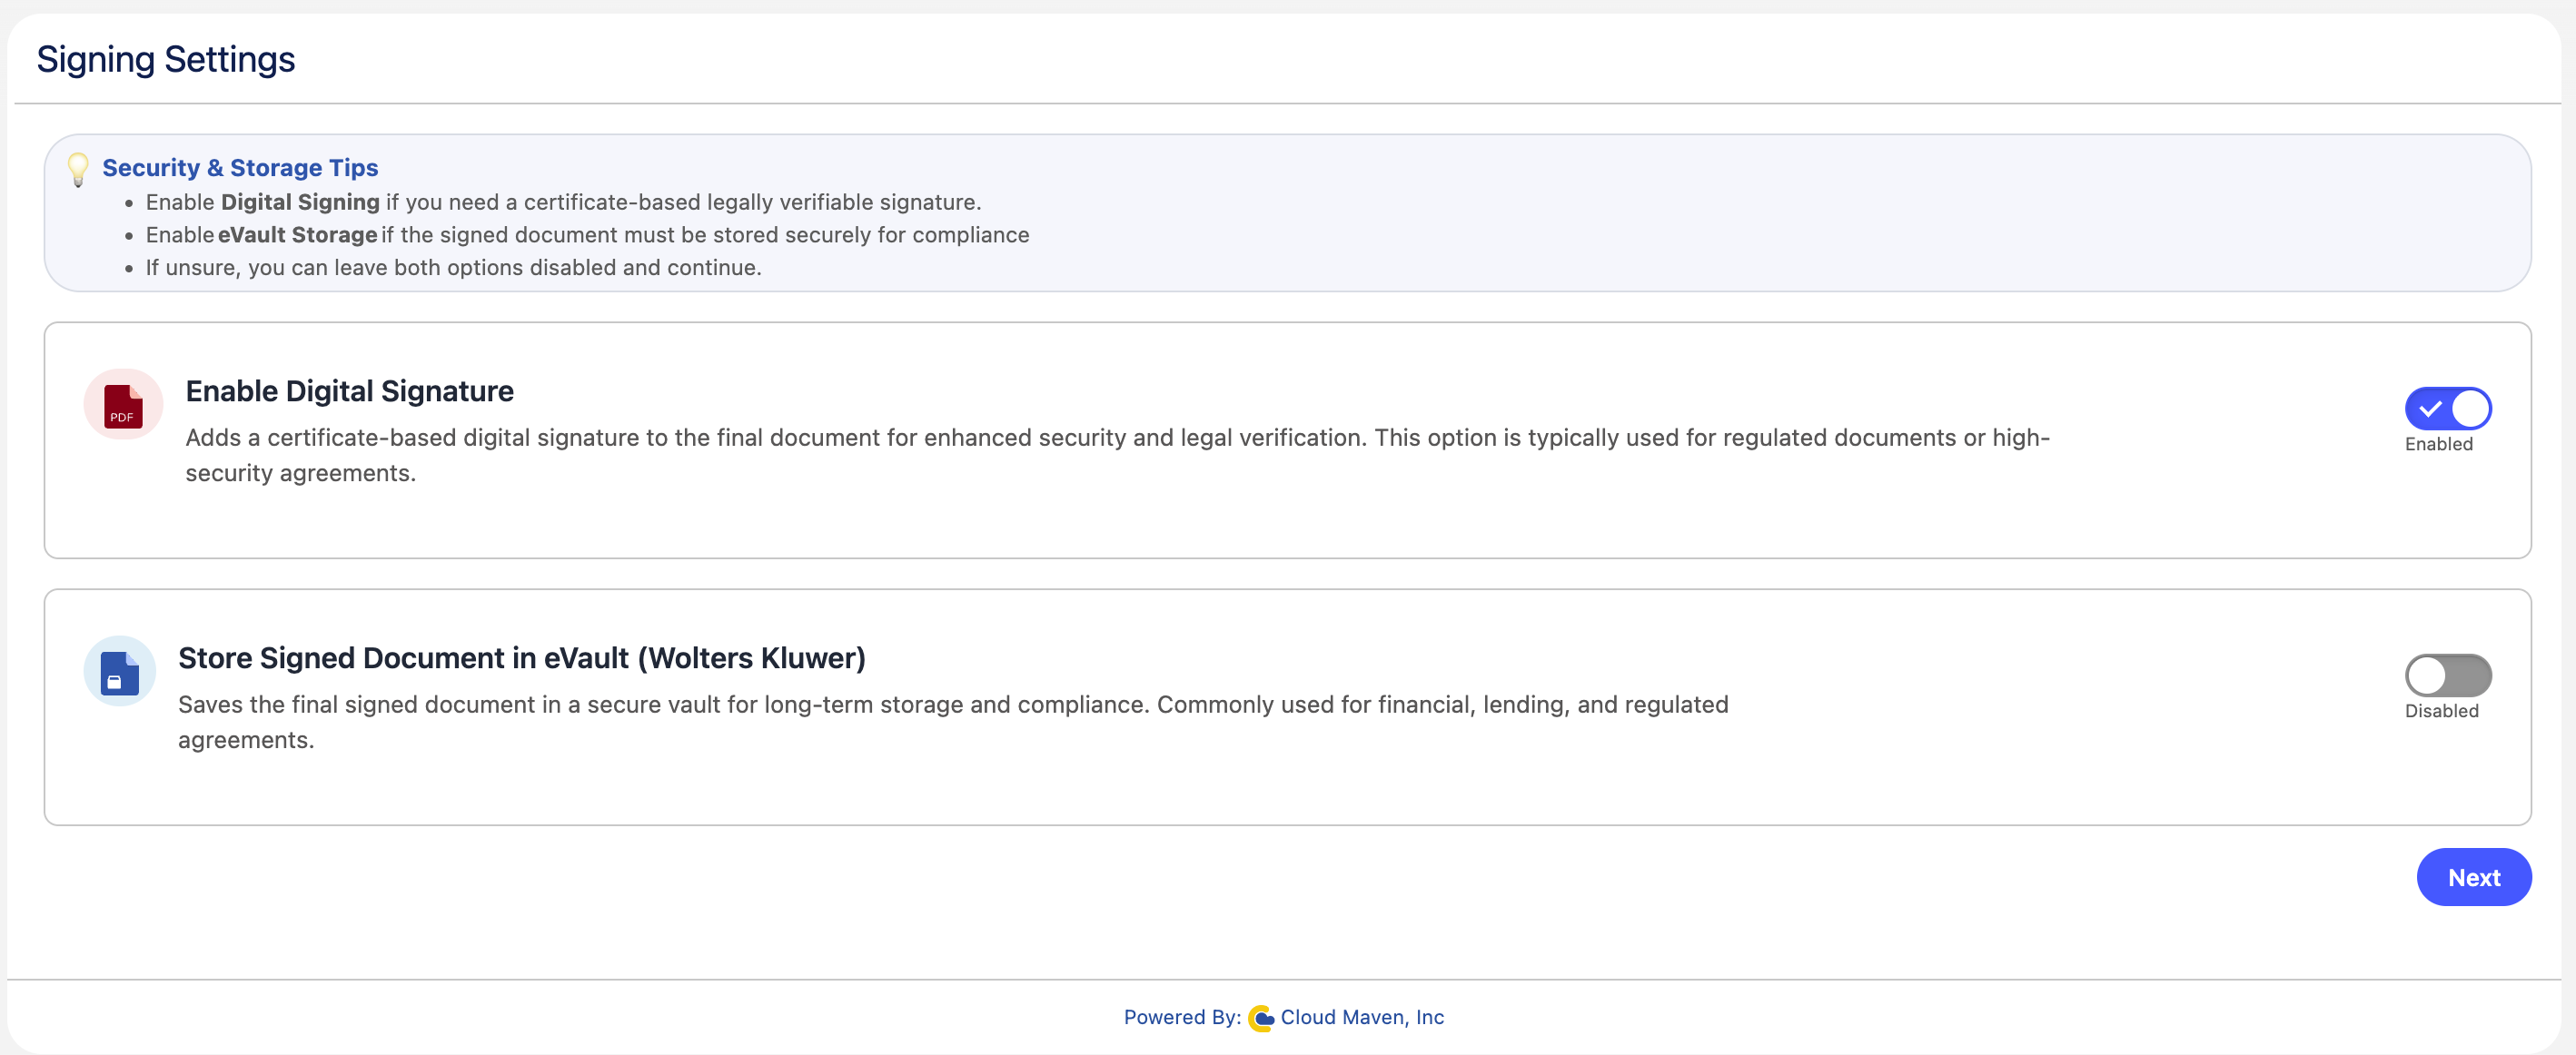
Digital Signature and eVaulting
Depending on your organization's configuration, additional options may be available for Digital Signature or eVaulting.
These features provide additional security and document management capabilities.
If these options are enabled, review and configure the available settings as required.
If they are not enabled, this step may be skipped automatically and you will proceed to document preparation.
Prepare the Document for Signing
After configuring the signers, prepare the document by adding the fields that the signers need to complete.
The document editor provides a drag-and-drop interface that allows you to place fields directly onto the document.
You can add fields such as:
-
Signature
-
Initials
-
Name
-
Date
-
Text
-
Checkbox
-
Dropdown
-
Internal Signature
Each field can then be assigned to the appropriate signer.
Learn how to create an editable PDF
Configure Field Properties
Select a field to open the Field Properties panel.
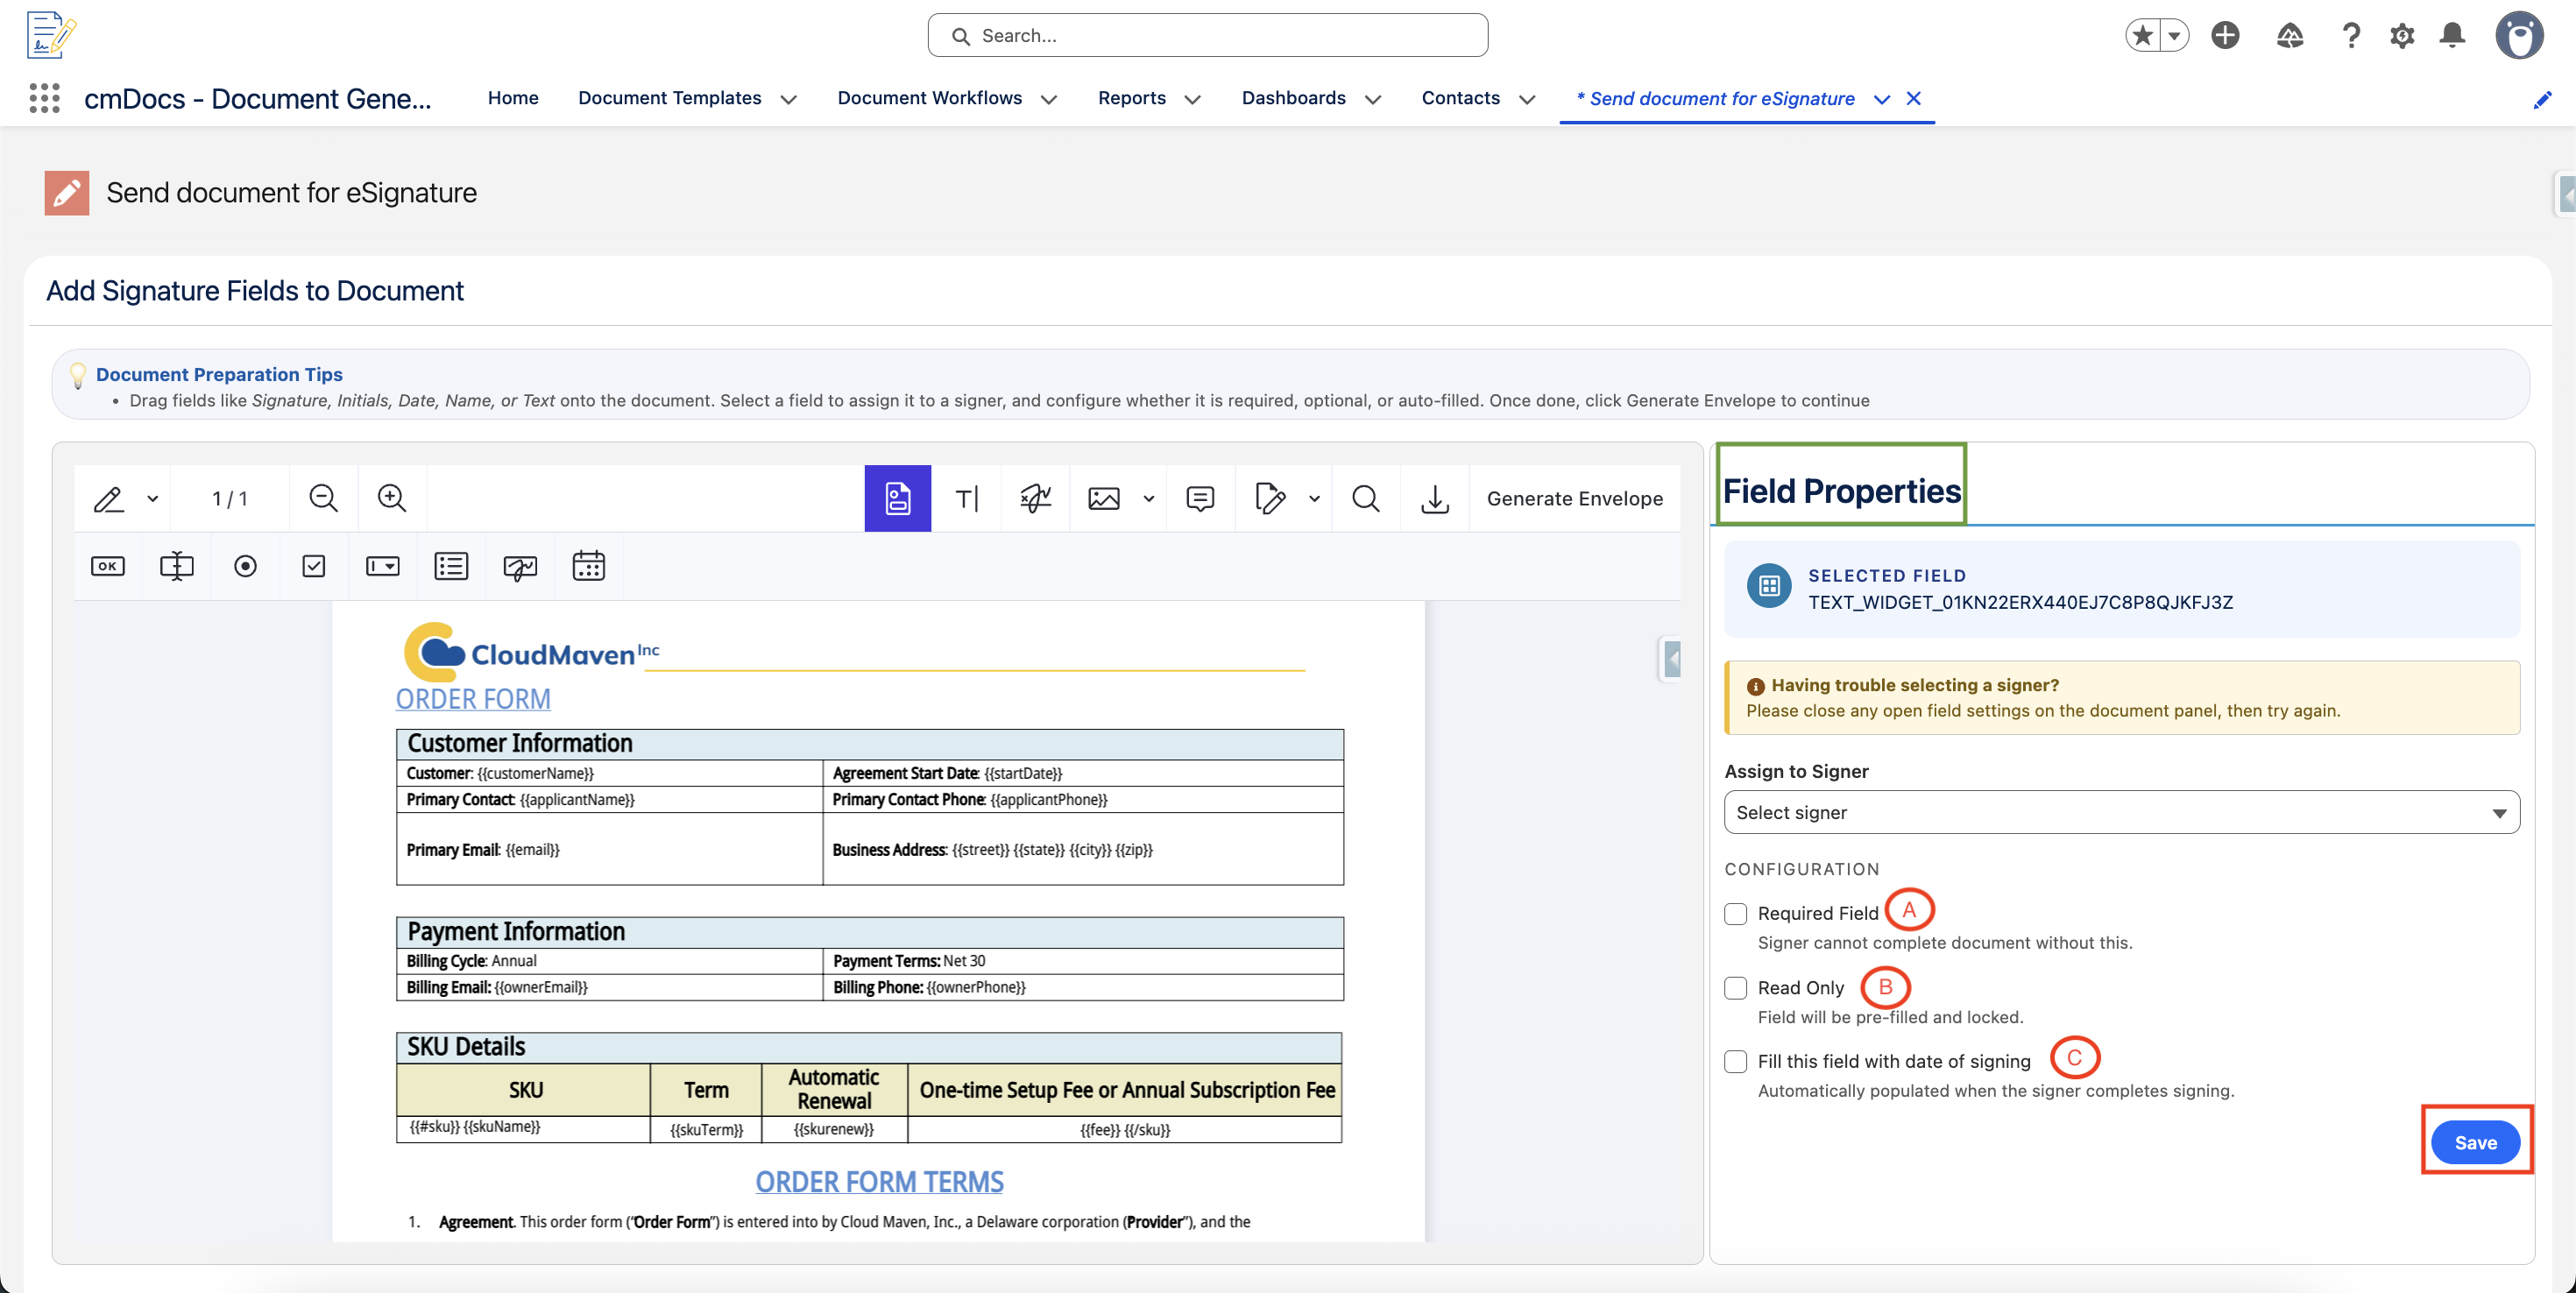
The available options may include:
Required Field
Enable Required Field when the signer must complete the field before submitting the document.
A signer cannot complete the signing process until all required fields assigned to them have been completed.
Read Only
Enable Read Only when the field should be visible to the signer but should not be editable.
This is useful for information that has already been populated or should remain unchanged.
Auto-Fill Date
Enable Auto-Fill Date (Date of Signing) to automatically populate the field with the date when the signer completes the signing process.
Important: When a field is required for one signer, the field is automatically treated as read-only for other signers to prevent unintended changes.
Assign Fields to Signers
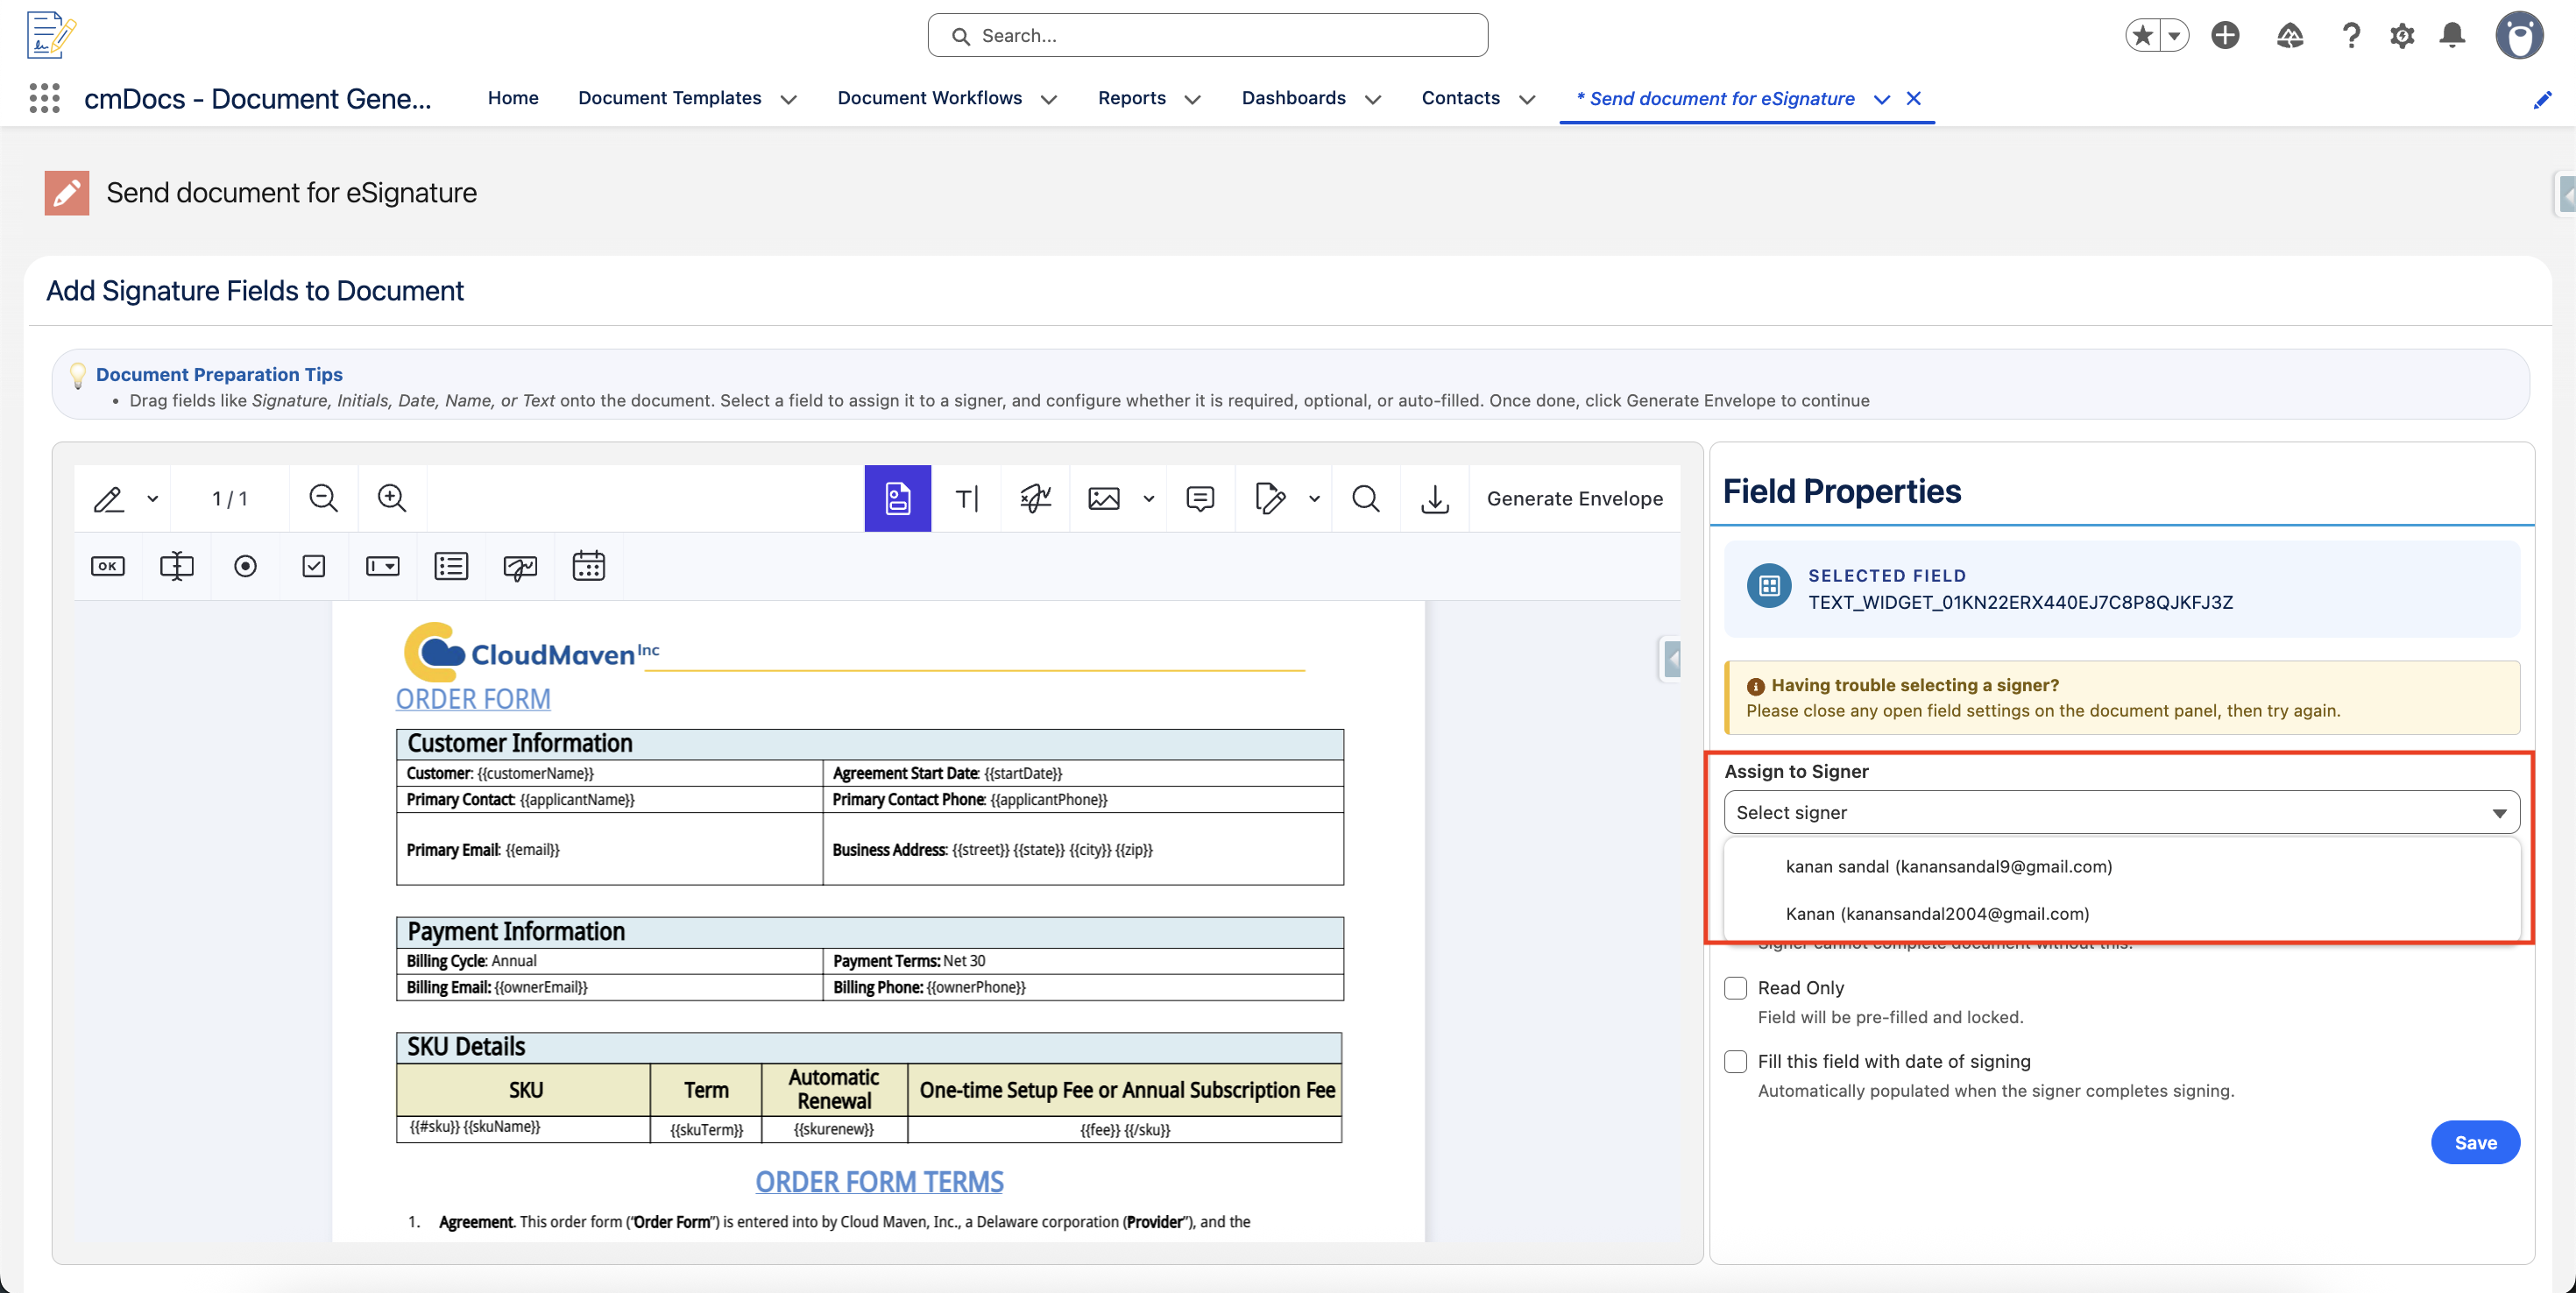
Each field must be assigned to the signer who is responsible for completing it.
Use the Assign to Signer dropdown in the Field Properties panel to select the appropriate signer.
The dropdown displays the configured recipients, including their email addresses.
Example
If the document has two signers:
-
John Smith
-
Sarah Johnson
You can configure the fields as follows:
|
Field |
Assigned To |
|---|---|
|
Borrower Signature |
John Smith |
|
Borrower Date |
John Smith |
|
Co-Borrower Signature |
Sarah Johnson |
|
Co-Borrower Date |
Sarah Johnson |
Only the assigned signer will be able to interact with their fields during the signing process.
Important
-
Make sure every required field is assigned to the correct signer.
-
Review all fields before sending the document.
-
Use Required for fields that must be completed.
-
Fields assigned to one signer are read-only for other signers.
Review the Document
Before sending the document, review the complete document to ensure:
-
All required fields have been added.
-
Signature fields are positioned correctly.
-
Each field is assigned to the correct signer.
-
Required fields are configured correctly.
-
Signing order is correct.
-
The document content is complete.
This review helps prevent errors after the document has been sent to the recipients.
Send the Document for Signing
Once the document is prepared, proceed to the Send Document step.
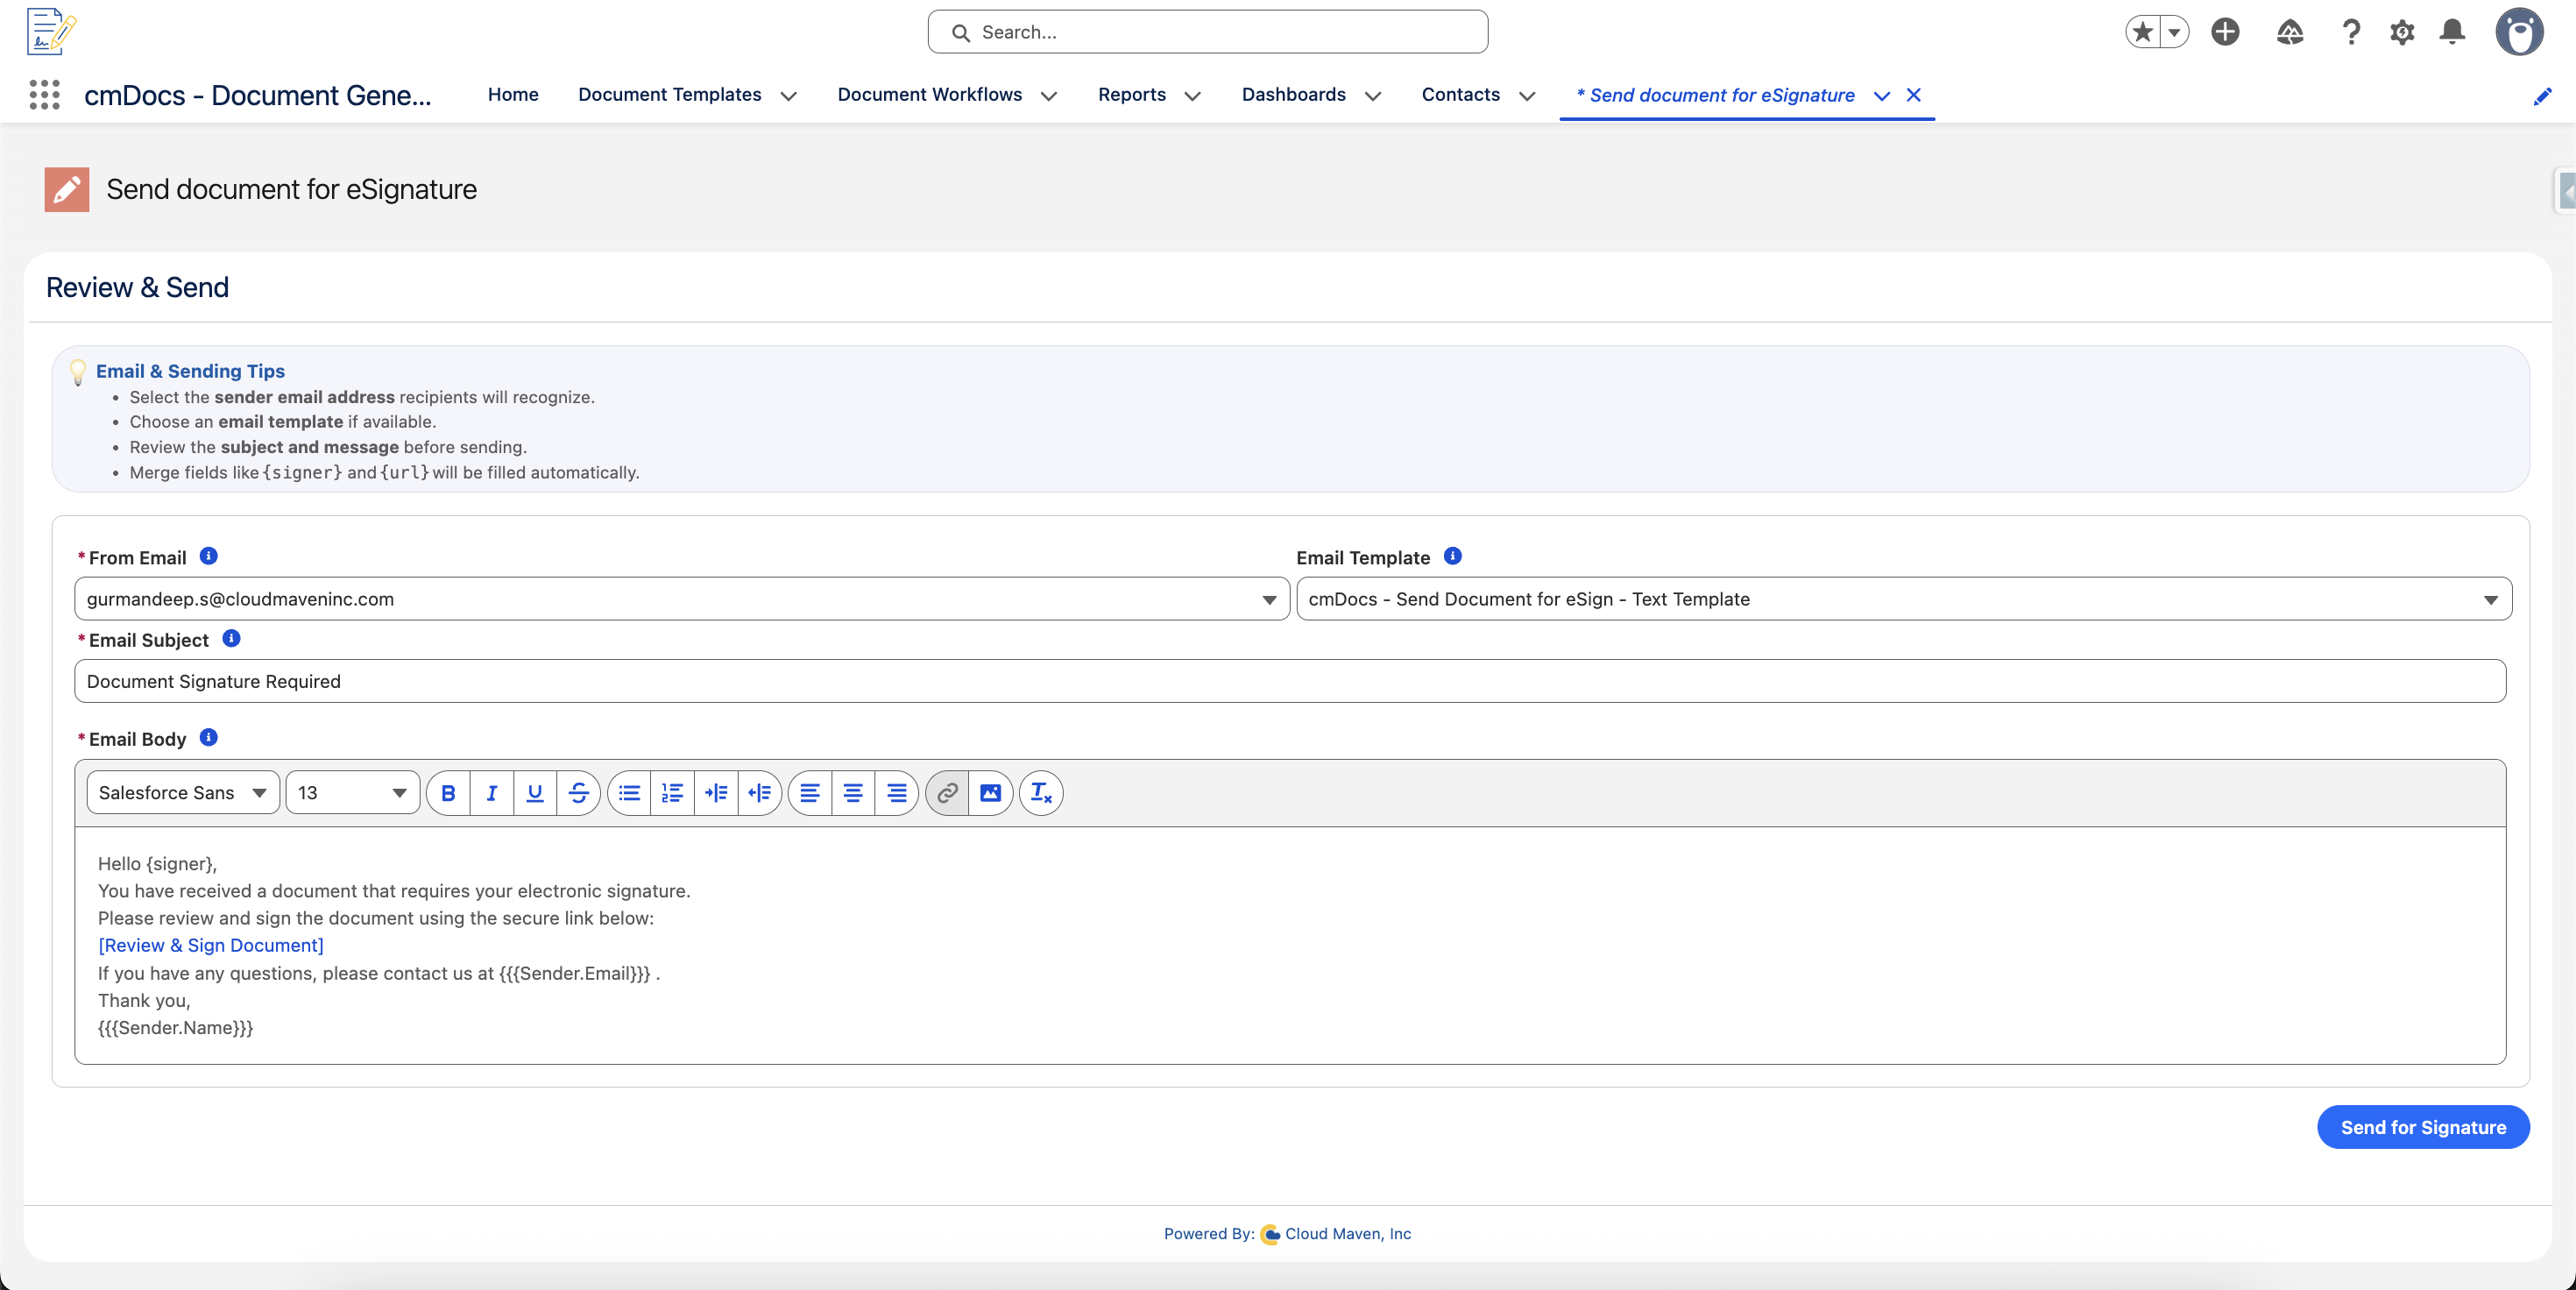
You can review and customize the email that will be sent to the signers.
Depending on the configuration, you may be able to customize:
-
Email subject
-
Email message
-
Email template
After confirming the details, click Send.
The document is sent to the configured signers through a secure signing workflow.
Each signer receives an email containing the signing request and can access the document using the provided signing link.
Customize the Signing Email
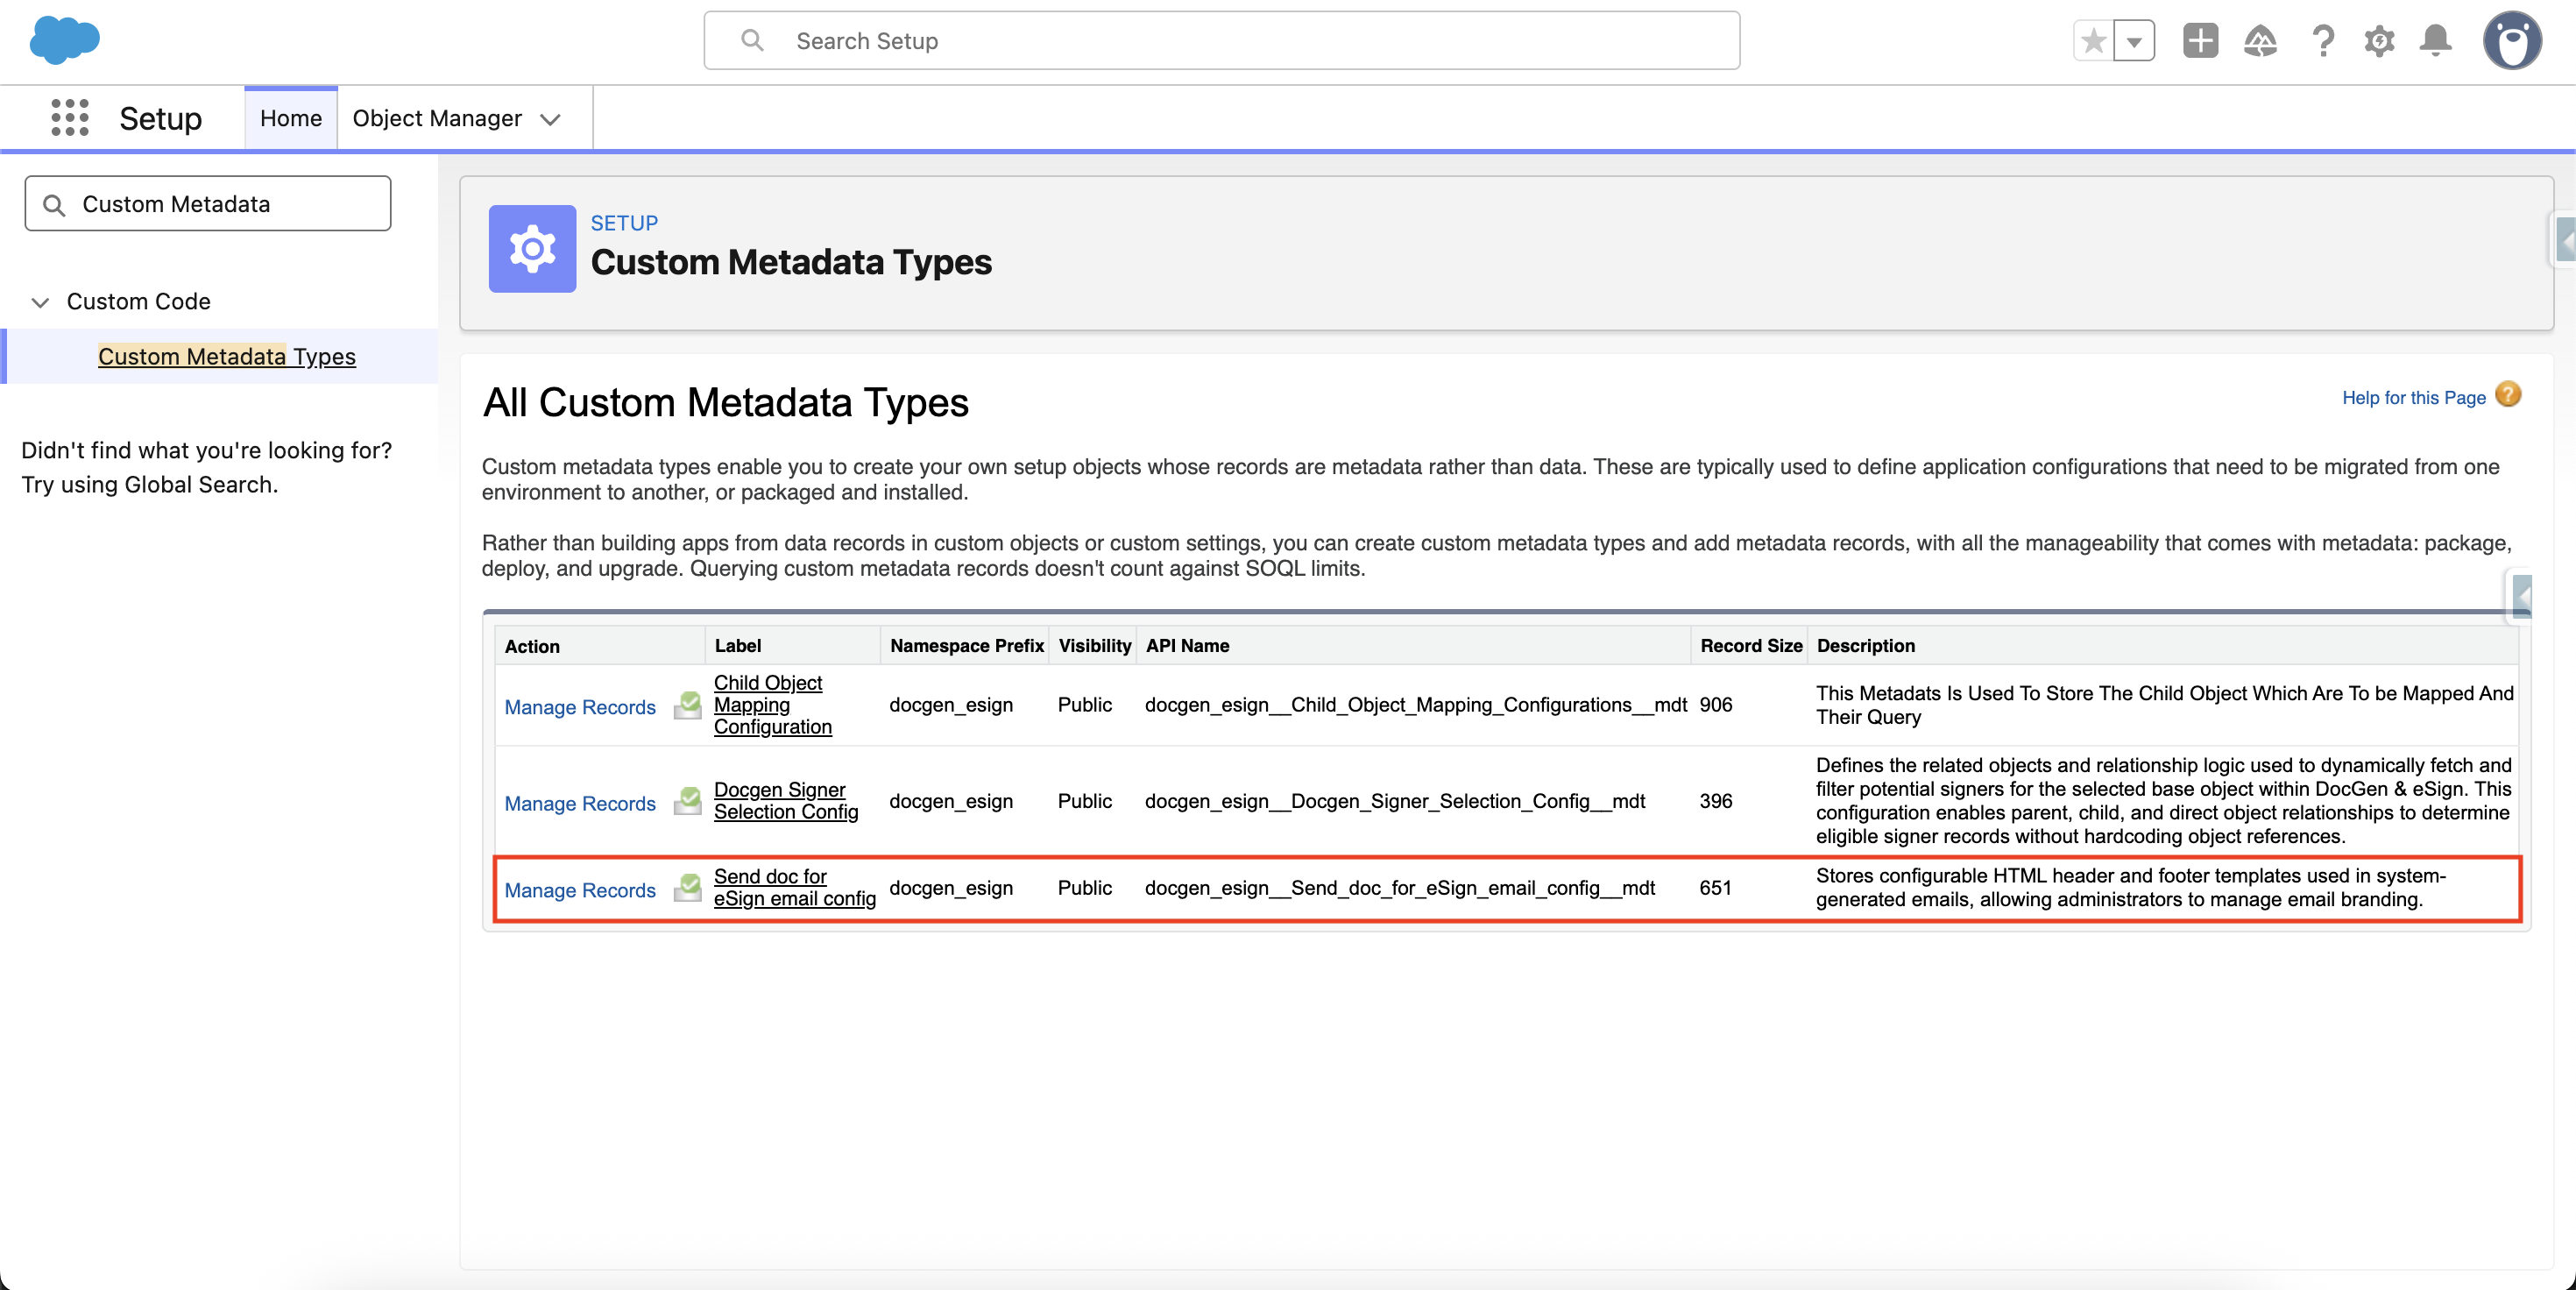
Organizations can customize the email content used when sending documents for eSignature.
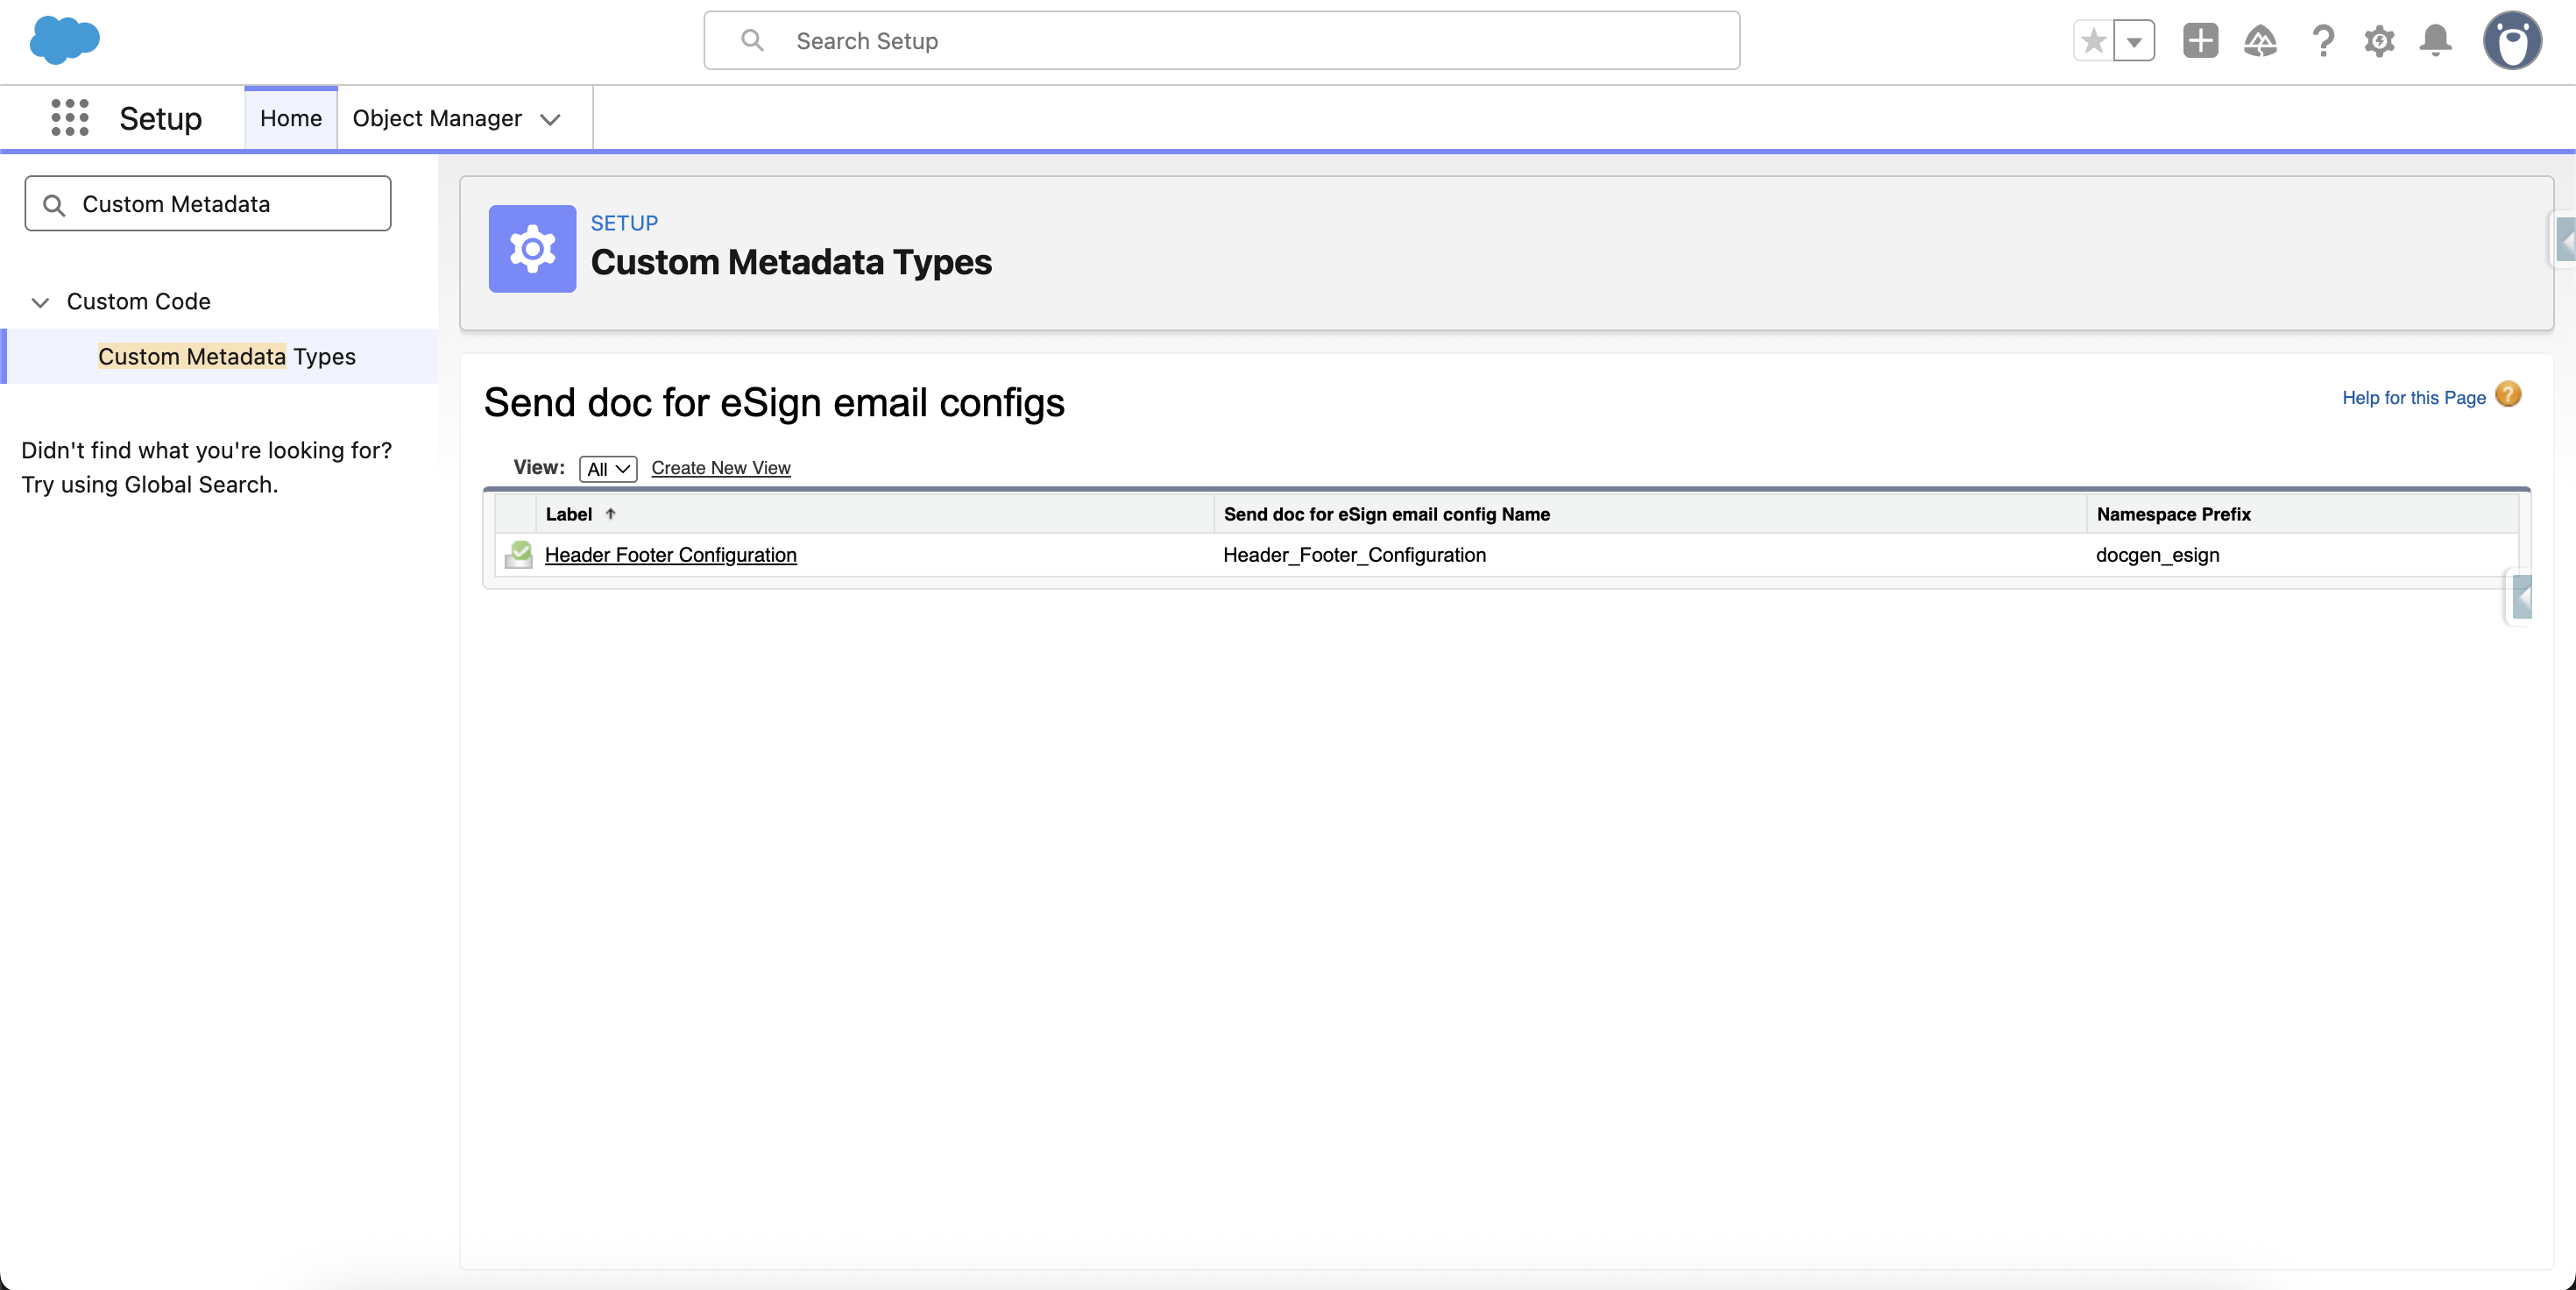
Administrators can configure the email header, footer, and content to match the organization's branding.
To configure the email:
-
Go to Setup.
-
Navigate to Custom Metadata.
-
Open Send Doc for eSign Email Config.
-
Click Manage.
-
Open Header Footer Configuration.
-
Click Edit.
-
Update the required HTML content.
-
Save the configuration.
Custom Email Templates
Organizations can also create custom email templates using the DocGen & eSign Classic Email Templates folder.
When creating a template, ensure that the template is created as a Text email template to maintain compatibility with the eSignature workflow.