
1. Overview
The Payment Console allows direct payment processing from within Salesforce. Users can instantly capture payments, schedule them for future dates, or set up recurring payments—all from a unified screen.
2. Log In to Salesforce
➡ Access your Salesforce org with the appropriate credentials.
3. Navigate to the Source Record
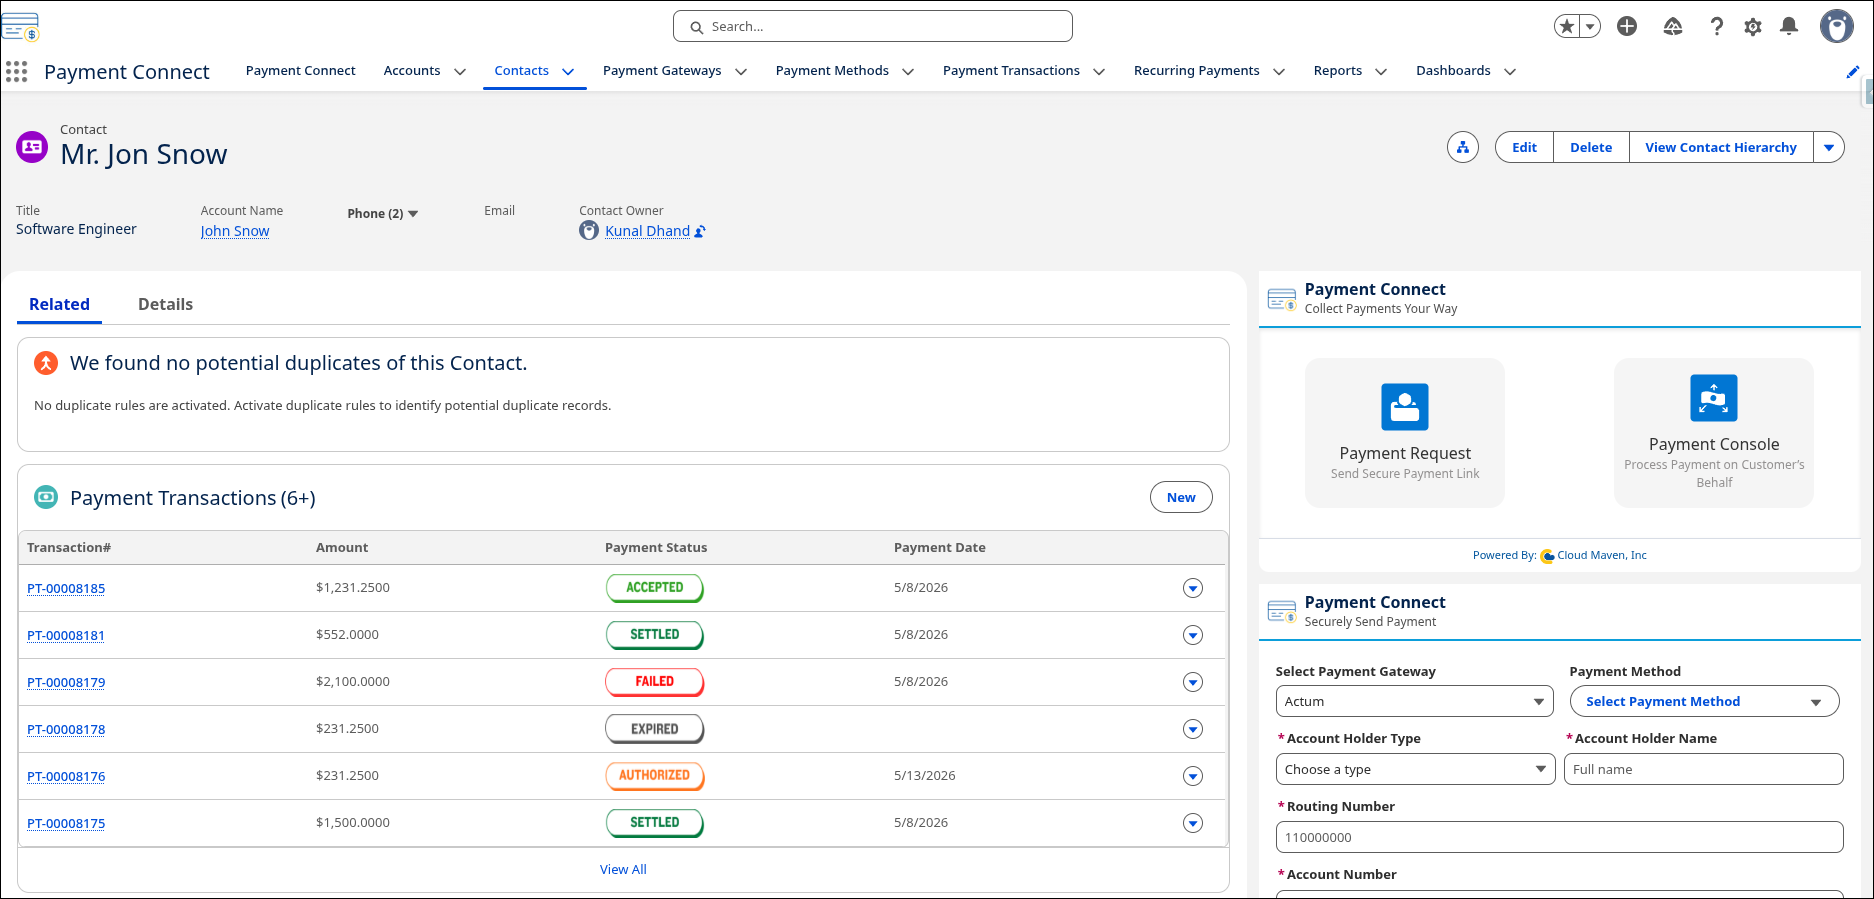
Open existing record or create a new one
-
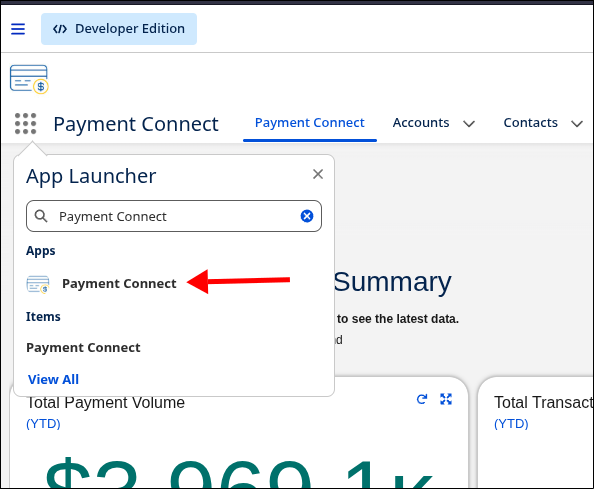
Go to the Payment Connect App
-
Search for the Record from where you want to initiate the Search.
4. Steps to Use Payment Console
-
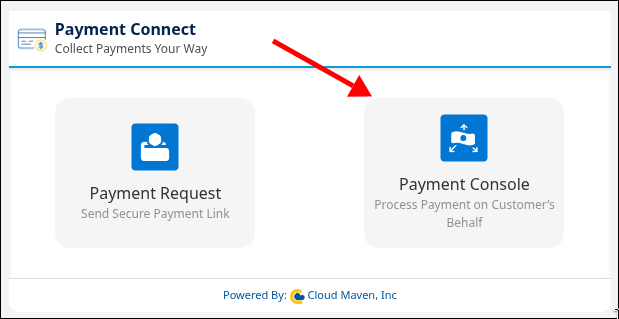
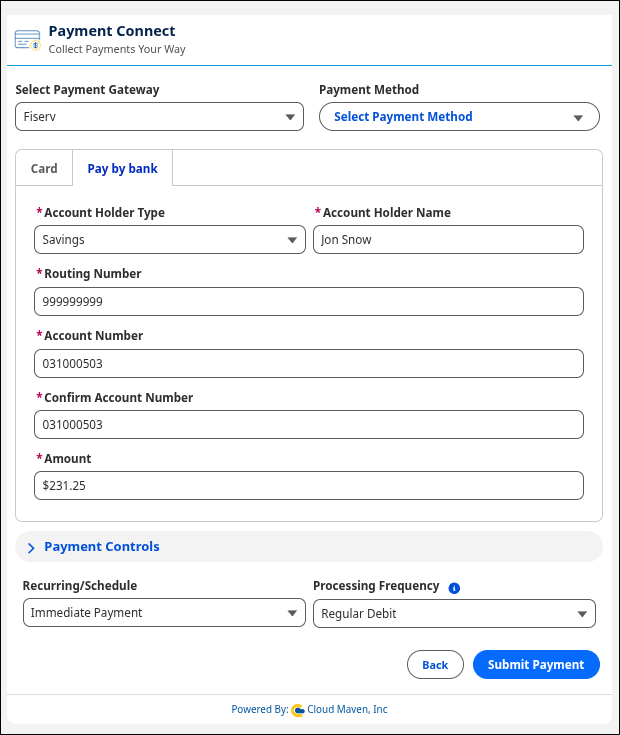
Navigate to the Payment Console screen.
-
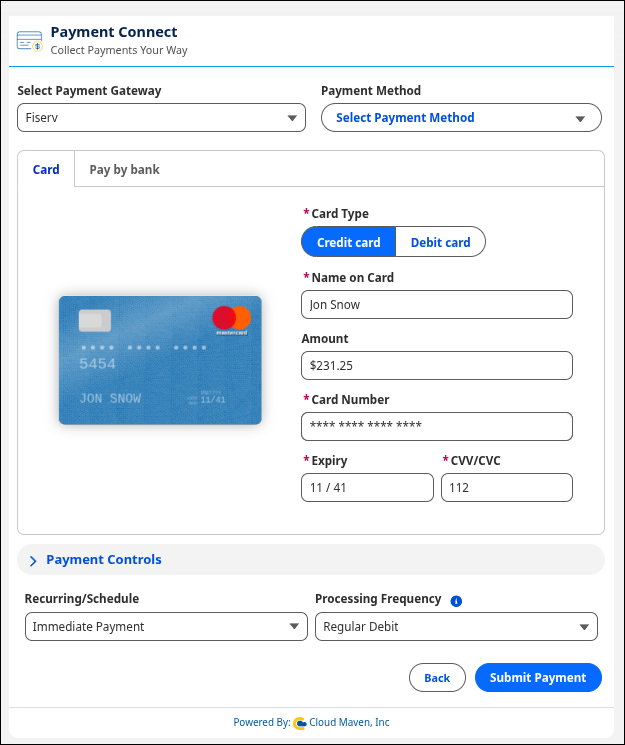
Select the Payment Gateway from the dropdown. The gateway marked as default is auto-selected.
-
Select the Payment Method Type (e.g., Card or Pay by Bank (ACH)).
-
Card Payment Screen
Allows users to input card details (number, expiry, CVV). -
Pay by Bank Screen
Accepts bank routing and account number.
-
|
|
|---|
The billing address is optional and can be hidden based on the payment gateway configuration.
-
Click Submit Payment.
-
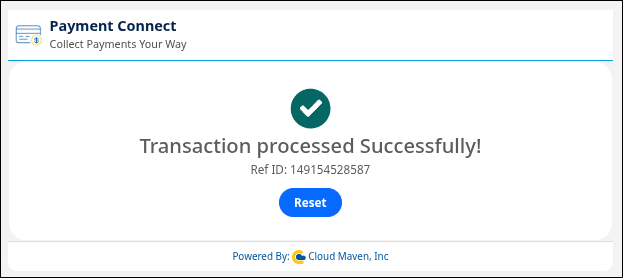
After the successful payment, a Payment Complete screen is shown with the reference ID
5. What Happens in Salesforce
When a payment is submitted from the Payment Console, different types of Salesforce records and statuses are managed based on the selected payment option: Immediate, Scheduled, or Recurring.
5.1 Payment Transaction Record Created
-
A new Payment Transaction record is created for every payment action.
-
It includes:
-
Amount
-
Payment Method (Card or Bank)
-
Payment Date
-
Payment Status
-
Tracking ID
-
5.2 Payment Status
-
If the payment is submitted and processed immediately:
-
Payment Status is set to
Accepted/Captured.
-
-
If the payment fails:
-
Payment Status is set to
Failed. -
The failure reason is captured in the Gateway Error Message field.
-