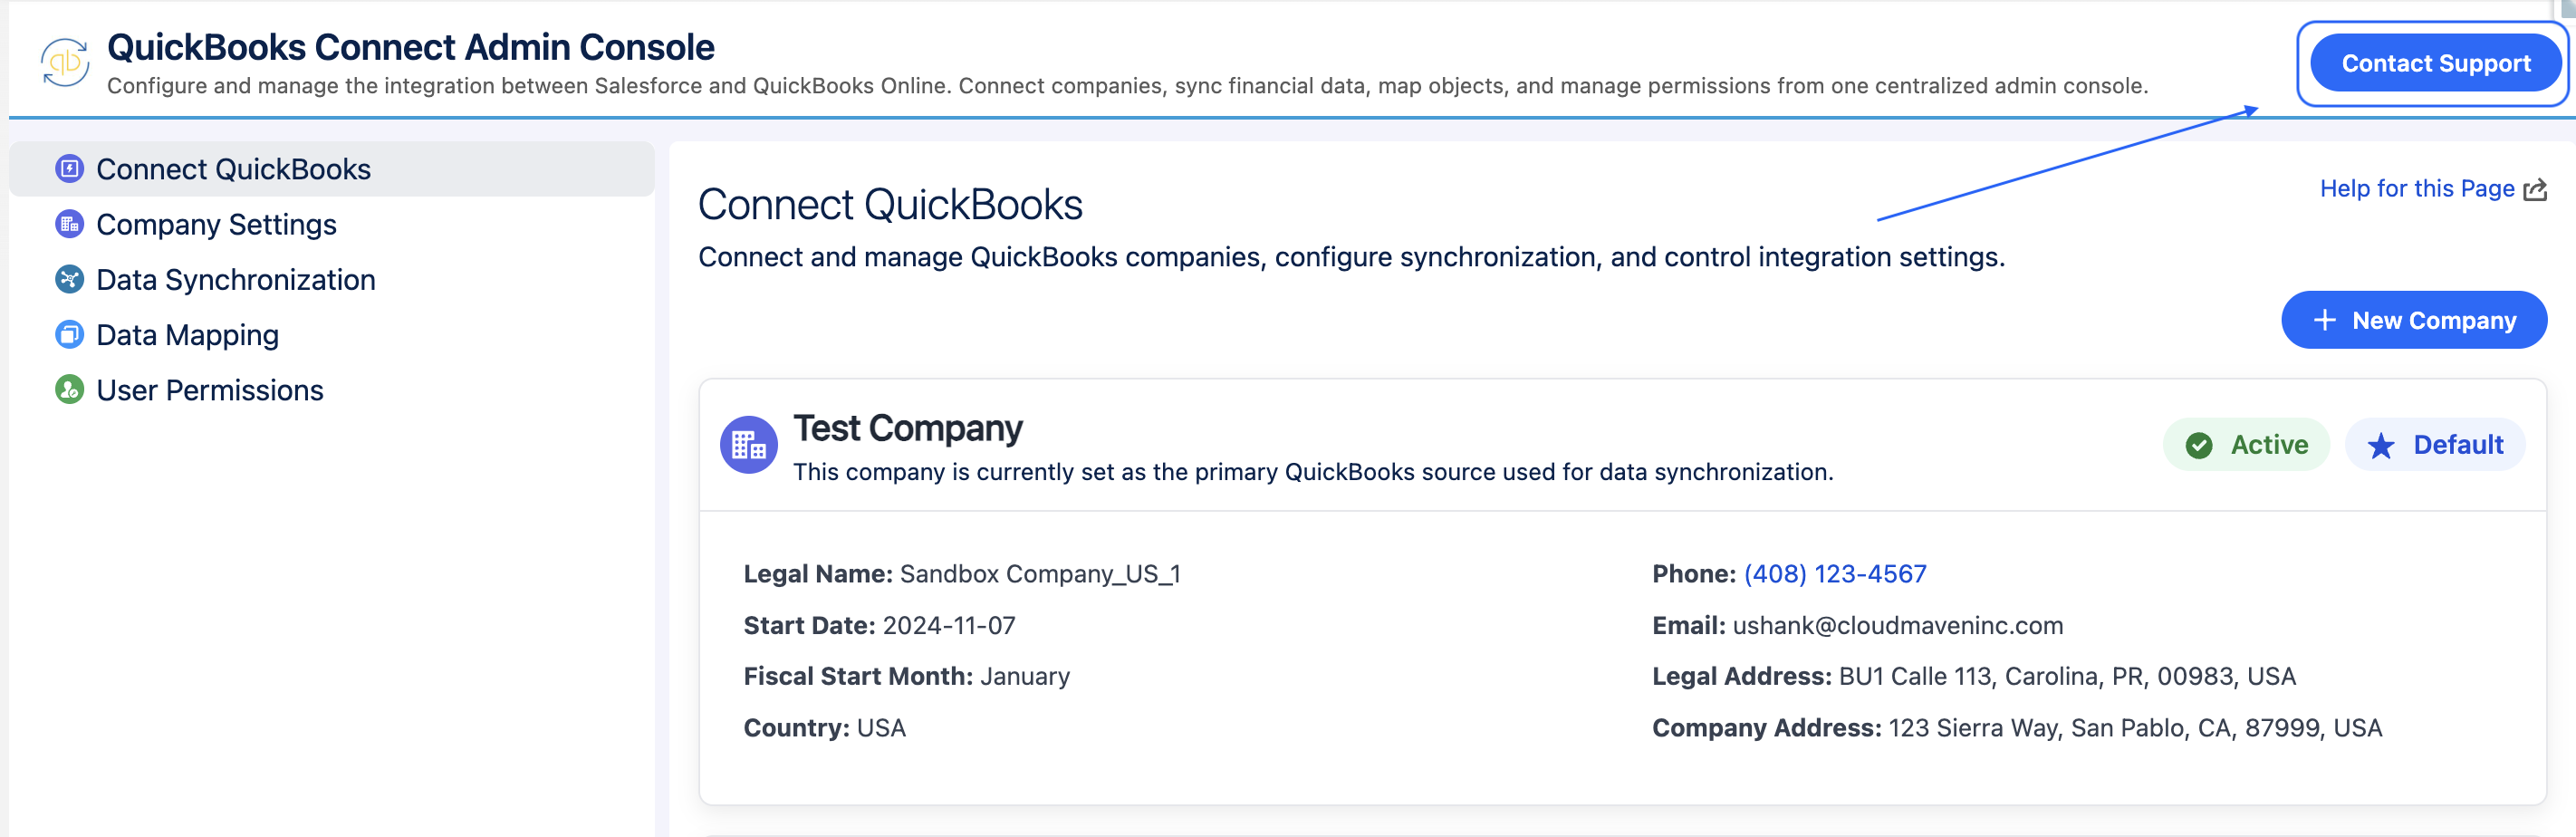
1. Login to Salesforce
Begin by logging into your Salesforce organization.
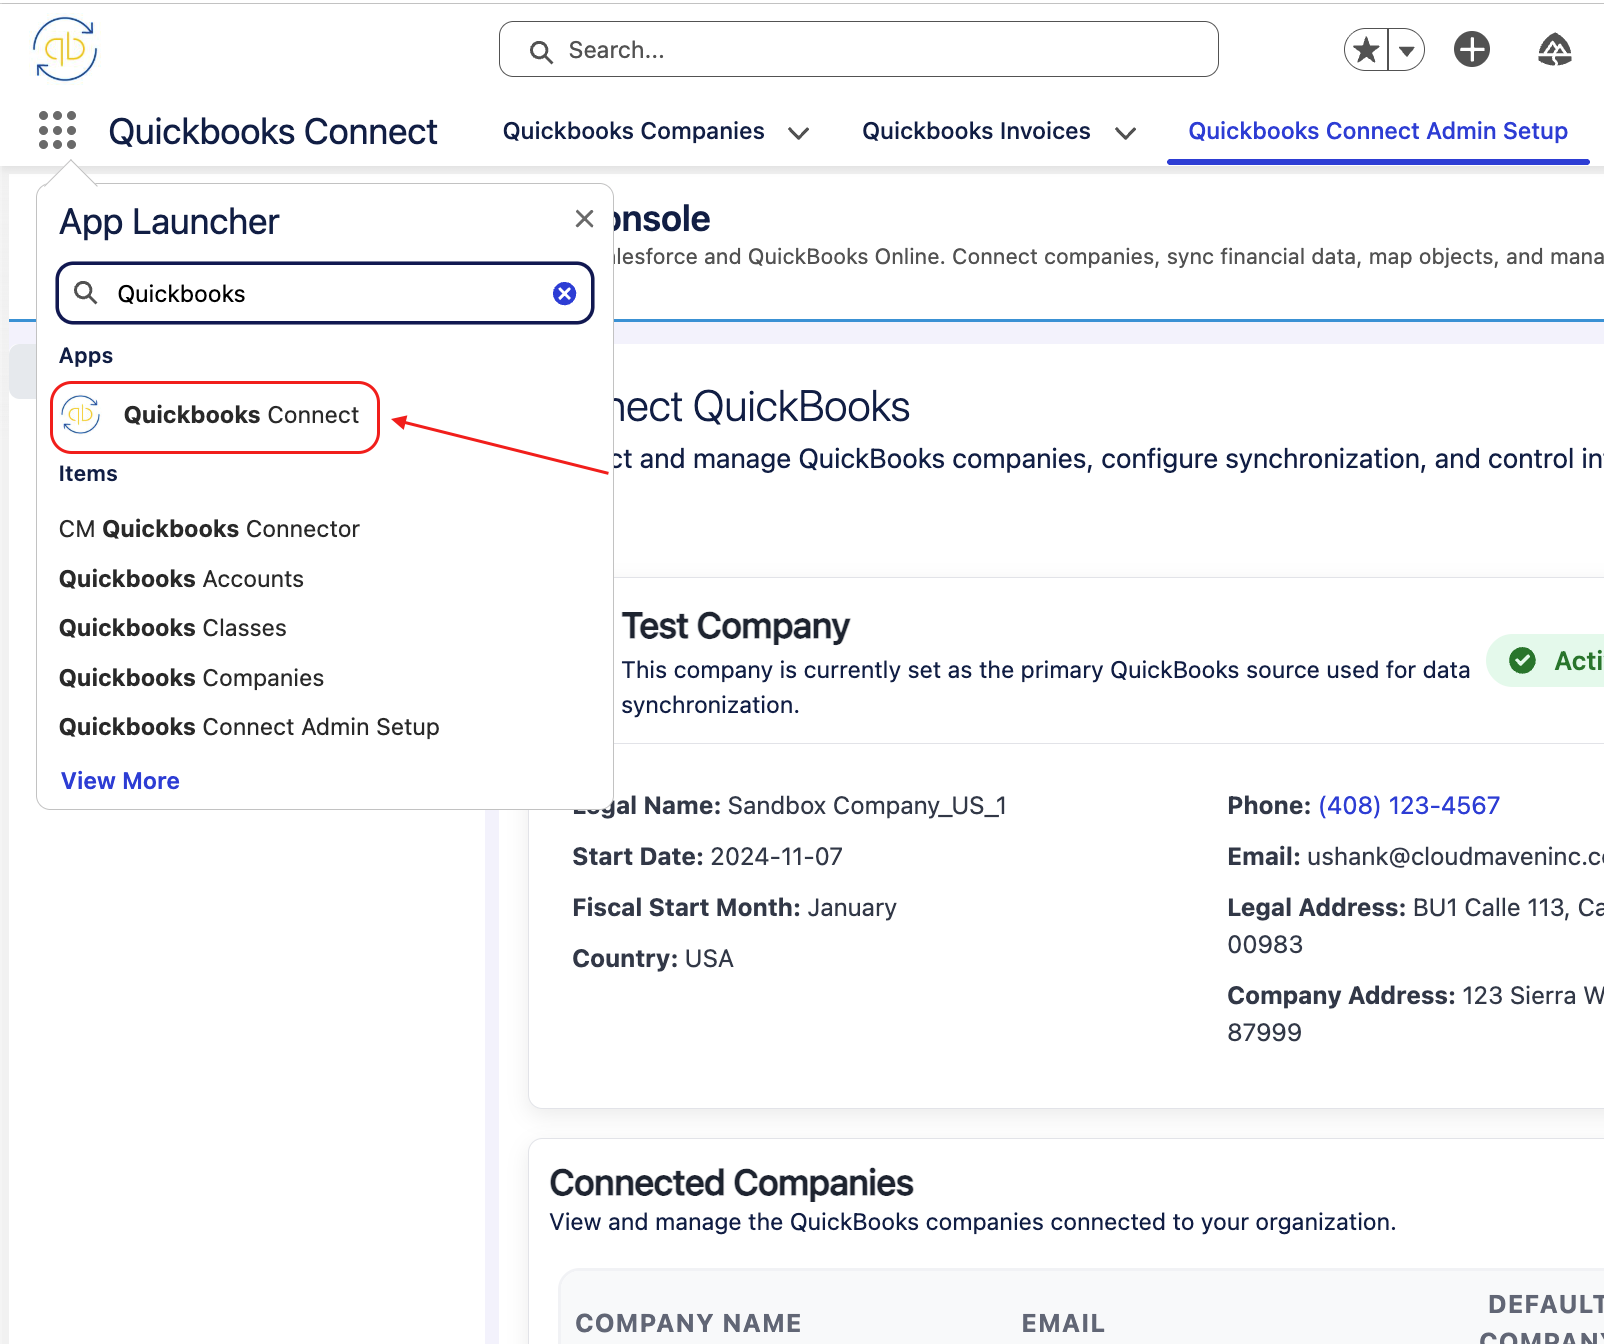
2. Accessing the QuickBooks Connect App
Navigate to the QuickBooks Connect app from your Salesforce dashboard.
3. Connecting to QuickBooks
Once inside the QuickBooks Connect app, you will be able to connect to QuickBooks. The following steps cover how to establish and manage your QuickBooks connections.
Steps to Manage QuickBooks Connection
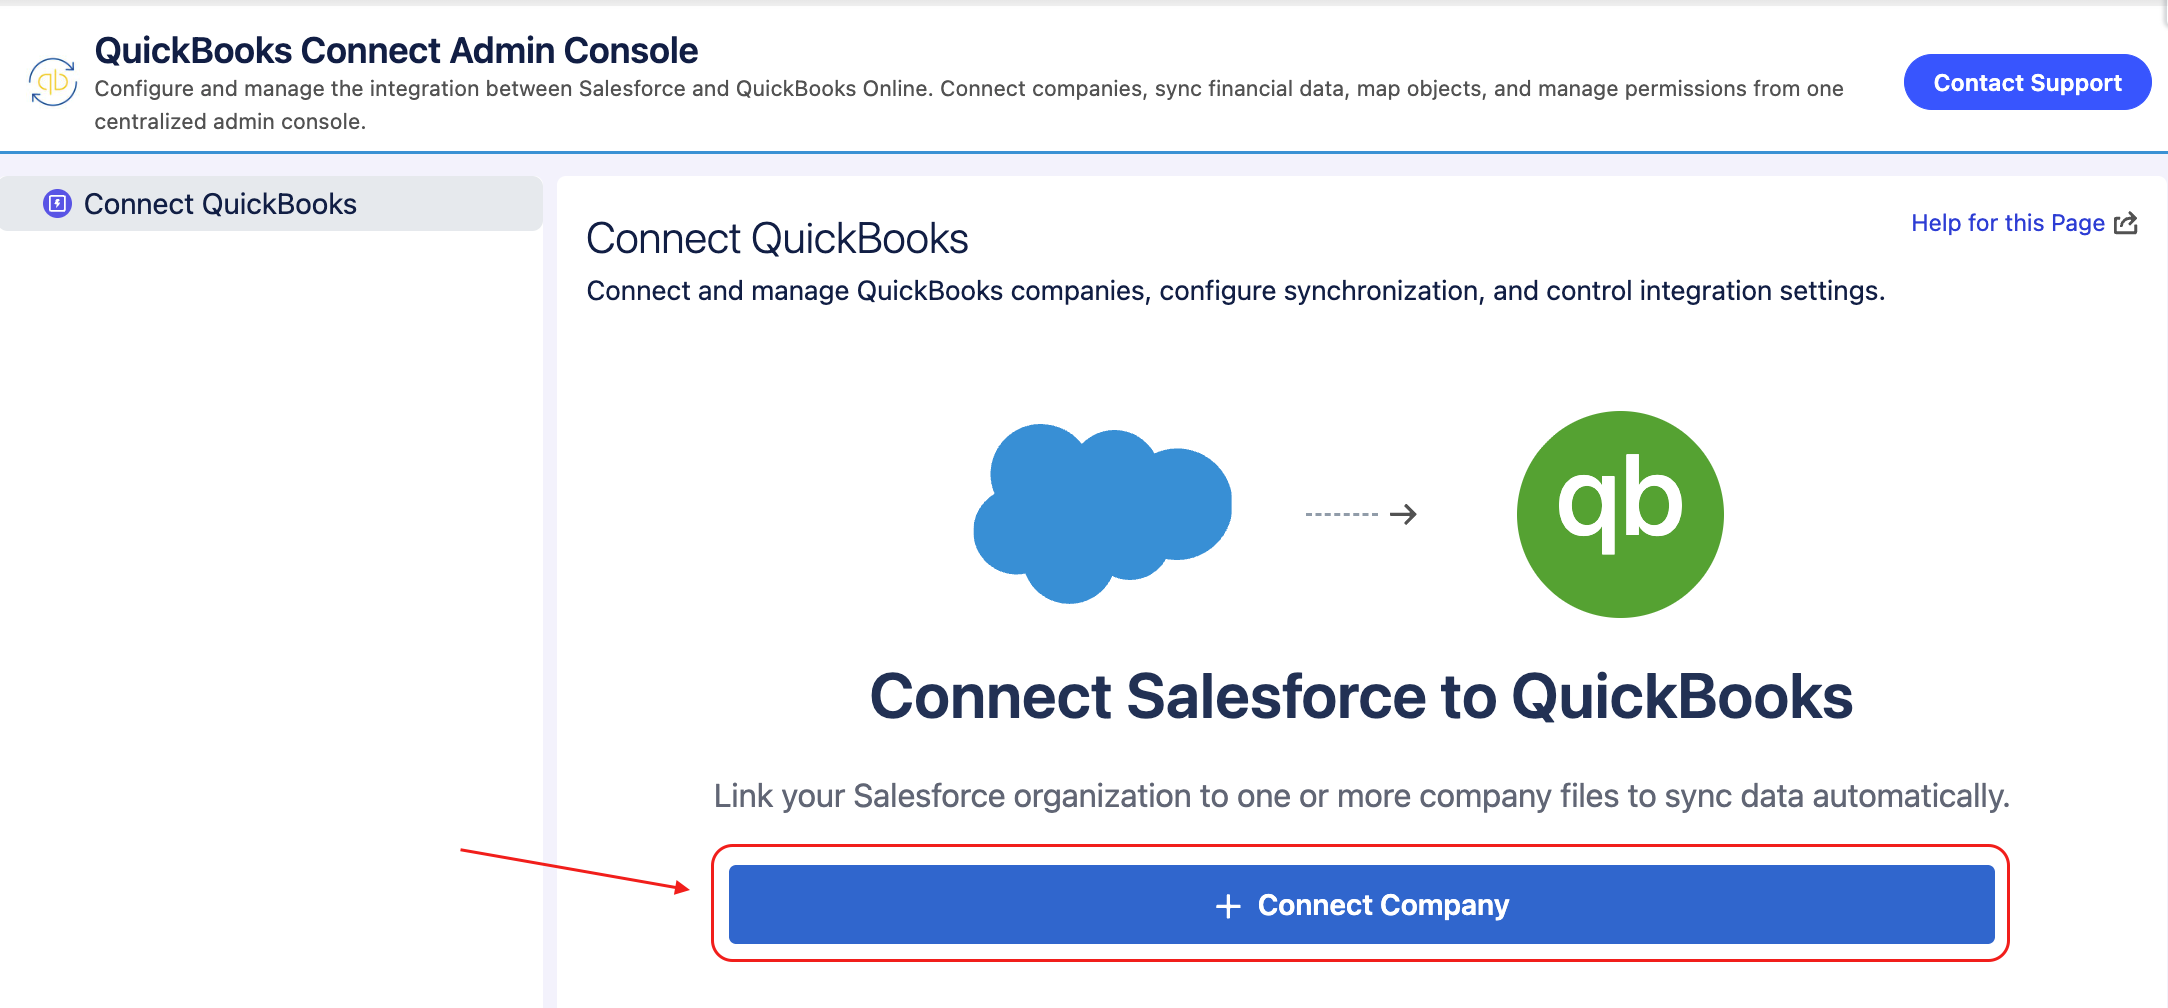
3.1. Manage QuickBooks Connection
Click on “+ Connect Company” to initiate the connection with QuickBooks.
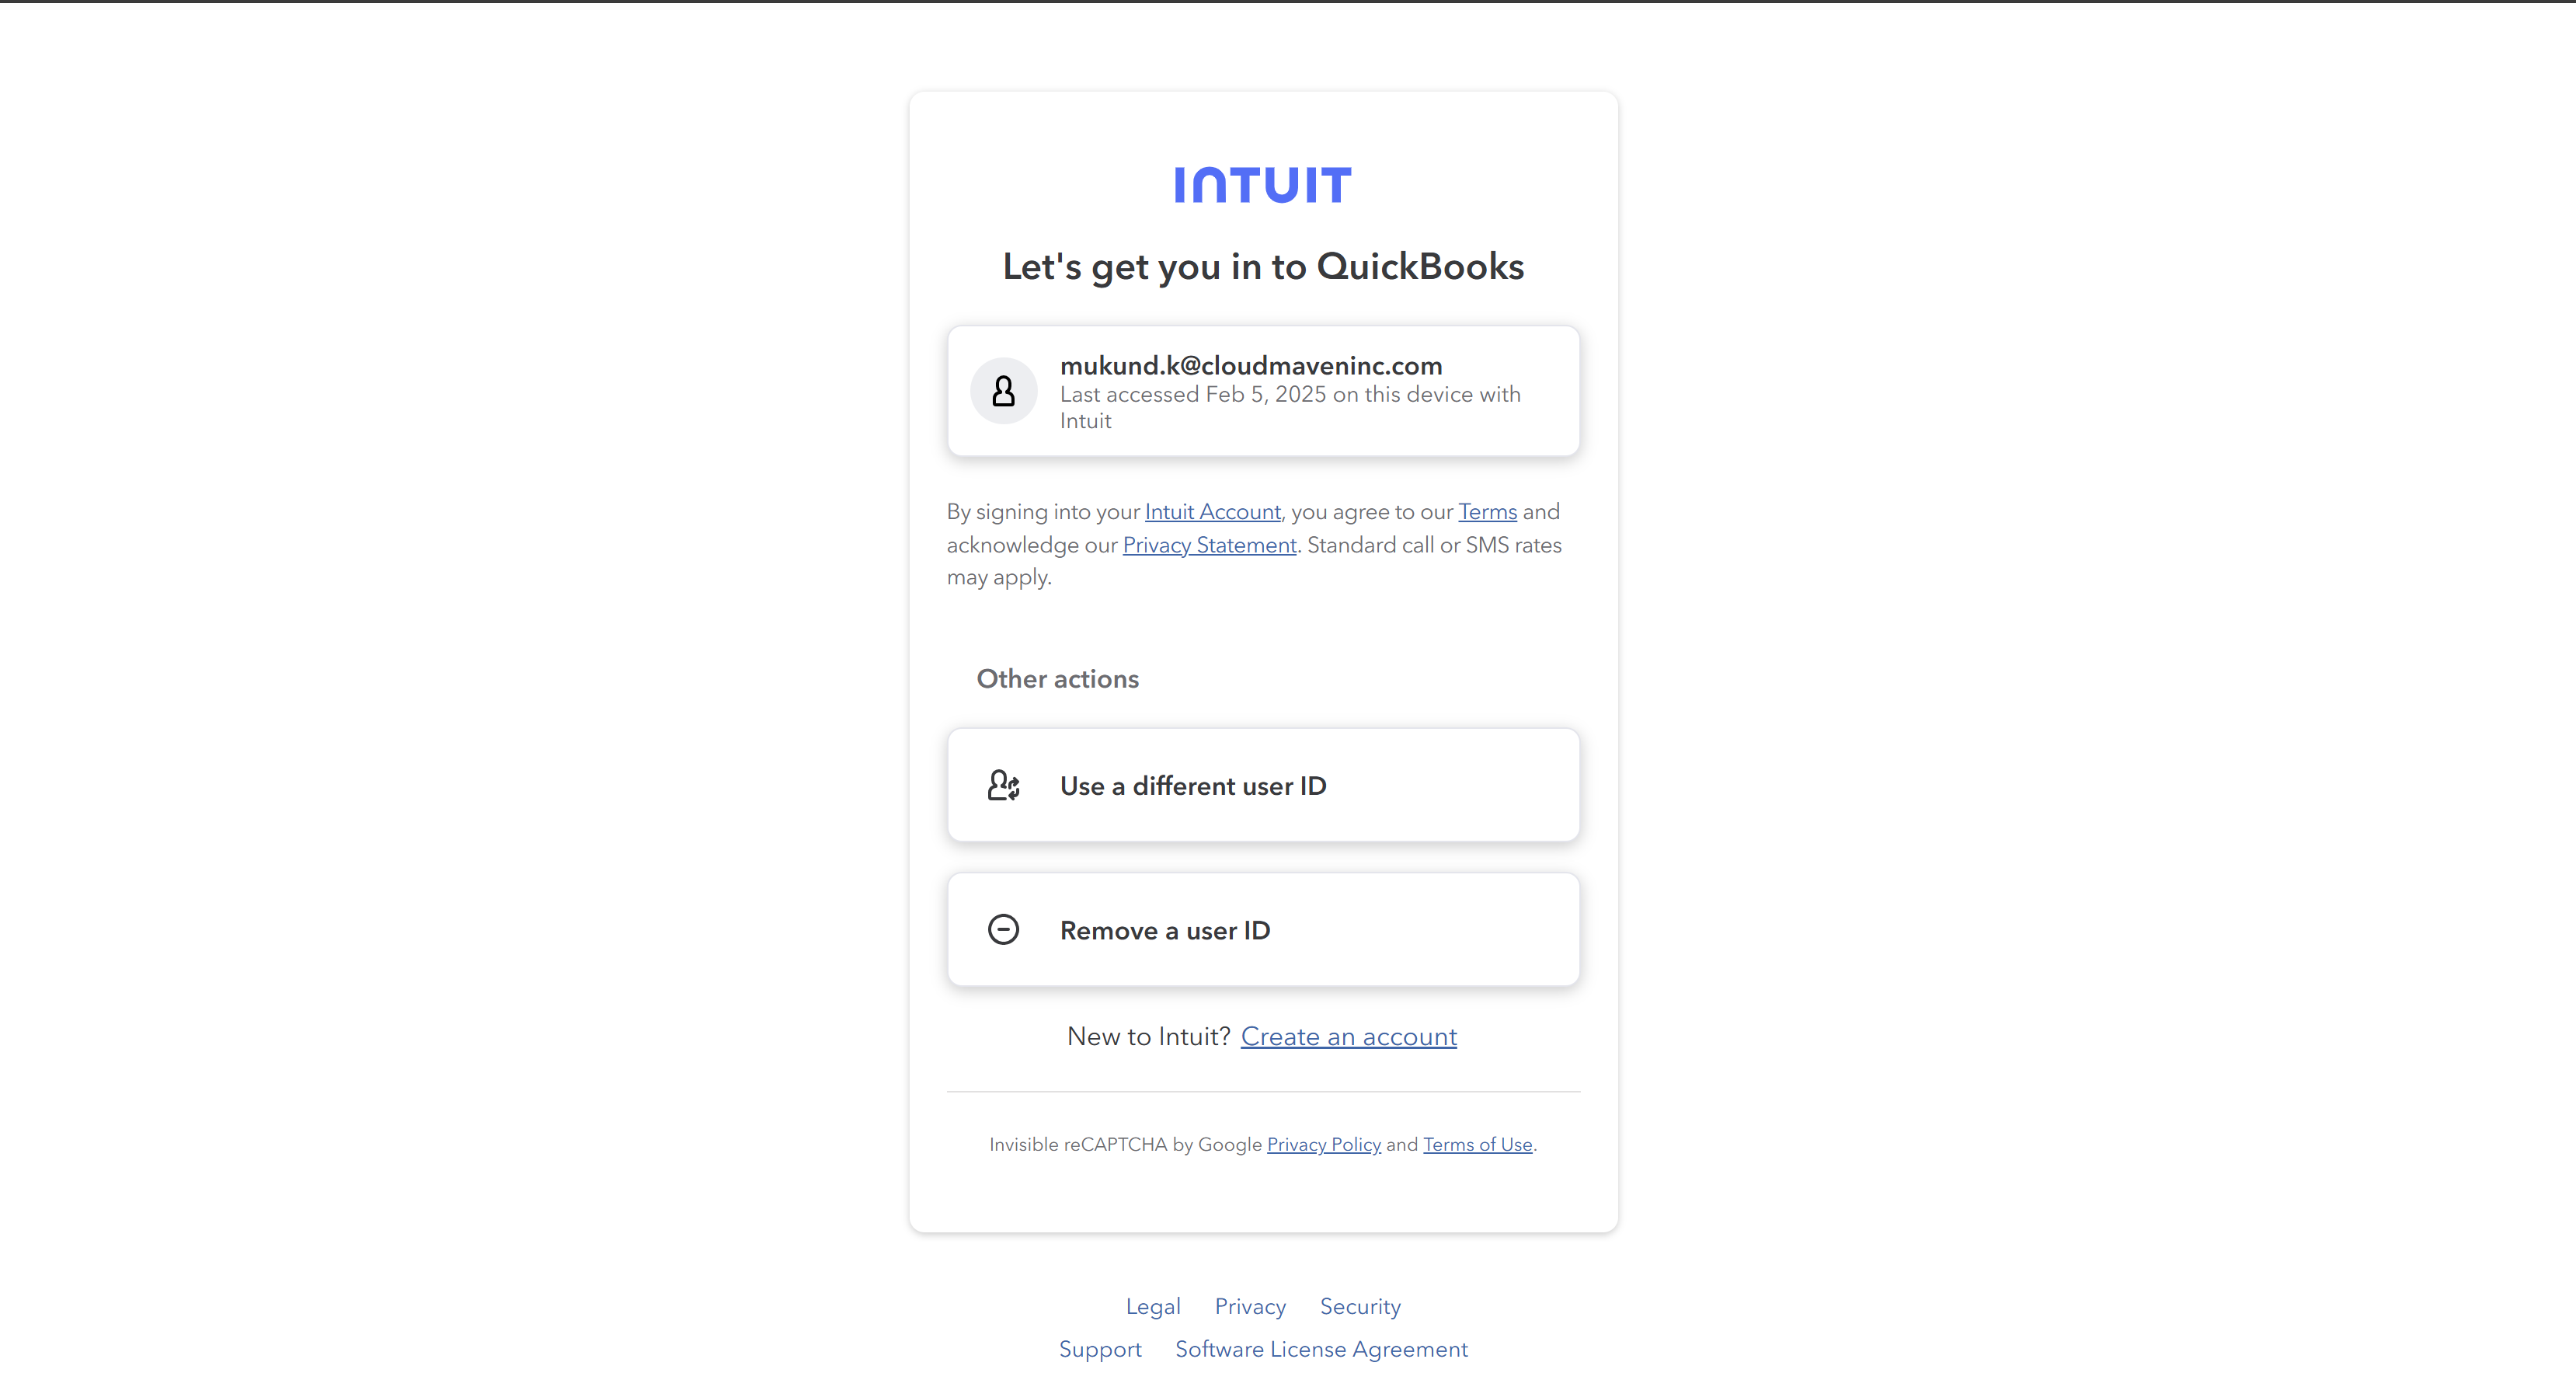
3.3. Authentication with QuickBooks
You will be redirected to the QuickBooks authentication page where you need to authenticate and allow the connection.
3.4. After Connecting the Company
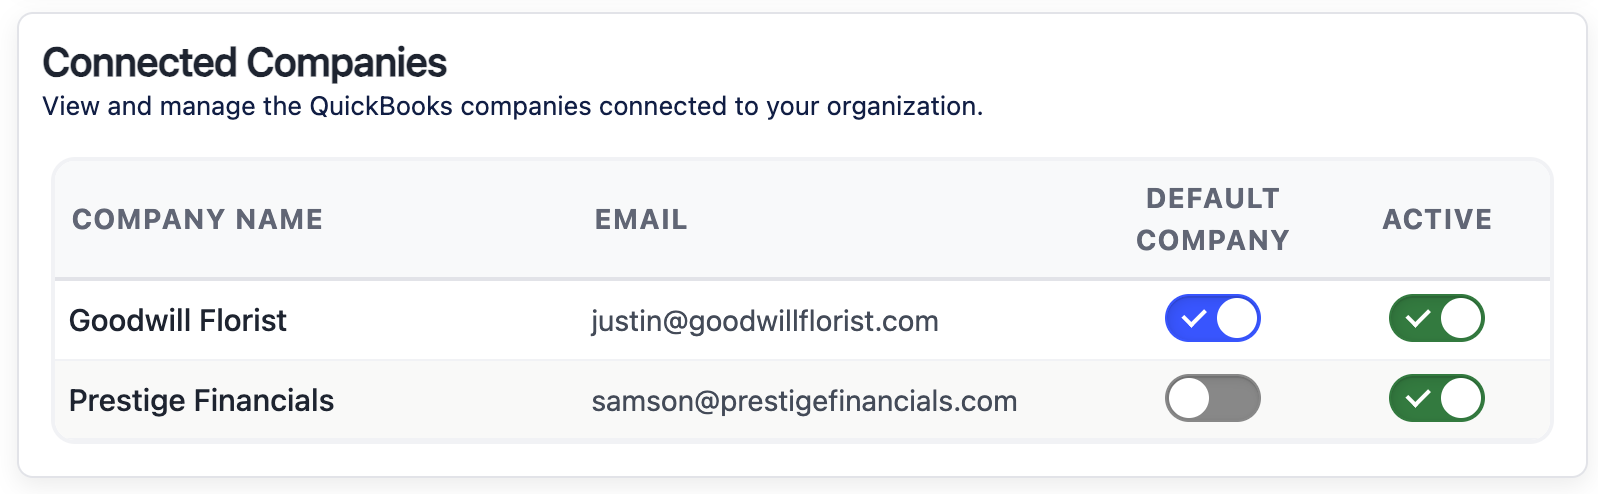
Once connected, the page will appear as shown below with your connected companies:
4. Managing Multiple QuickBooks Companies
You can connect multiple QuickBooks companies to your Salesforce org.
4.1. Connecting Multiple Companies
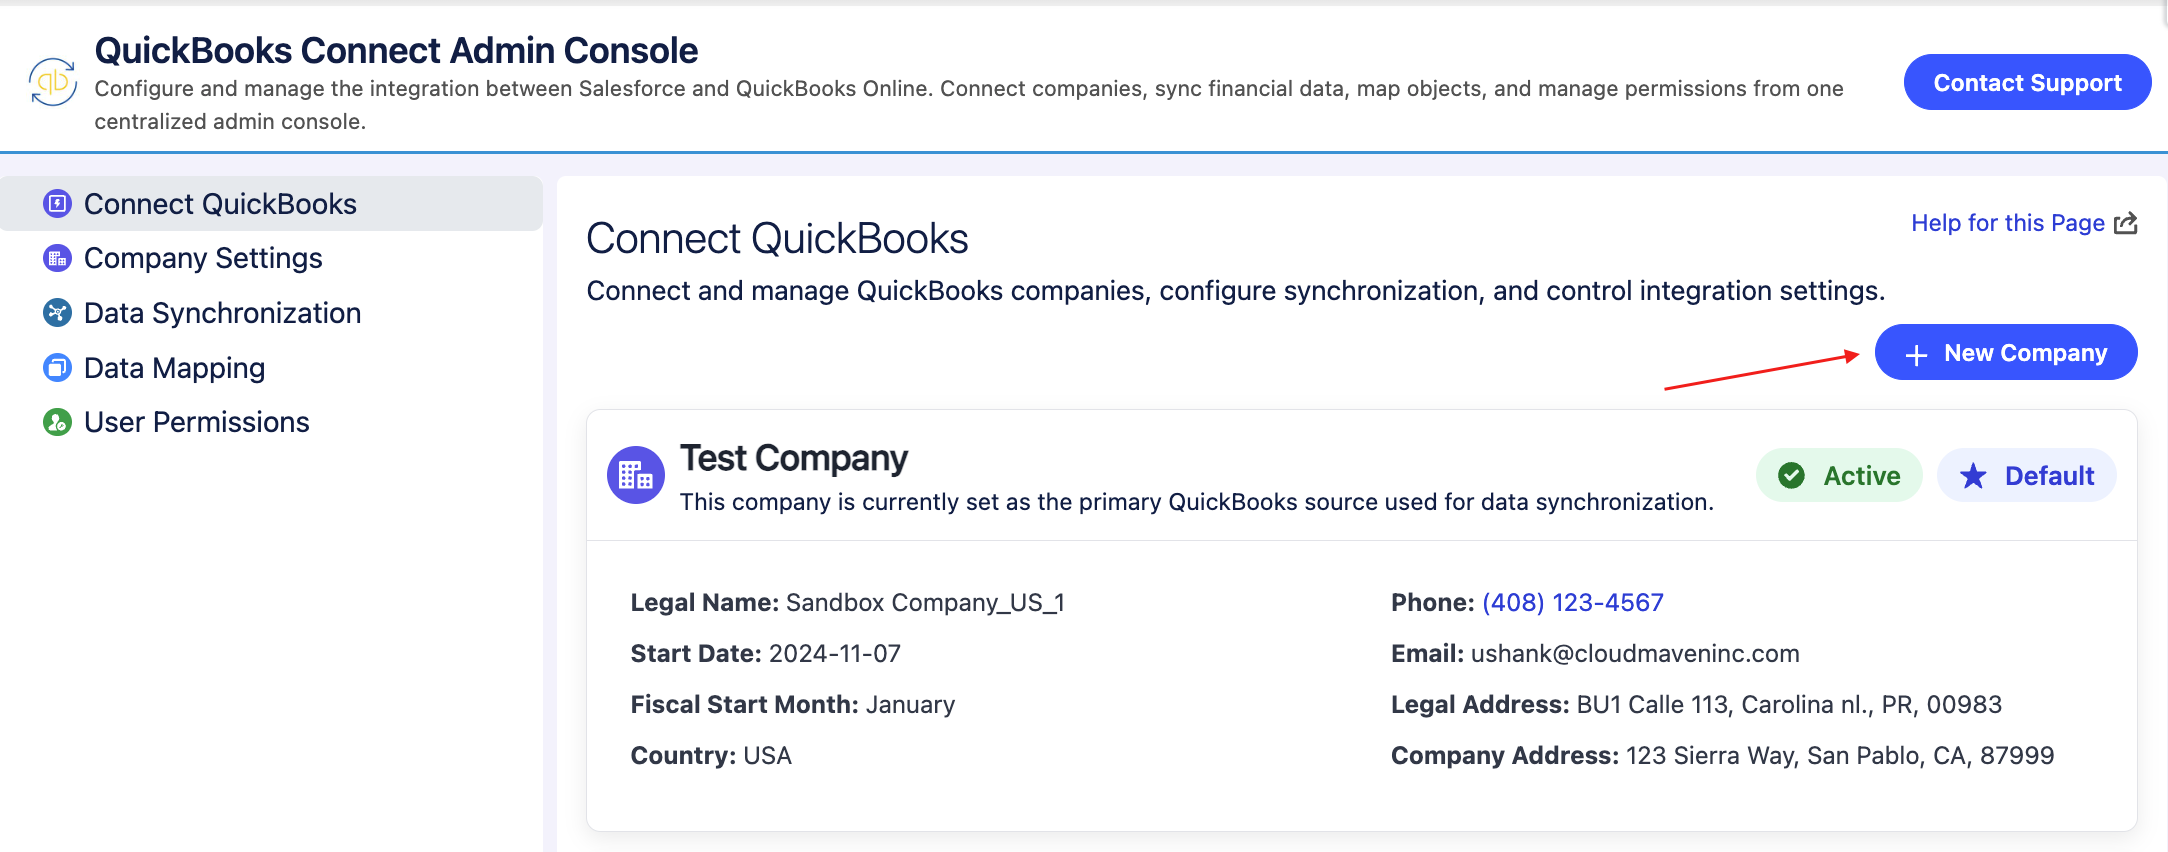
To connect to additional companies, click on “+ New Company” and repeat the authentication steps.
5. Setting Default Company
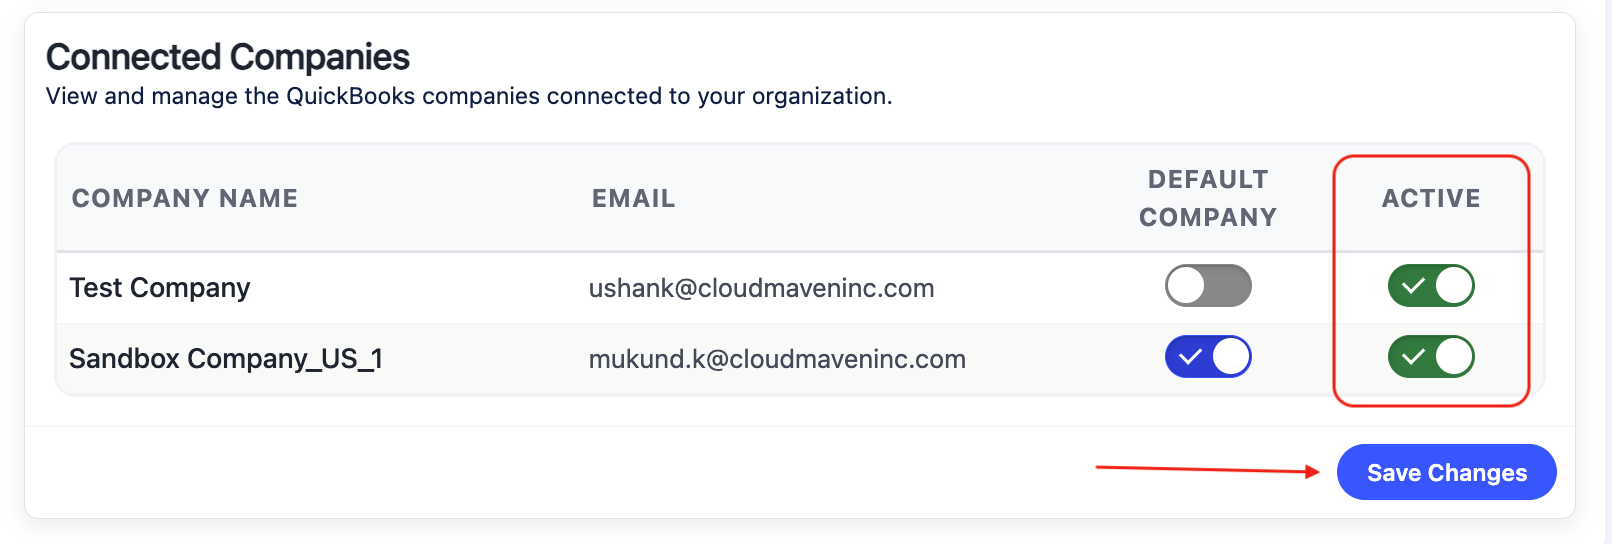
You can set a default company in two ways:
Steps to set a company as Default
5.1. Connect QuickBooks Section in the Admin Setup Console
In the Connect QuickBooks section in QuickBooks Connect Admin Console, click the checkbox next to the company you wish to set as default and then click on save changes button.
You can also deactivate a company by unchecking the "Active" checkbox. Please note, you cannot set an inactive company as the default. To set a new default, make sure to deactivate the previous default first.
6. Configuring Company Settings
After setting the default company, proceed to configure company settings. The screen will look like this:
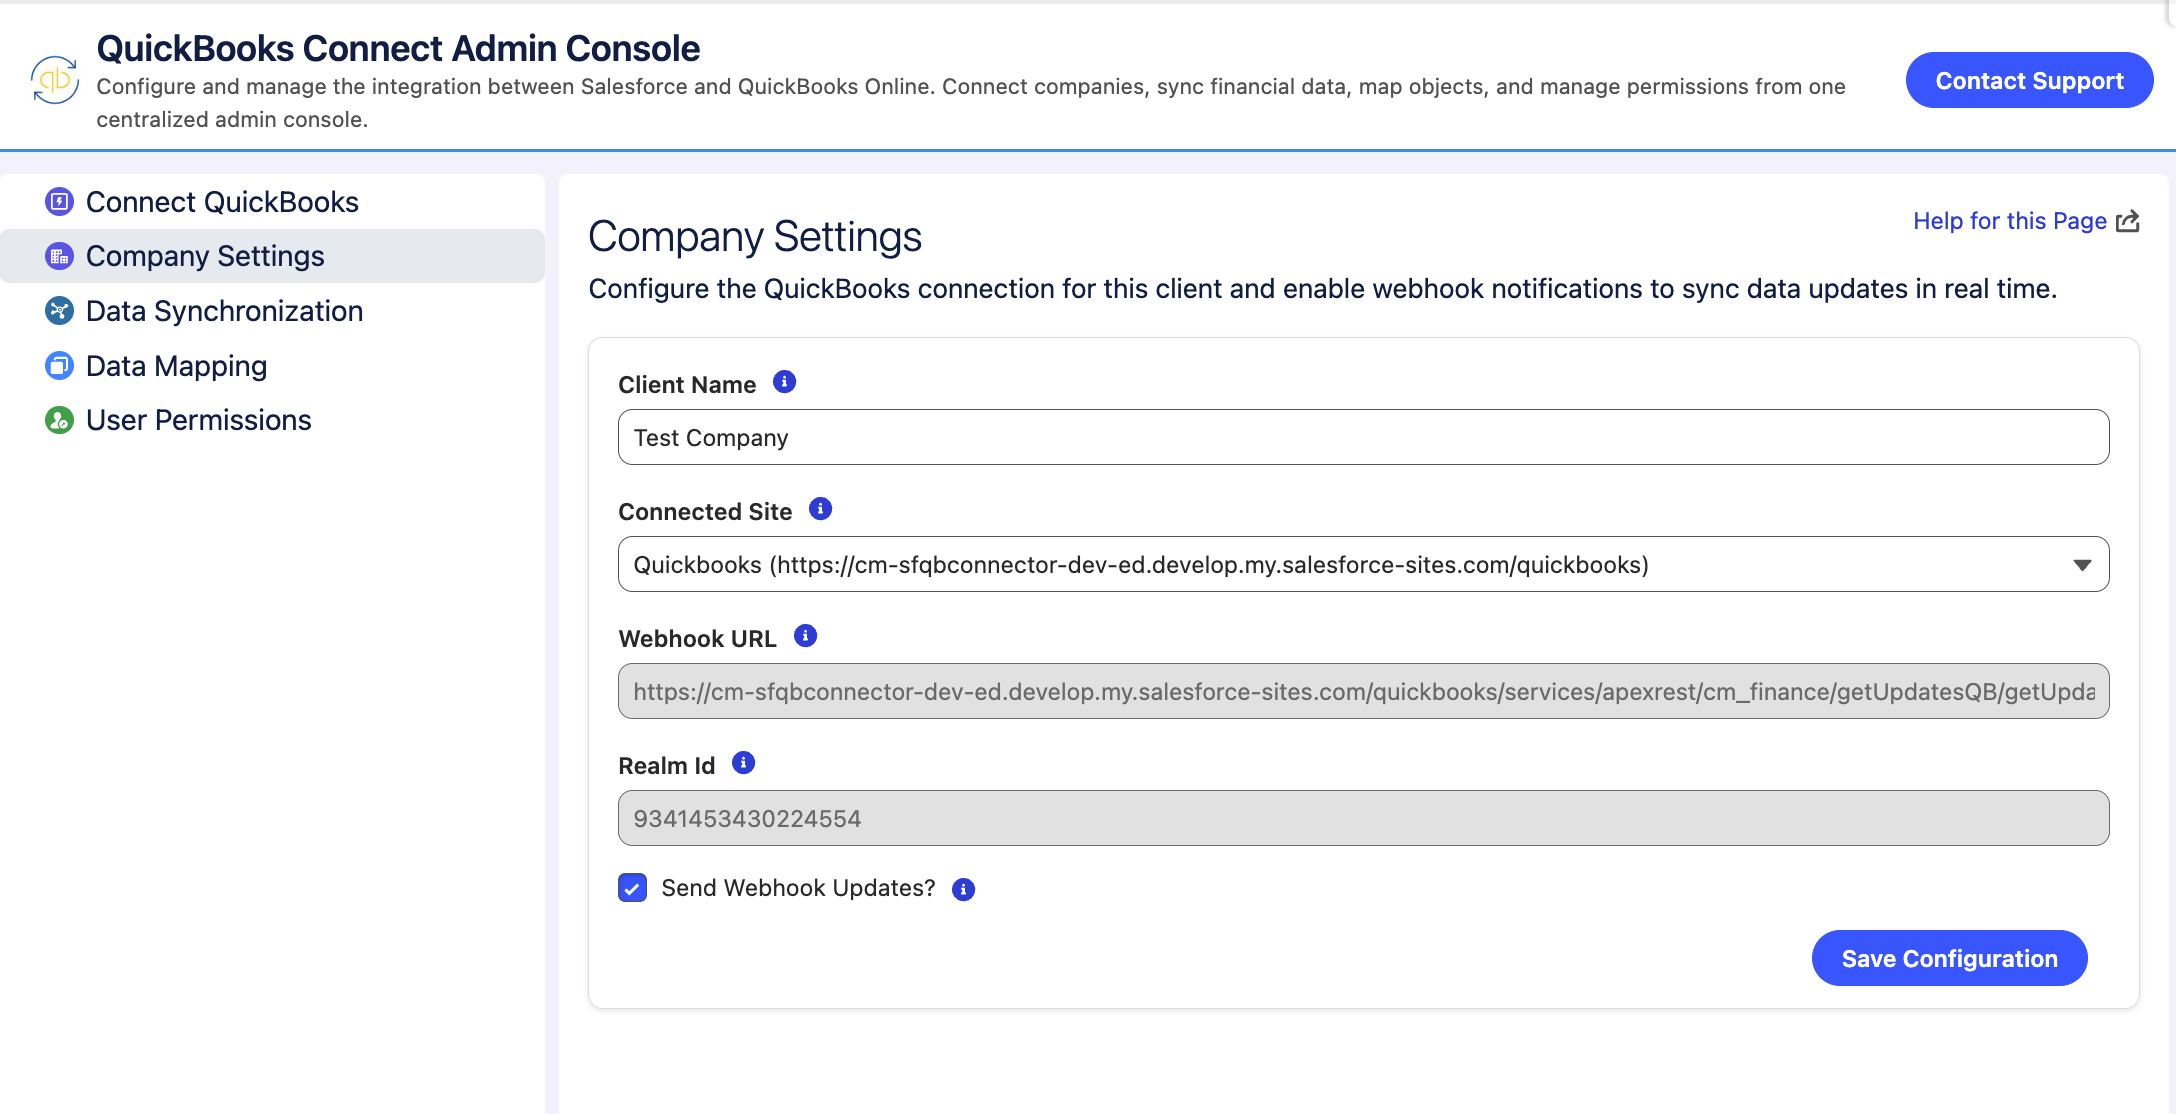
You can add the Webhook URL as well as check the ‘Send Webhook Updates' if you want real time sync in Salesforce from QuickBooks.
7. Syncing Data from QuickBooks
Once connected, you can sync data from QuickBooks to Salesforce.
7.1. Syncing Data
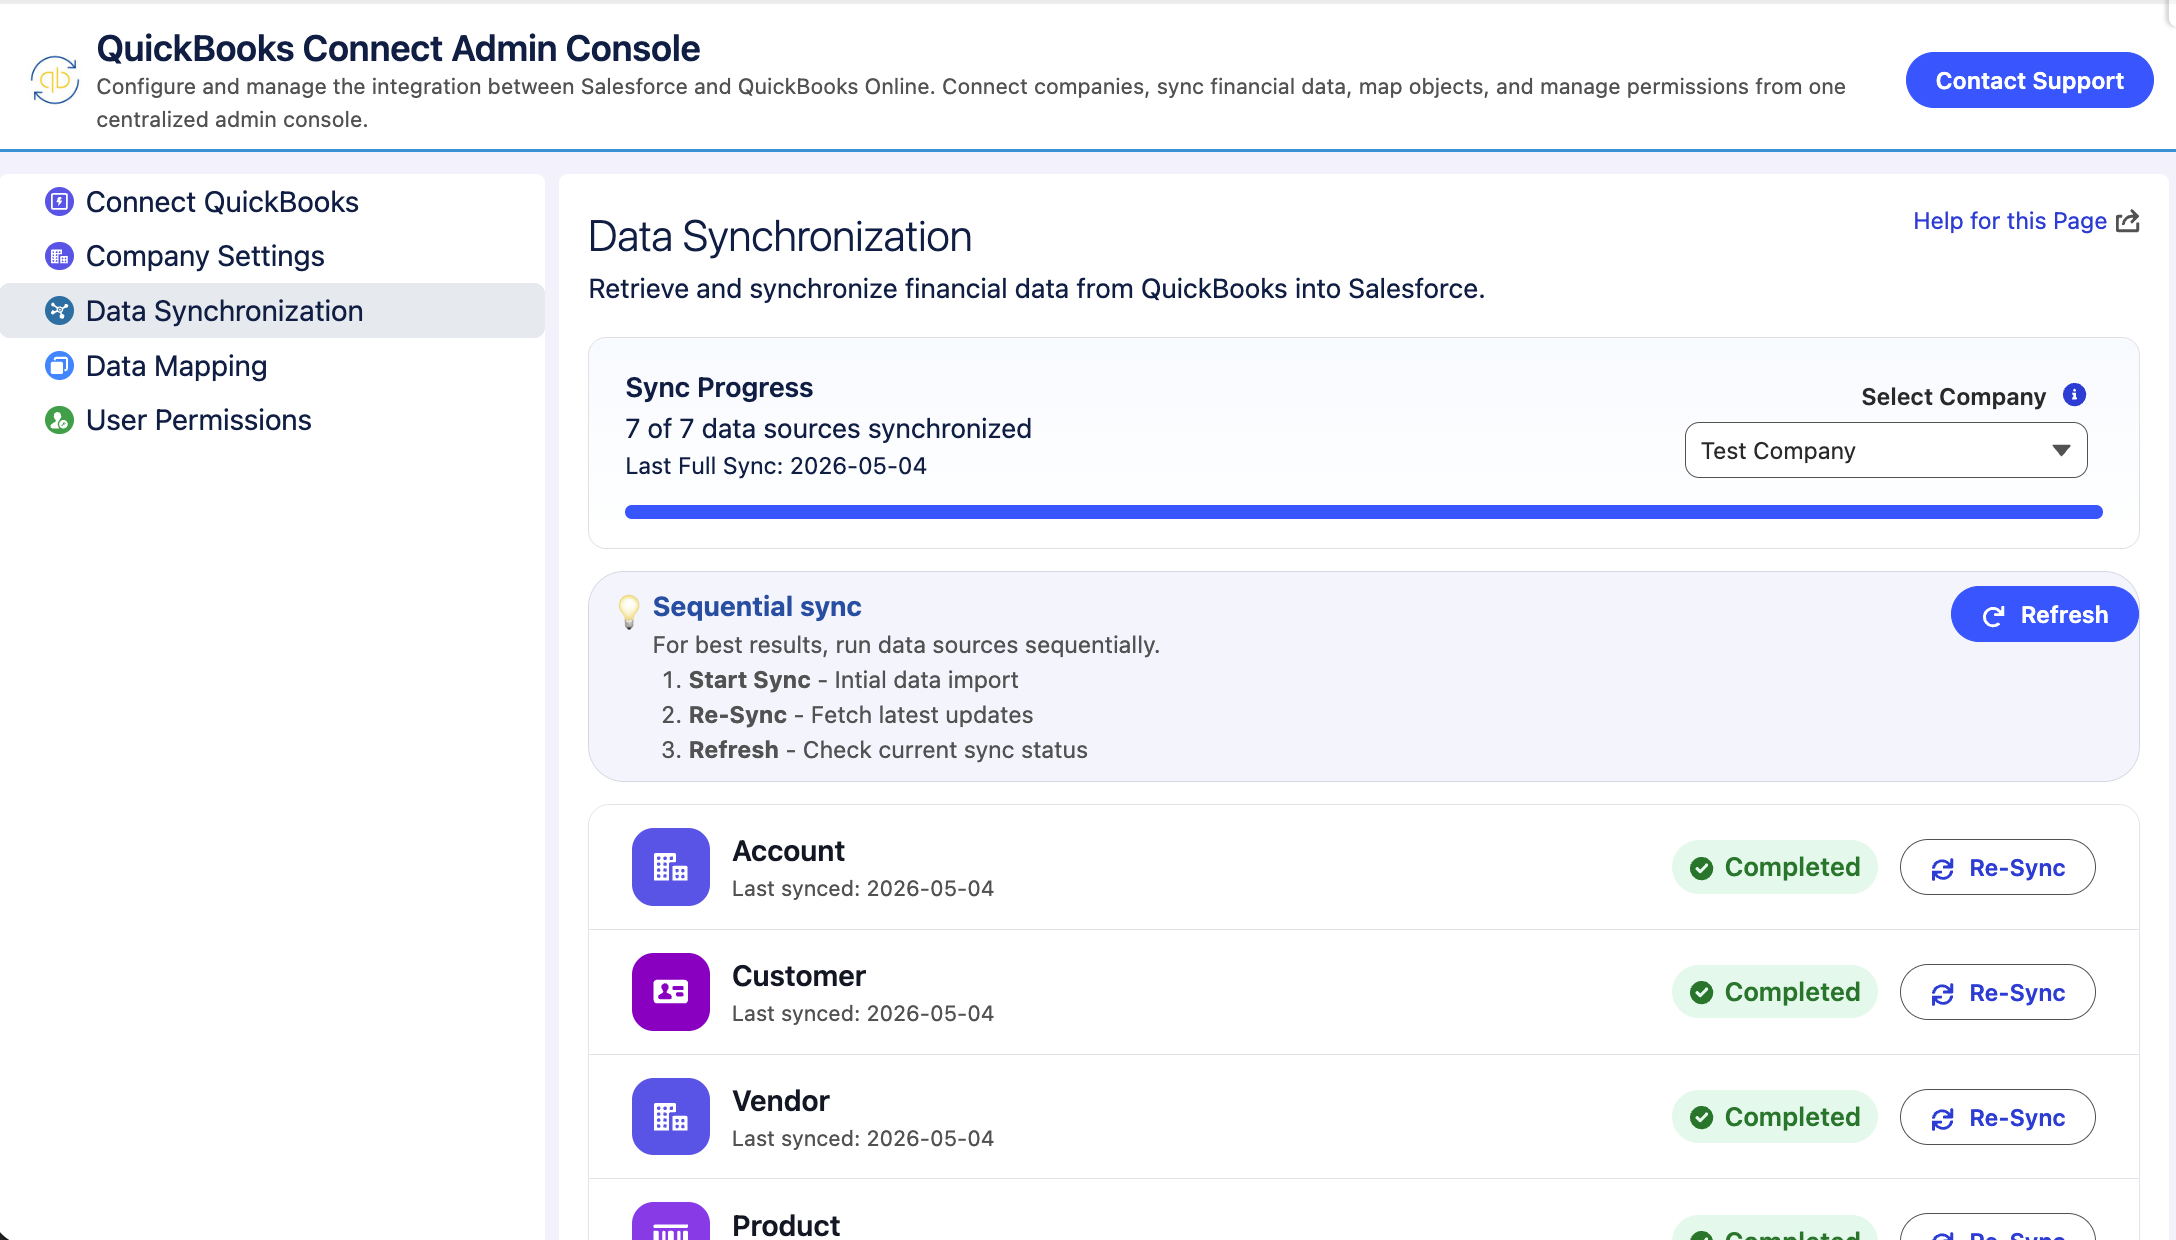
Navigate to the Sync section. Click Sync Data from QuickBooks, and the screen will display as shown below:
7.2. Syncing Desired Item
You can select and sync the desired items from QuickBooks by clicking on the items you wish to import.
8. Mapping QuickBooks Data to Salesforce
To map data fetched from QuickBooks to Salesforce records, click on Map QuickBooks Data with Salesforce. You will be redirected to the screen below:
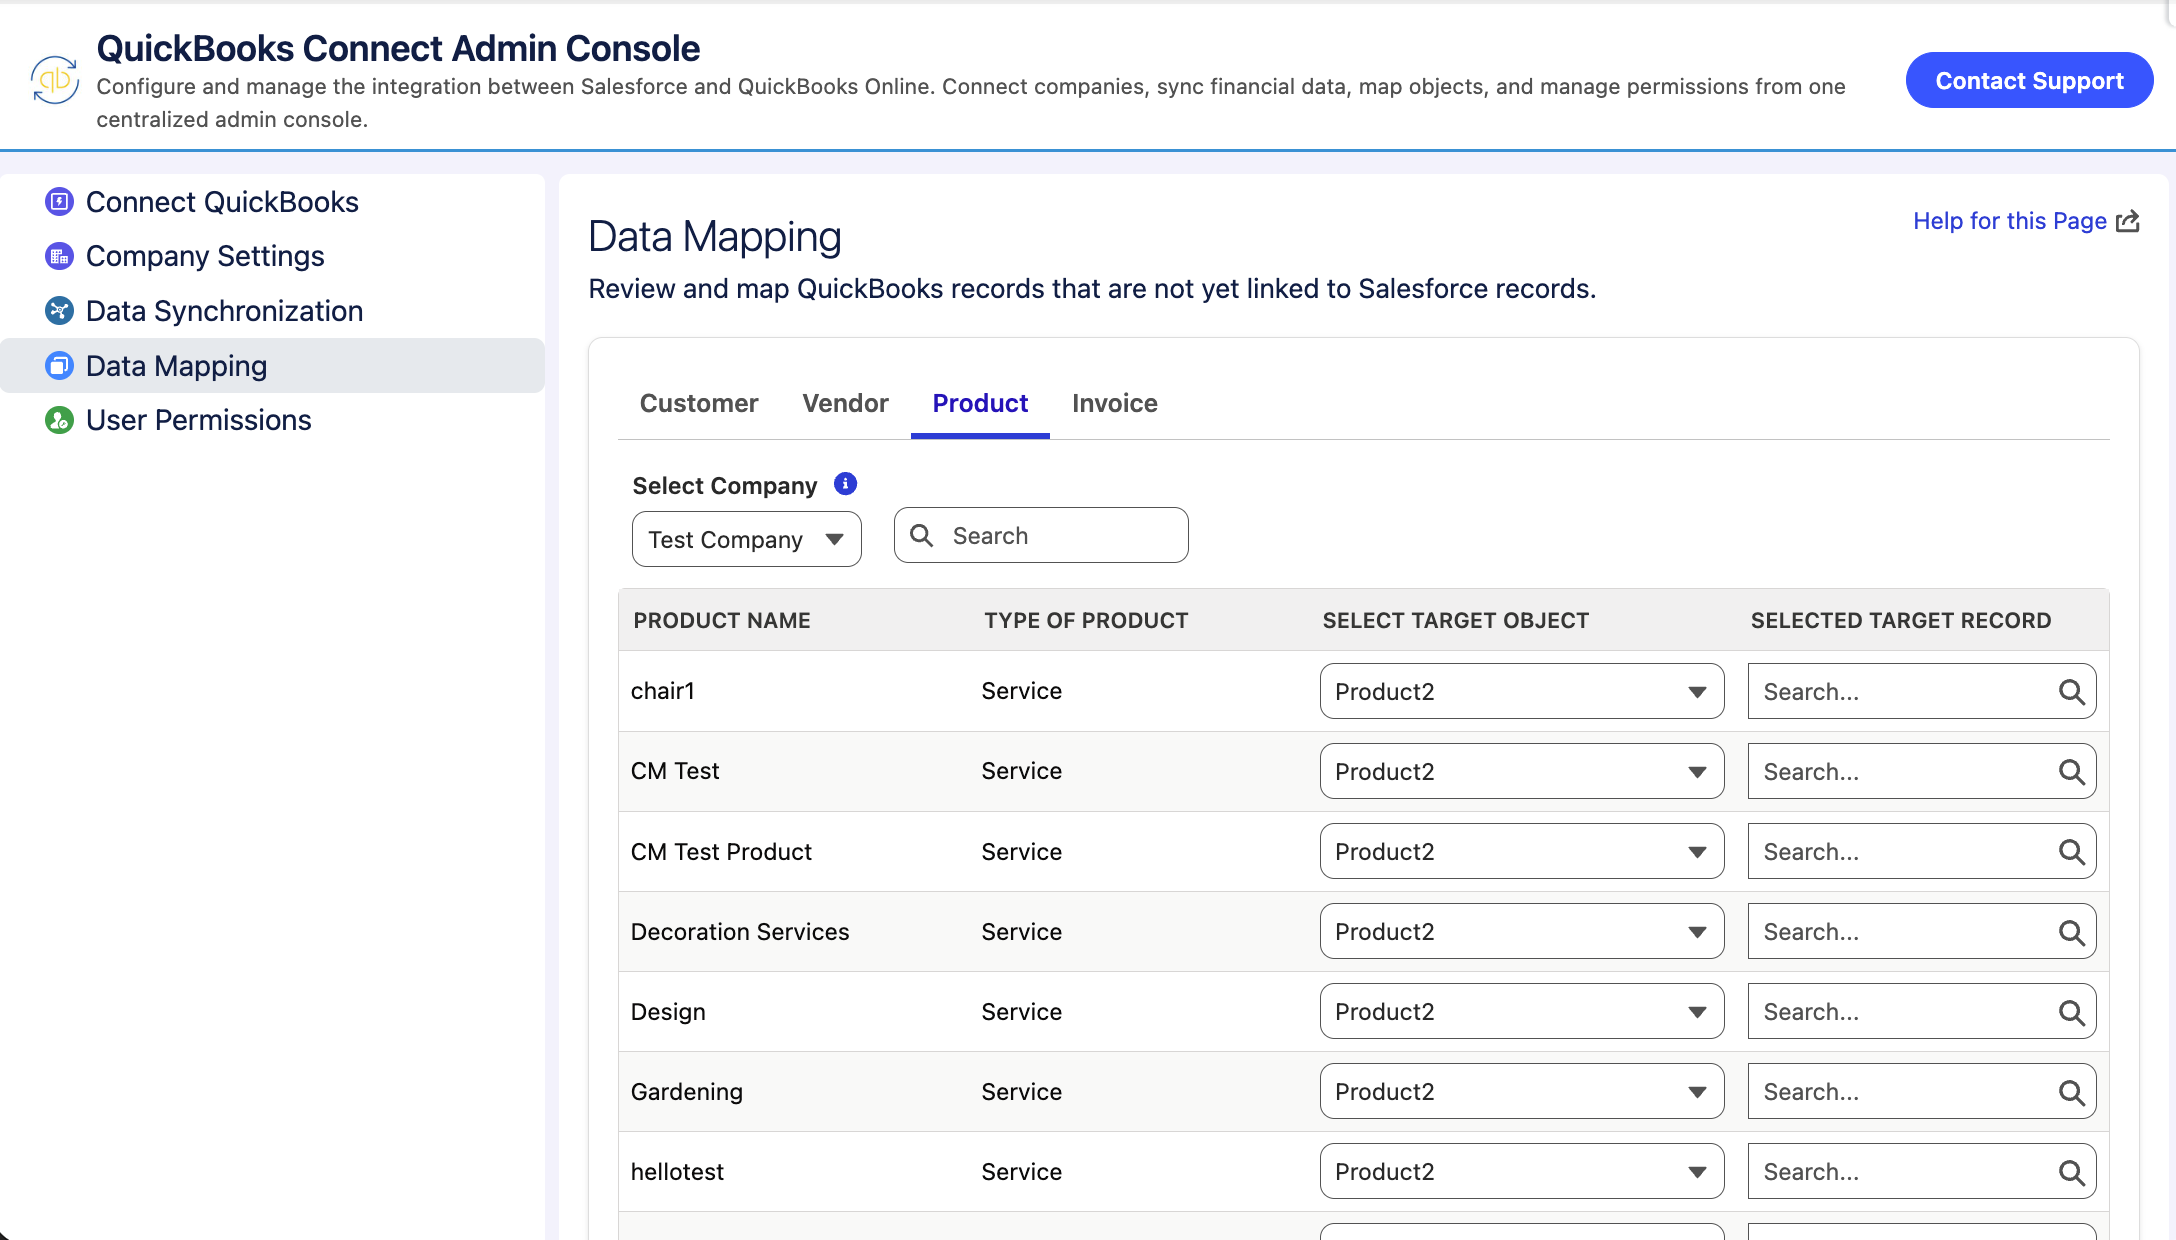
Here, you can map any unmapped QuickBooks data or items to the appropriate Salesforce records.
9. Assigning User Permissions
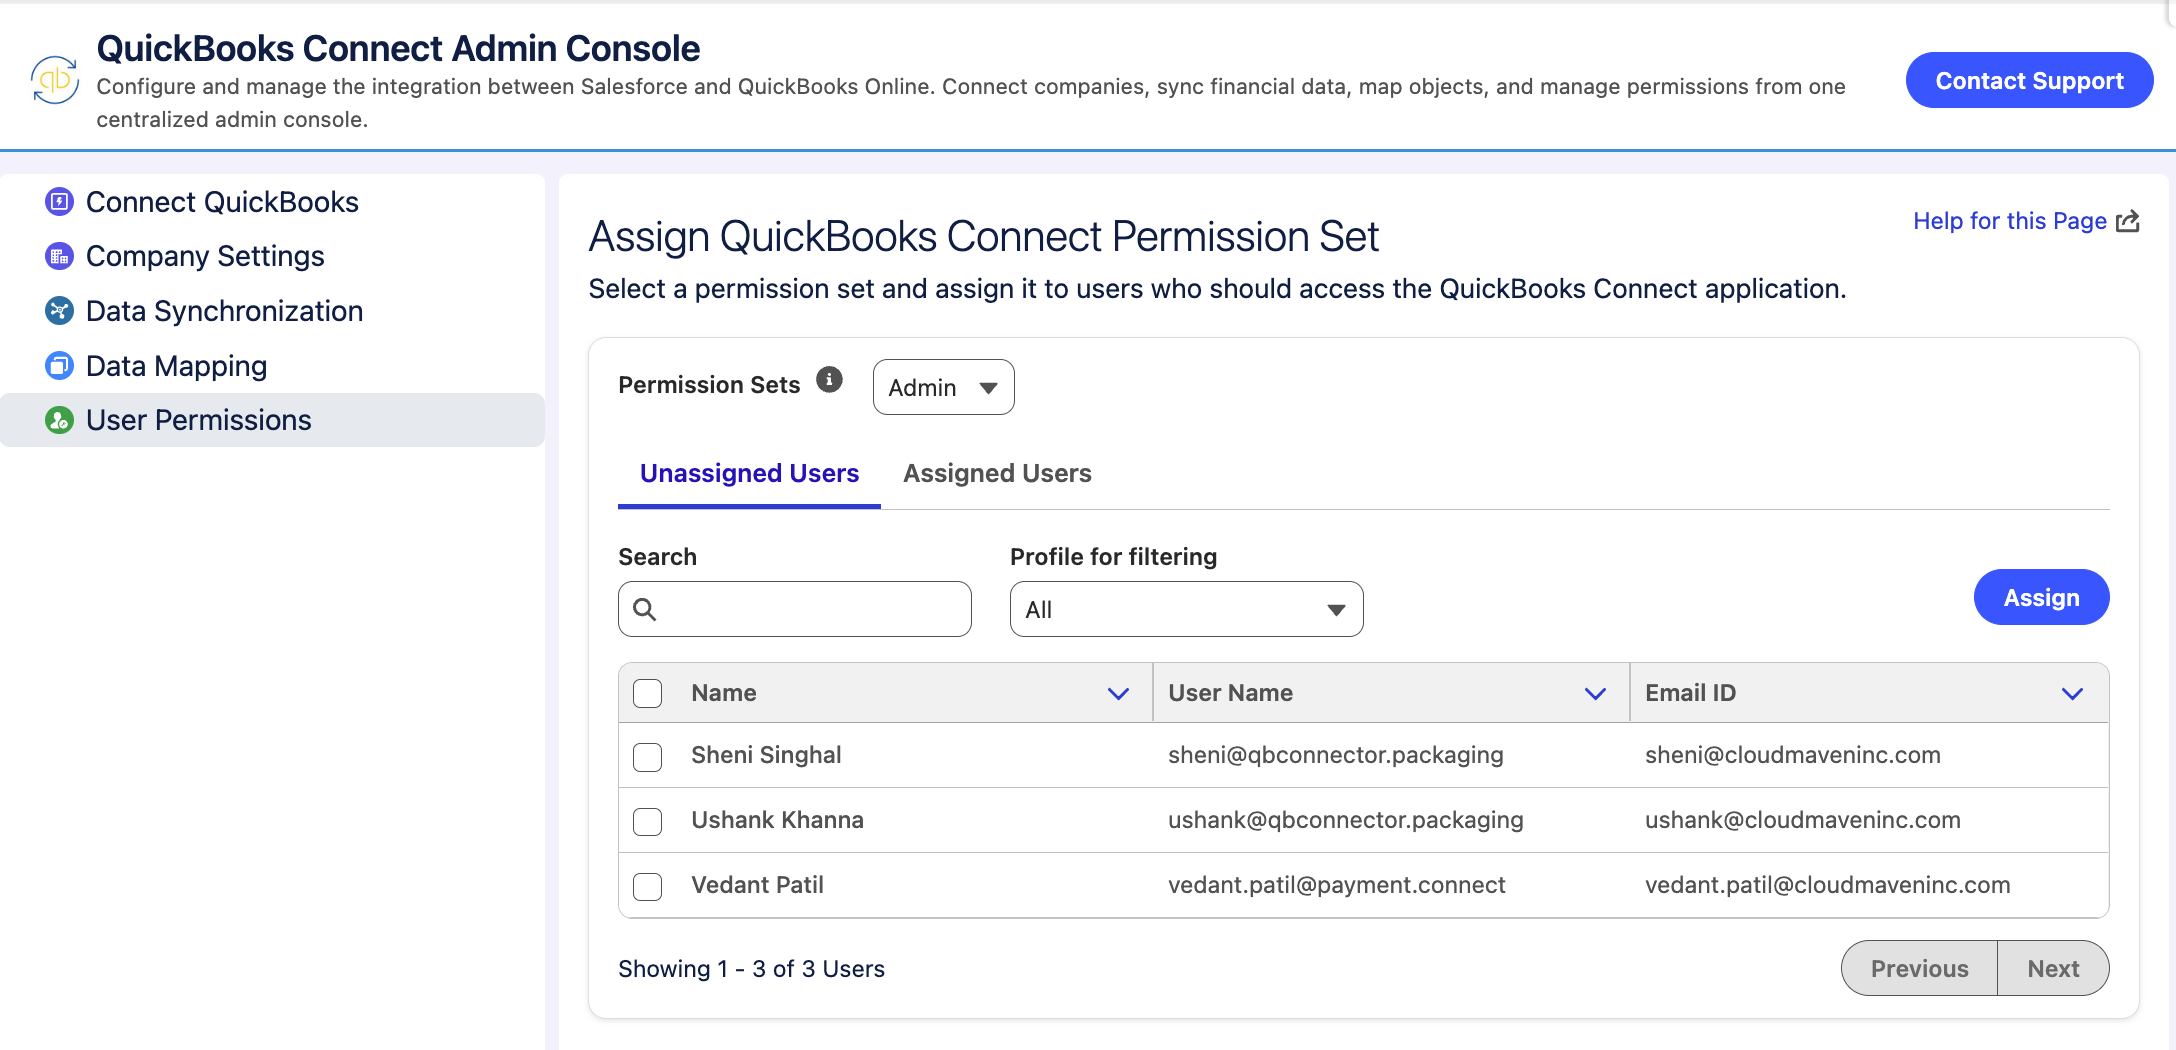
To assign permissions to users, go to the Assign Permission Set section. The screen will appear as shown below:
Steps to grant user permissions using Permission Sets
9.1. Selecting Permission Set
Choose either the Standard User or Admin User permission set.
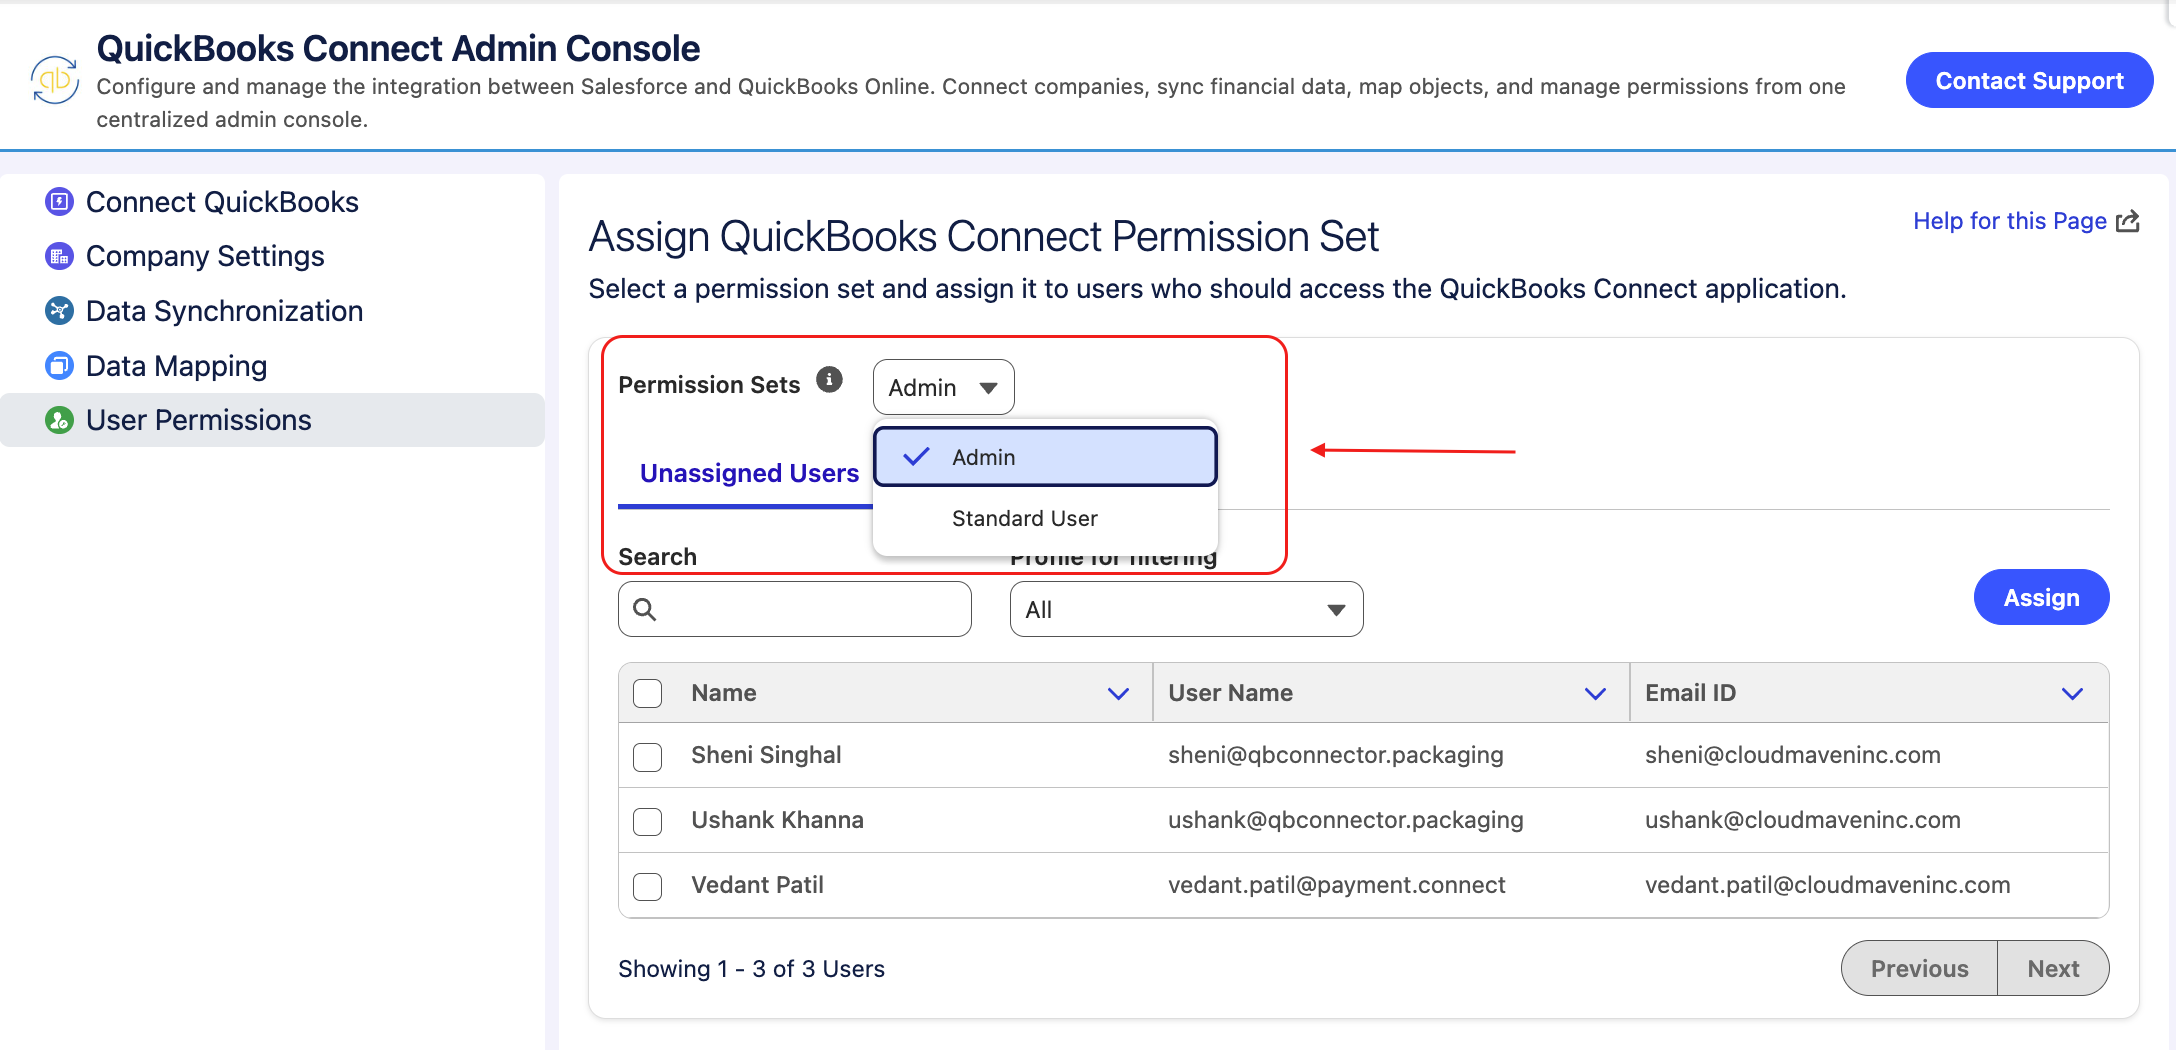
The user list will display on the screen, and you can select which users to assign the chosen permission set.
10. Contacting Support
If you encounter any issues or have questions, click on the Contact Support button. Add your inquiry or issue, and our support team will assist you promptly.