
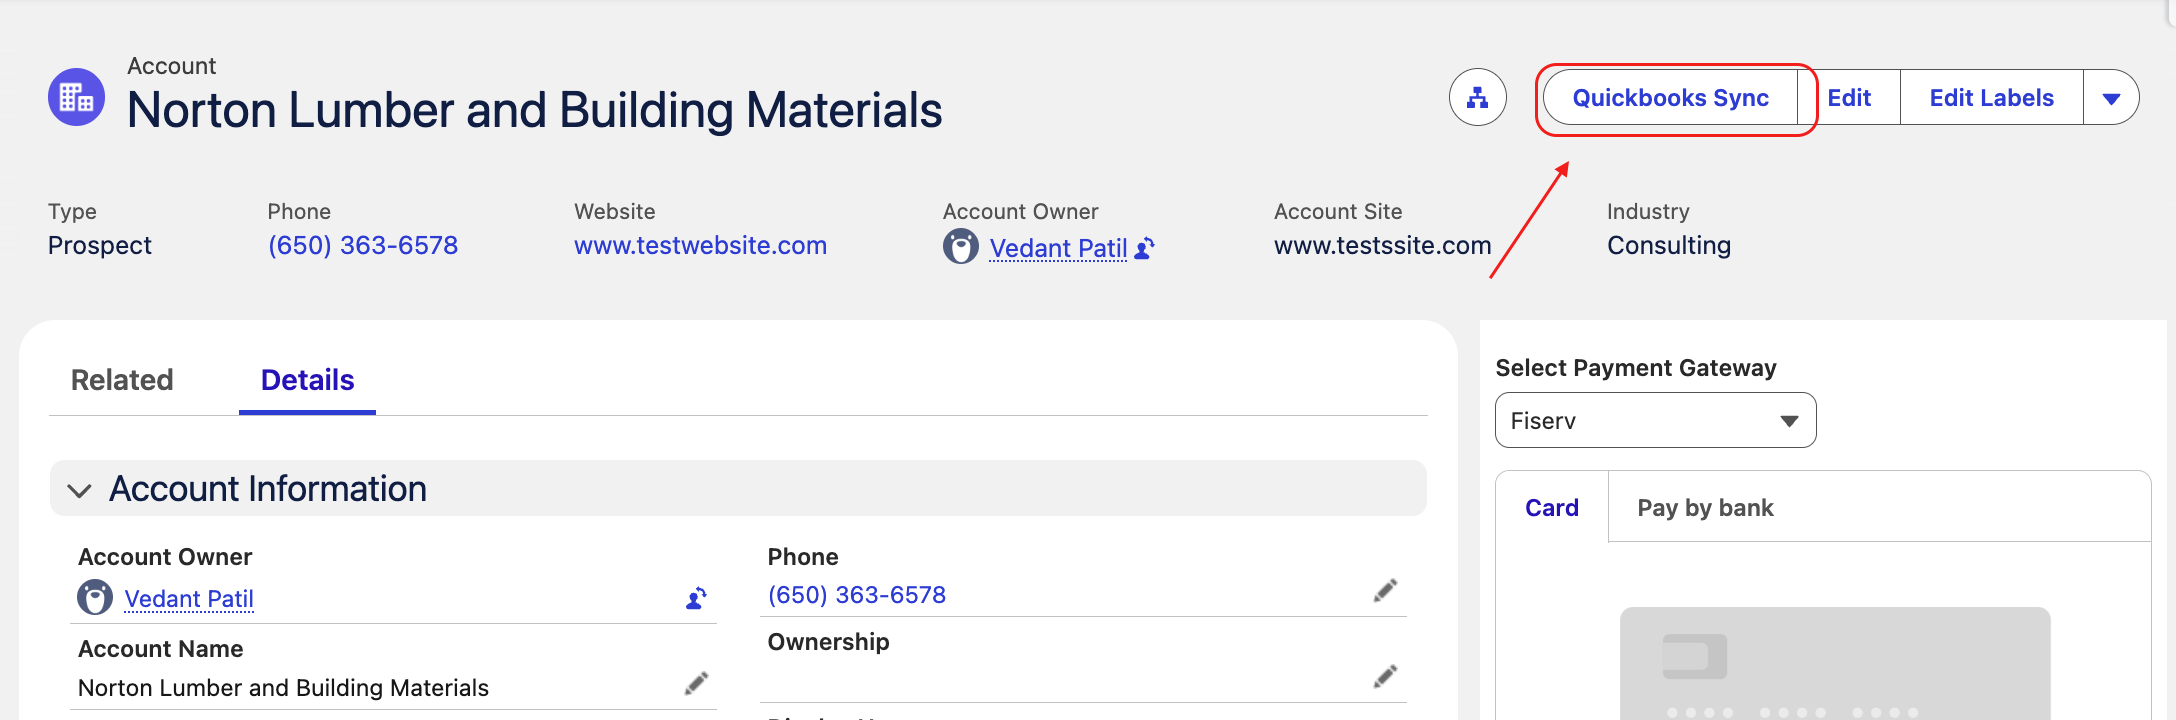
To create or sync existing QuickBooks records in Salesforce, use the QuickBooks Sync button, as shown below.
1 Sync Process for Products
Navigate to the record where the QuickBooks Product is configured.
1.1 Creating an Item (Product) in QuickBooks:
-
Click on Quickbooks Sync button
-
Select the desired Company (if multiple companies are linked and active). If only 1 company is connected, you’ll not see below screen
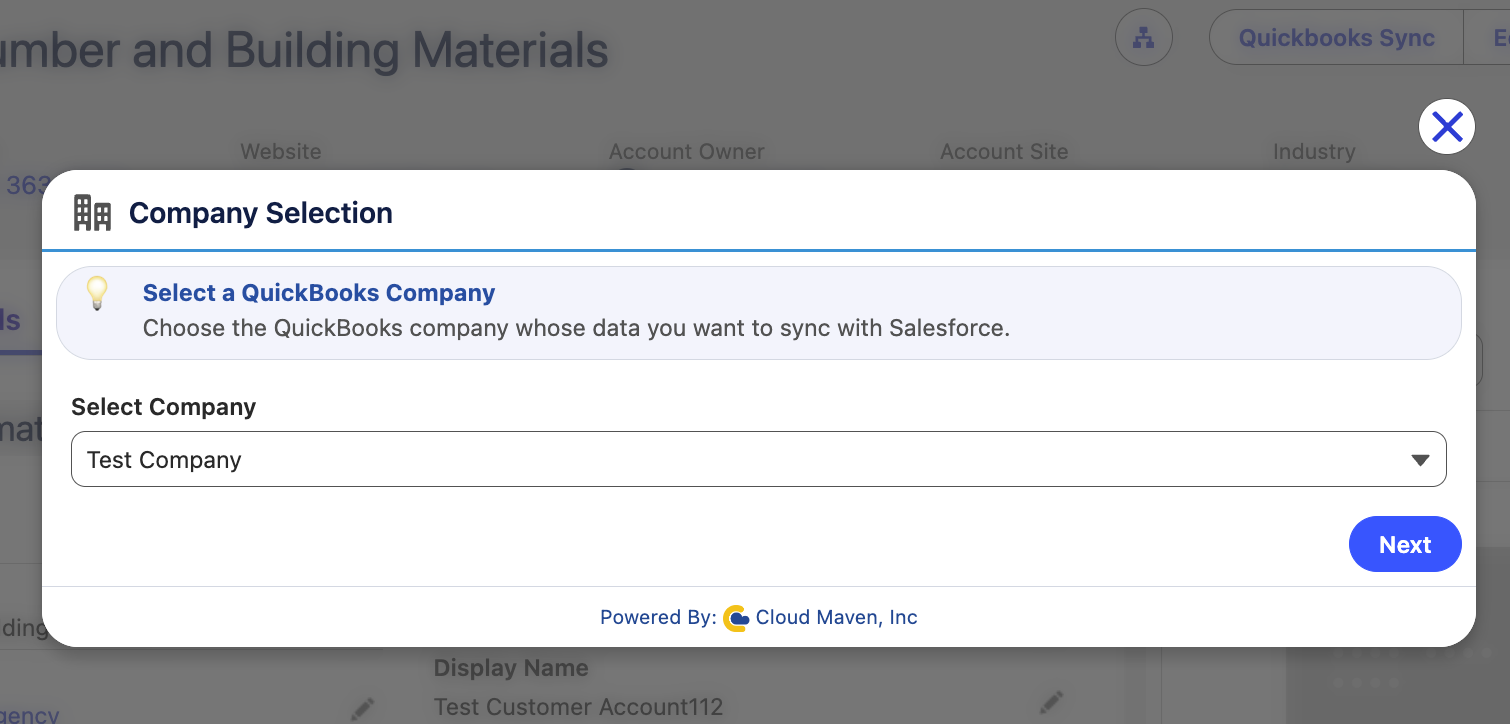
-
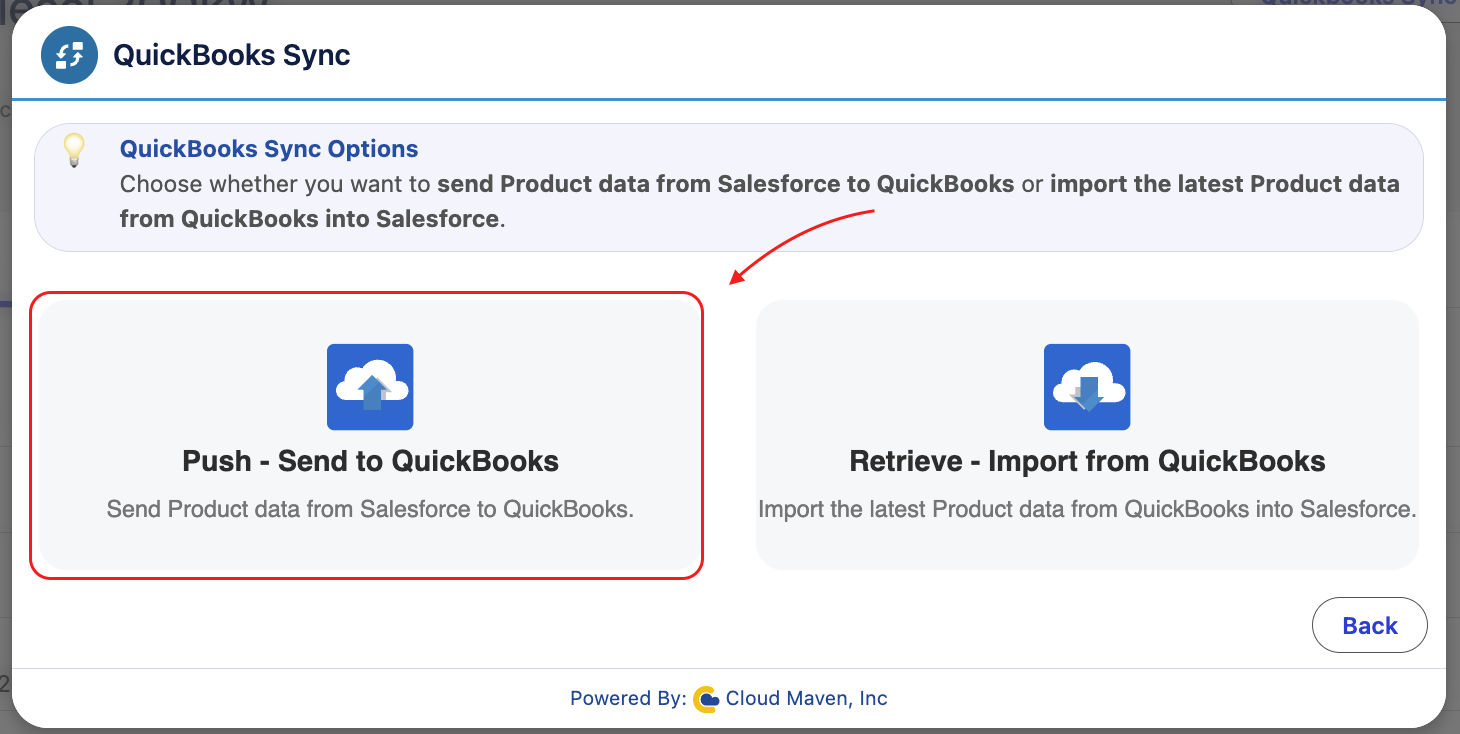
Click on “Push - Send to QuickBooks” to send data of Salesforce record to QuickBooks to create a new QuickBooks Product record.
-
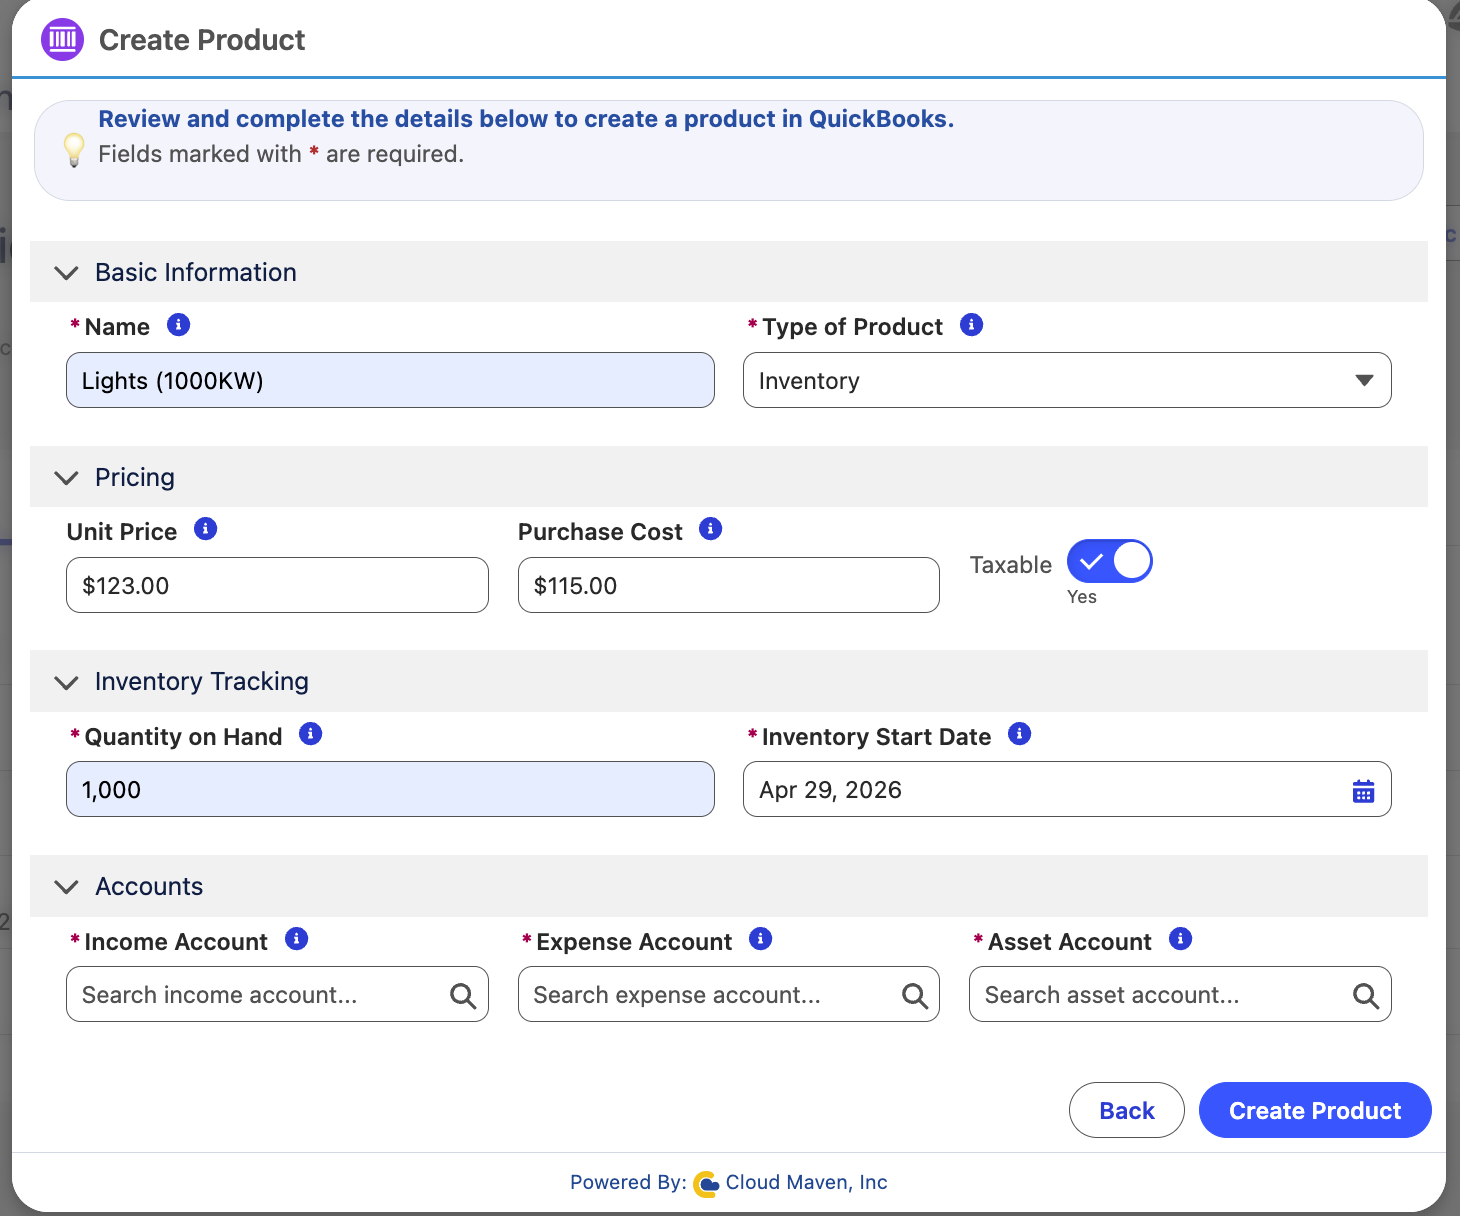
A “Create Product” screen will open and pre-populate values based upon Custom Field Mapping stored for source object. Fill in the fields and click on “Create Product” button to create a new Item/Product inside QuickBooks
1.2 Syncing Existing QuickBooks Records to Salesforce:
-
Click on Quickbooks Sync button
-
Select the desired Company (if multiple companies are linked and active). If only 1 company is connected, you’ll not see below screen
-
Click on “Retrieve - Import from QuickBooks” to retrieve data of QuickBooks entity inside Salesforce.
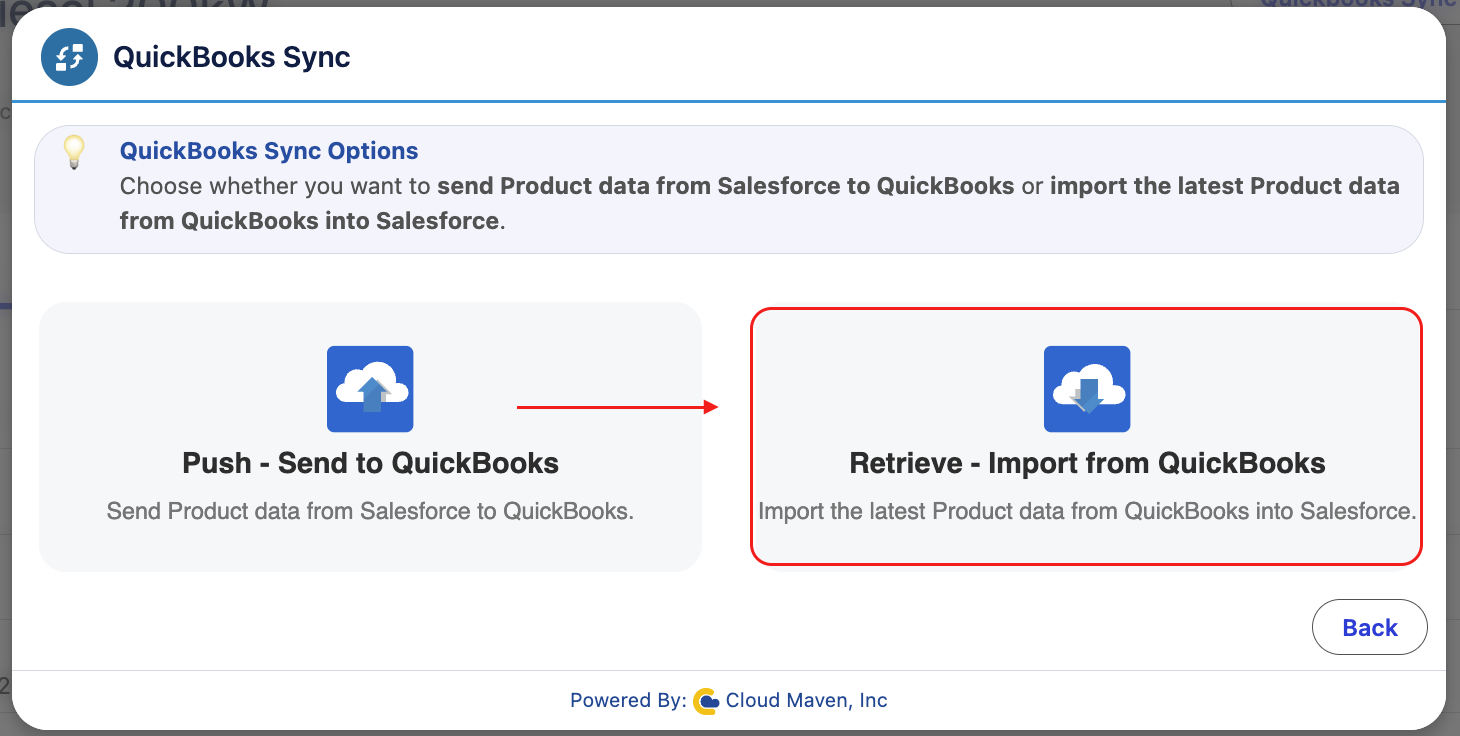
-
The data will be pulled from QuickBooks into Salesforce.
1.3 Attaching a QuickBooks Record to a Salesforce Record:
-
If no related QuickBooks record exists in Salesforce, click the Retrieve - Import from QuickBooks button.
-
Choose the company, then search for the record you want to attach.
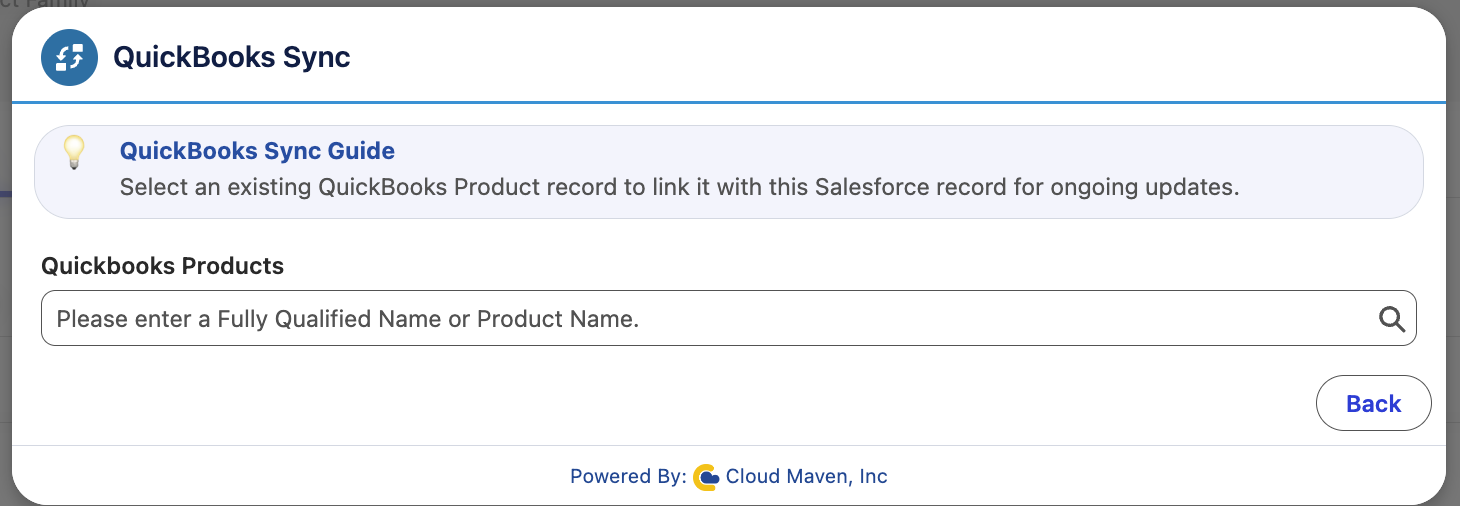
-
After selecting the record, it will automatically be linked to the Salesforce record.