
1. Create a Monitor List
Create a Monitoring List and add Members via Salesforce Report
1.1 Navigate to TR Adverse Monitor List Tab
-
Go to App Launcher and find → TR Adverse Monitor List
-
Open the List View
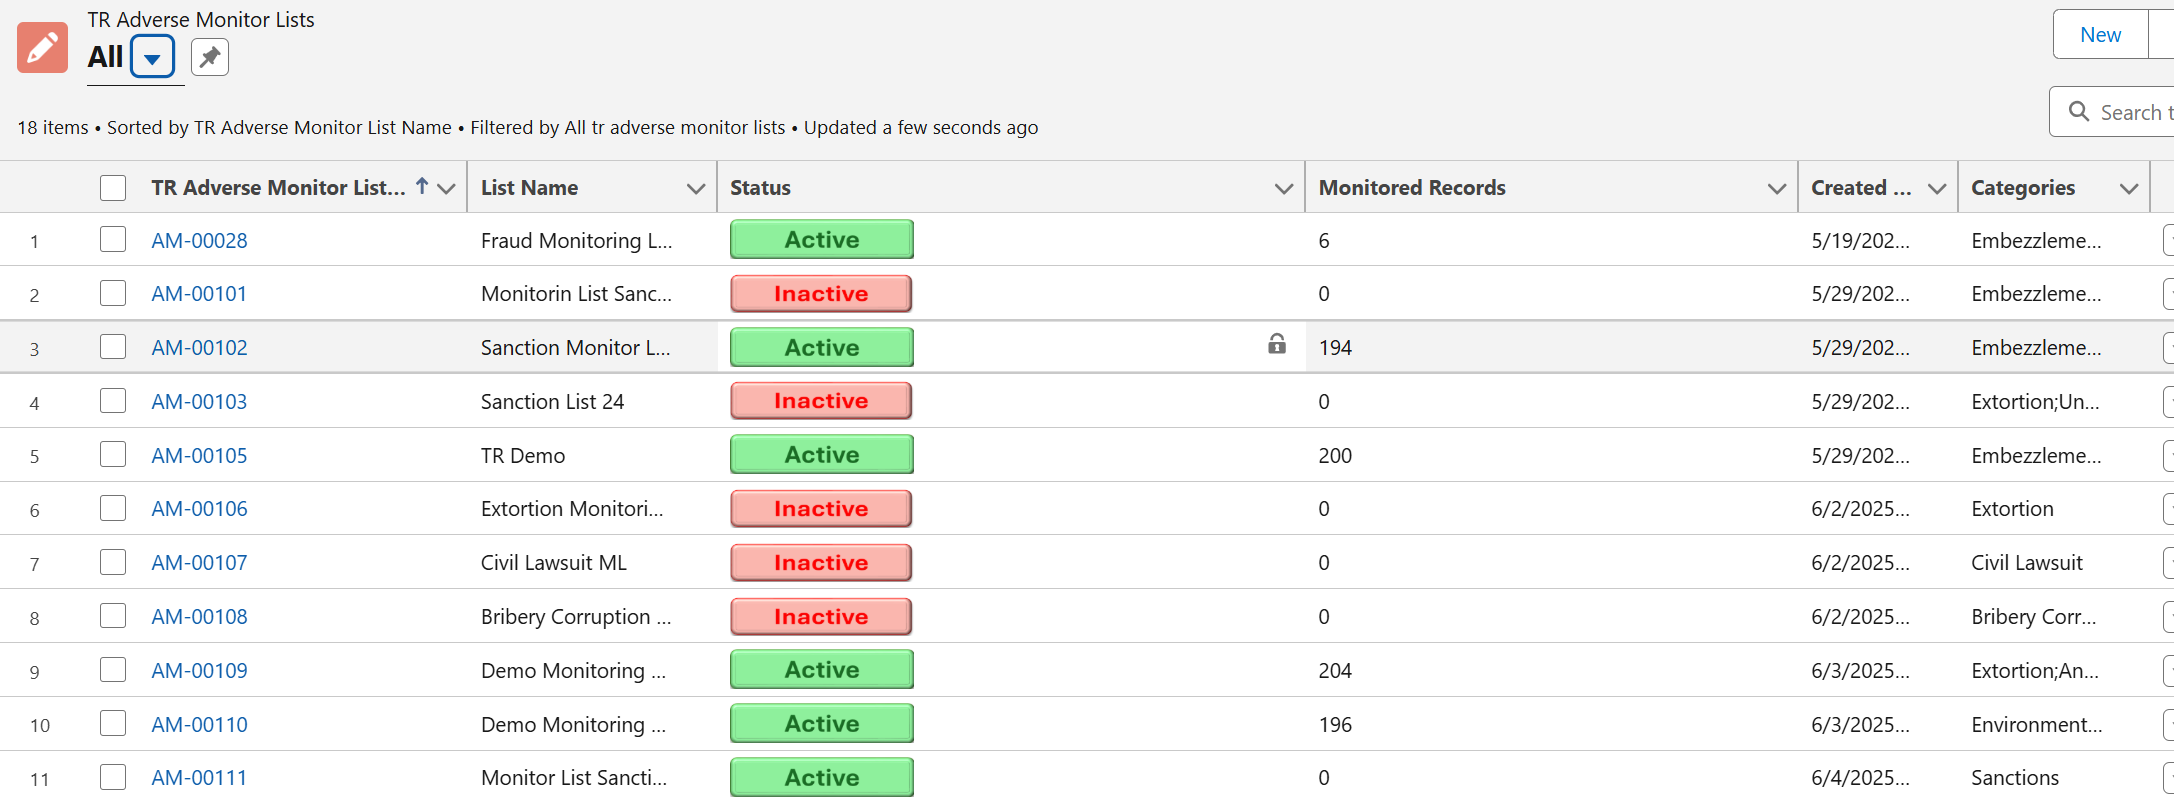
1.2 Click on New
-
Click the New button to start creating a new monitor list.
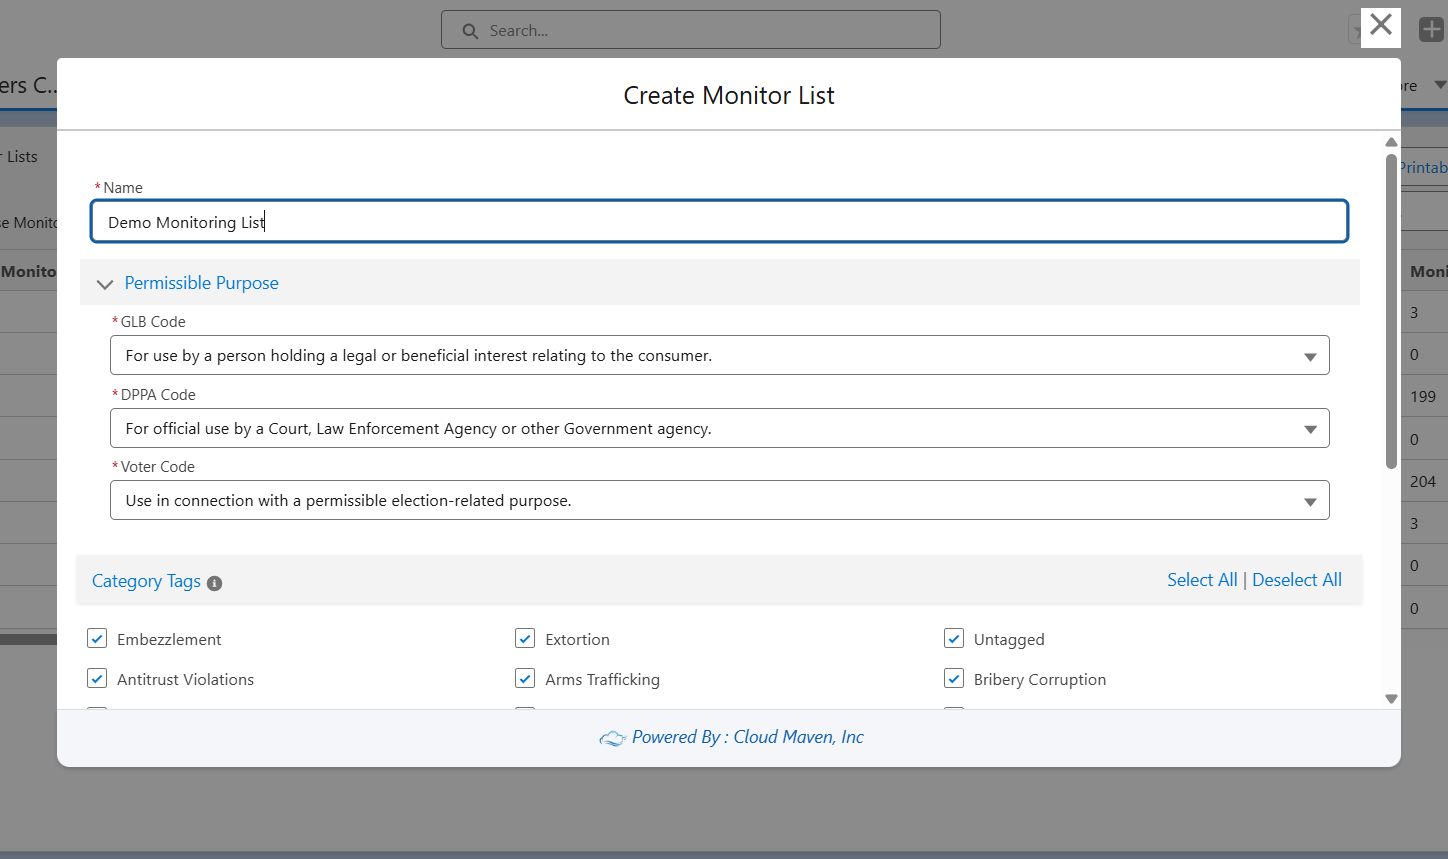
1.3 Enter the List Name and Select the Permissible Purpose
-
Provide a Monitor List Name
-
Select:
-
GLB
-
DPPA
-
Voter Code
-
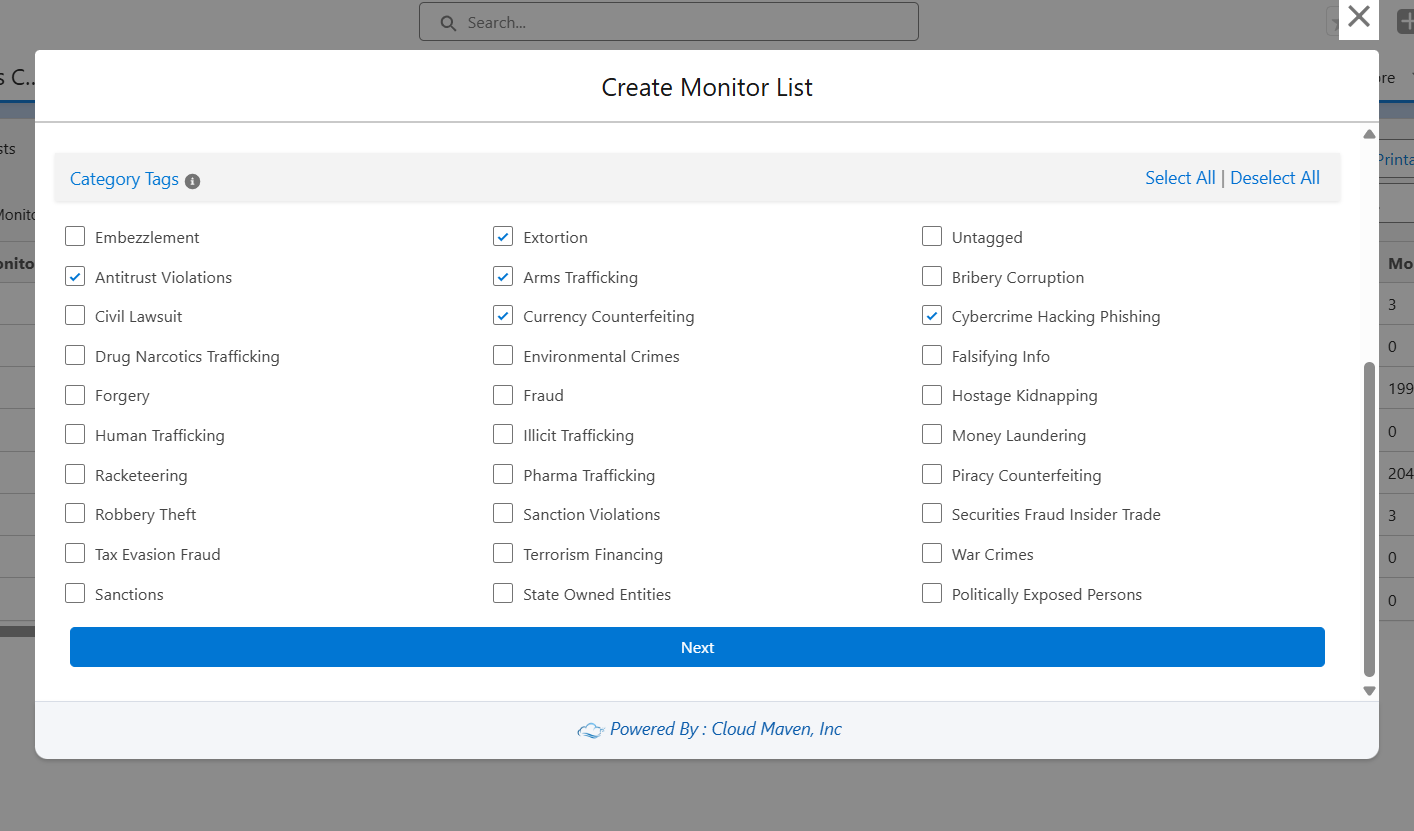
1.4 Select Categories
-
Choose one or more Categories (They allow you to narrow down or restrict the results shown based on specific categories you've selected.) to associate with this monitor list.
-
Click Next
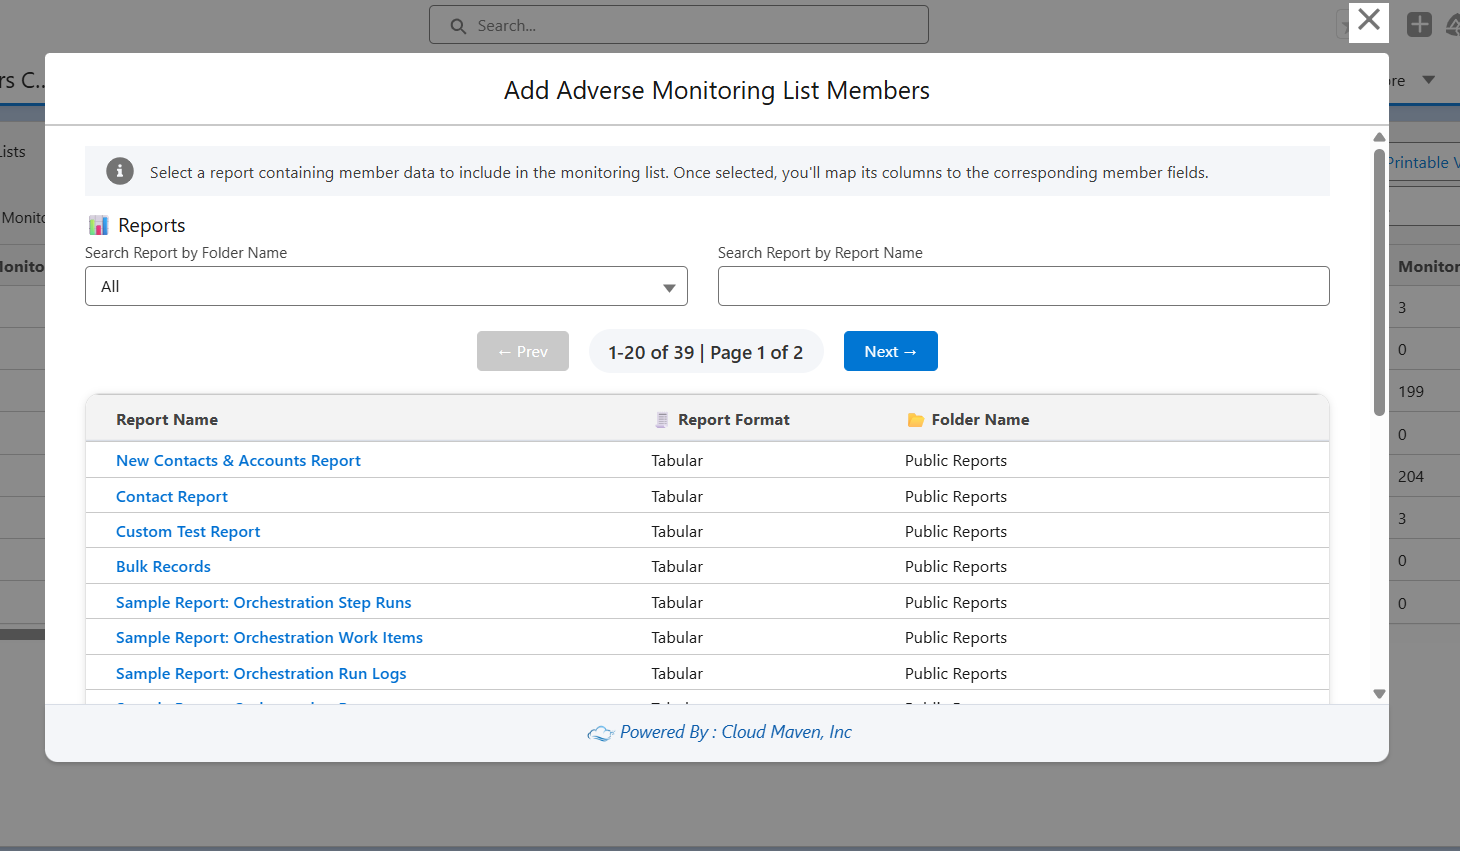
1.4 Add List Members
1.4.1 Select a Salesforce Report
-
A screen will display all reports in the org.
-
Select the appropriate Report containing the records to add to monitor list.
1.4.2 Map the Report fields with the Salesforce fields
-
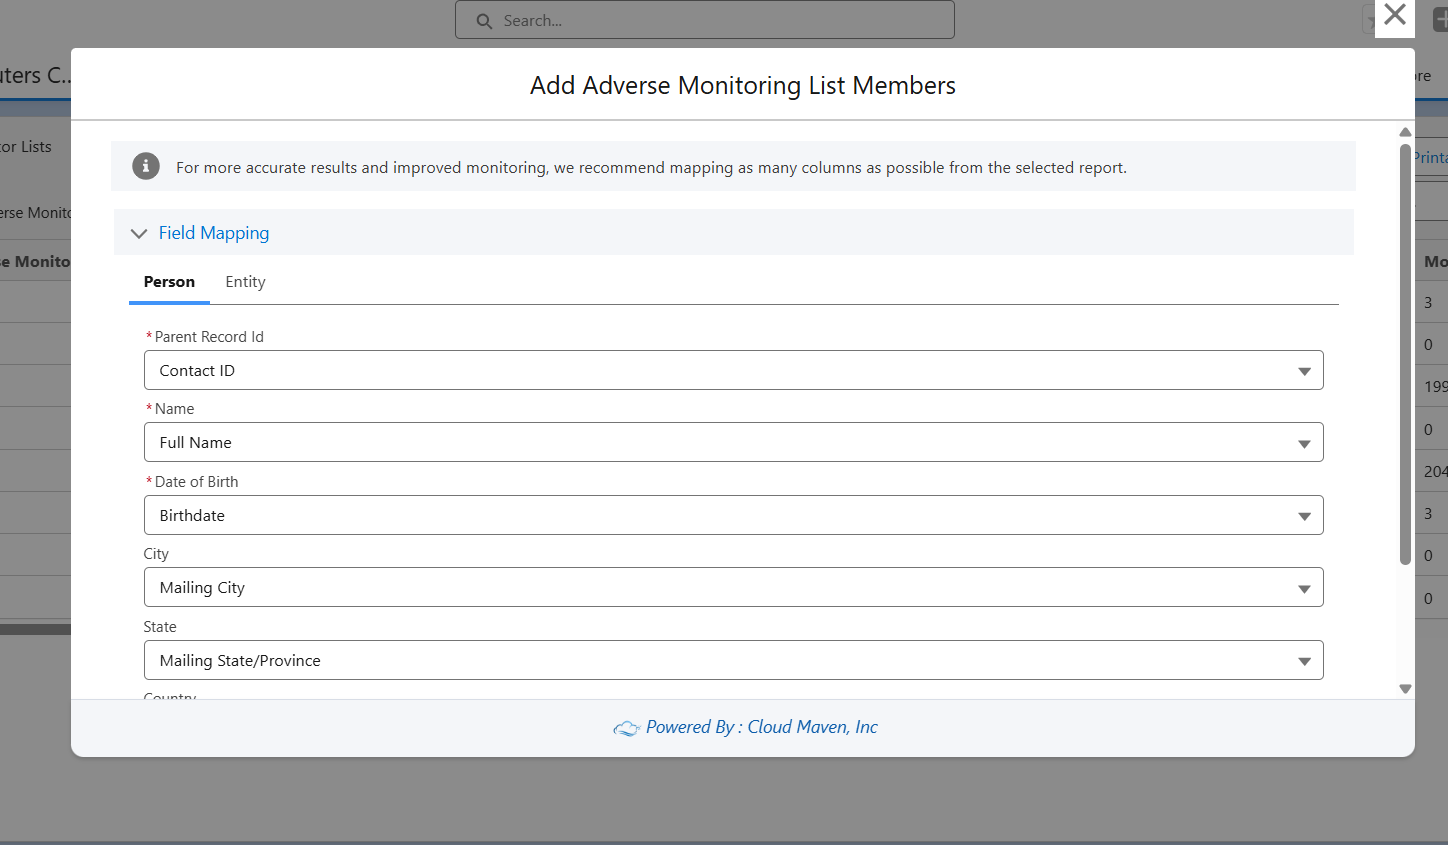
A Mapping Screen will open. Select either the Person or Entity tab.
-
Map the following fields:
-
Parent Record Id
-
Name *
-
Date of Birth (mandatory for Person)
-
City
-
State
-
Country
-
1.4.3 Click on Add Members
-
Click the Add Members button.
-
This will:
-
Create the Monitoring List Record
-
Add all records in the Selected Report as List members to the newly created Monitor List
-
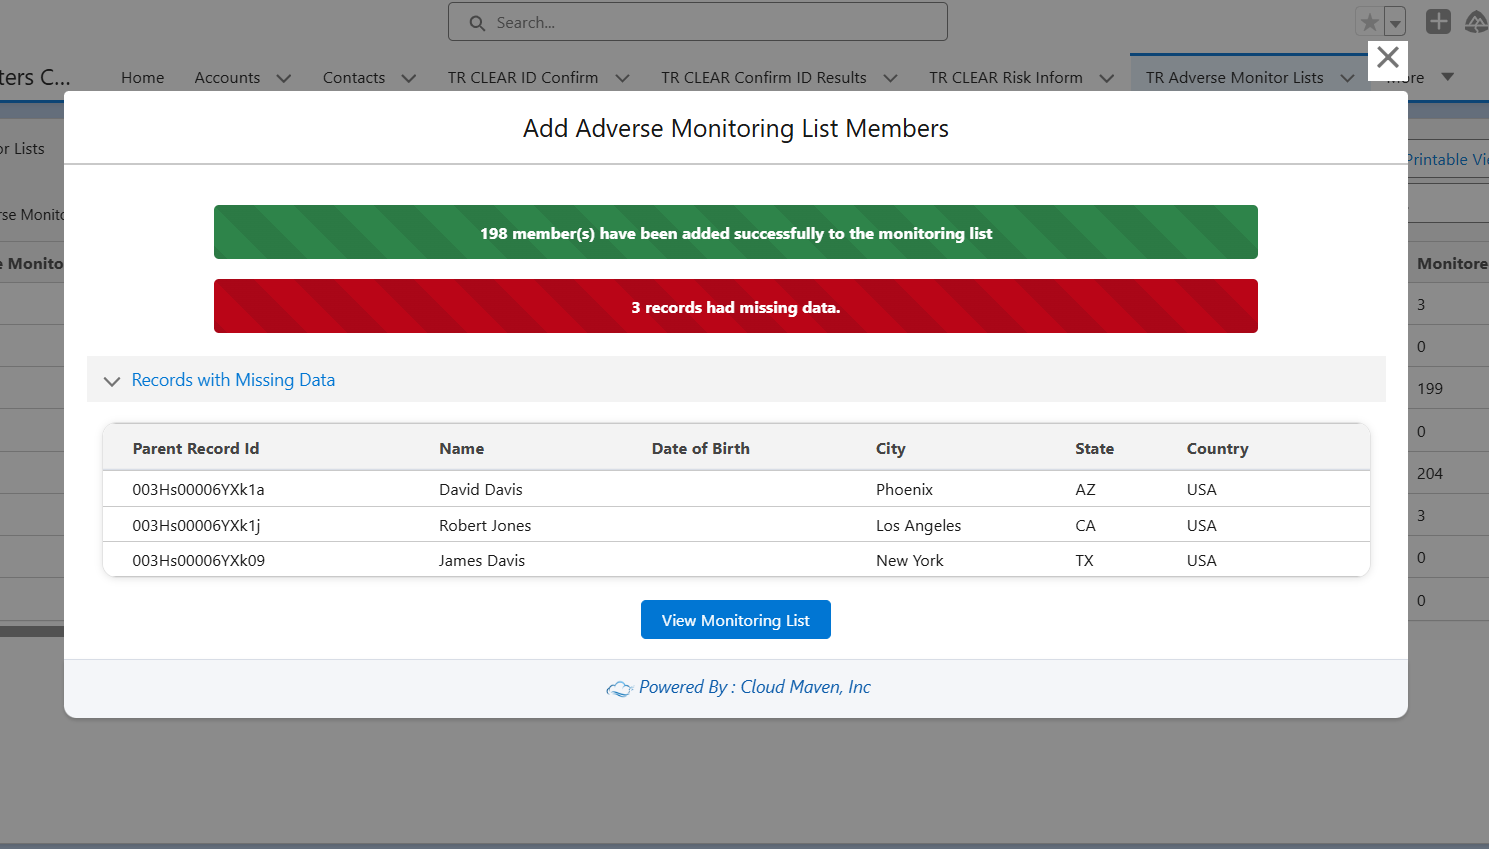
In case if the required field is missing for any of the records, you can view the details in the table as shown above. These records are not being added to the list.
2. Update a Monitor List
Update an existing Monitoring List
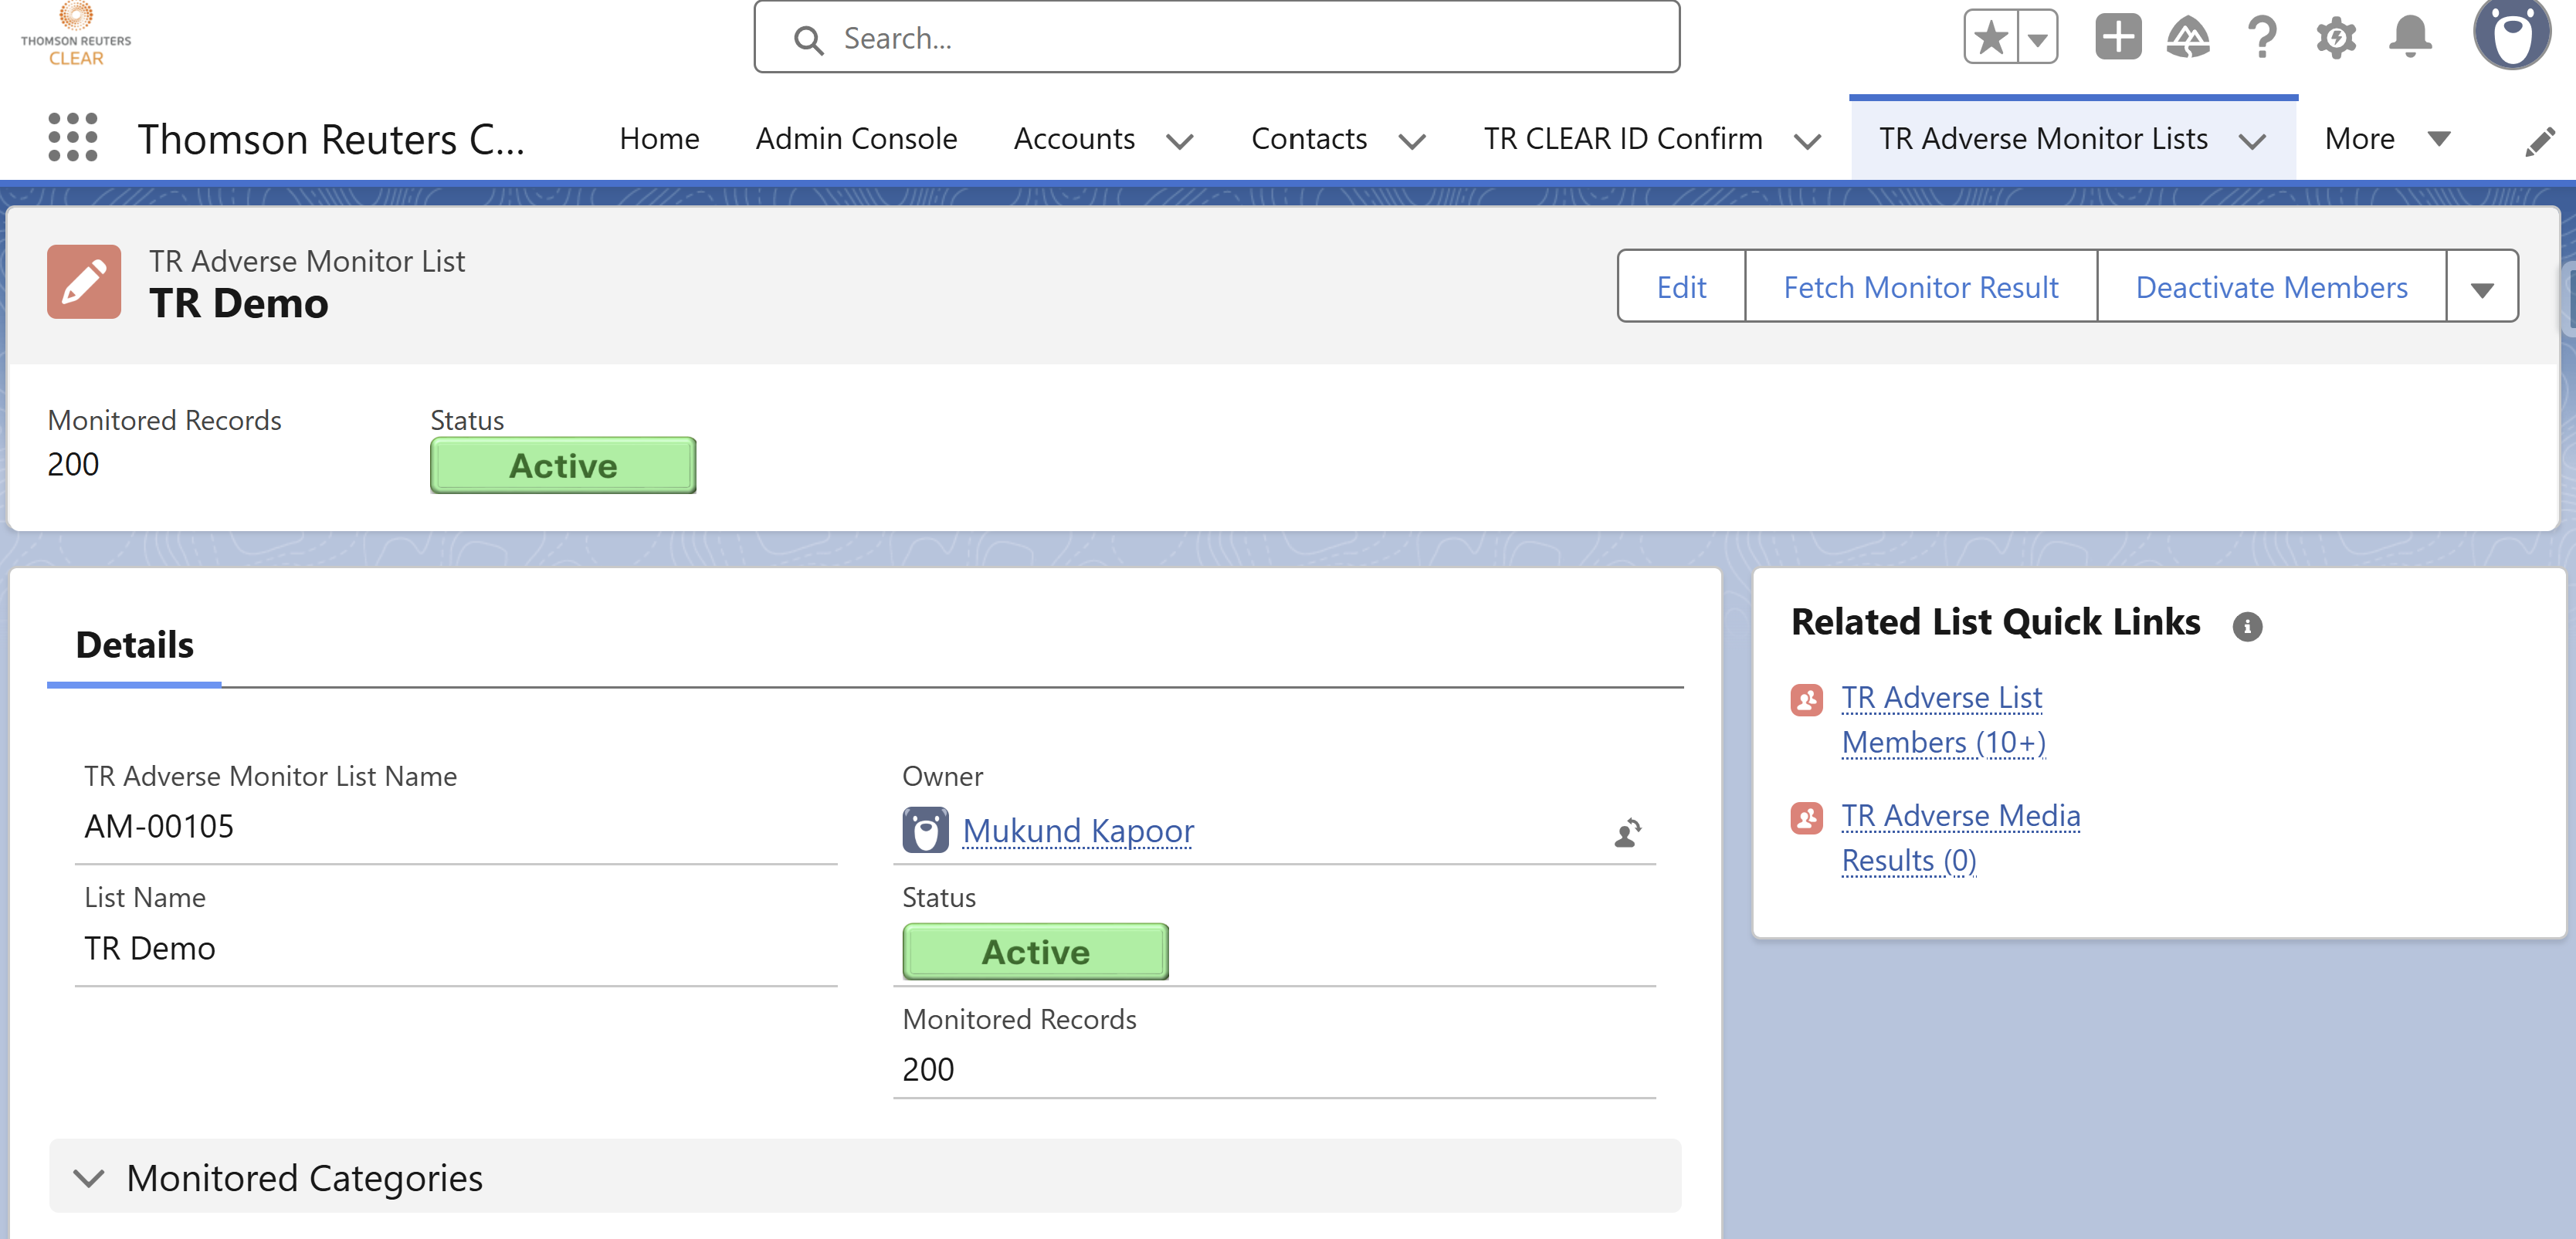
2.1 Navigate to the TR Adverse Monitor List record
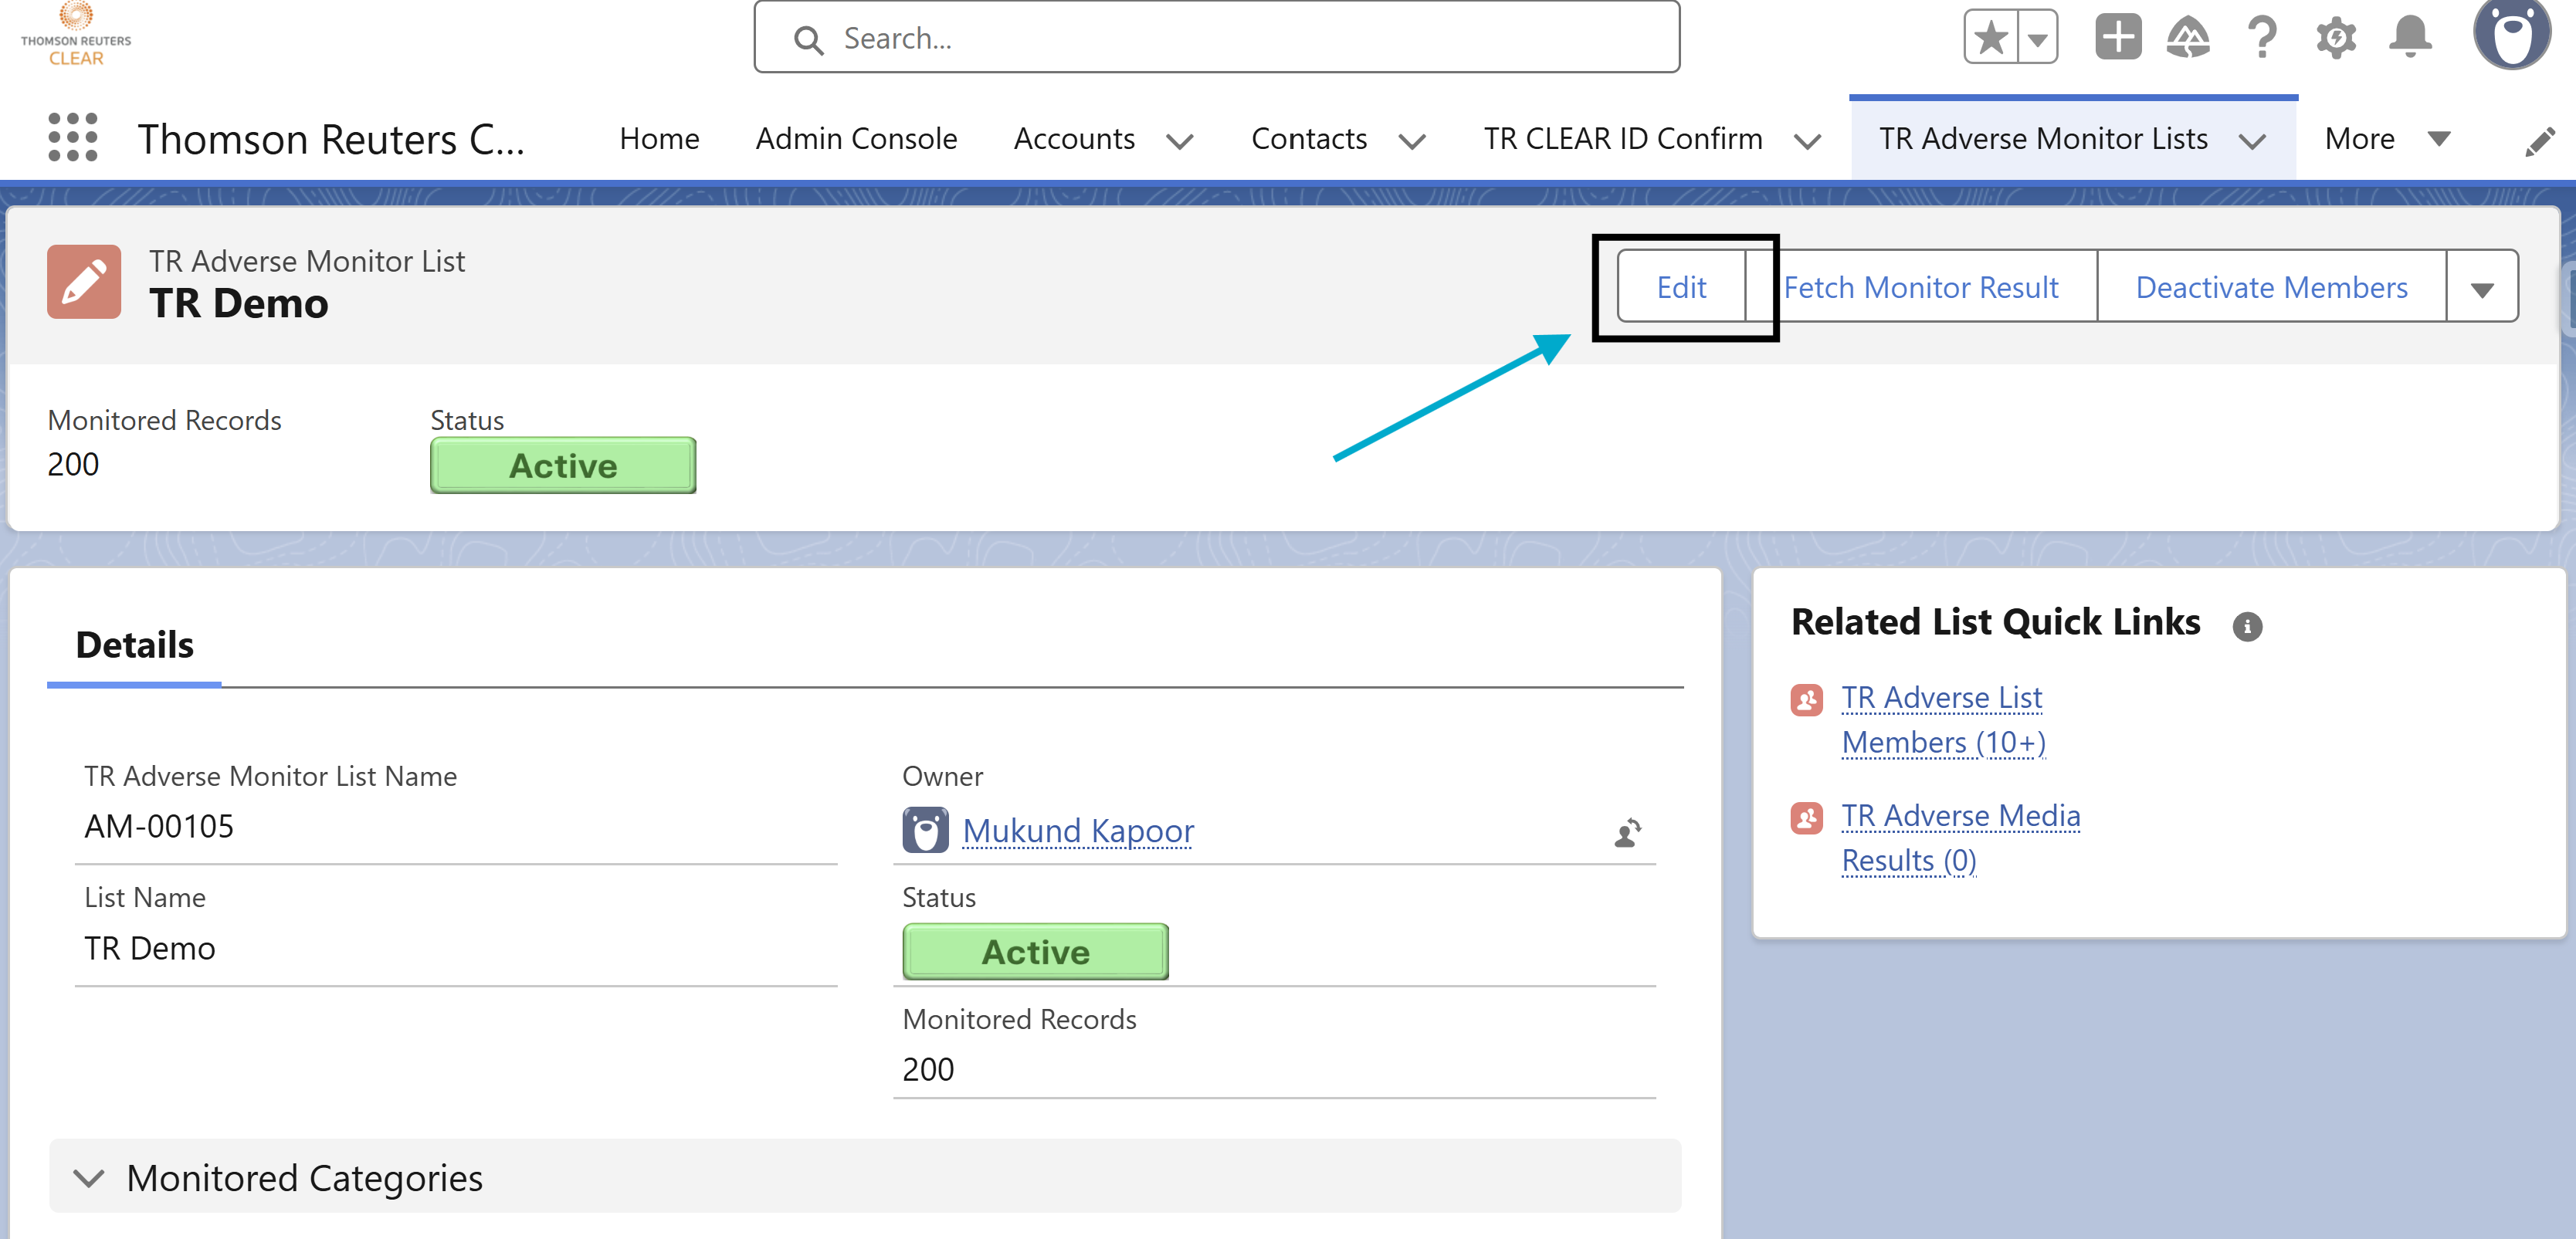
2.2 Click on the Edit button
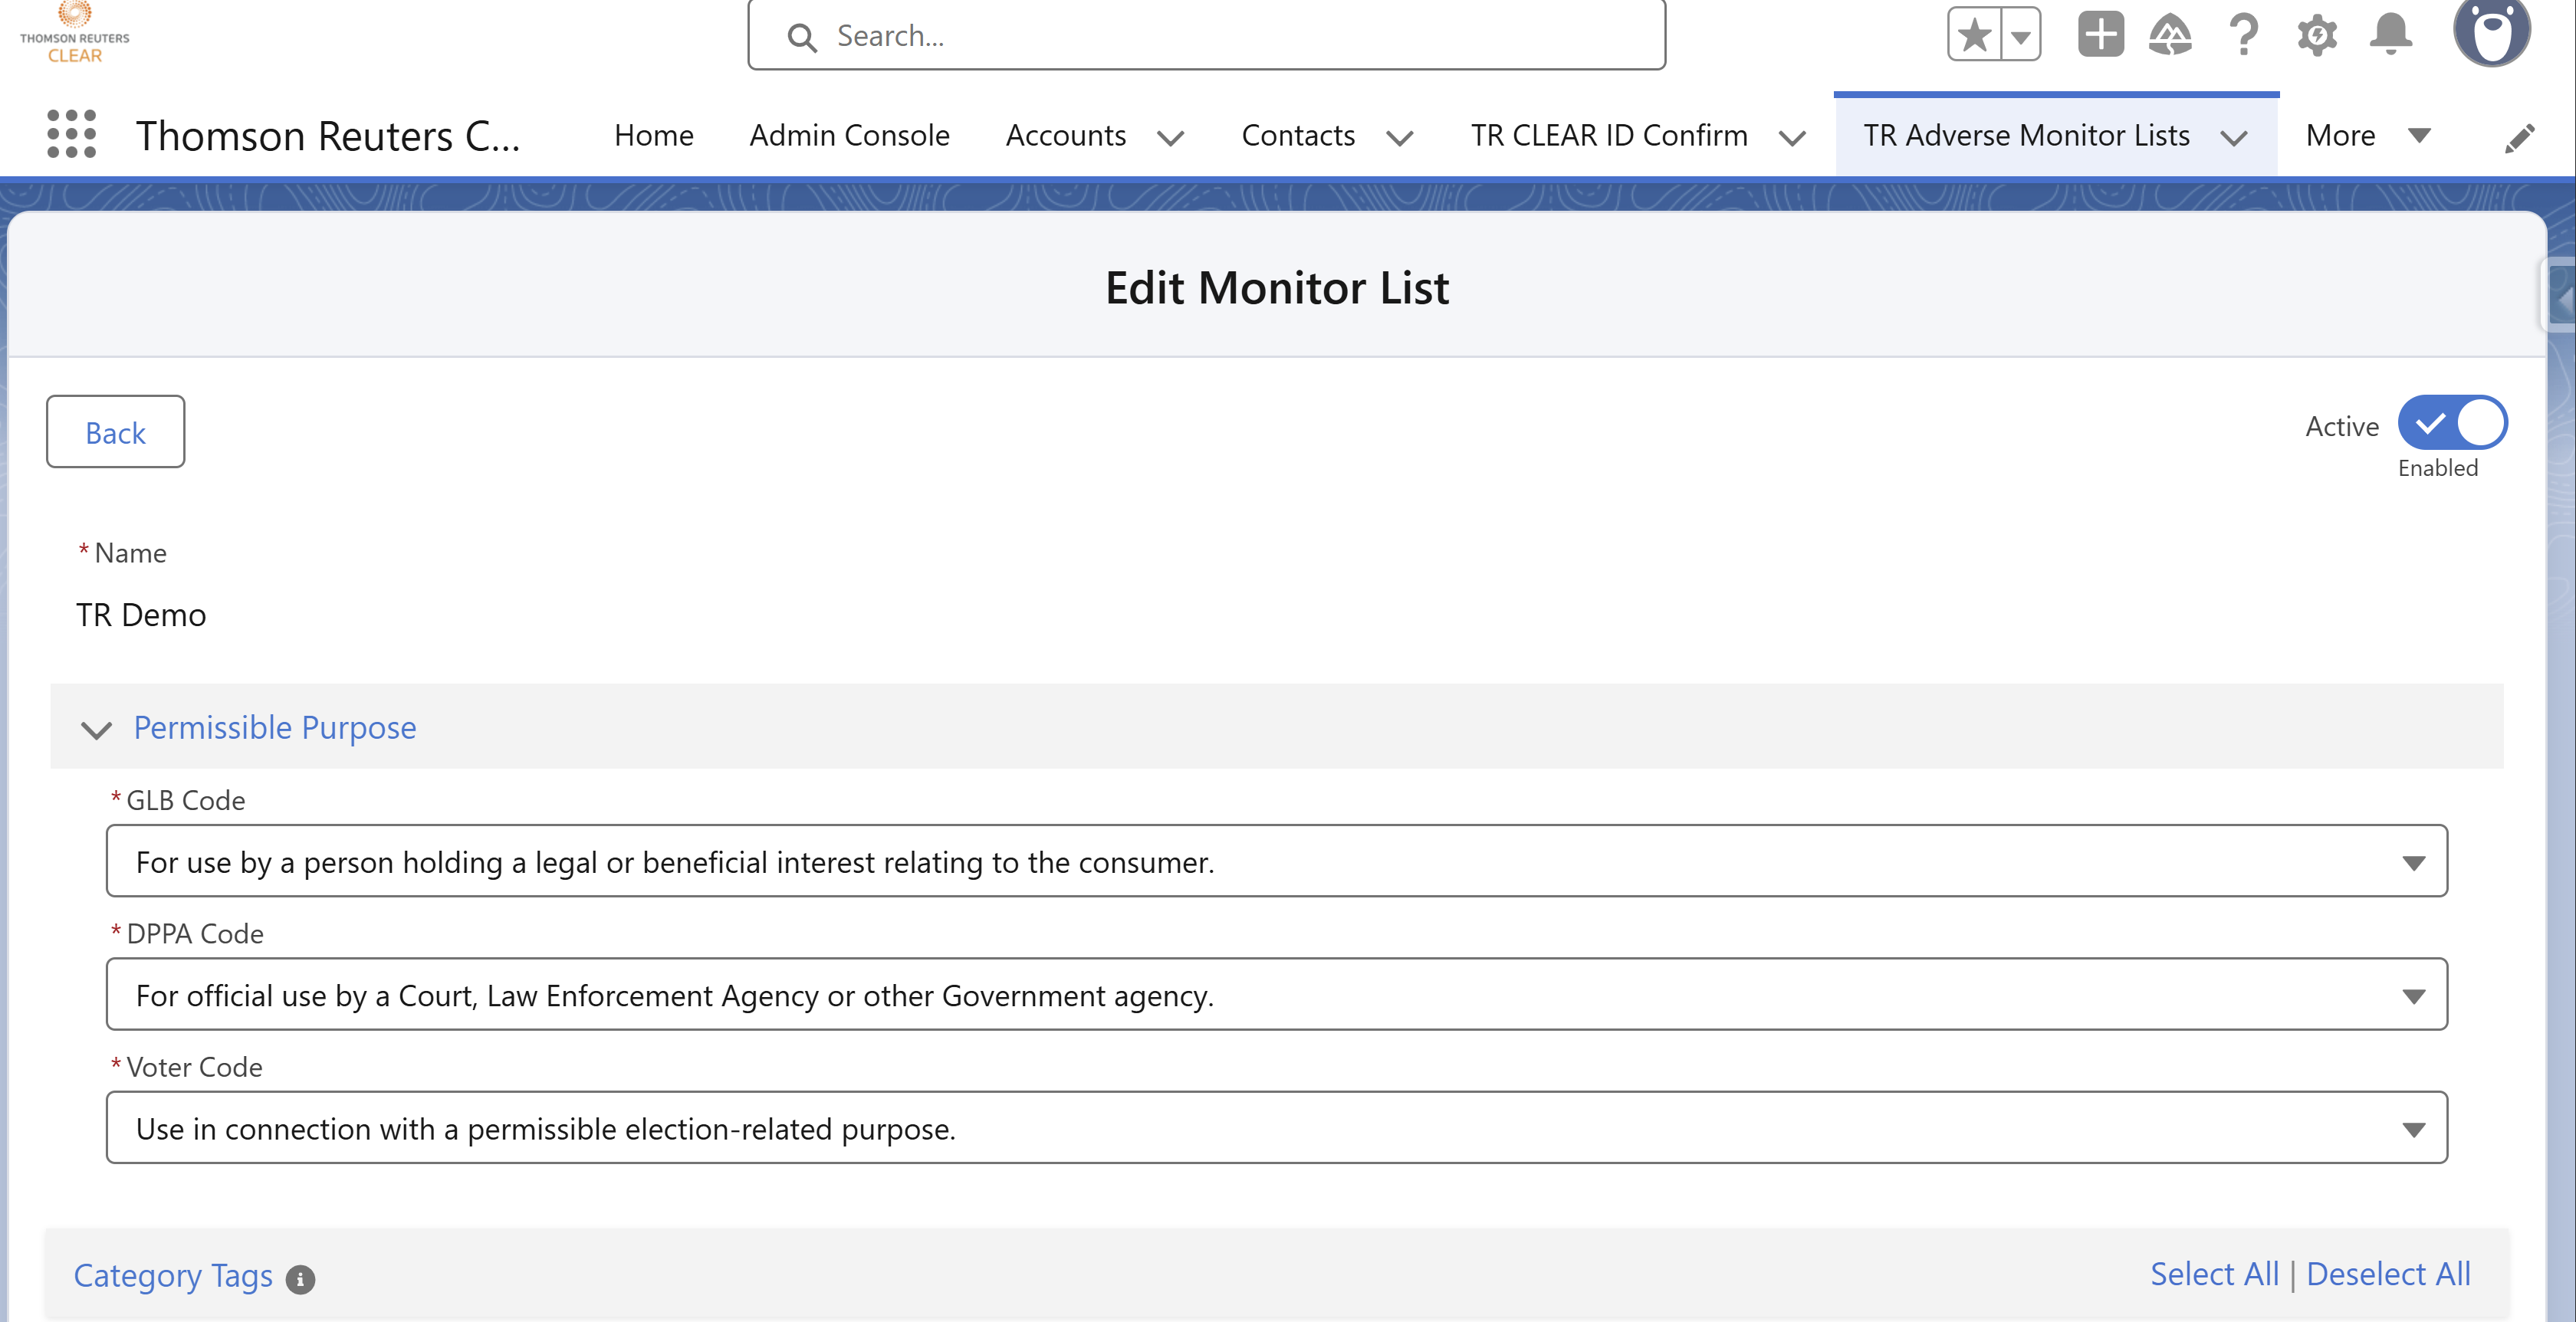
2.3 Update the Permissible Purpose and/or Categories
-
Permissible Purposes
-
Categories
2.4 Submit the Changes to TR
-
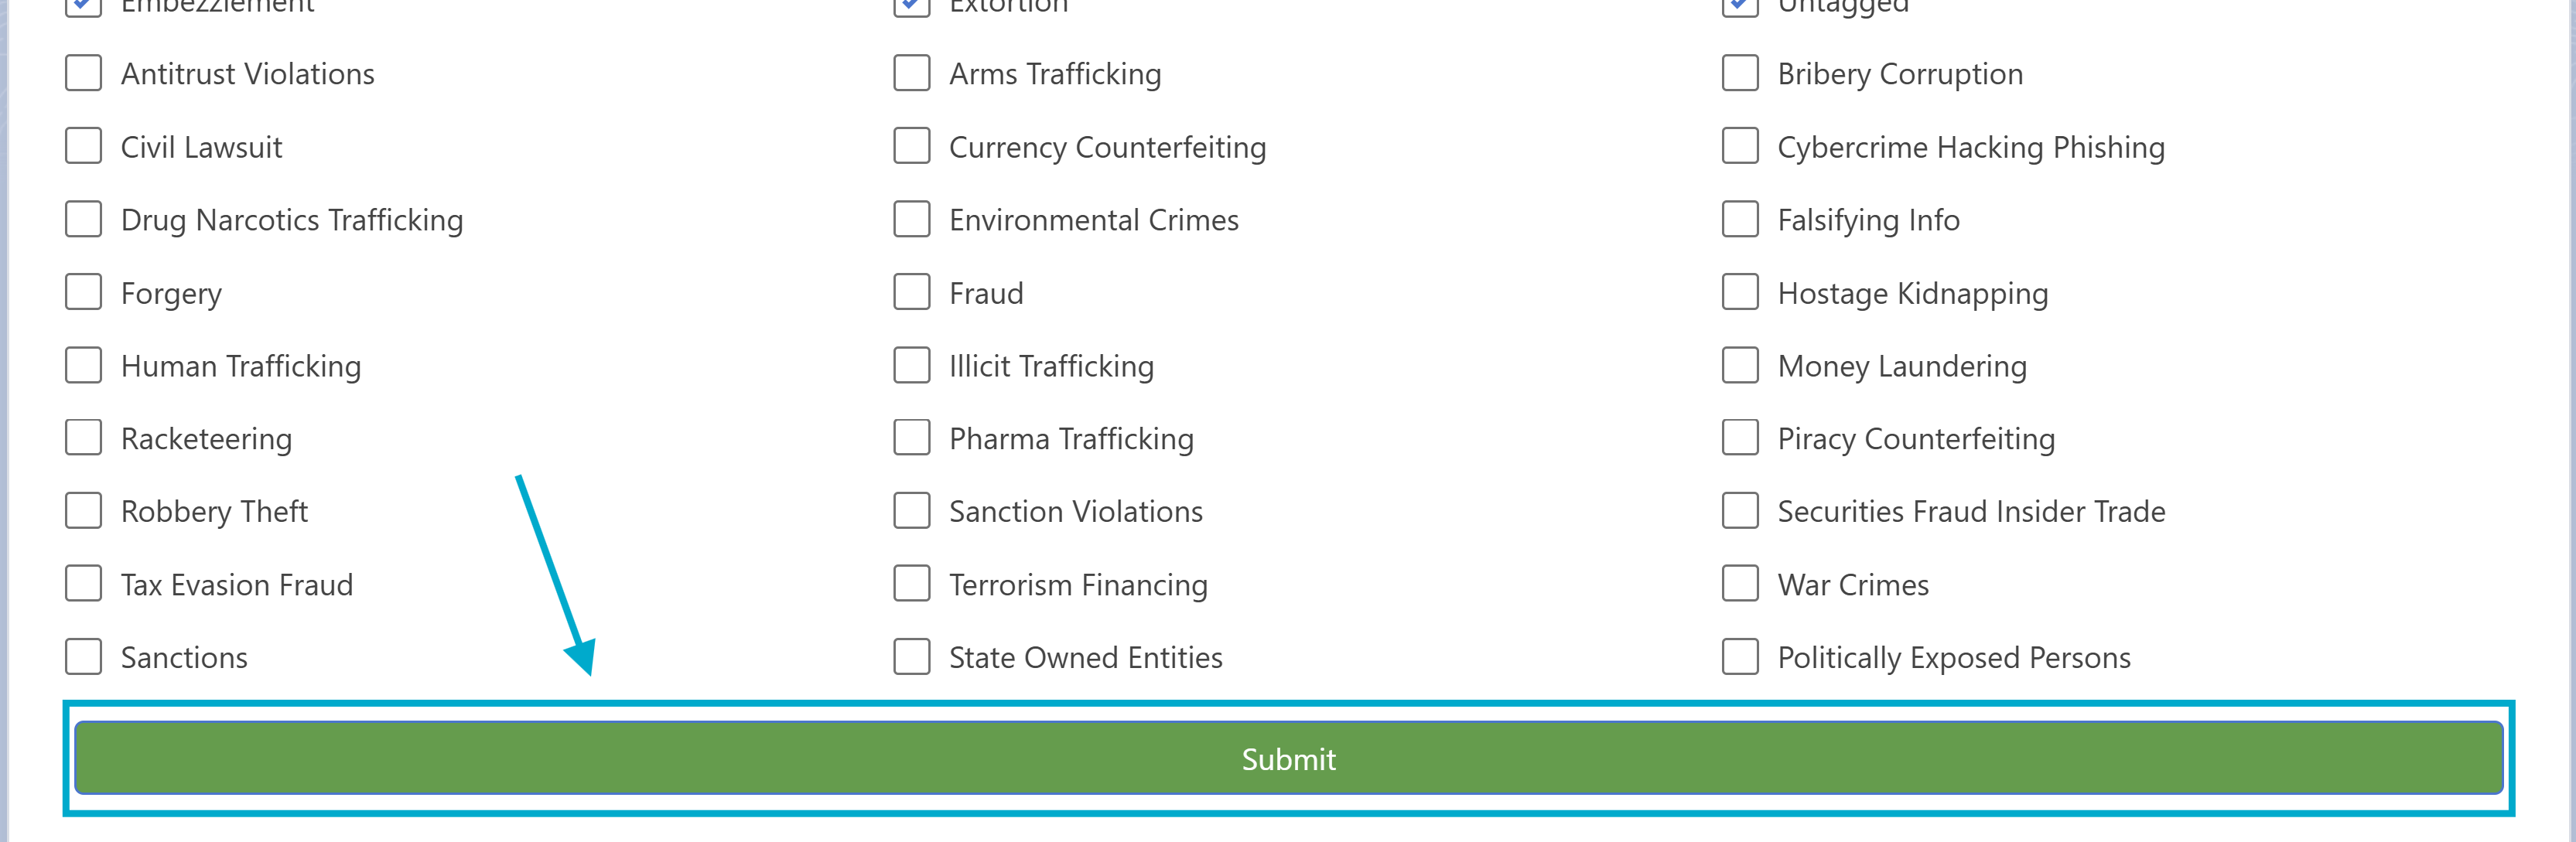
After making the necessary changes, click the Submit button to save the updates.
3. Deactivate a Monitor List
Deactivating a Monitor List
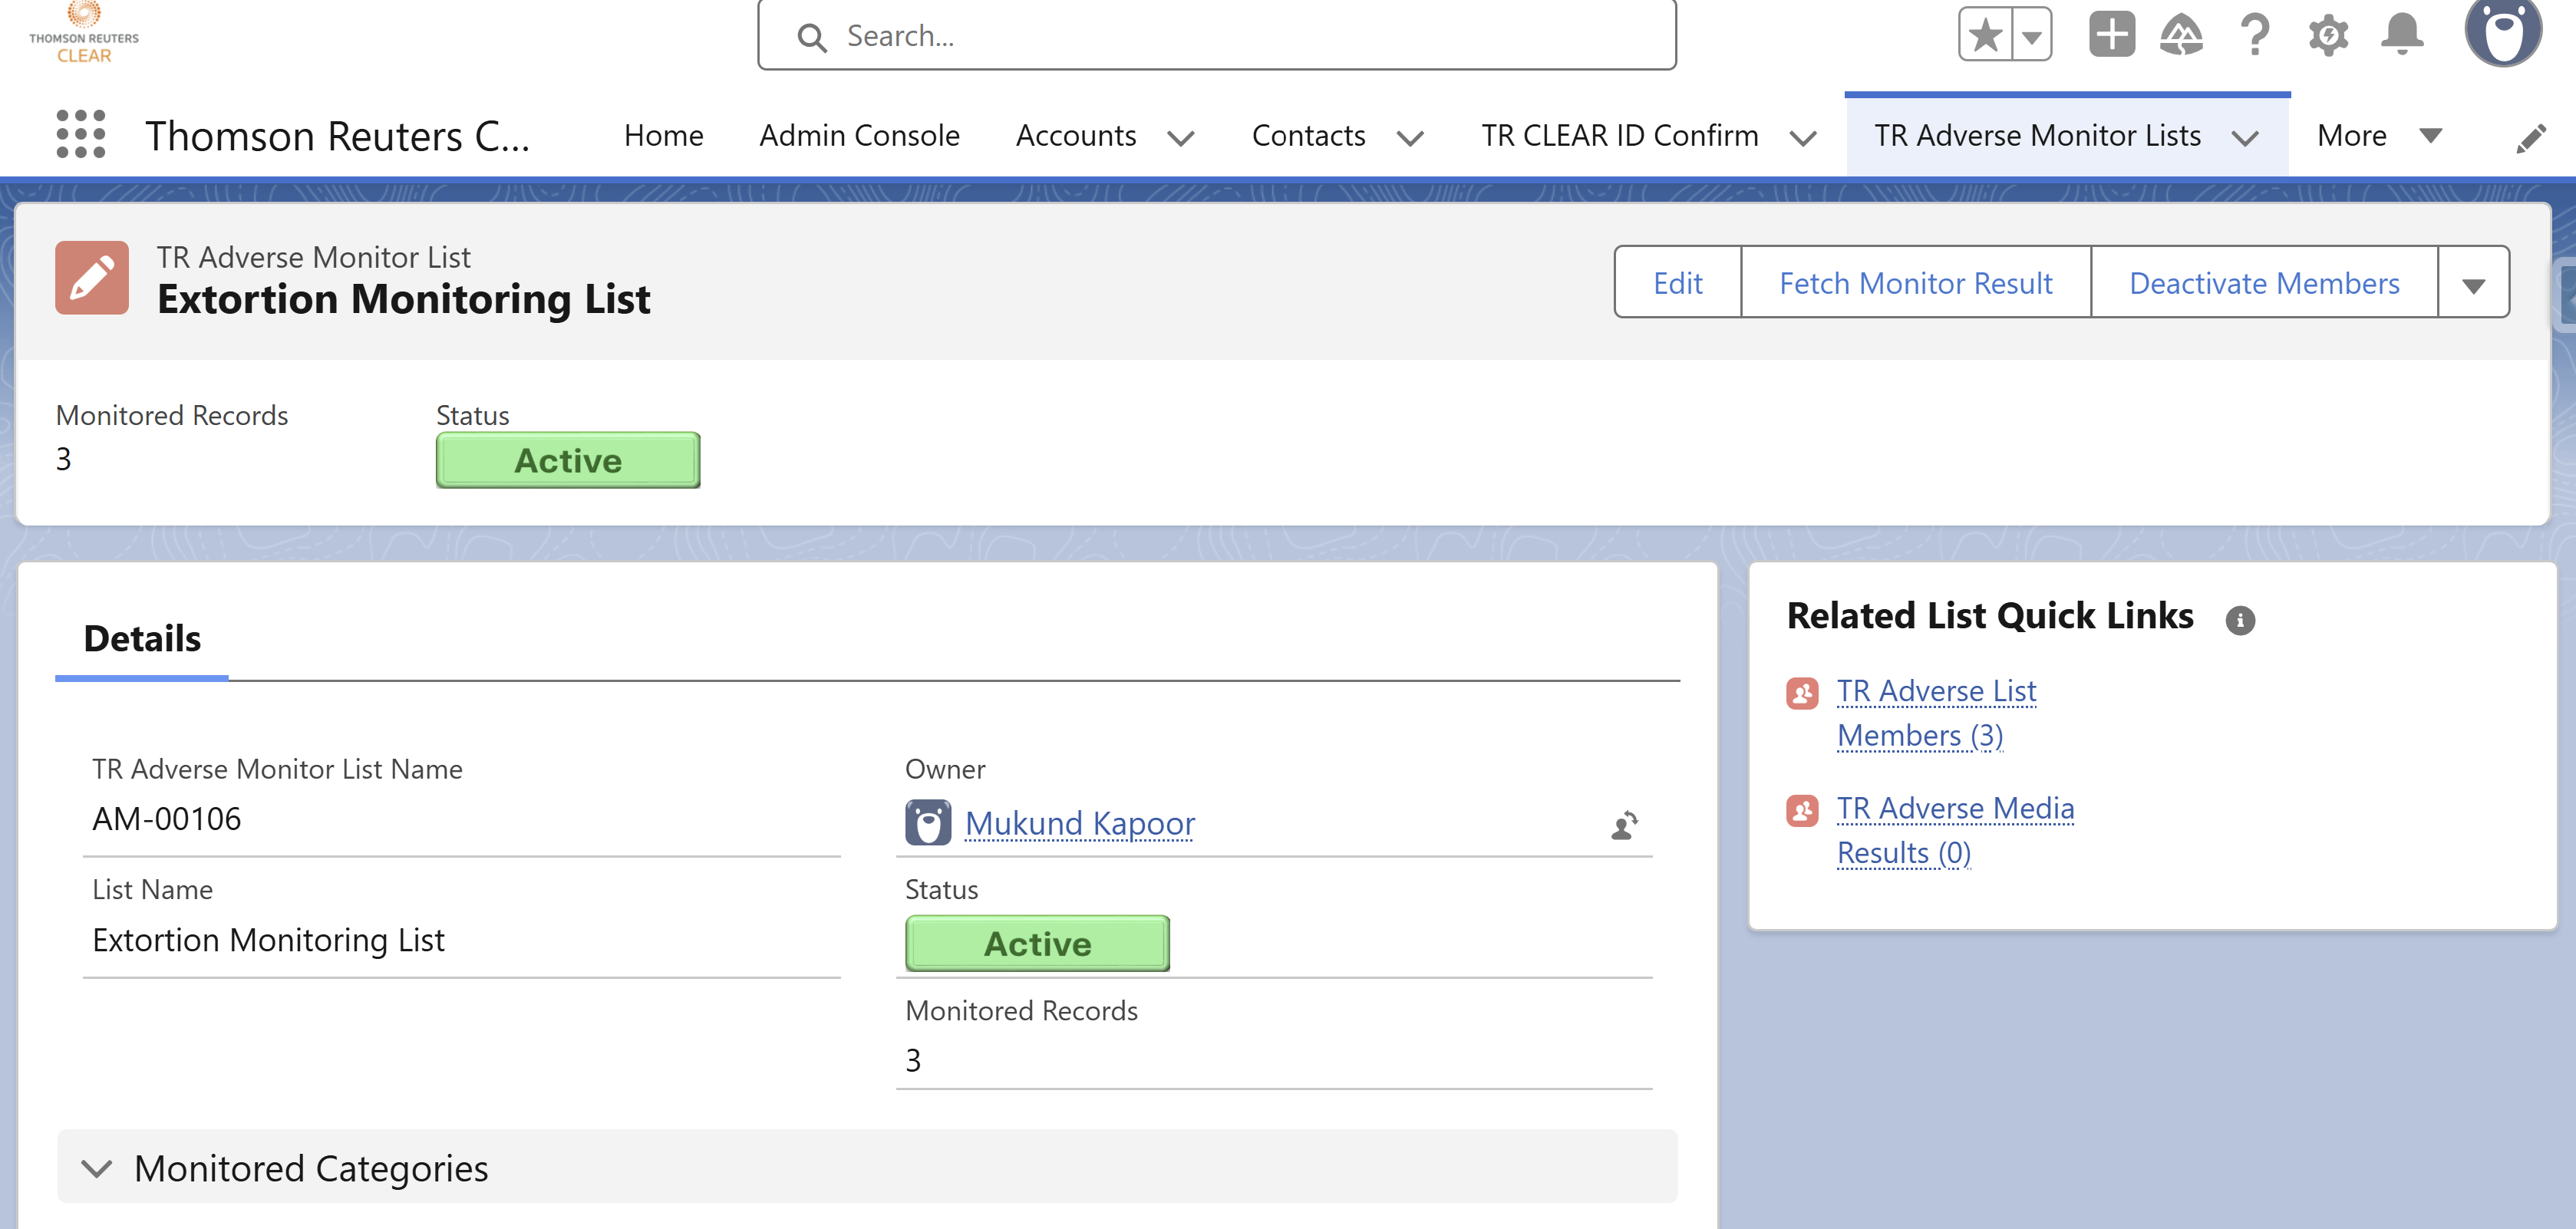
3.1 Navigate to the TR Adverse Monitor List record
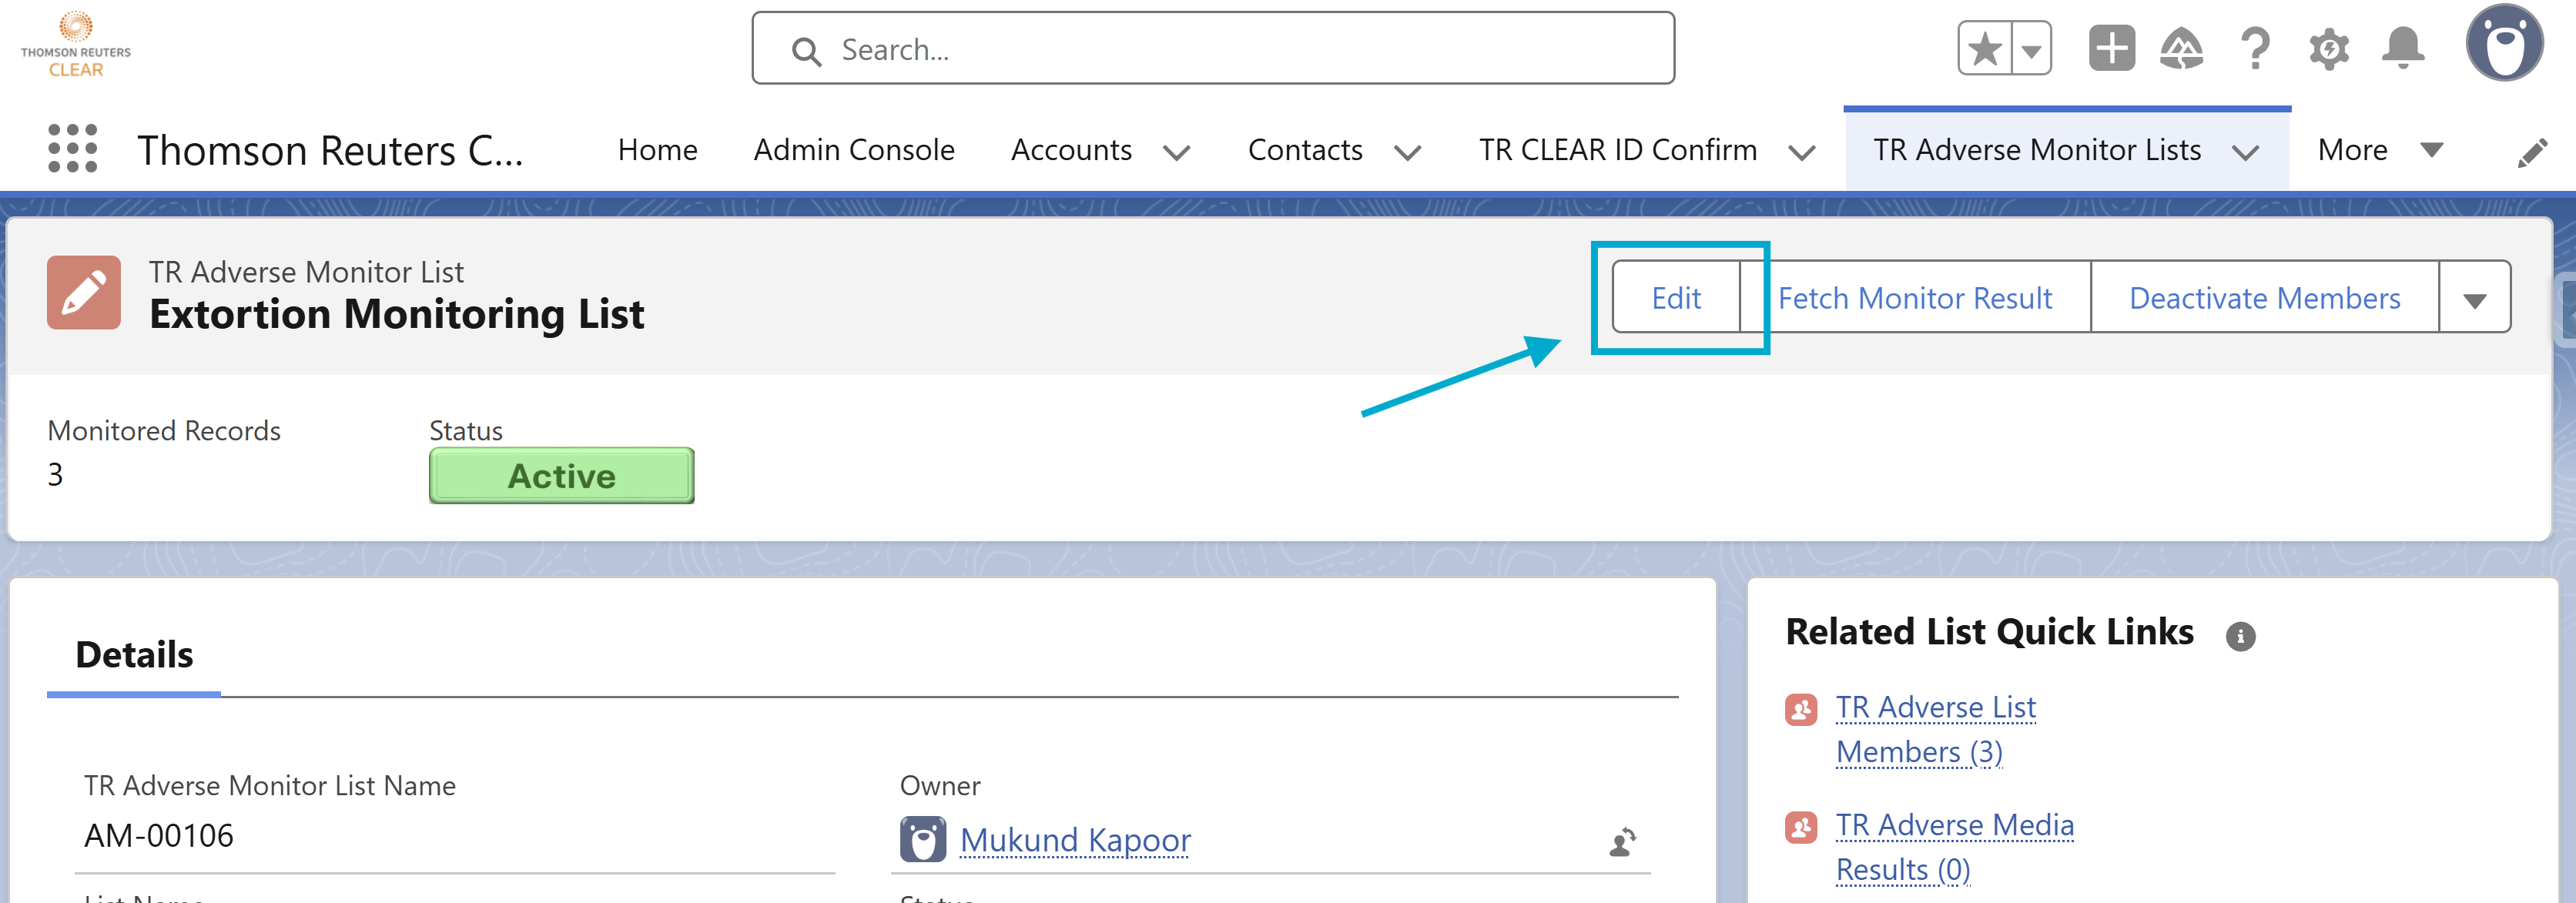
3.2 Click on the Edit button
3.3 Deactivate the Monitoring List
-
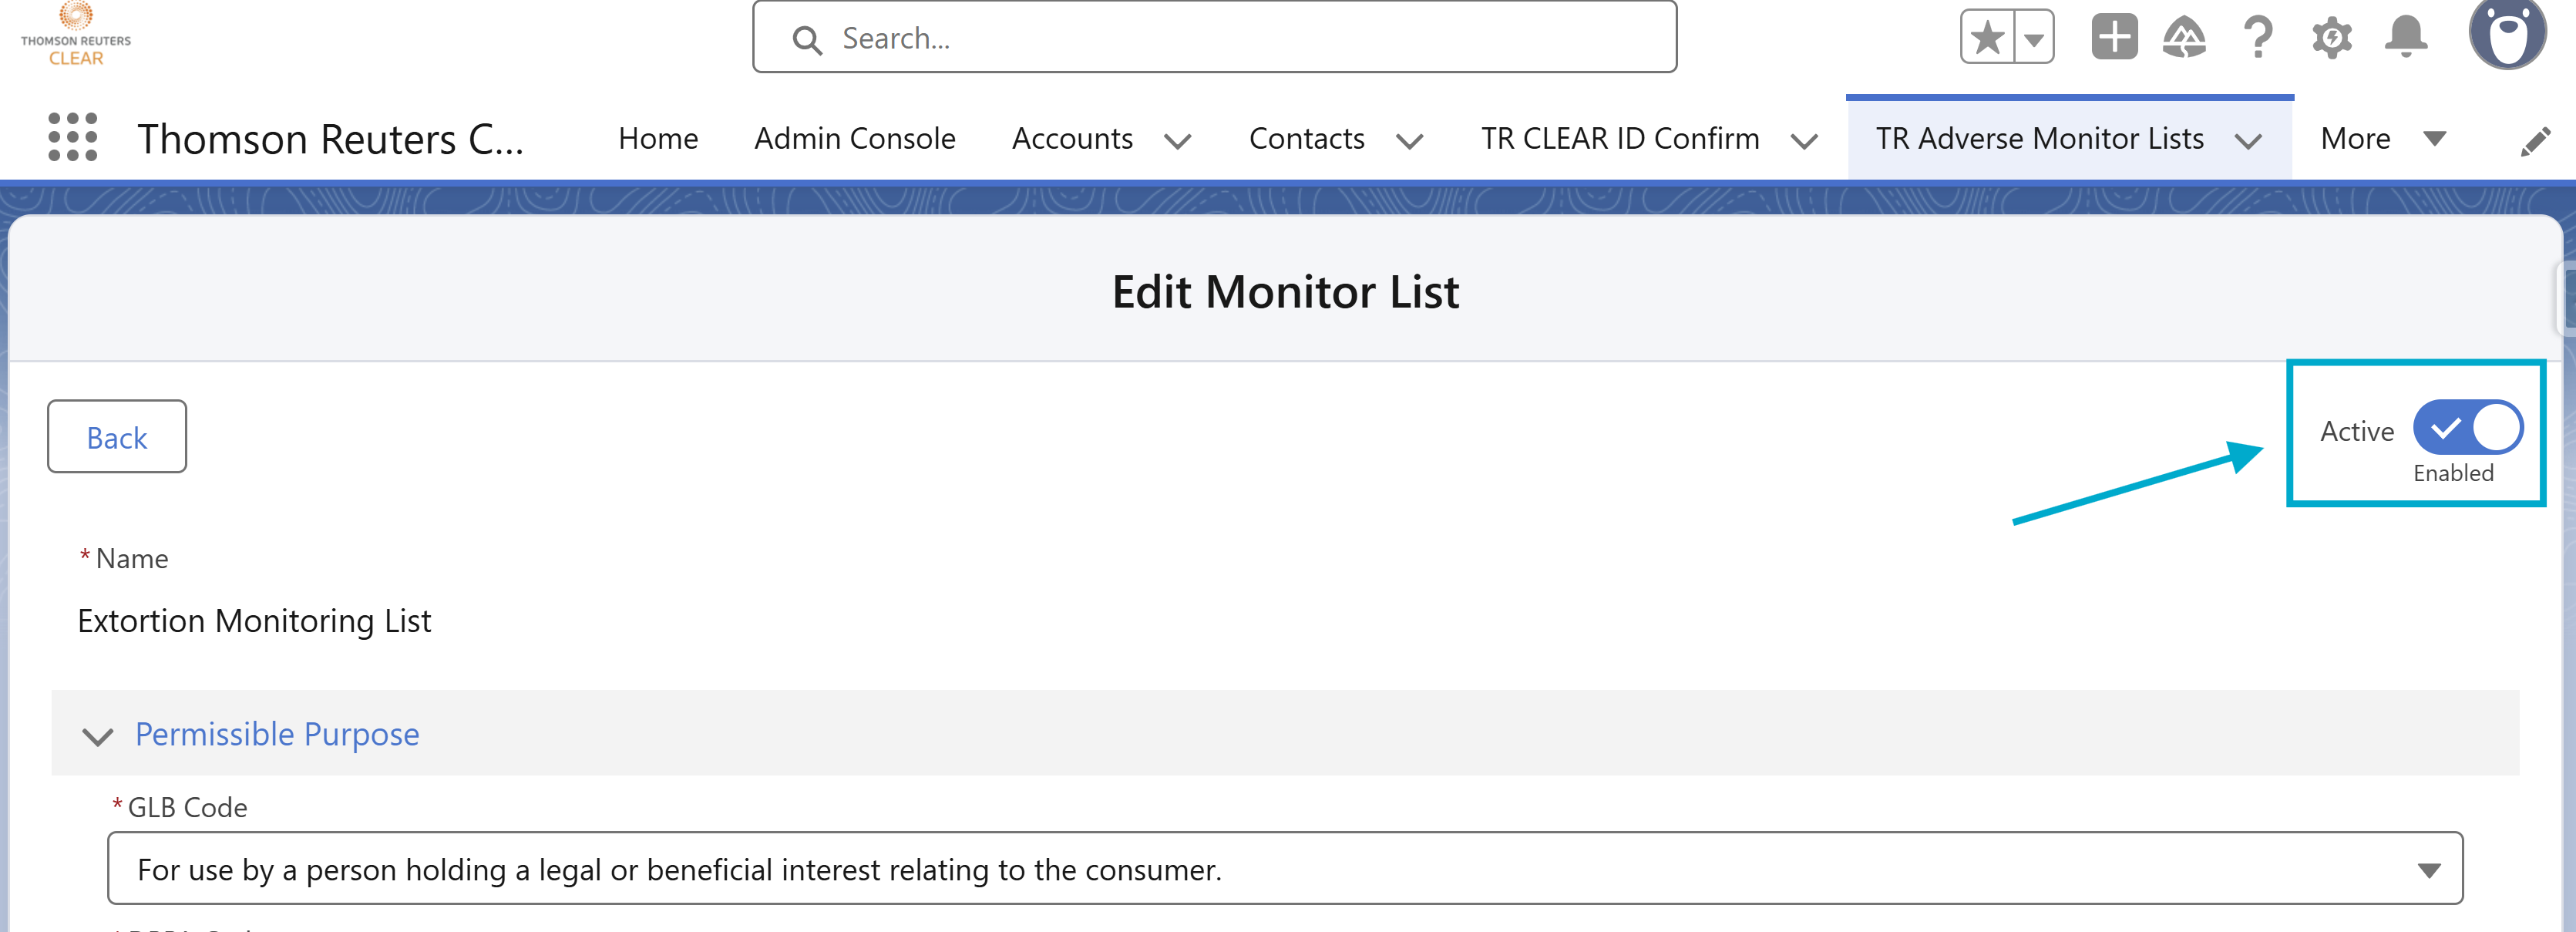
Locate the Active toggle switch in the top-right corner of the form.
-
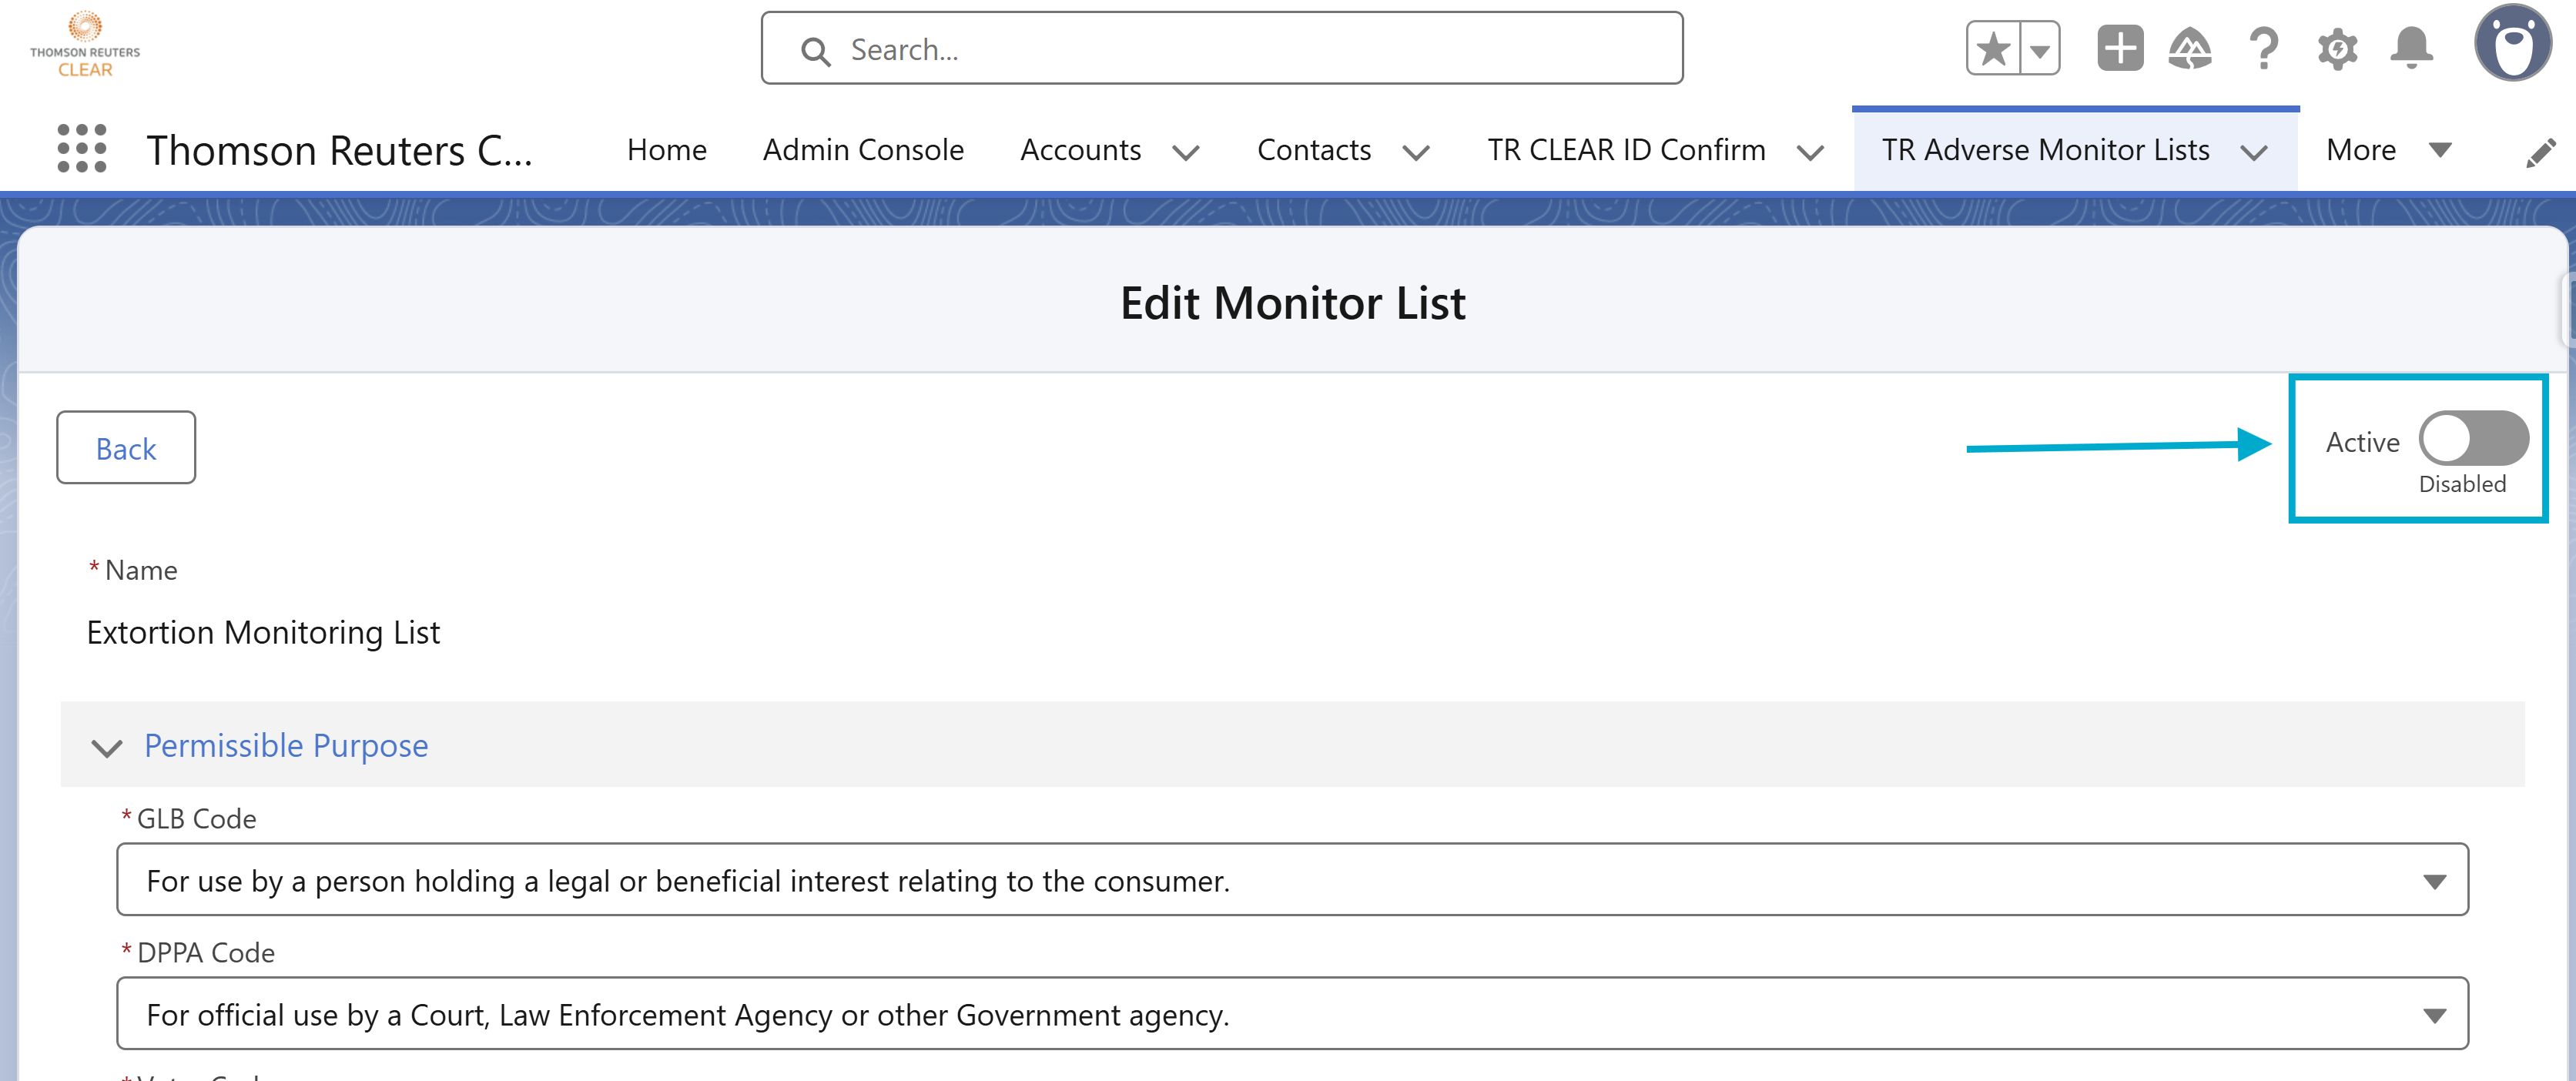
Switch the toggle off to deactivate the list.
3.4 Submit the Changes
-
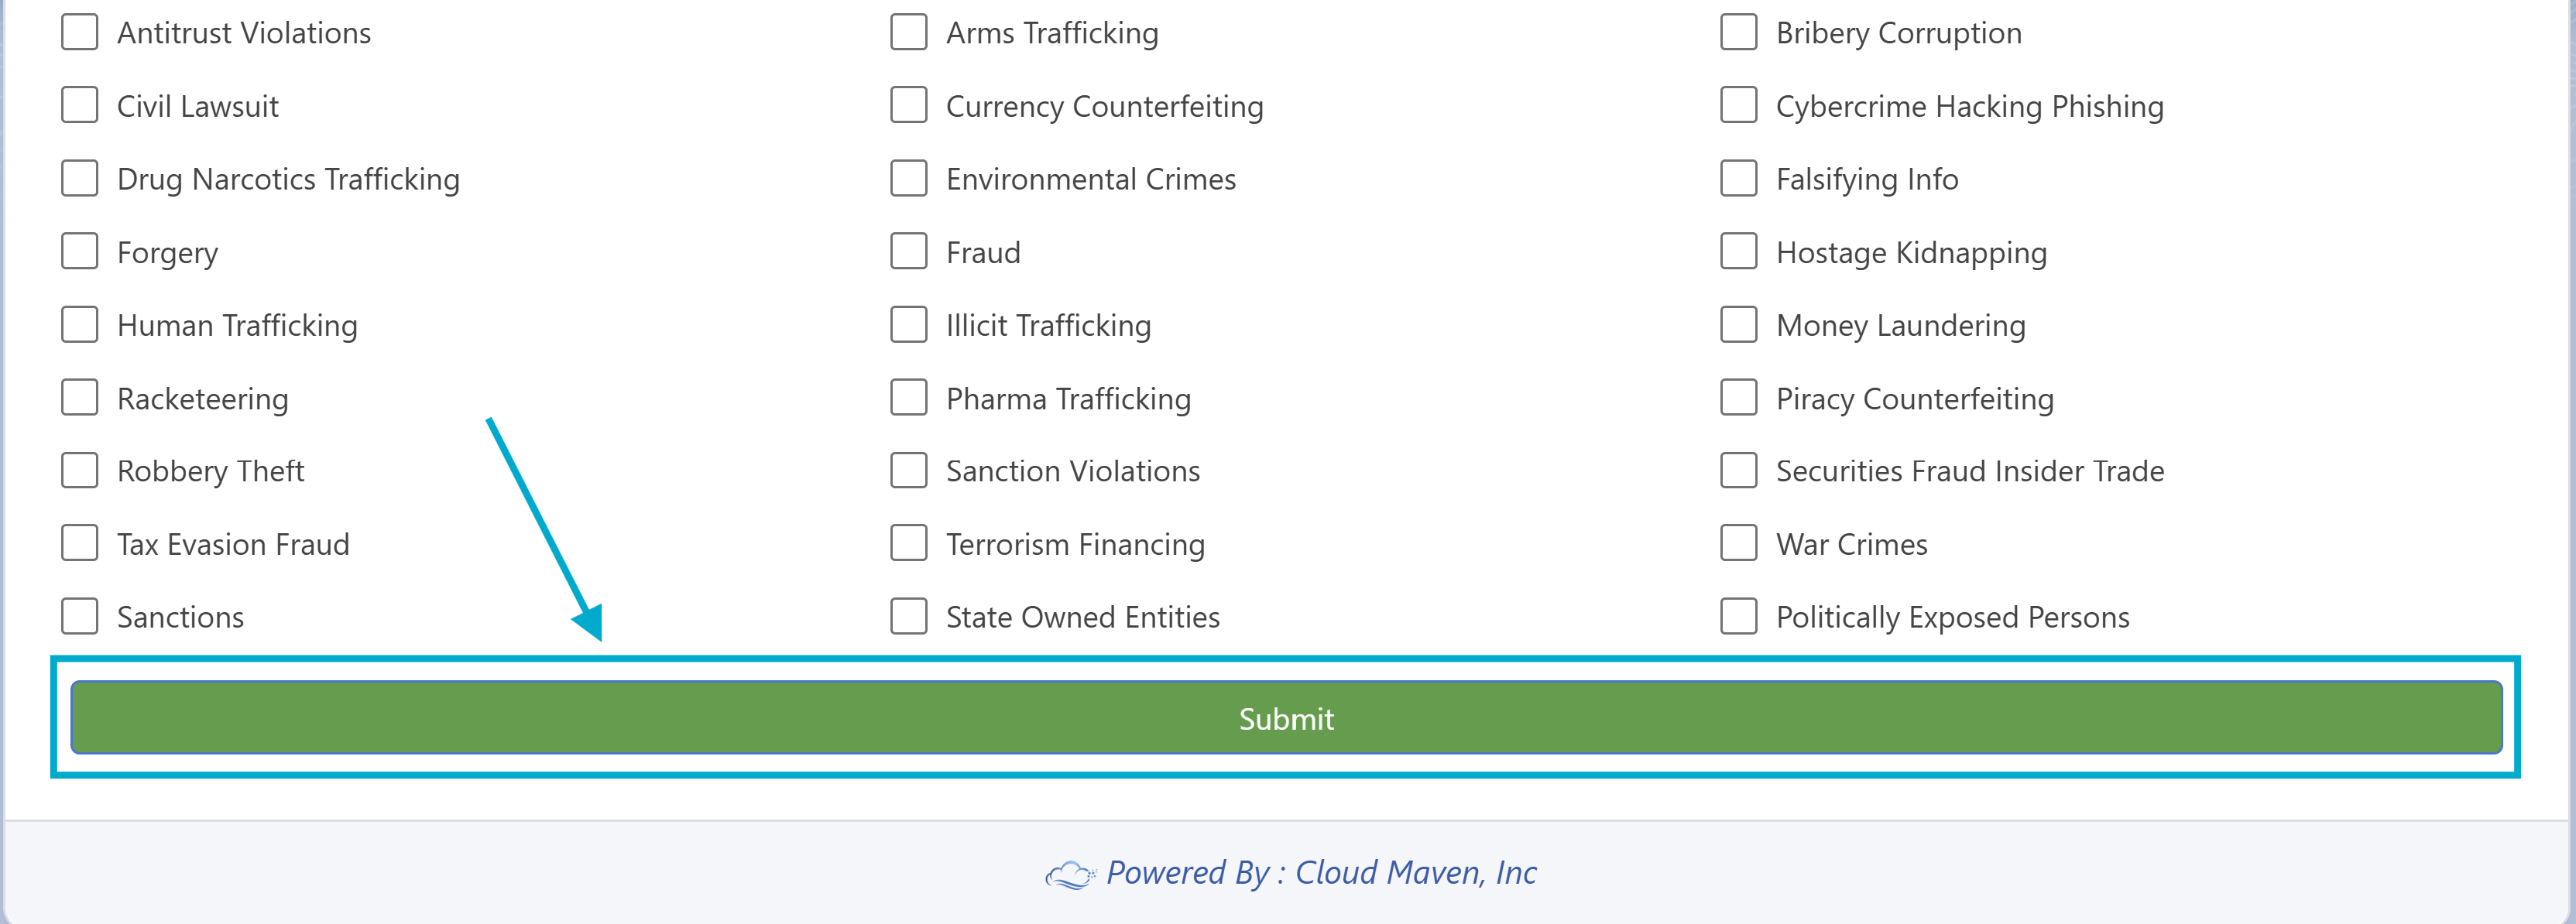
Click the Submit button to apply the changes.
-
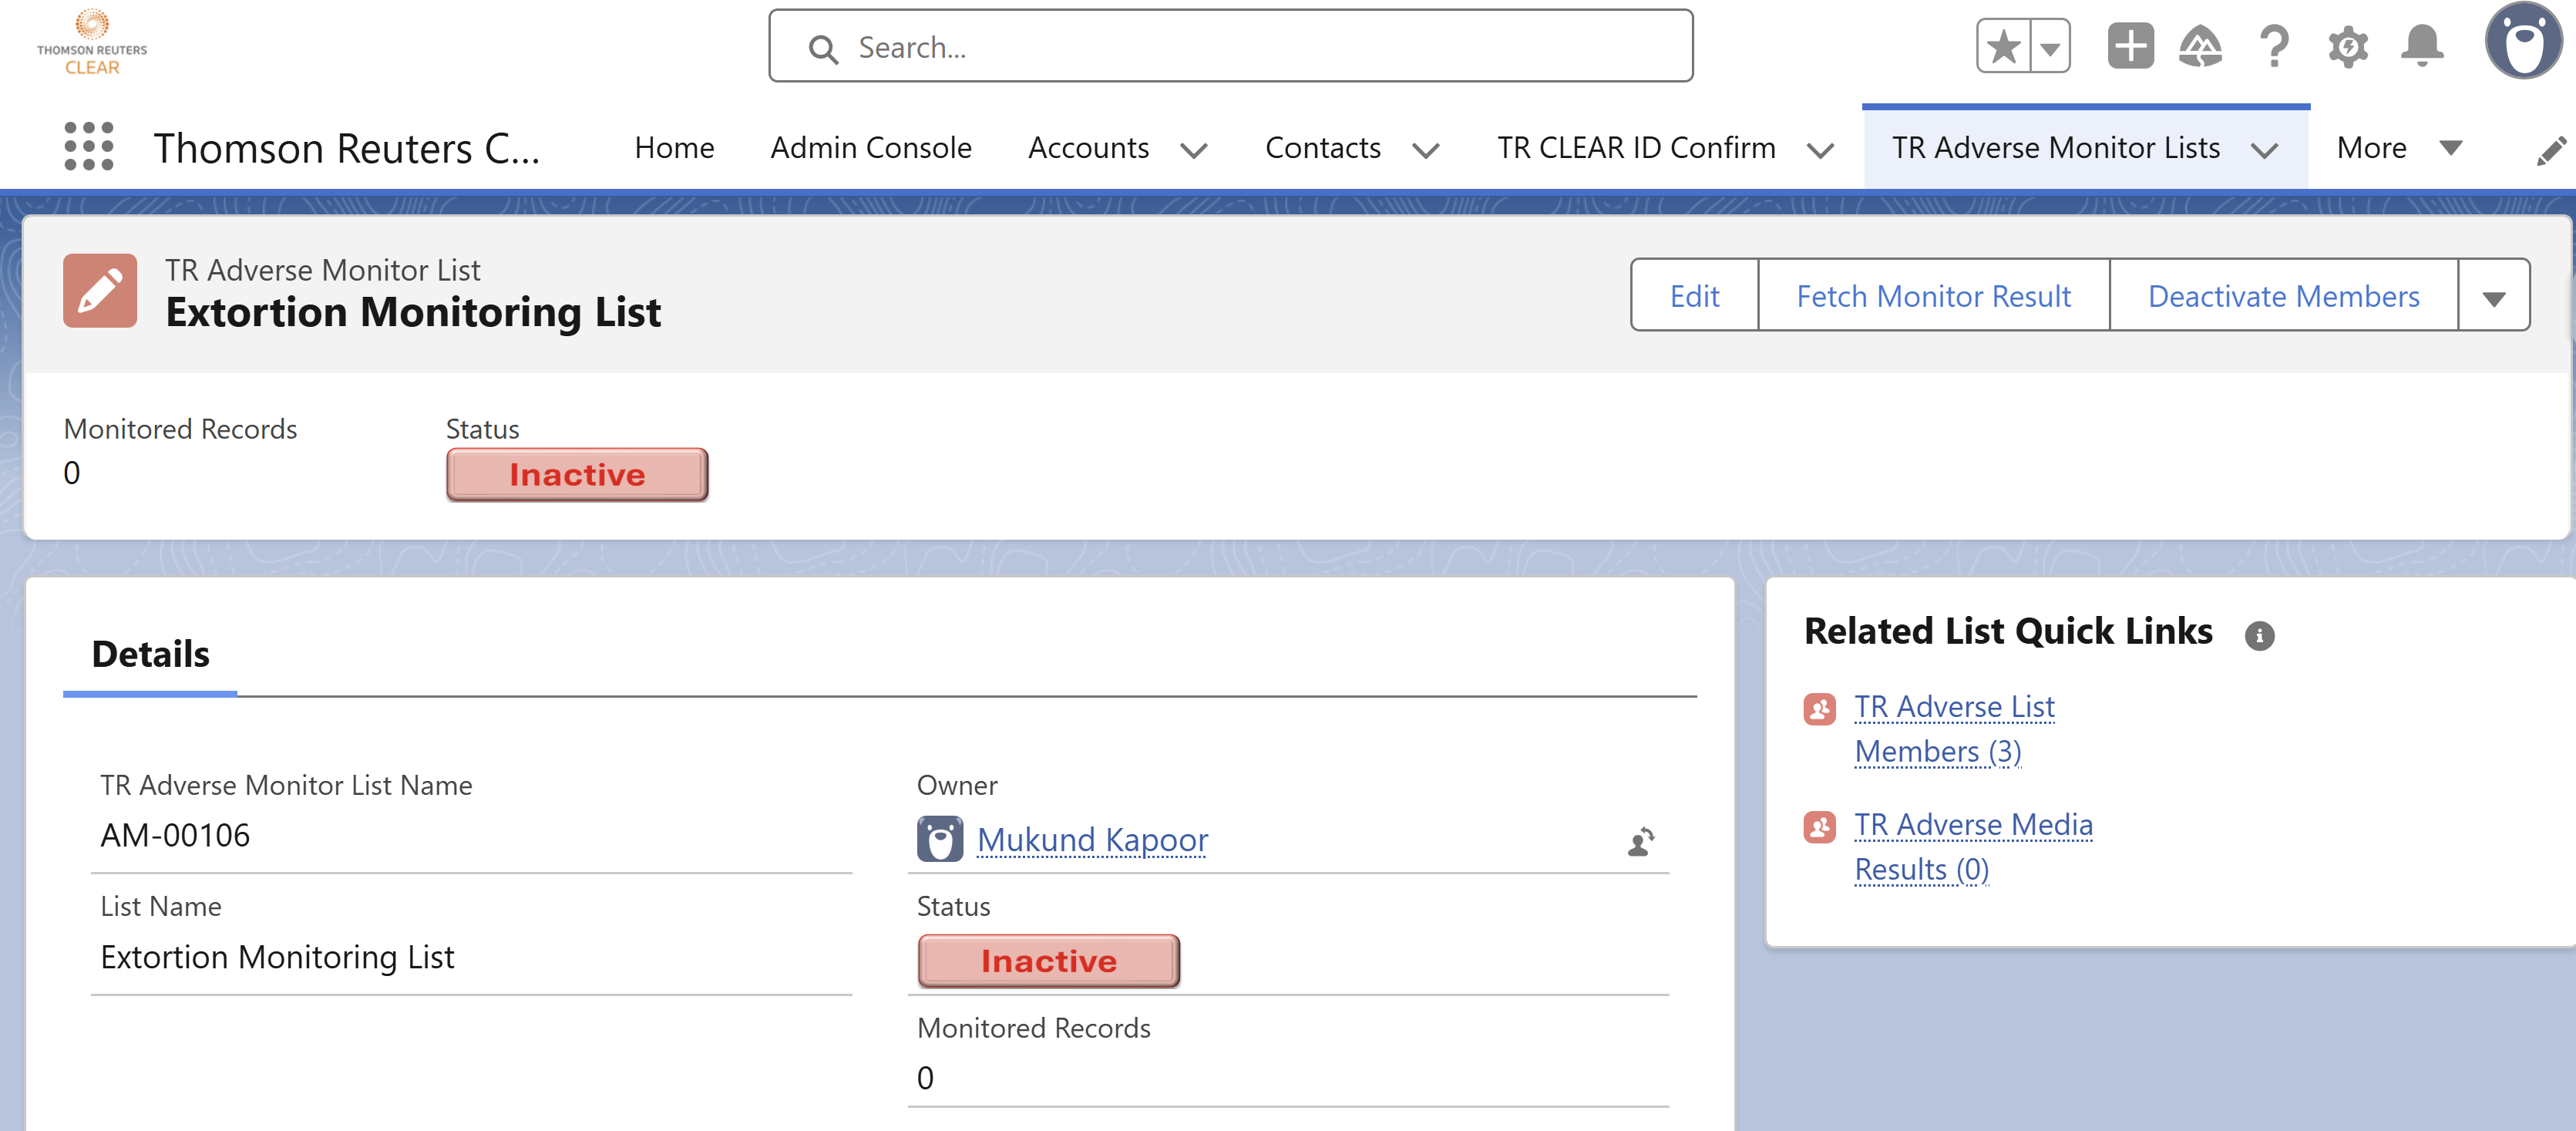
The Monitor List will now be deactivated.
4. Deactivate List Members
Deactivate List Members in Bulk from the Monitoring List
There are two ways to deactivate list members:
4.1 From Monitor List Record
-
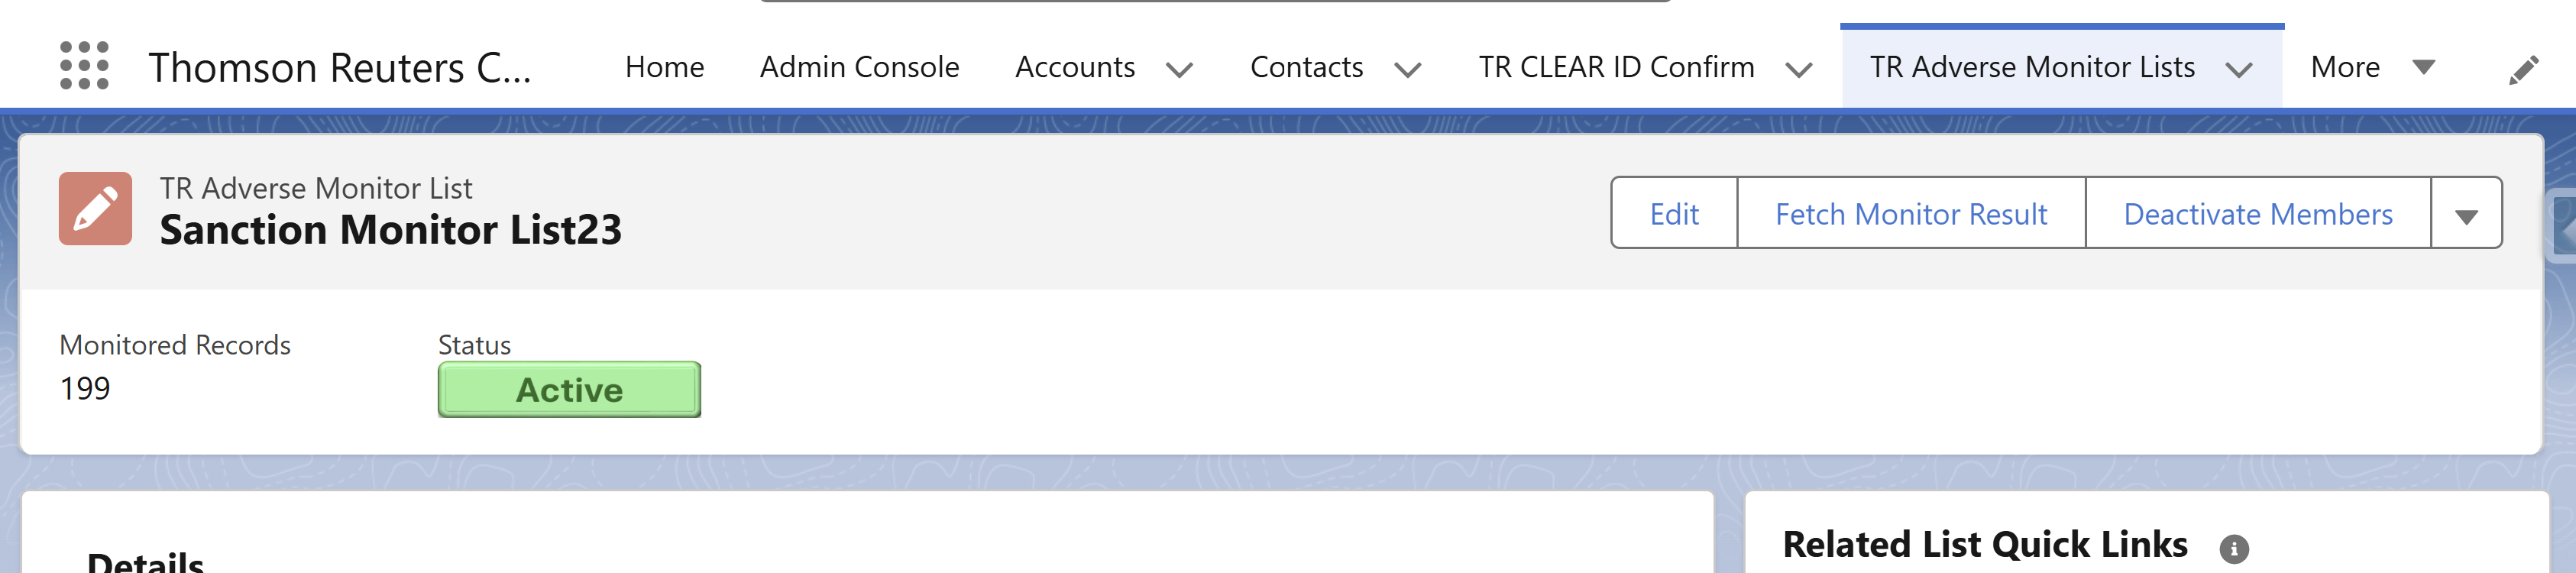
Open the TR Adverse Monitor List record.
-
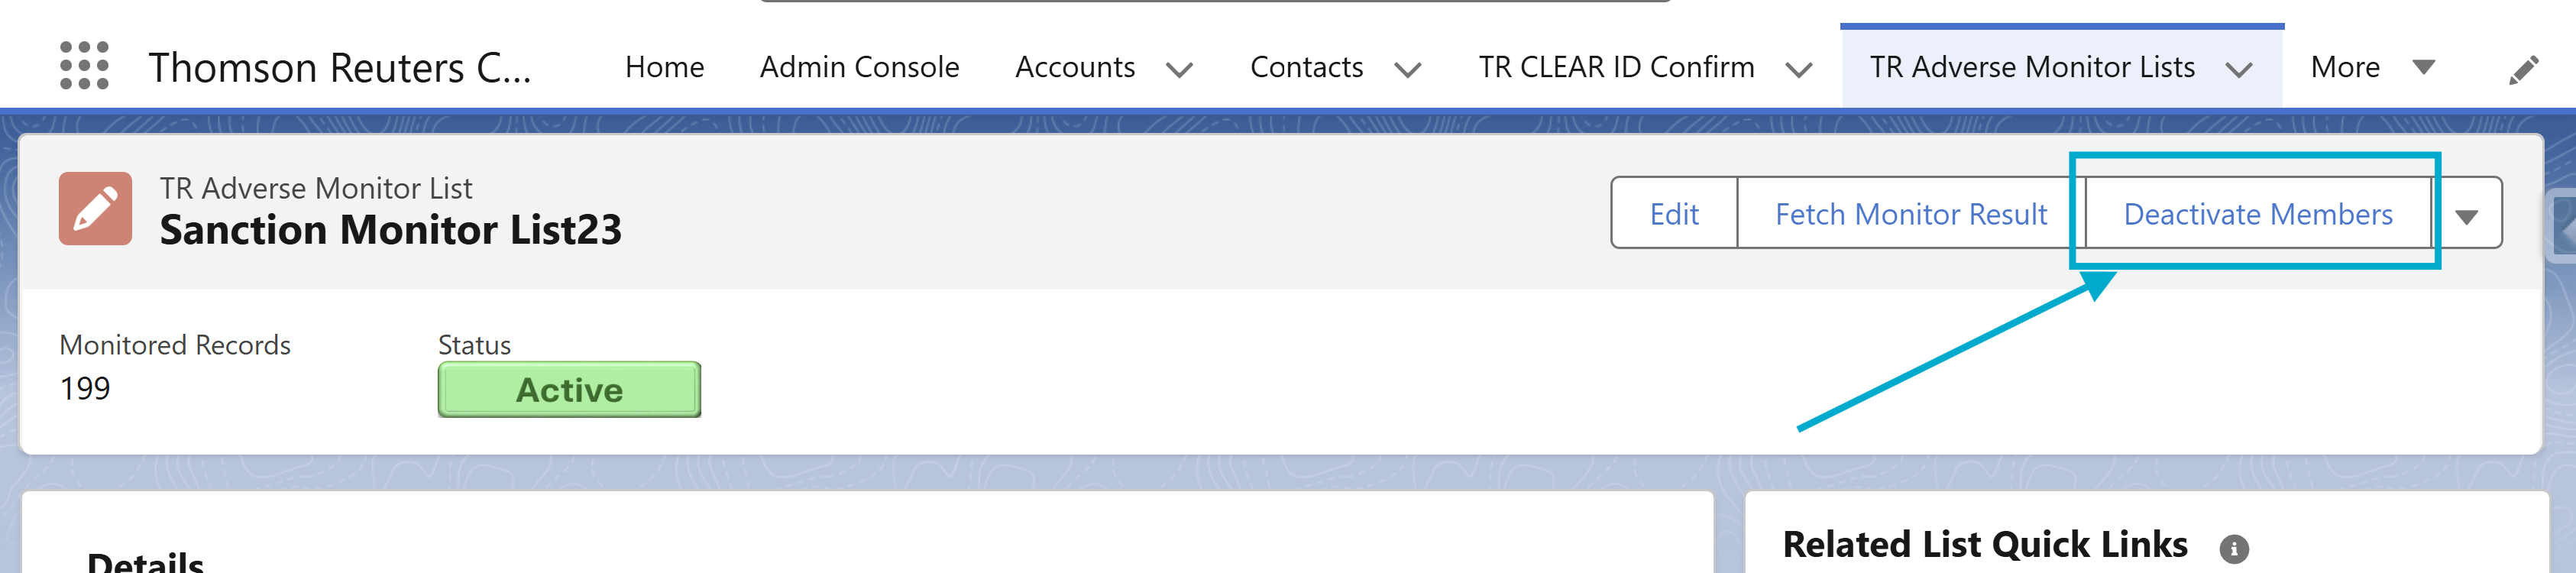
Click the Deactivate Members button.
-
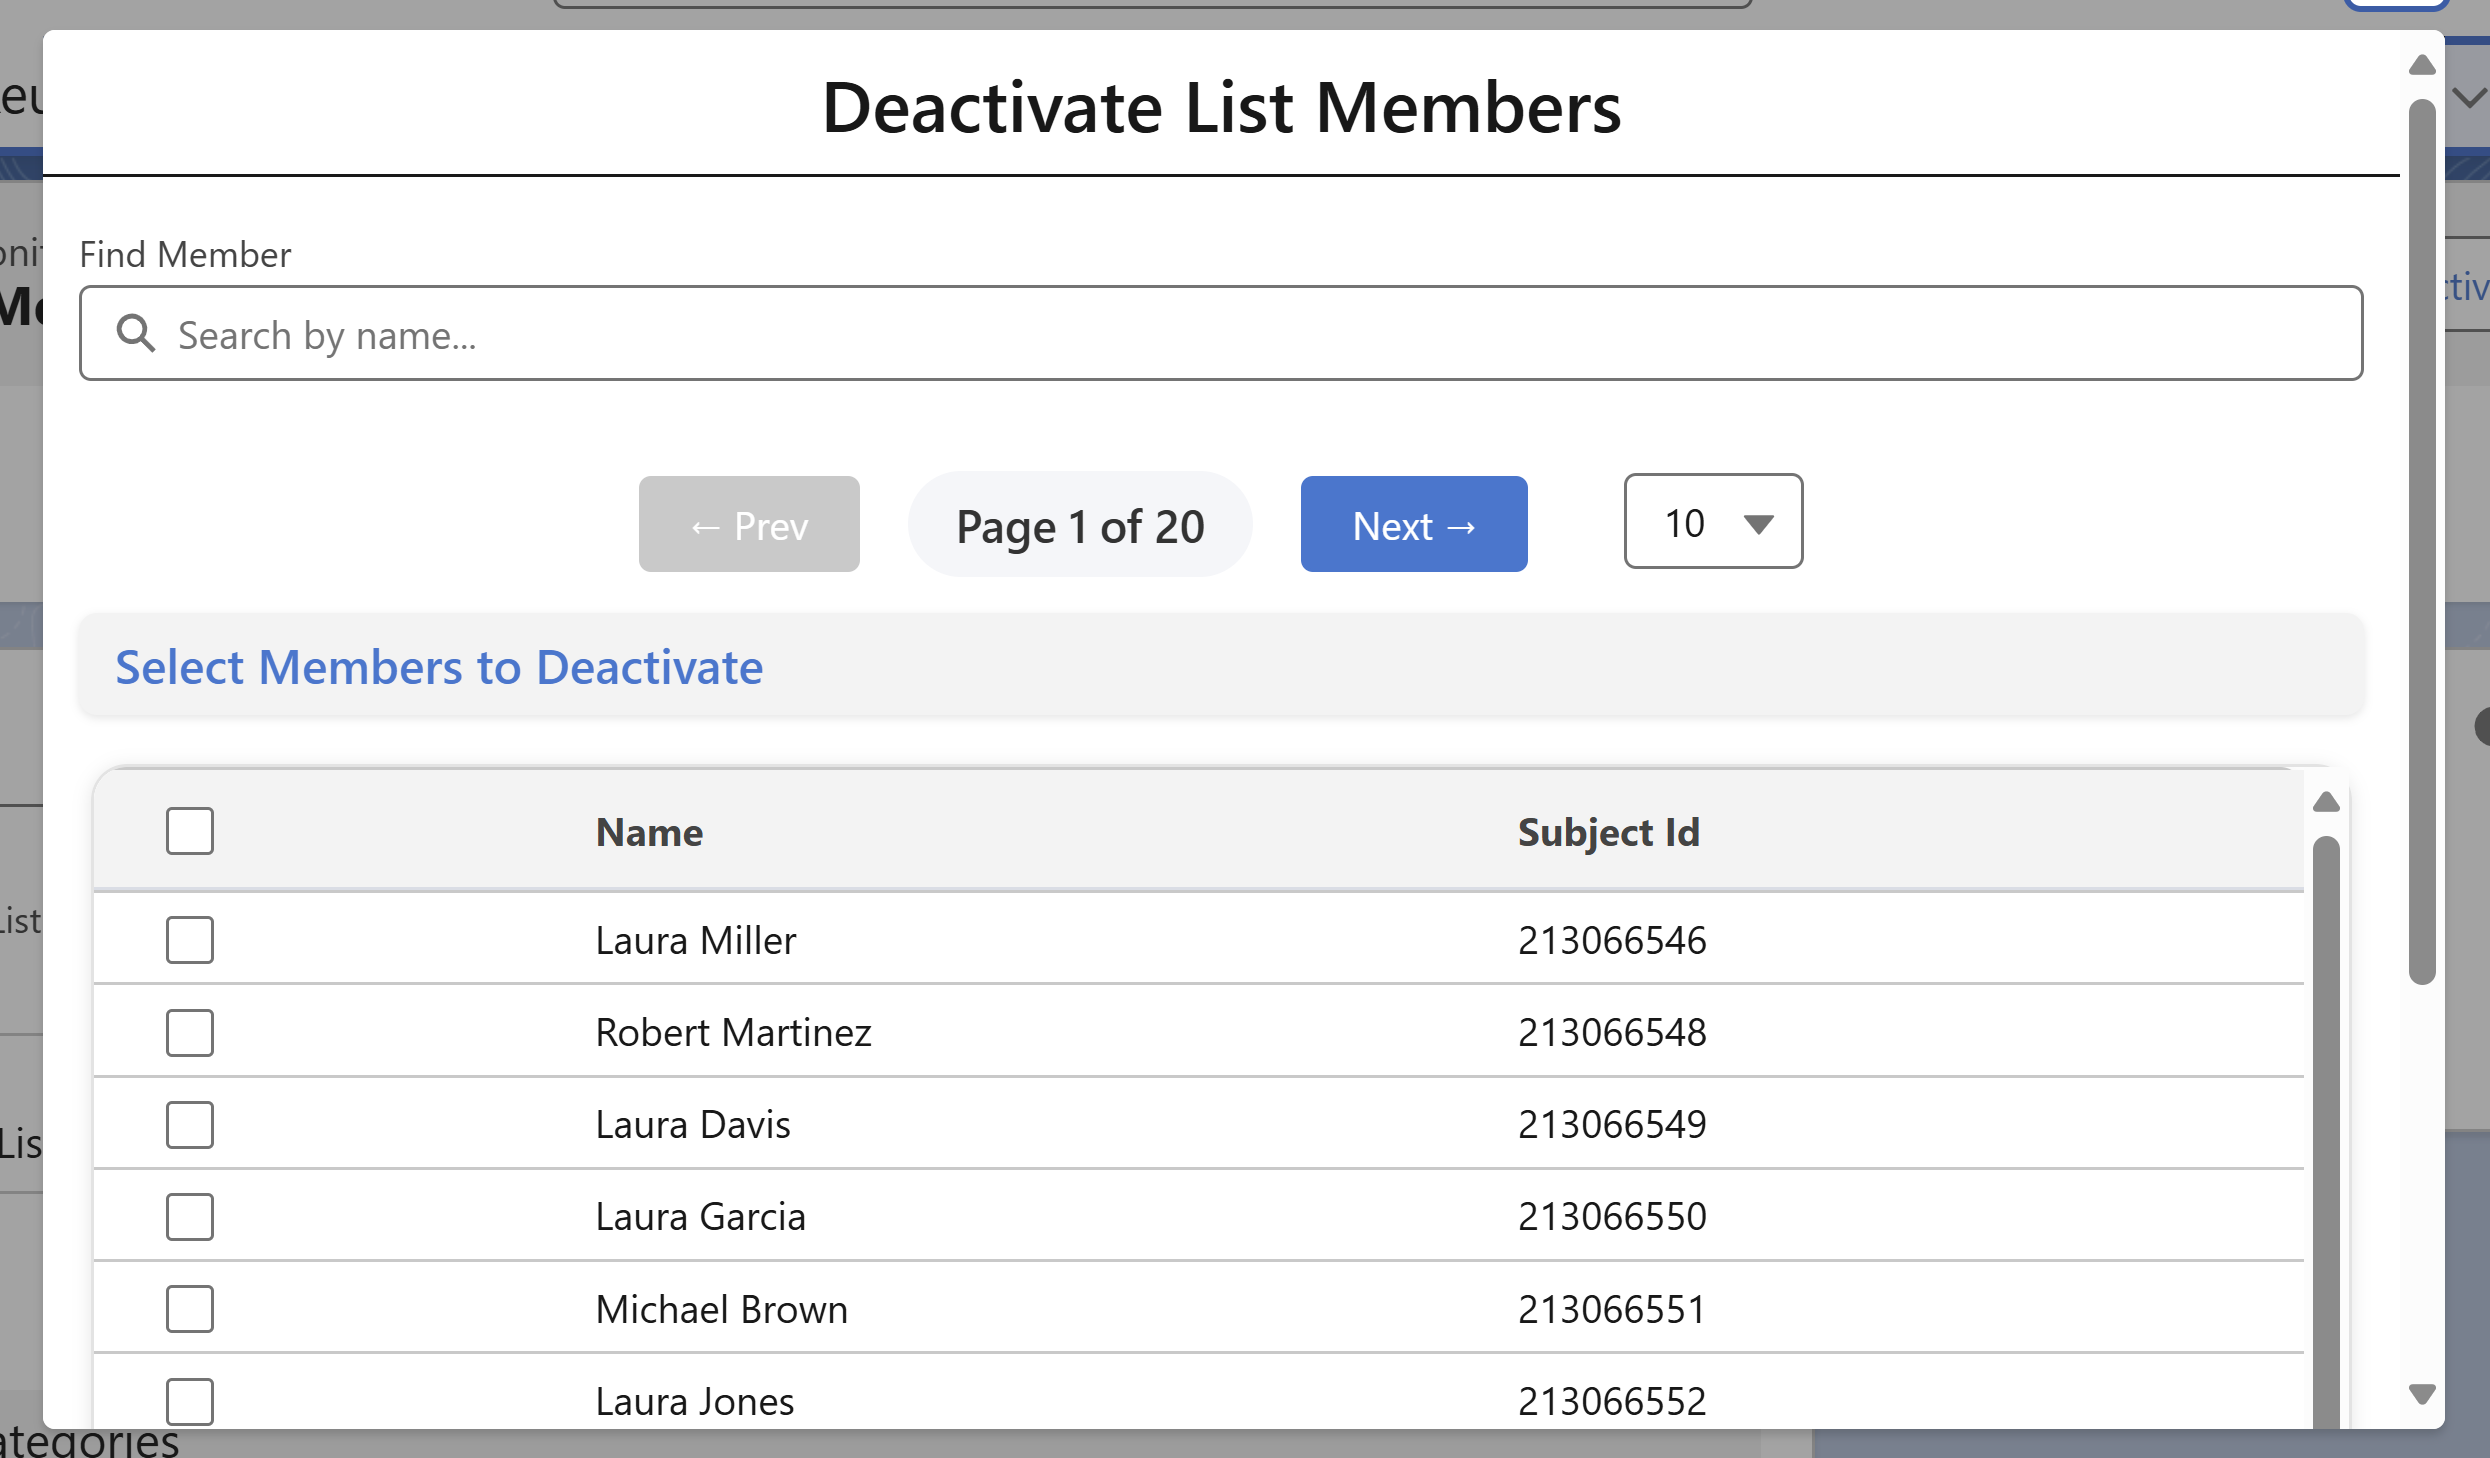
A screen will appear displaying all active list members associated with the list.
-
On this screen, you can:
-
Select members using the checkboxes next to their names
-
Use the search bar to filter members by name
-
Adjust the page length for easier viewing.
-
-
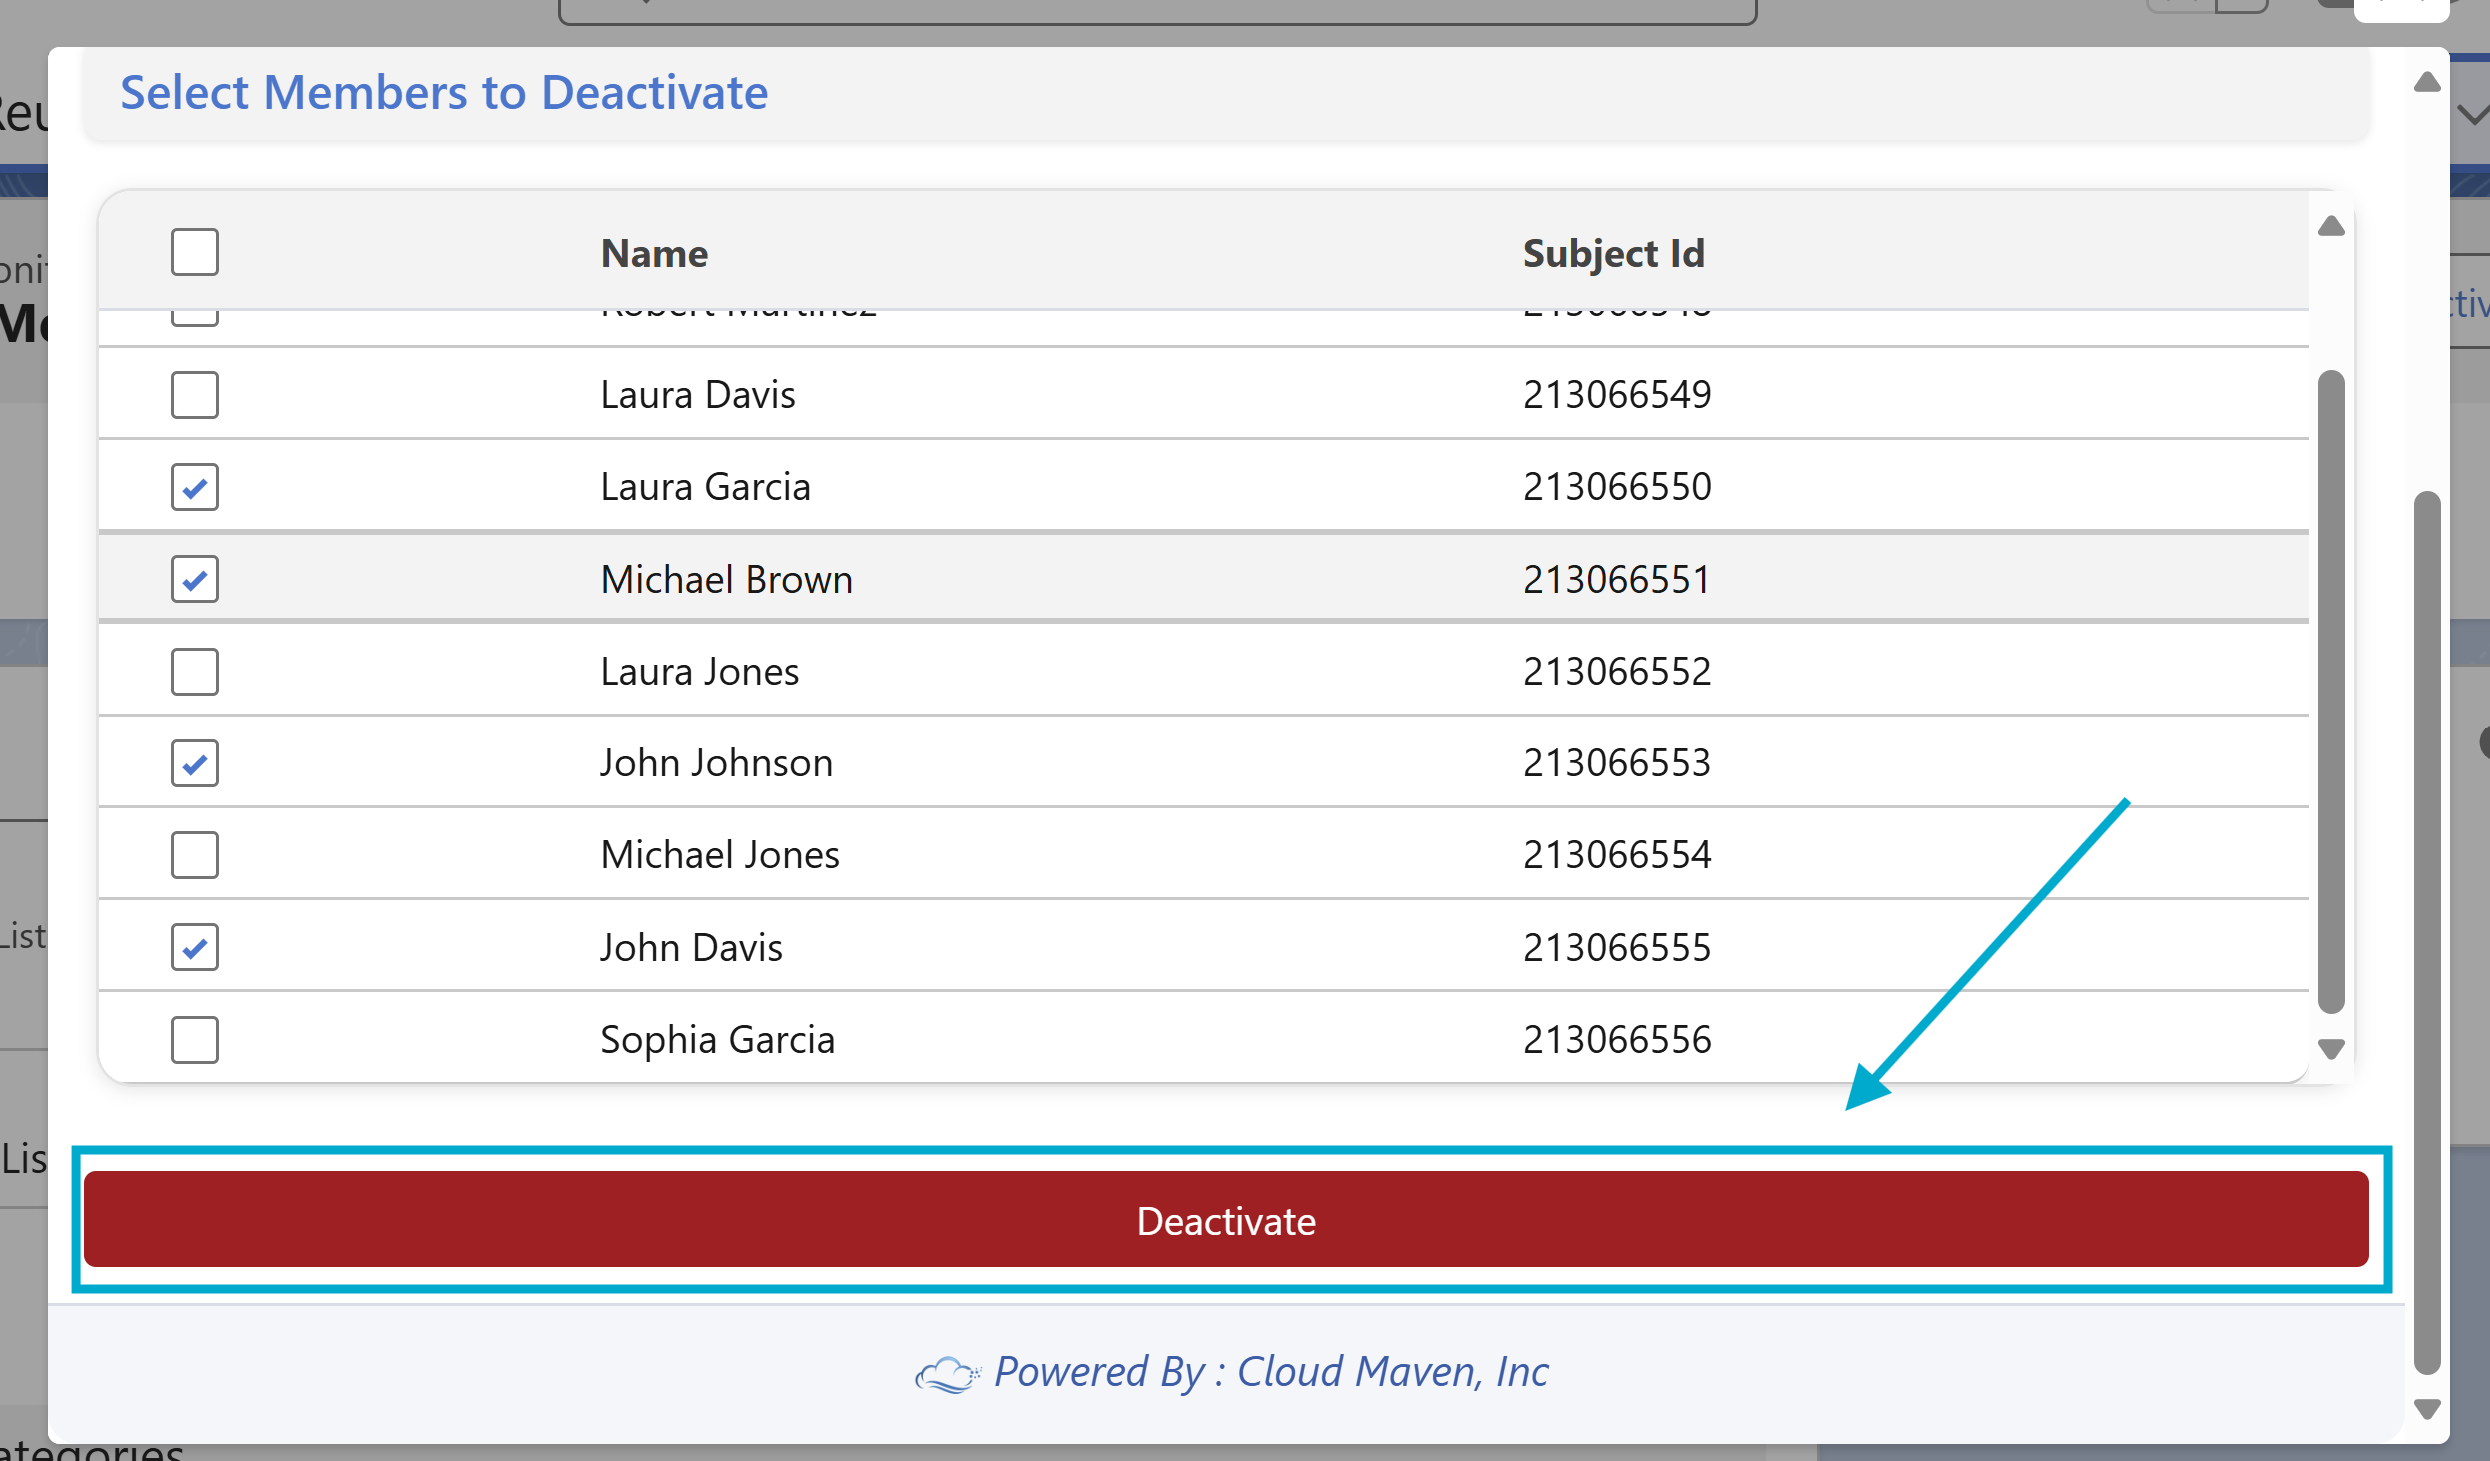
After selecting the members to deactivate, click the Deactivate button.
-
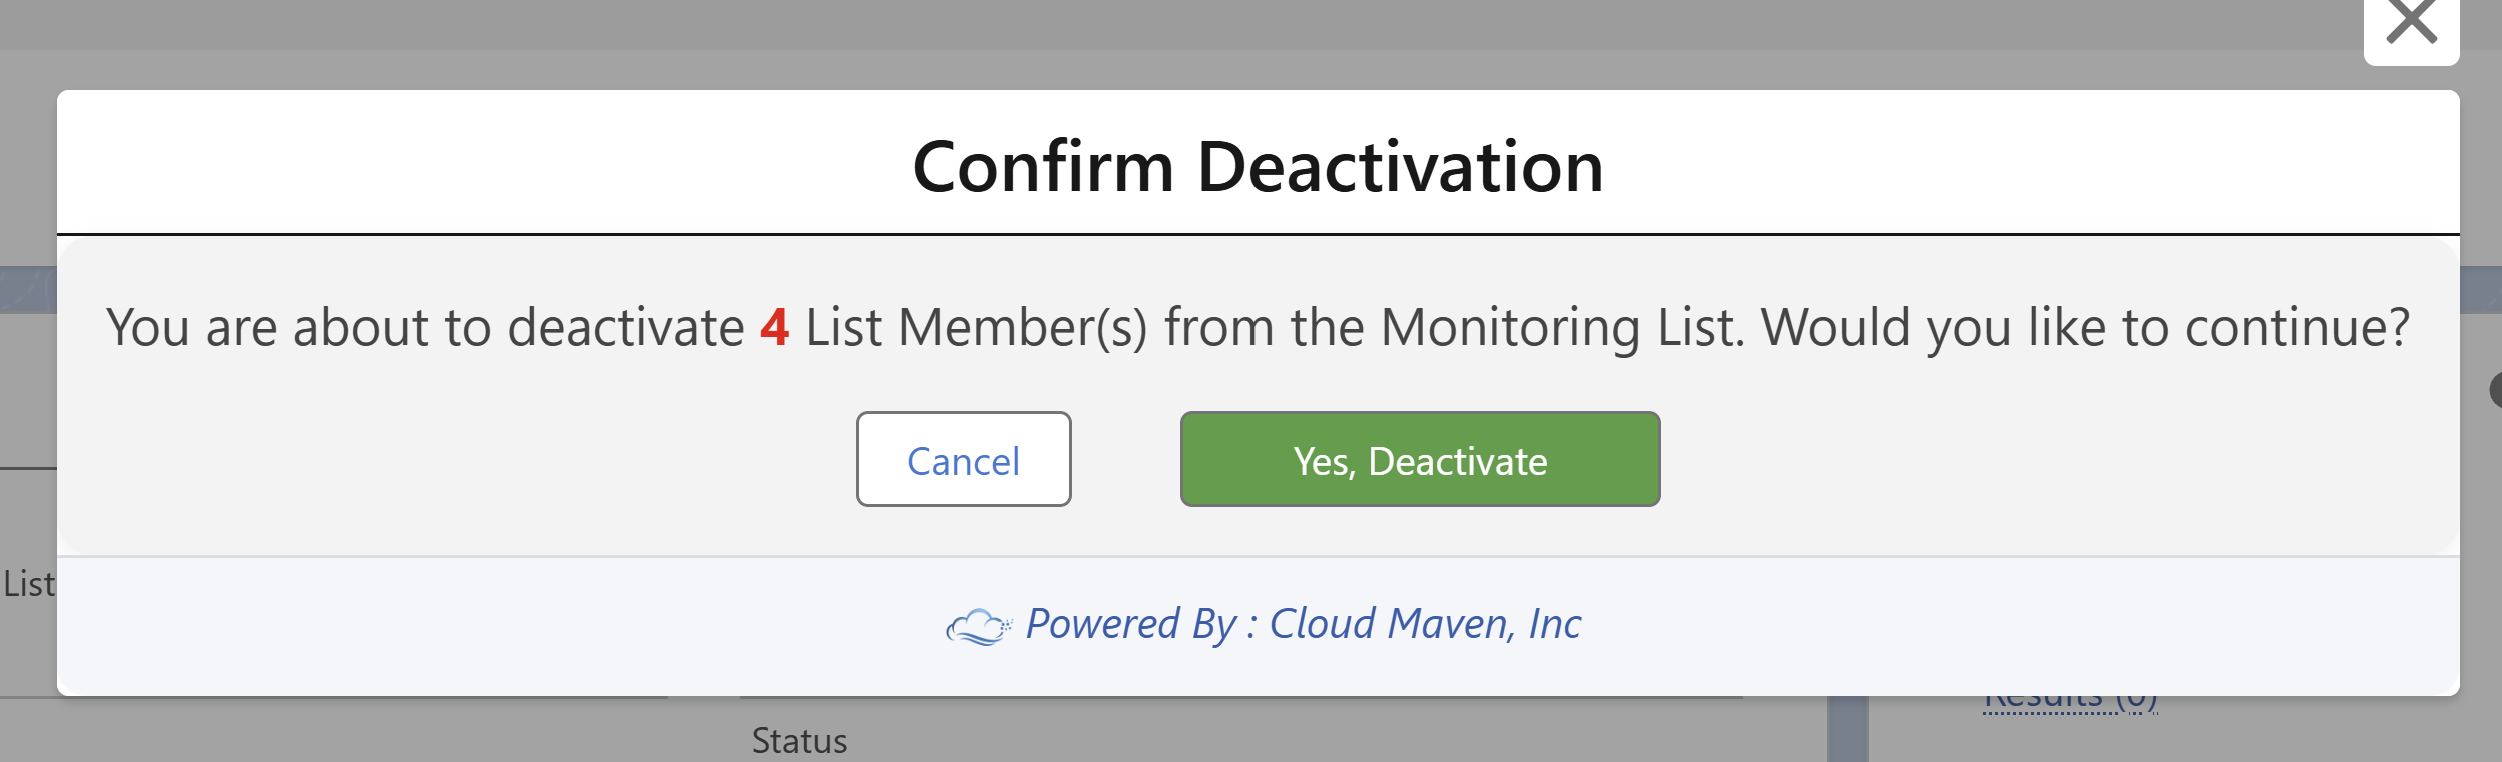
A confirmation screen will display the number of selected members.
-
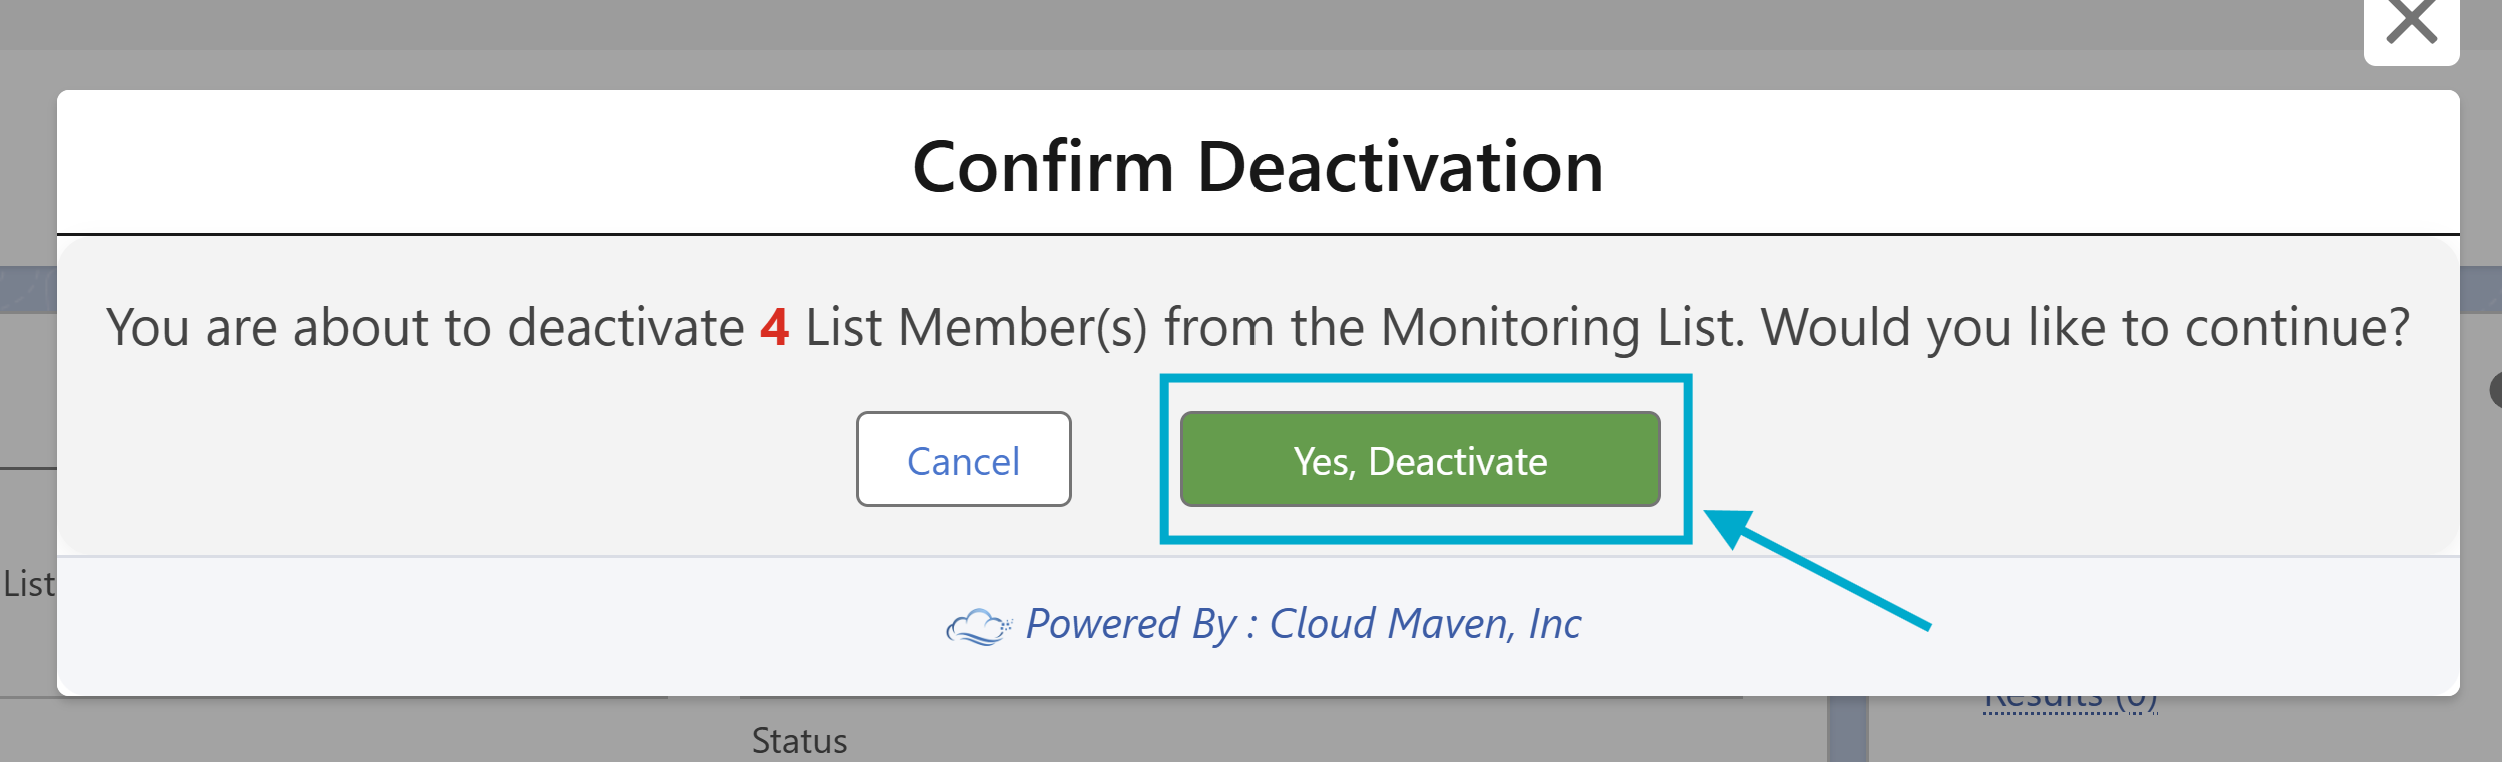
Click Yes, Deactivate to proceed.
-
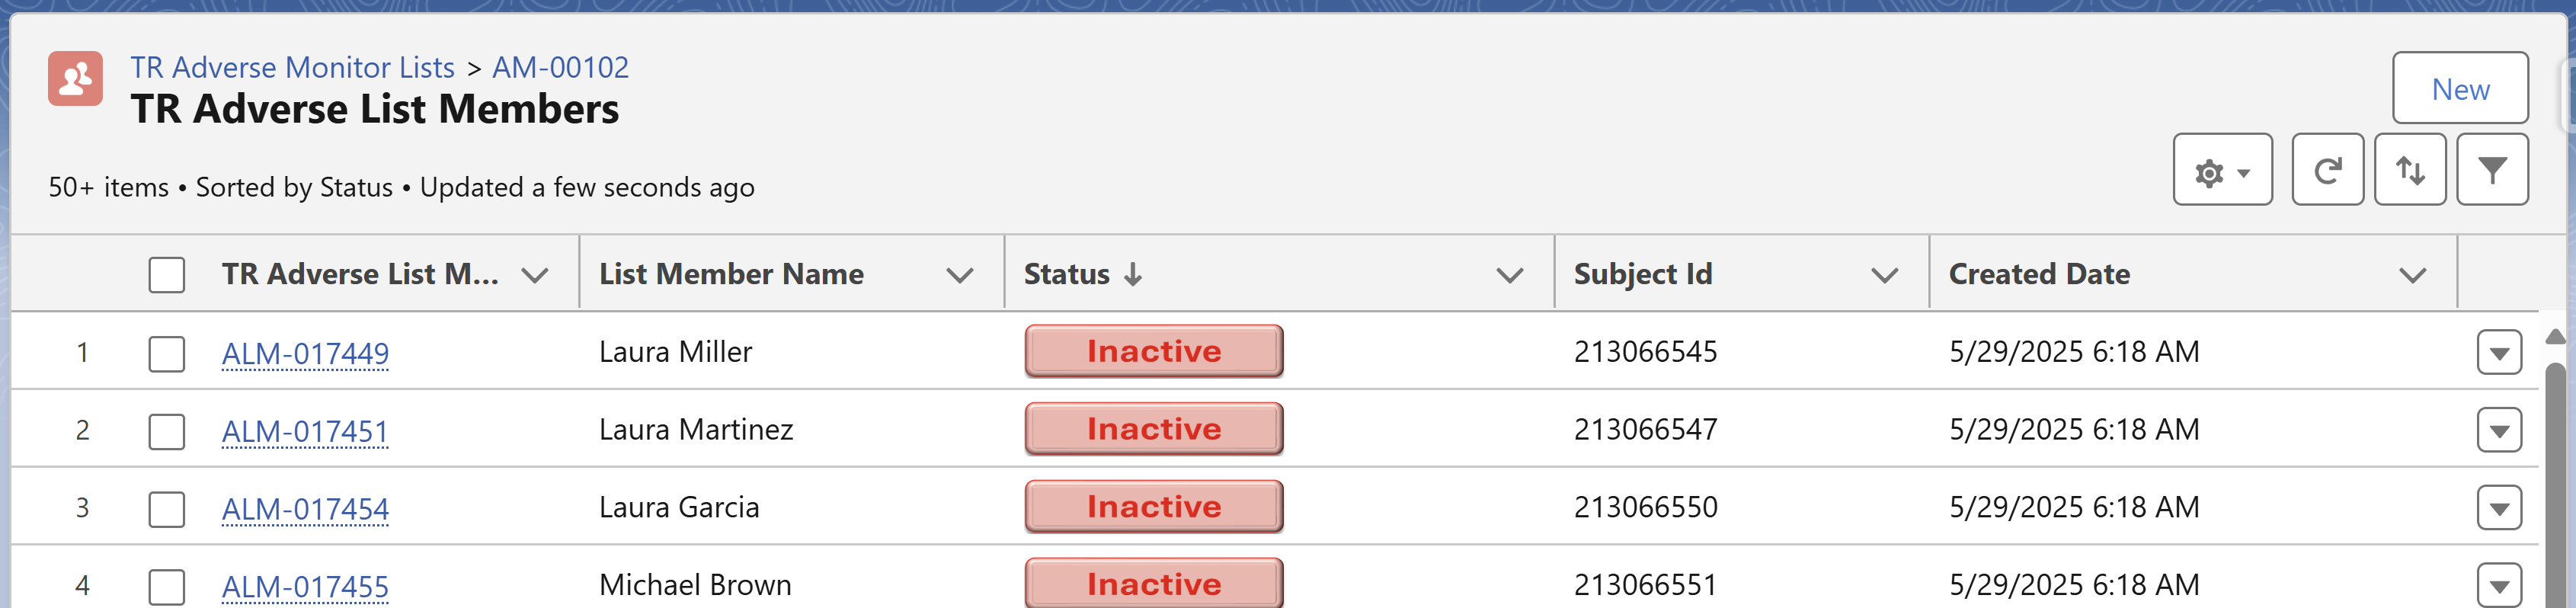
You will be seeing the Deactivated List Members in the related section.
4.2 From List Member Record
-
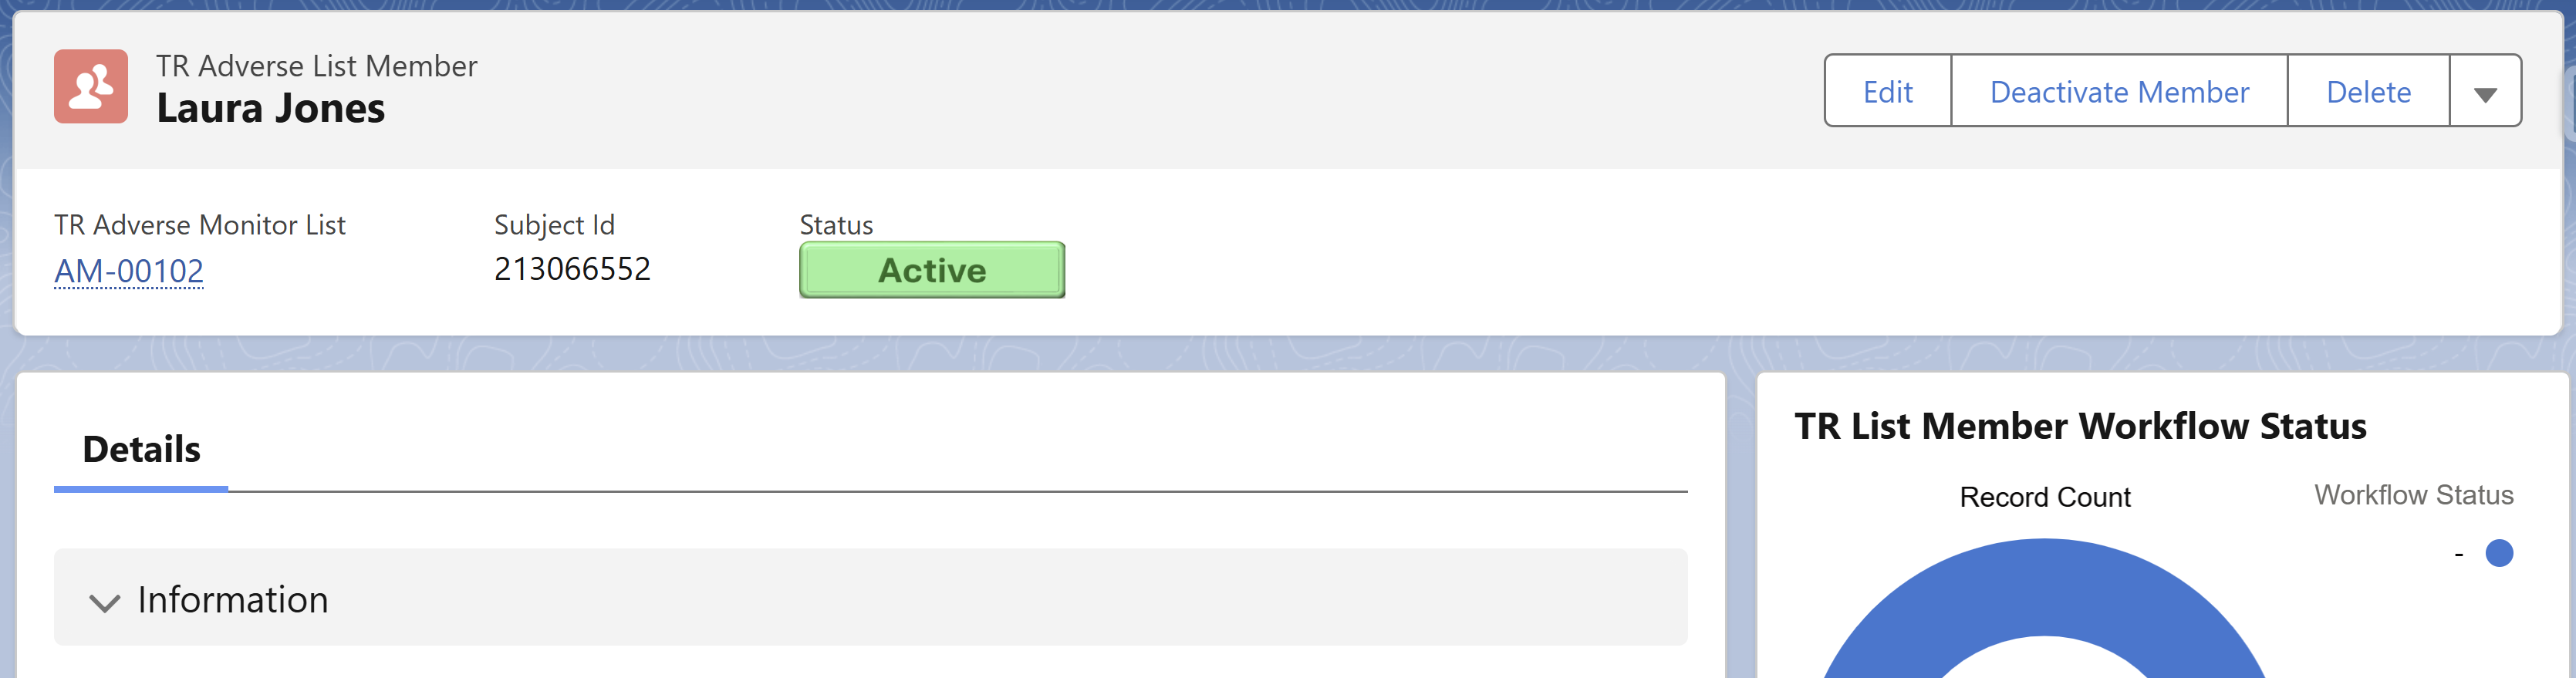
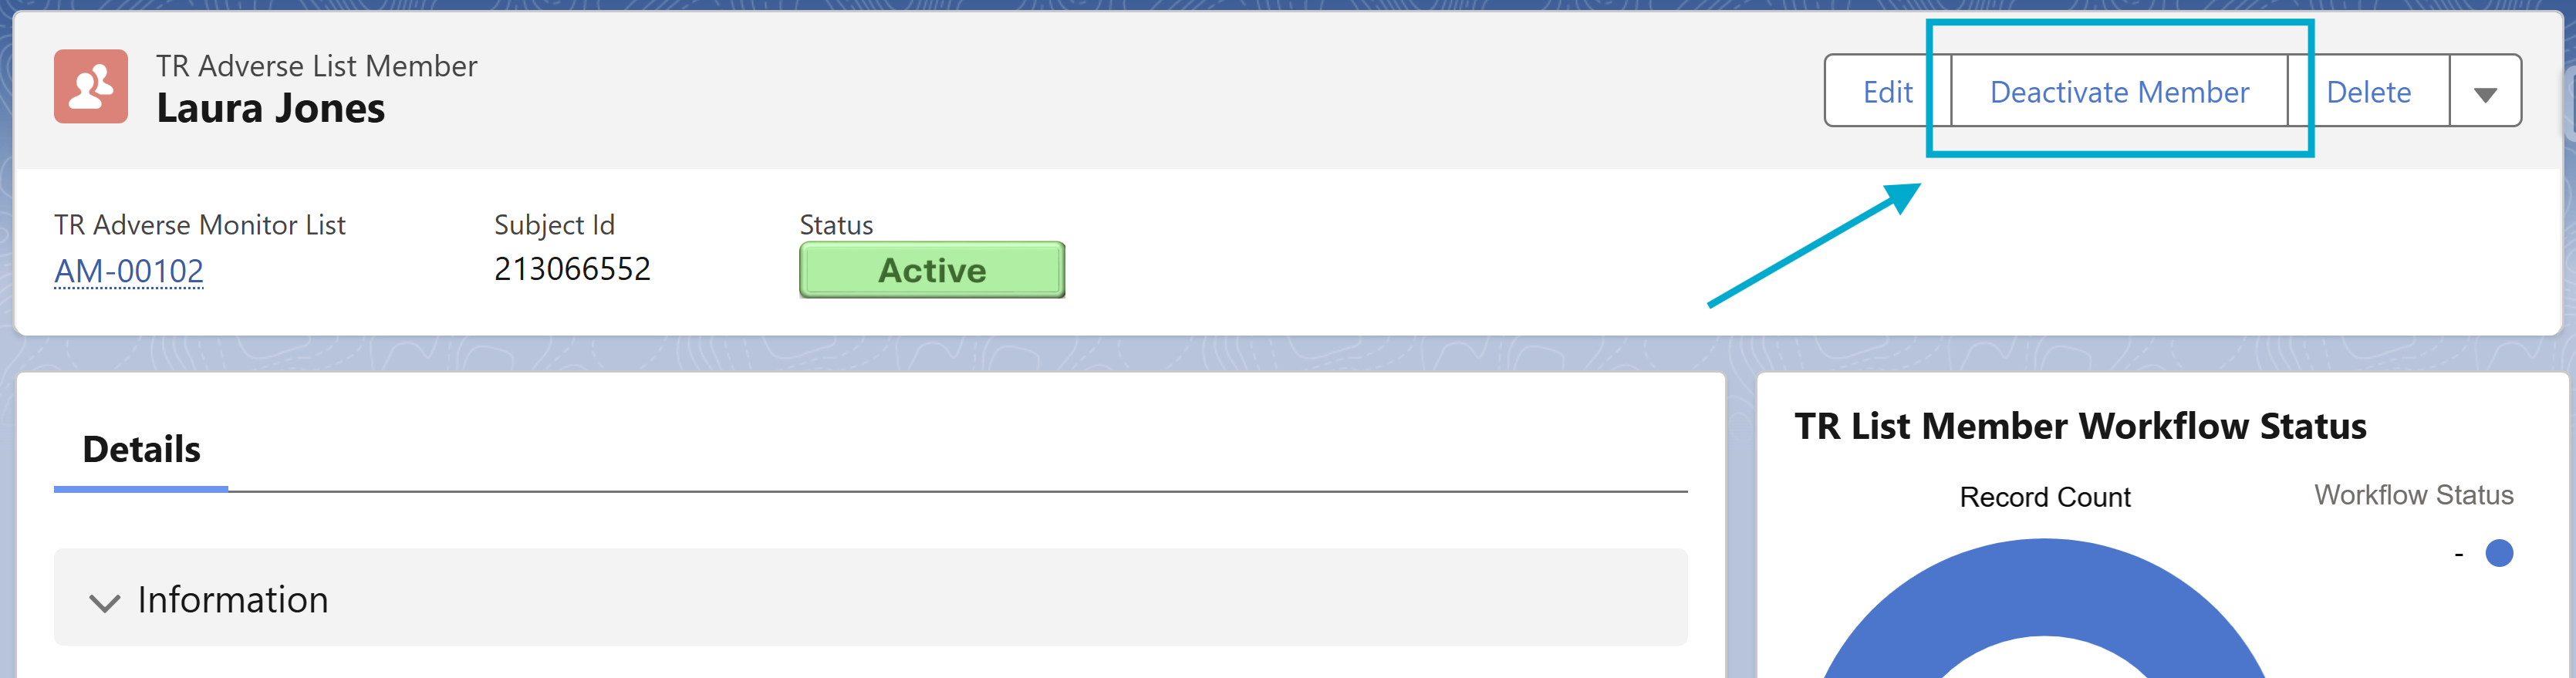
Navigate to the specific List Member record.
-
Click the Deactivate Member button.
-
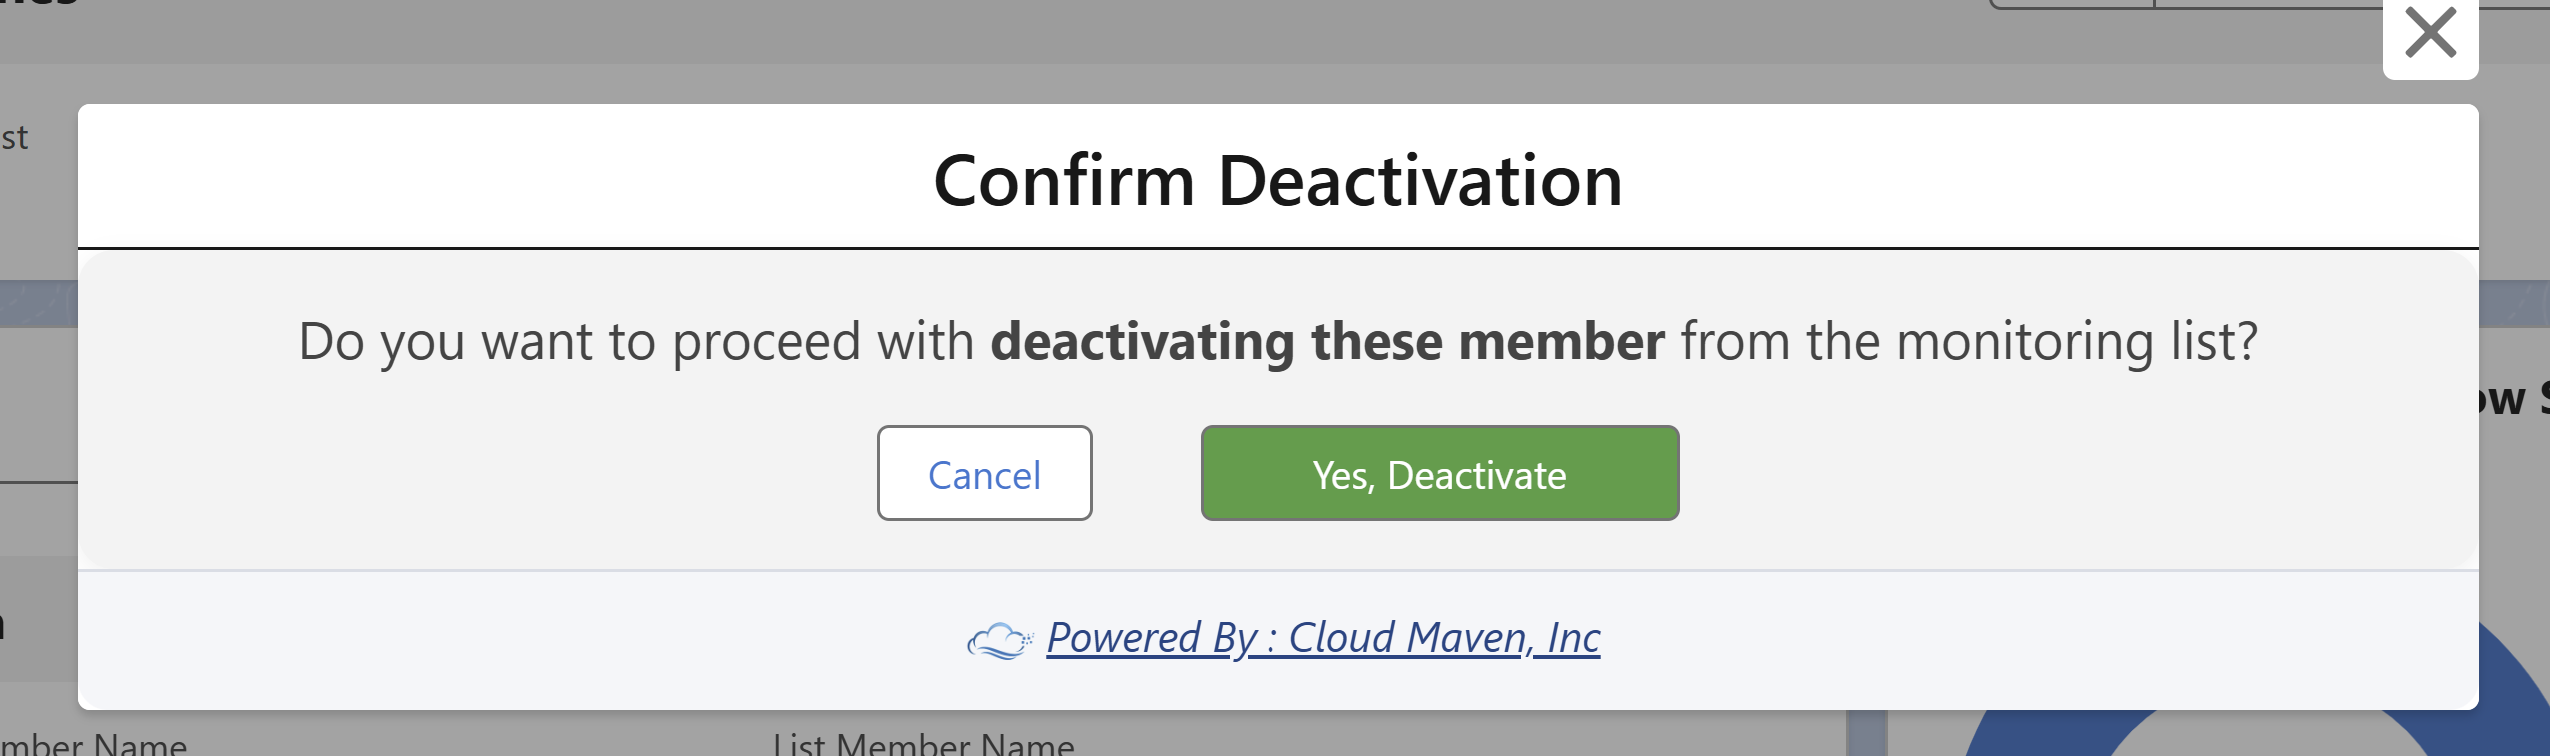
A confirmation prompt will appear.
-
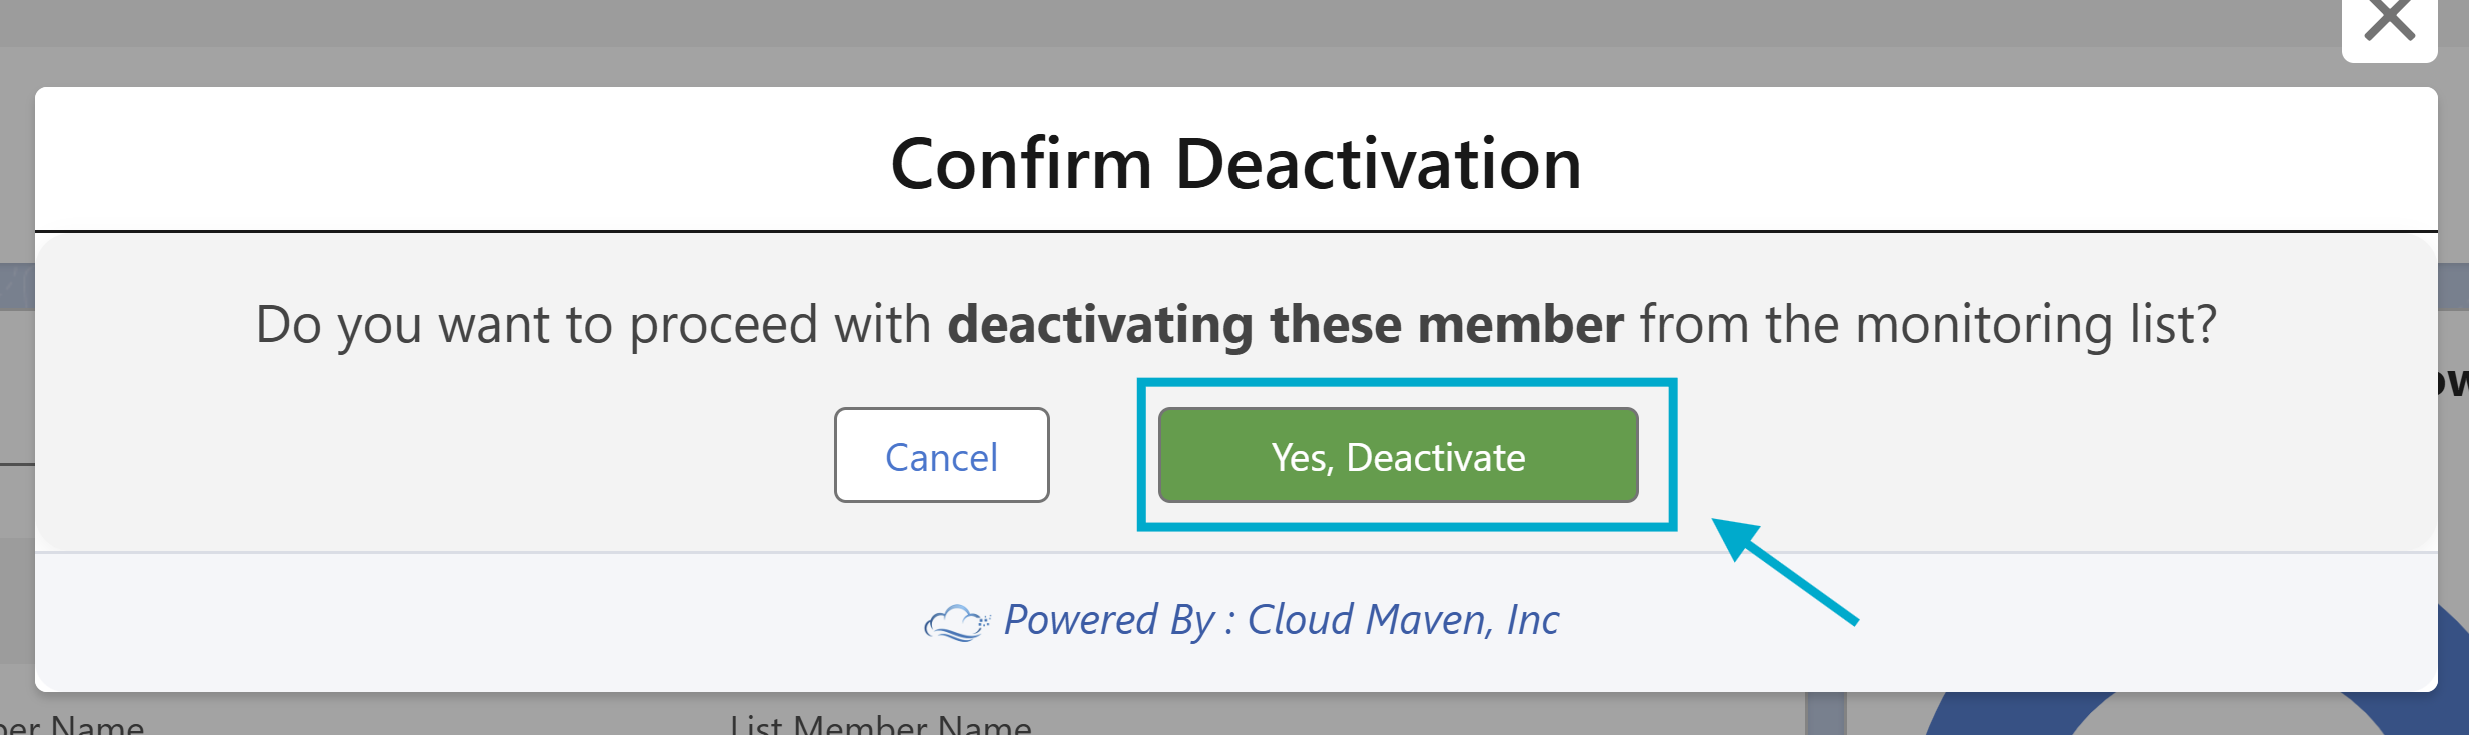
Click Yes, Deactivate to complete the action.
-
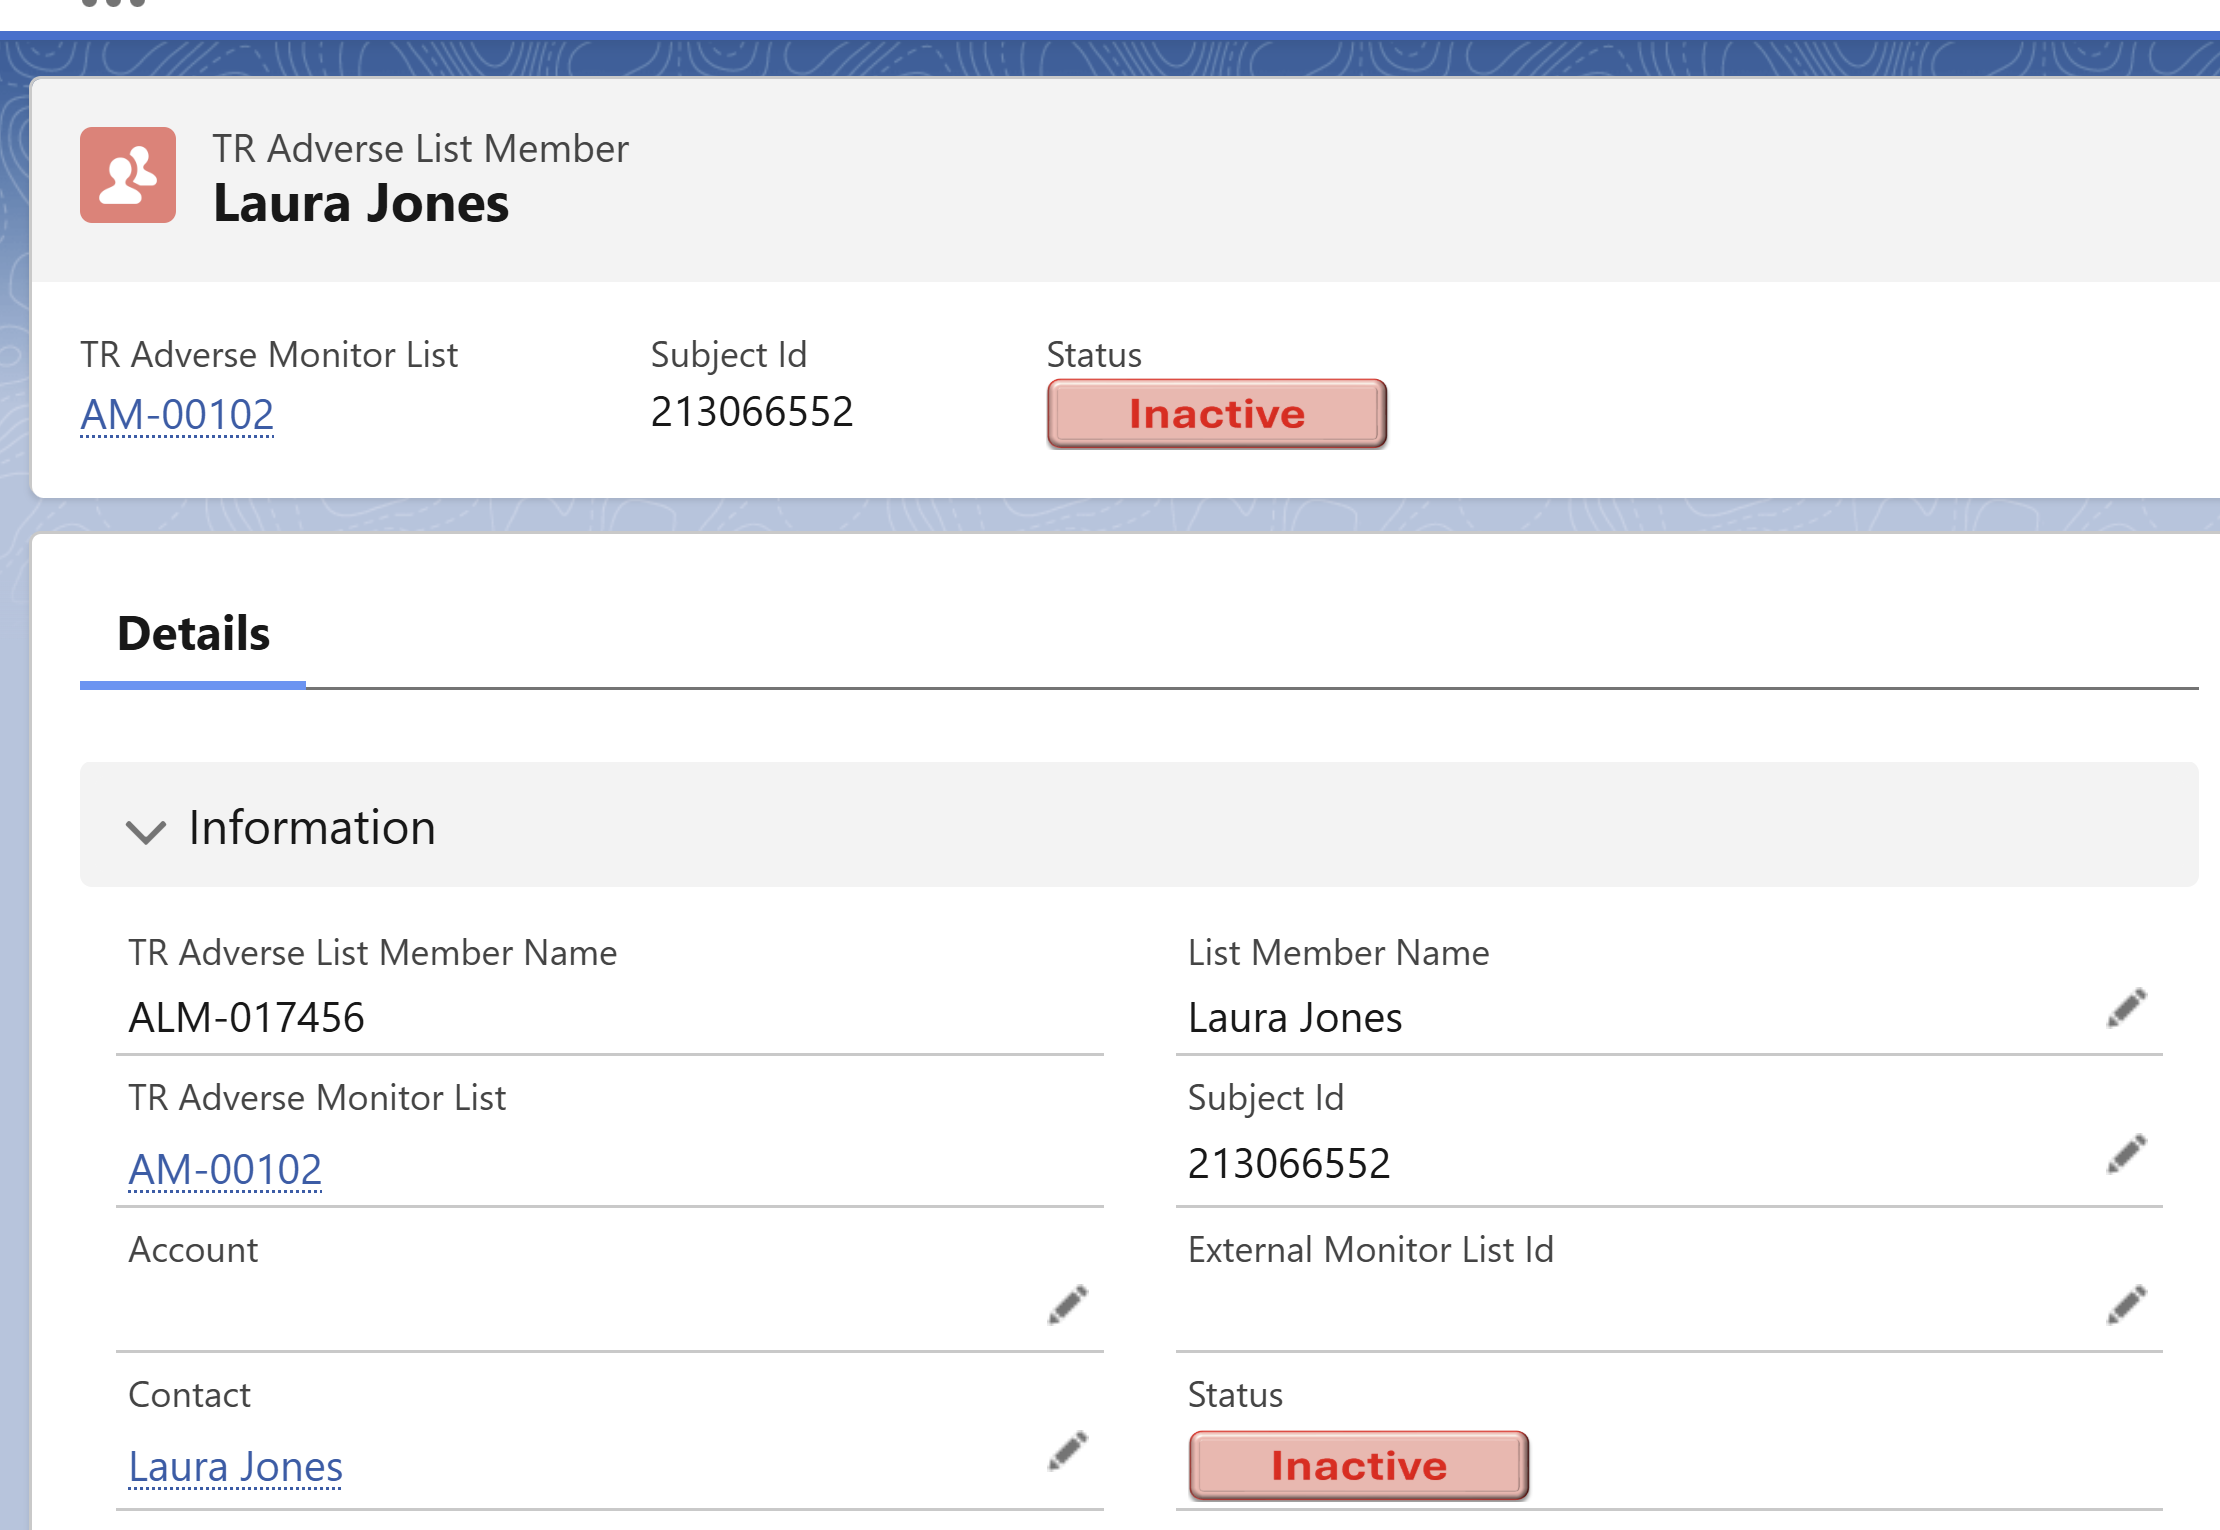
You will be able the see the Deactivated list member record.
📩 Need Help?
For any questions or support, don't hesitate to get in touch with us at: