
Overview
This guide provides step-by-step instructions for creating and managing document templates in Salesforce, enabling efficient document generation and e-signature workflows.
Create a New Document Template
To create a new document template:
-
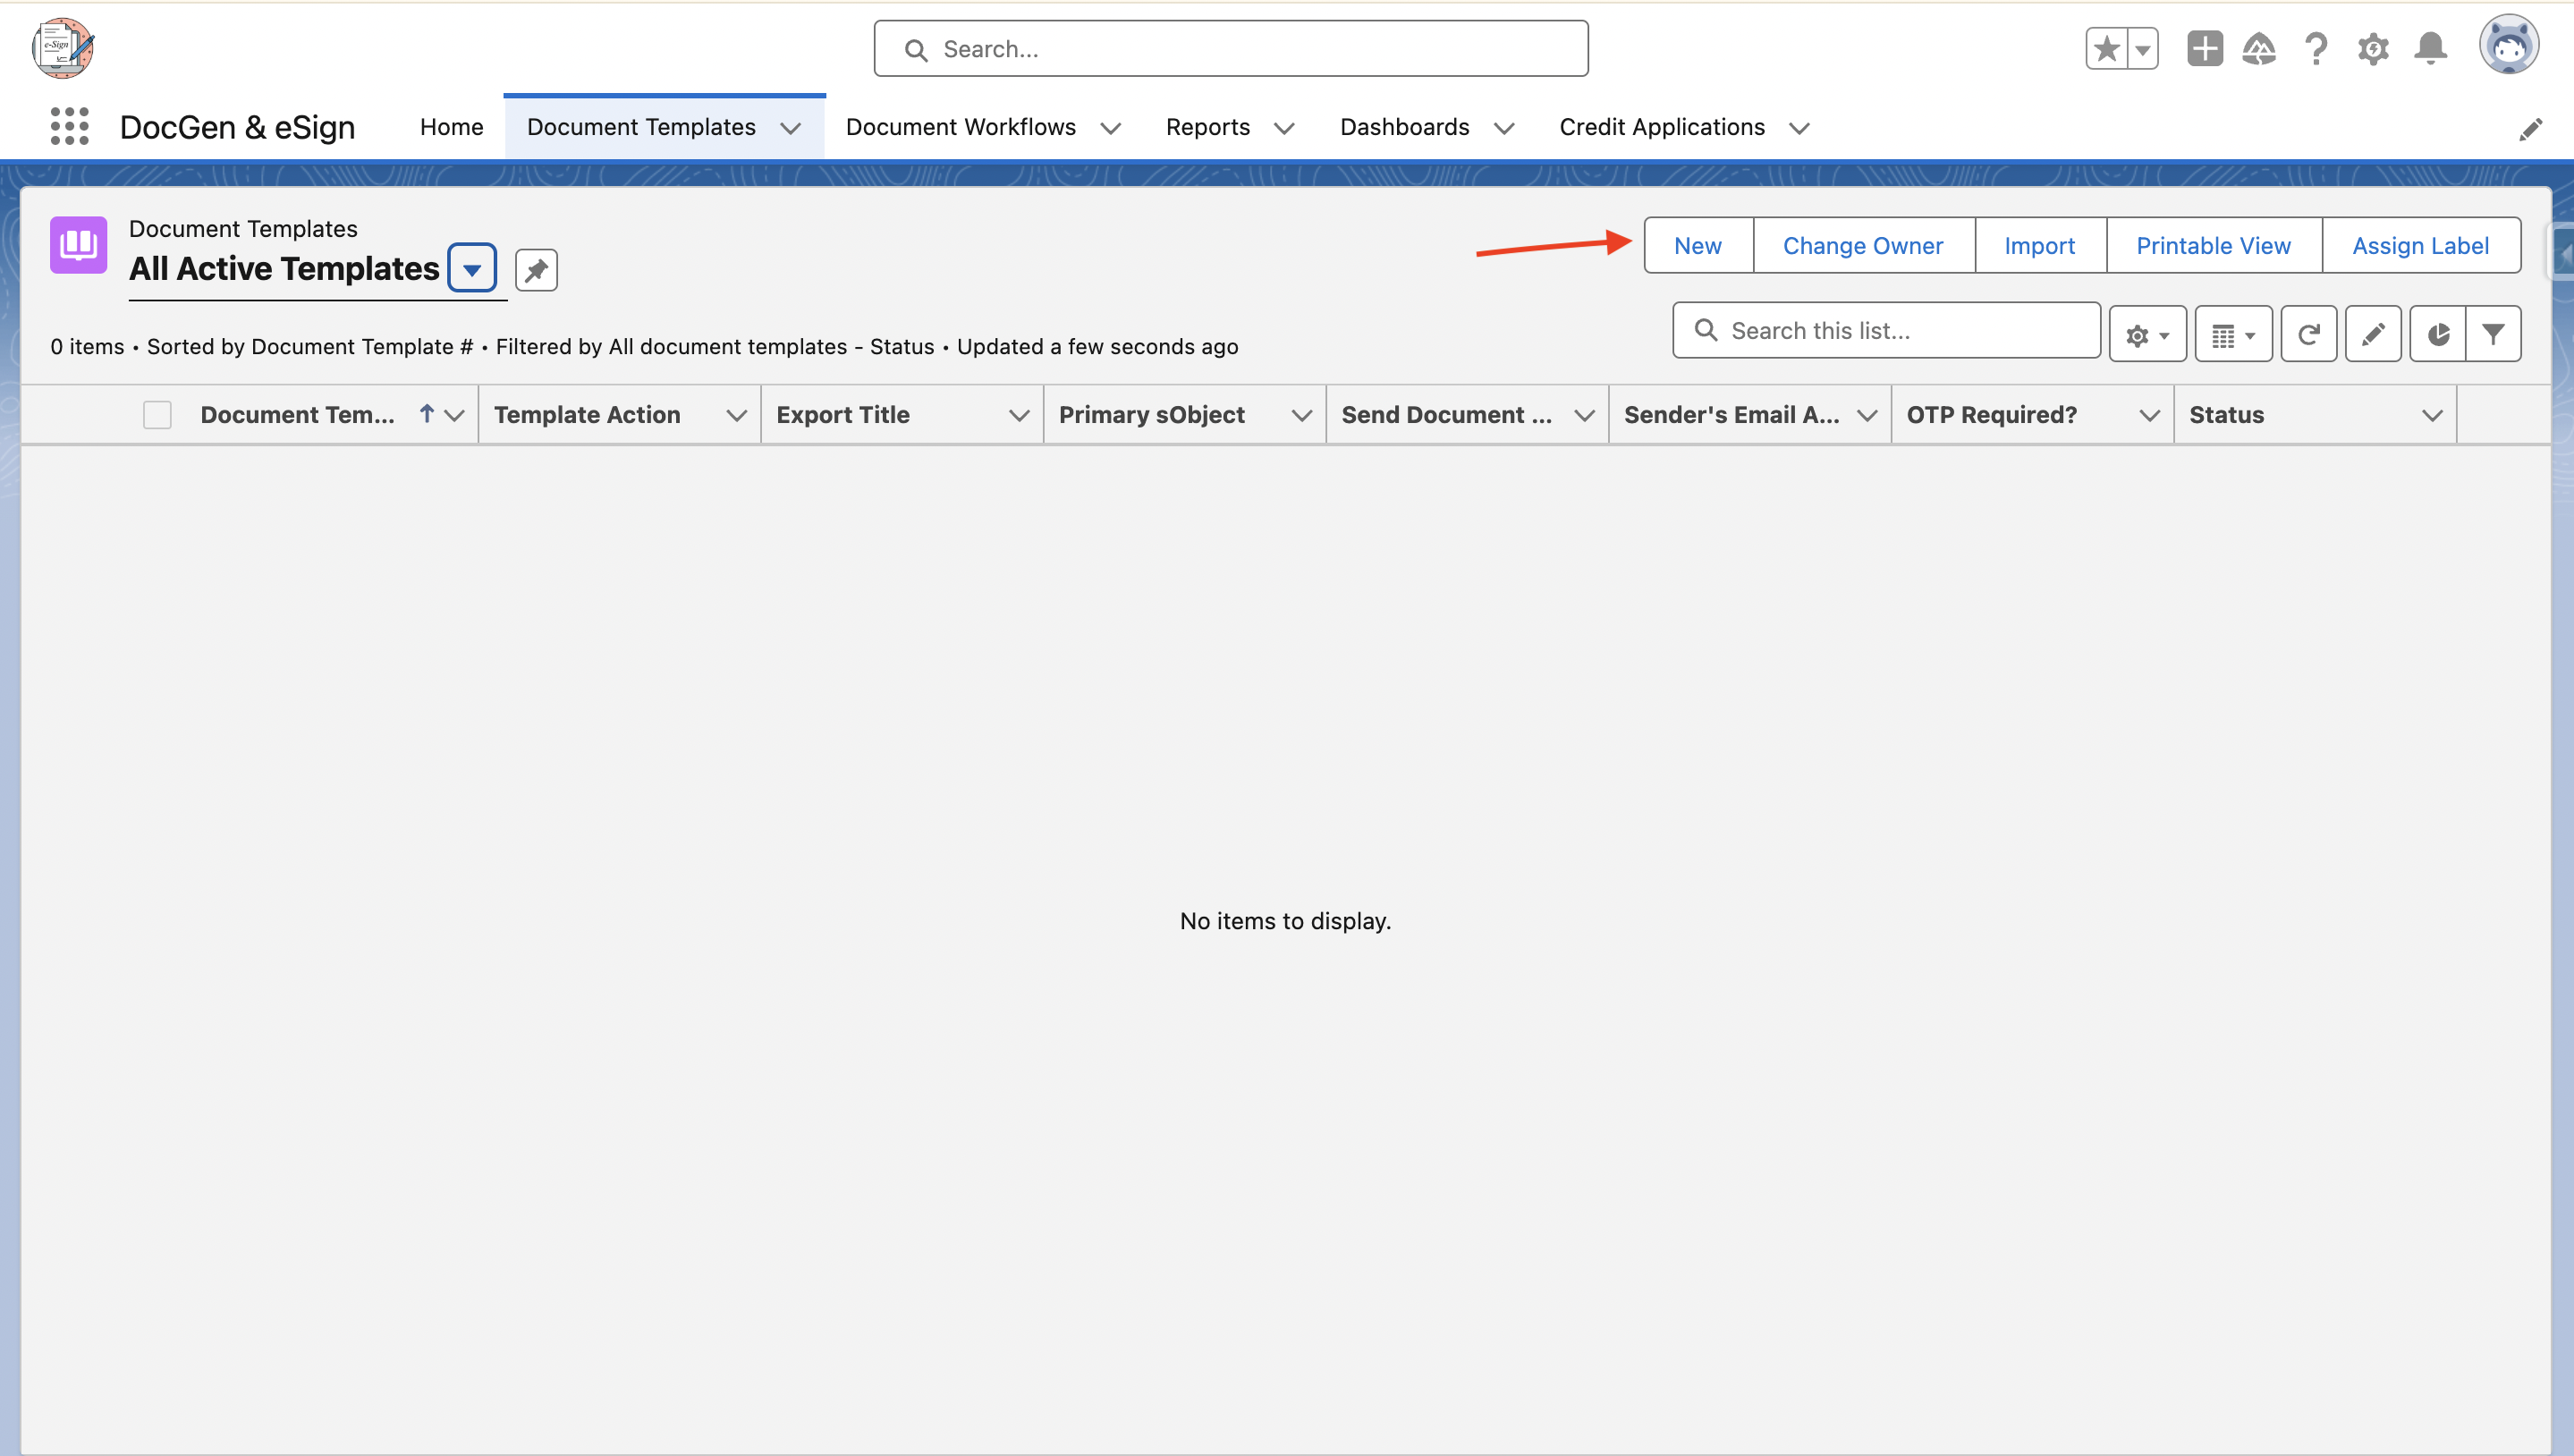
Log in to Salesforce and navigate to the Document Template tab.
-
Open the Document Template List View to view the existing templates.
-
Click New to create a new document template.
-
The Document Template configuration screen will open.
Enter the Basic Details
The first step is to provide the basic information required for the document template.
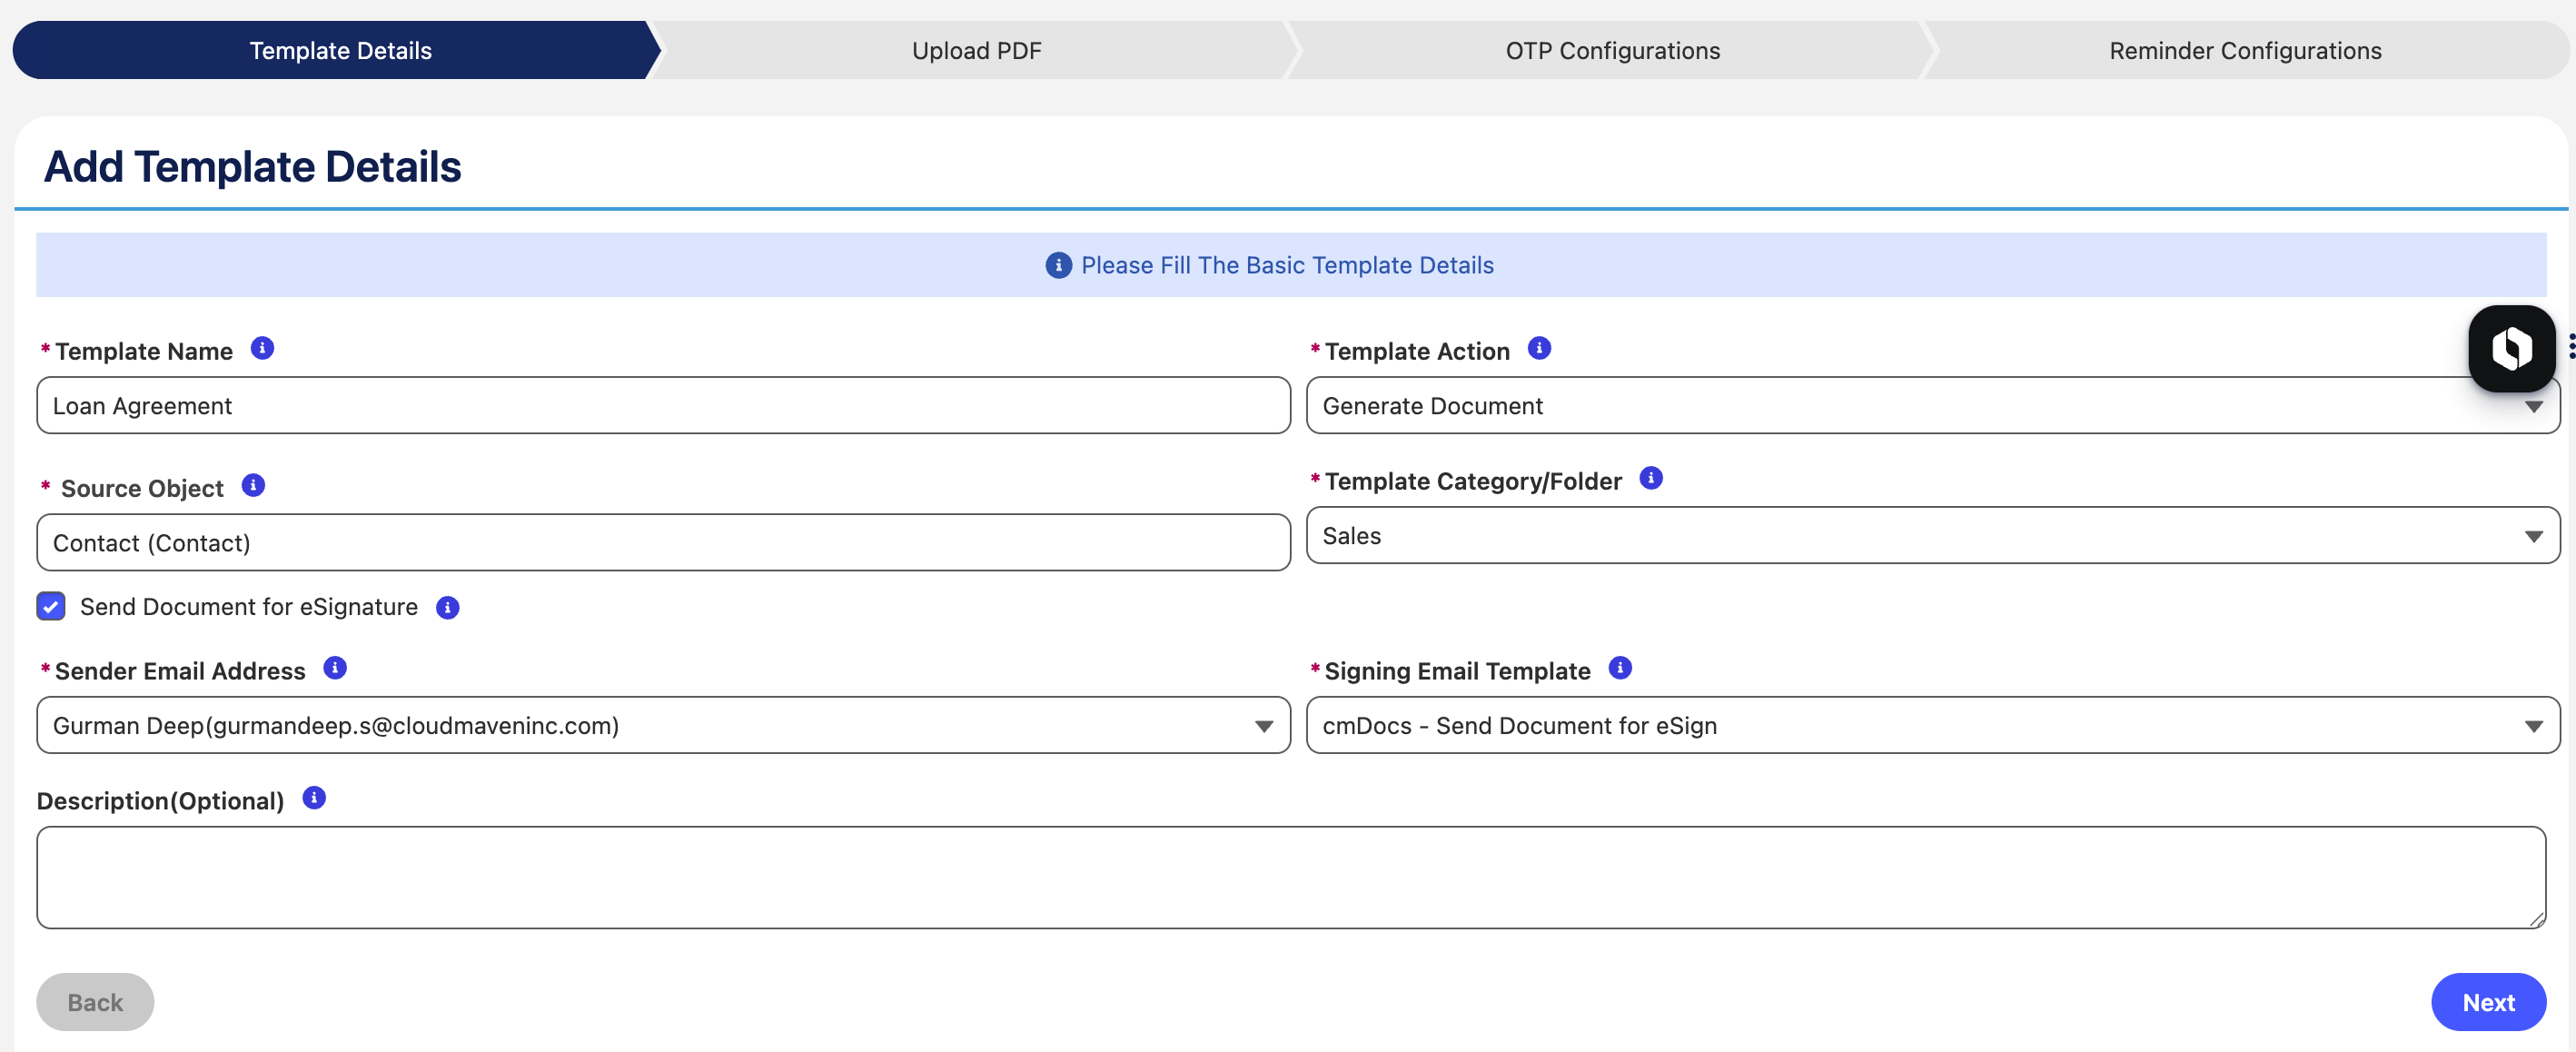
Export Title
Enter the name you want to use for the generated document.
The Export Title is used as the name of the document when it is generated or signed. Choose a clear and meaningful name so that users can easily identify the document later.
Example:
Loan Agreement
or
Bank Verification Form
Use a name that clearly describes the purpose of the document. This makes generated documents easier to identify and manage in Salesforce.
Template Action
The Template Action determines what the system should do when the template is used. Select the option that best matches your business process.
Generate Document
Select Generate Document when you want to generate a PDF document from the configured template and save it in Salesforce.
When this option is selected:
-
A PDF document is generated using the configured template.
-
The generated document is securely saved within Salesforce.
-
The document is automatically associated with the relevant parent record.
-
Users can access the generated document from the associated Salesforce record.
-
If Send Document for E-Signature is enabled, the document can also be sent to the recipient for electronic signing.
Generate Link
Select Generate Link when you want to generate a secure signing link without automatically sending an email to the recipient.
The generated link can then be manually shared with the recipient through your preferred communication method.
This option is useful when your organization wants more control over how and when the signing link is distributed.
Create Record
Select Create Record when completing the document should result in the creation of a new Salesforce record.
With this option, the system generates a blank document for the user or signer to complete. Once the document is successfully completed or signed, a new Salesforce record is automatically created using the information captured from the document.
This option is useful when the document acts as a data-collection form and the captured information needs to be stored as a Salesforce record.
Salesforce Object
Select the Salesforce Object to which the document template will apply.
A Salesforce object is where Salesforce stores a particular type of business information. Objects can be standard Salesforce objects, such as Account, Contact, Opportunity, or Case, or custom objects created specifically for your organization.
The selected object determines the Salesforce records where the document template can be used.
Example:
If you select Opportunity, the template can be used in the context of Opportunity records.
Email Template
Select the Email Template that should be used when sending the document signing link to recipients.
An email template allows you to define the message that recipients will receive along with the document signing request.
The Lightning Email Template must be created in Salesforce before it can be selected here. Ensure that the Related Entity Type of the email template matches the Salesforce Object selected for the Document Template.
Alternatively, the package provides three preconfigured email templates that are ready to use for common e-signature workflows:
-
E-Signature Email Template – Used to send the document signing request to recipients.
-
Reminder Email Template – Used to send reminder notifications for pending signatures. You can use the same template as the E-Signature Email Template if required.
-
OTP Email Template – Used to send the One-Time Password (OTP) to signers when OTP authentication is enabled.
Developer Guide – Create an Email Template in Lightning Experience
Upload an Editable PDF
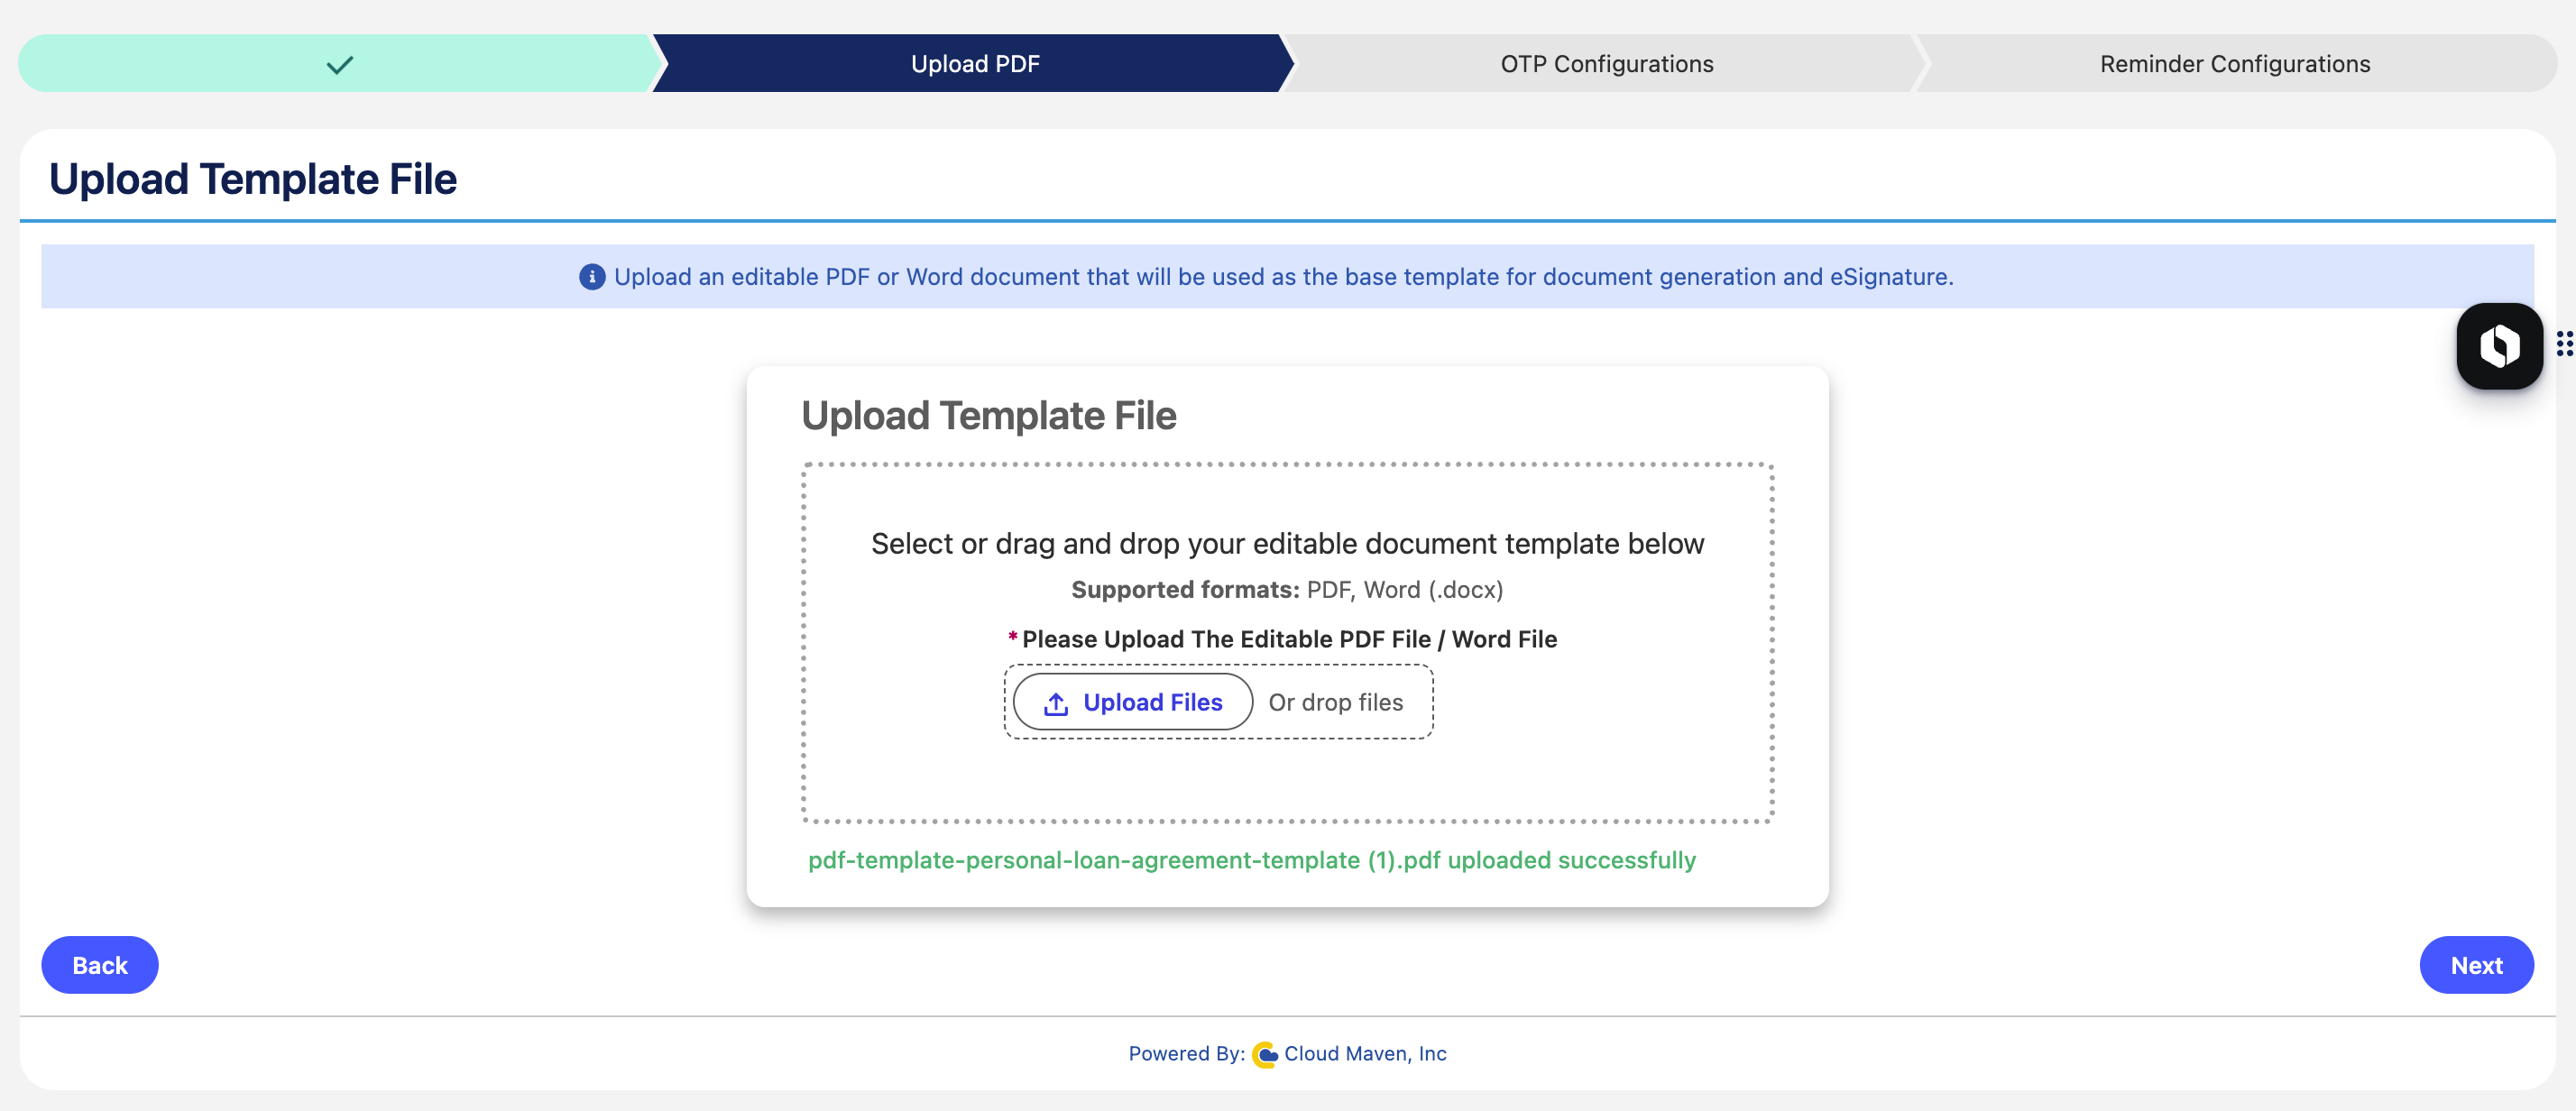
After entering the basic details, upload the document that will be used as the document template.
-
Click the Upload option.
-
Select the required PDF or Word document from your local device.
-
Upload the document to the template
The uploaded document should be properly formatted and suitable for document generation and electronic signatures.
Note: Before uploading a document, refer to the following guides for information on preparing and formatting your files:
-
PDF Document Preparation Guide – Explains the recommended practices for preparing PDF files for document generation and e-signature.
-
Word Document Preparation Guide – Covers supported formatting and structure requirements for preparing Word documents.
Configure OTP Authentication (Optional)
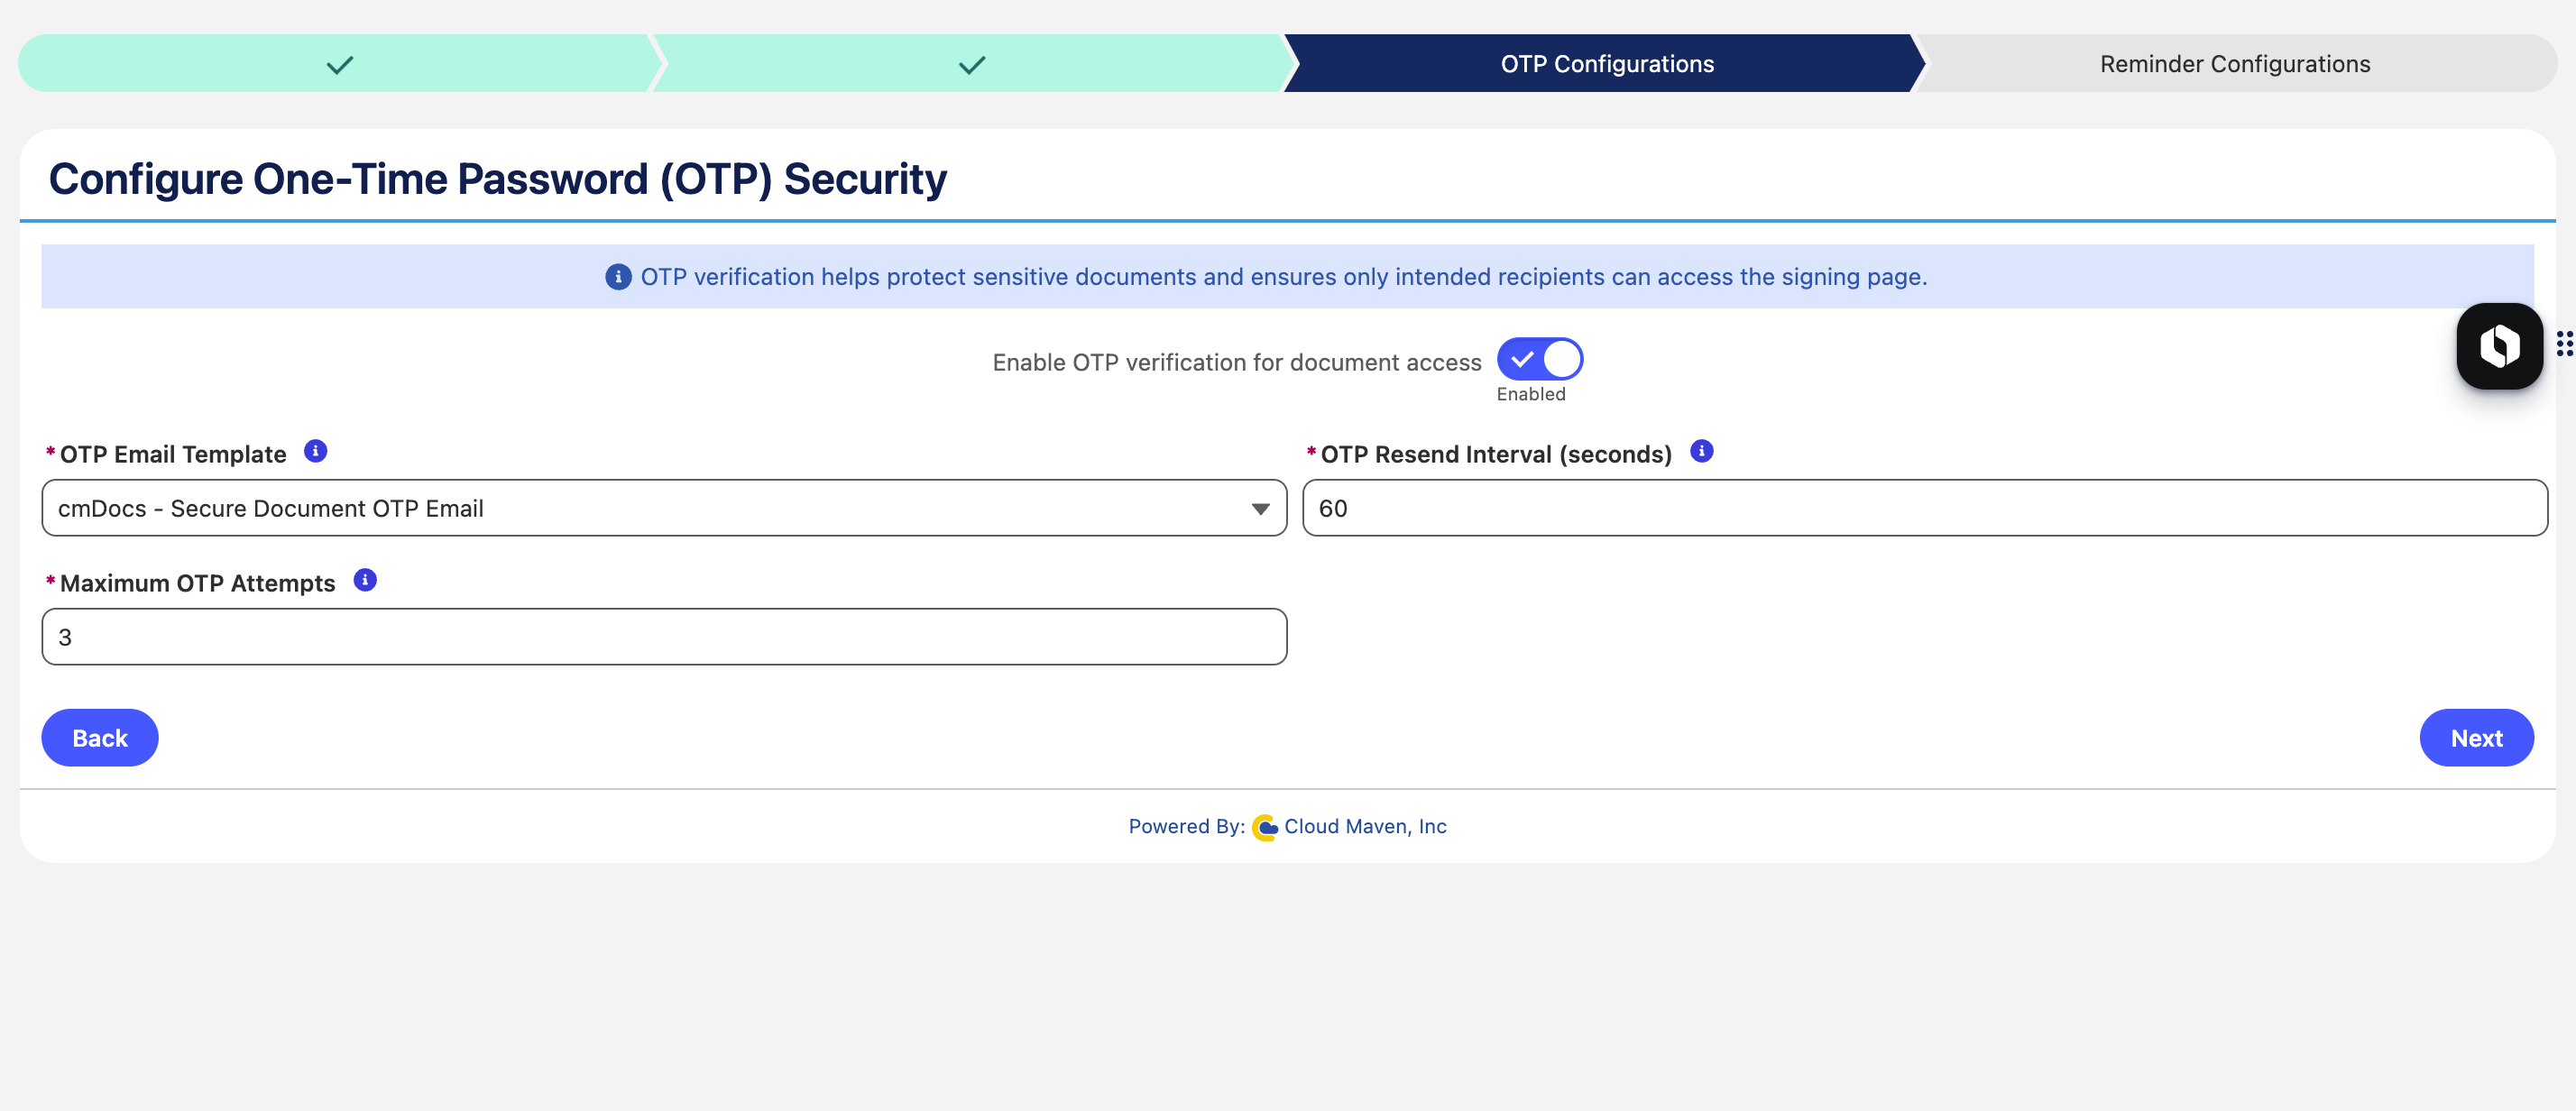
OTP Authentication adds an additional identity verification step for document signers.
When enabled, the signer is required to enter a One-Time Password (OTP) sent to their email address before they can proceed with the signing process.
To enable OTP authentication:
-
Select Enable OTP Authentication.
-
Select the OTP Email Template.
-
Verify that the selected email template contains the appropriate instructions for the signer.
-
Complete any other required fields.
-
Click Next to continue.
When Should You Use OTP Authentication?
OTP authentication is useful when additional verification of the signer's identity is required.
For example, if a document contains sensitive financial or business information, you may want the signer to verify their identity before accessing and signing the document.
OTP authentication is optional. If additional identity verification is not required for your workflow, you can leave this option disabled and continue to the next step.
Configure Reminder Notifications (Optional)
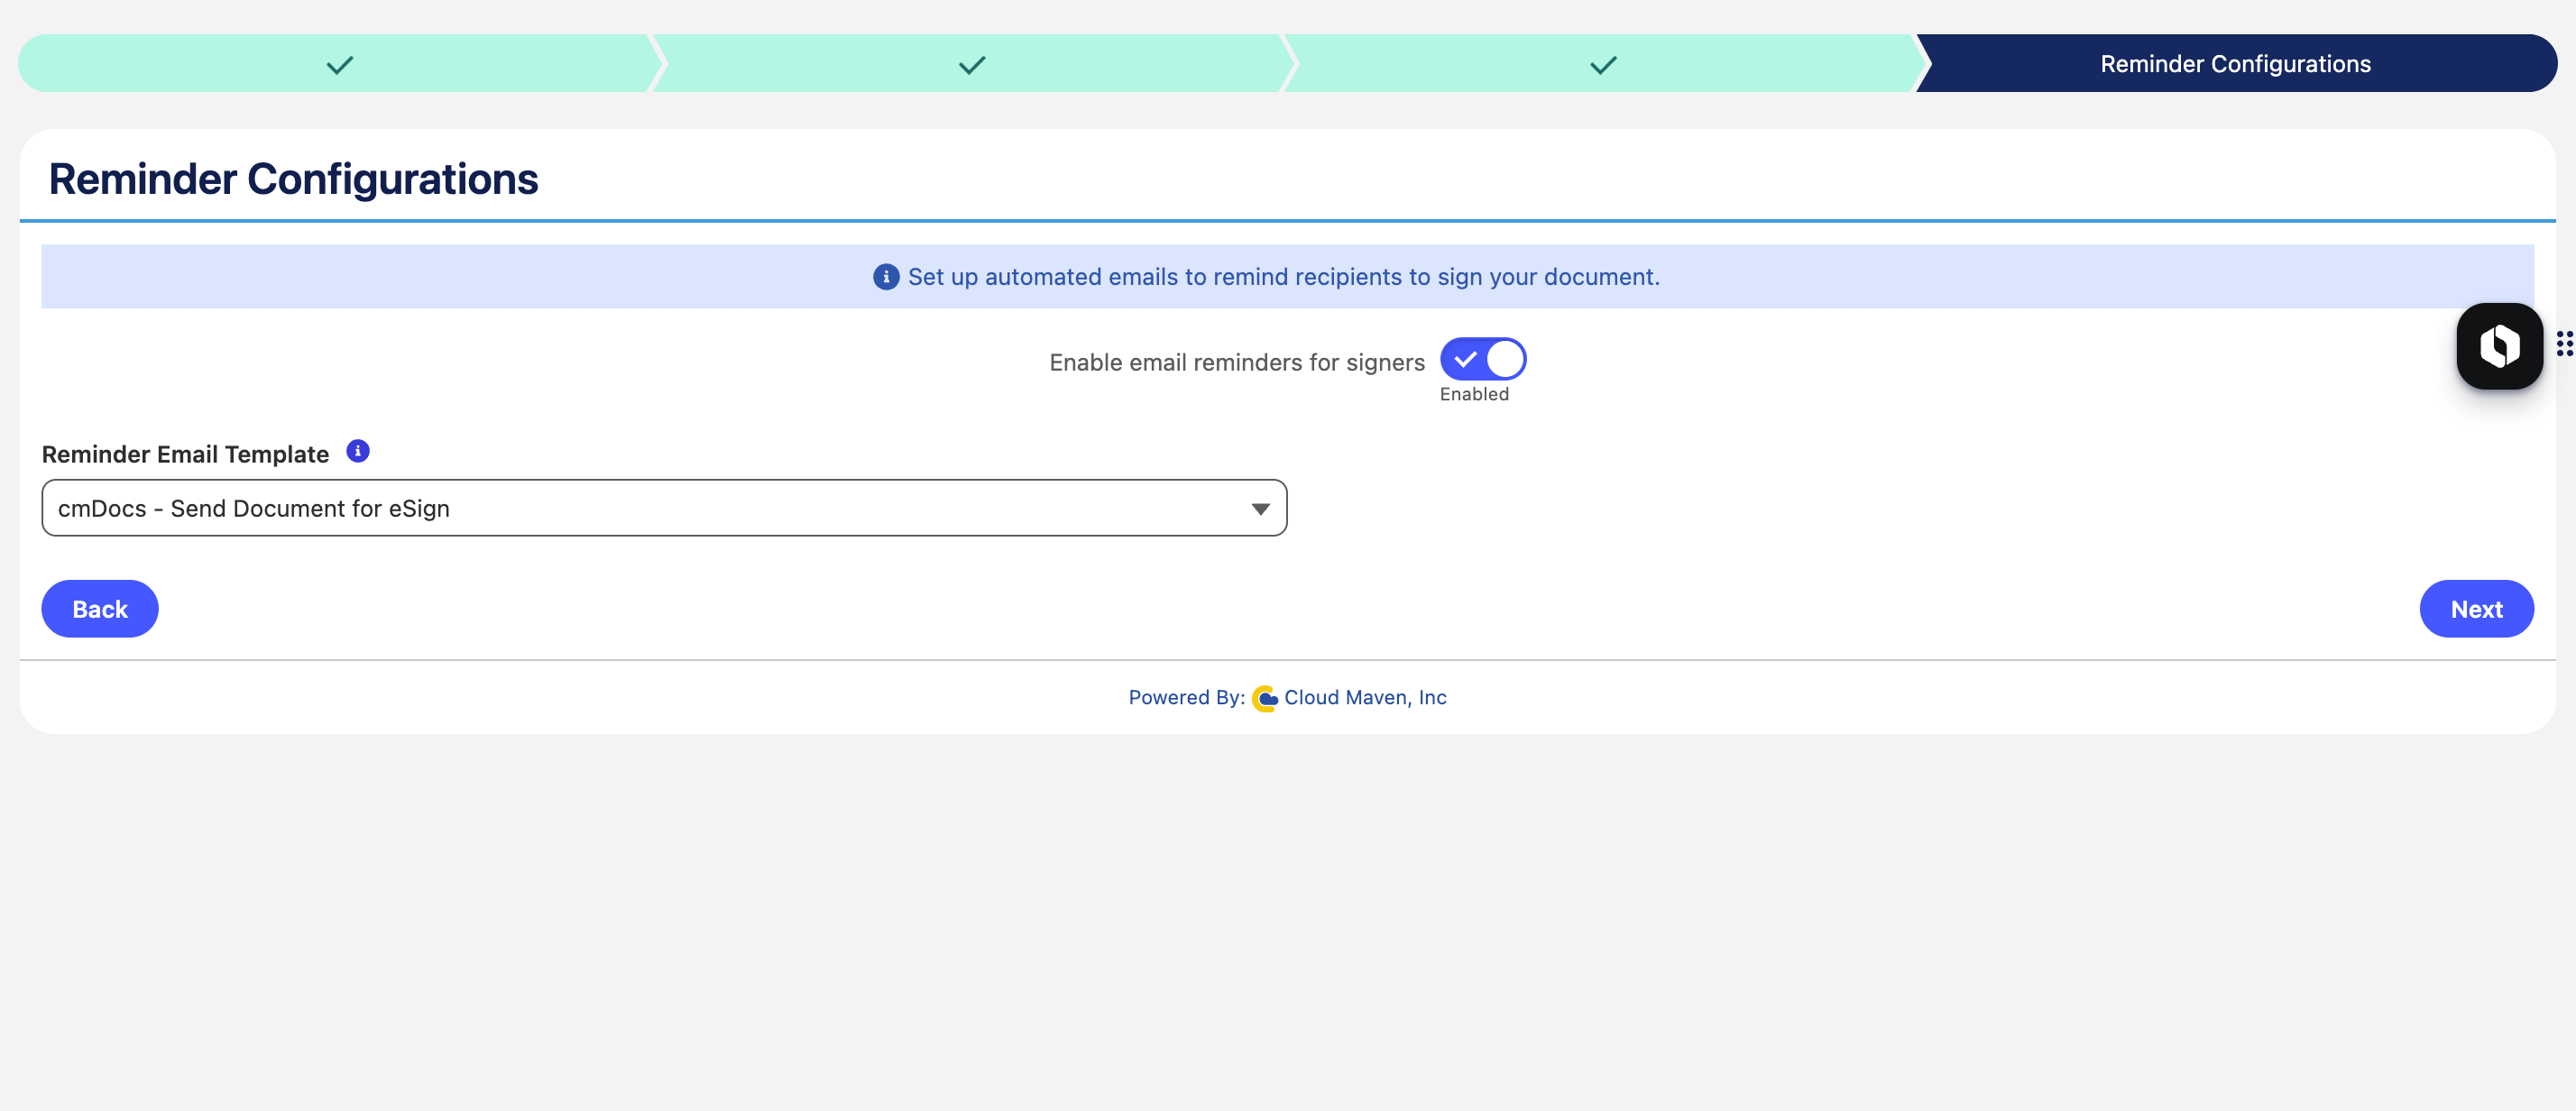
You can configure automatic reminder emails for documents that are waiting for recipients to complete their signatures.
To enable reminders:
-
Enable Send Reminder Emails.
-
Select or configure the email content that should be used for the reminder.
-
Review the reminder settings.
-
Click Next to continue.
Enable Automate Batch for Sending Emails to learn more about scheduling automated email batches. See the How to Schedule Automated Email Batches guide for details.
Why Use Reminder Notifications?
Recipients may not always complete a document immediately after receiving the signing request. Reminder notifications help ensure that pending documents are completed within the expected timeframe.
Activate the Document Template
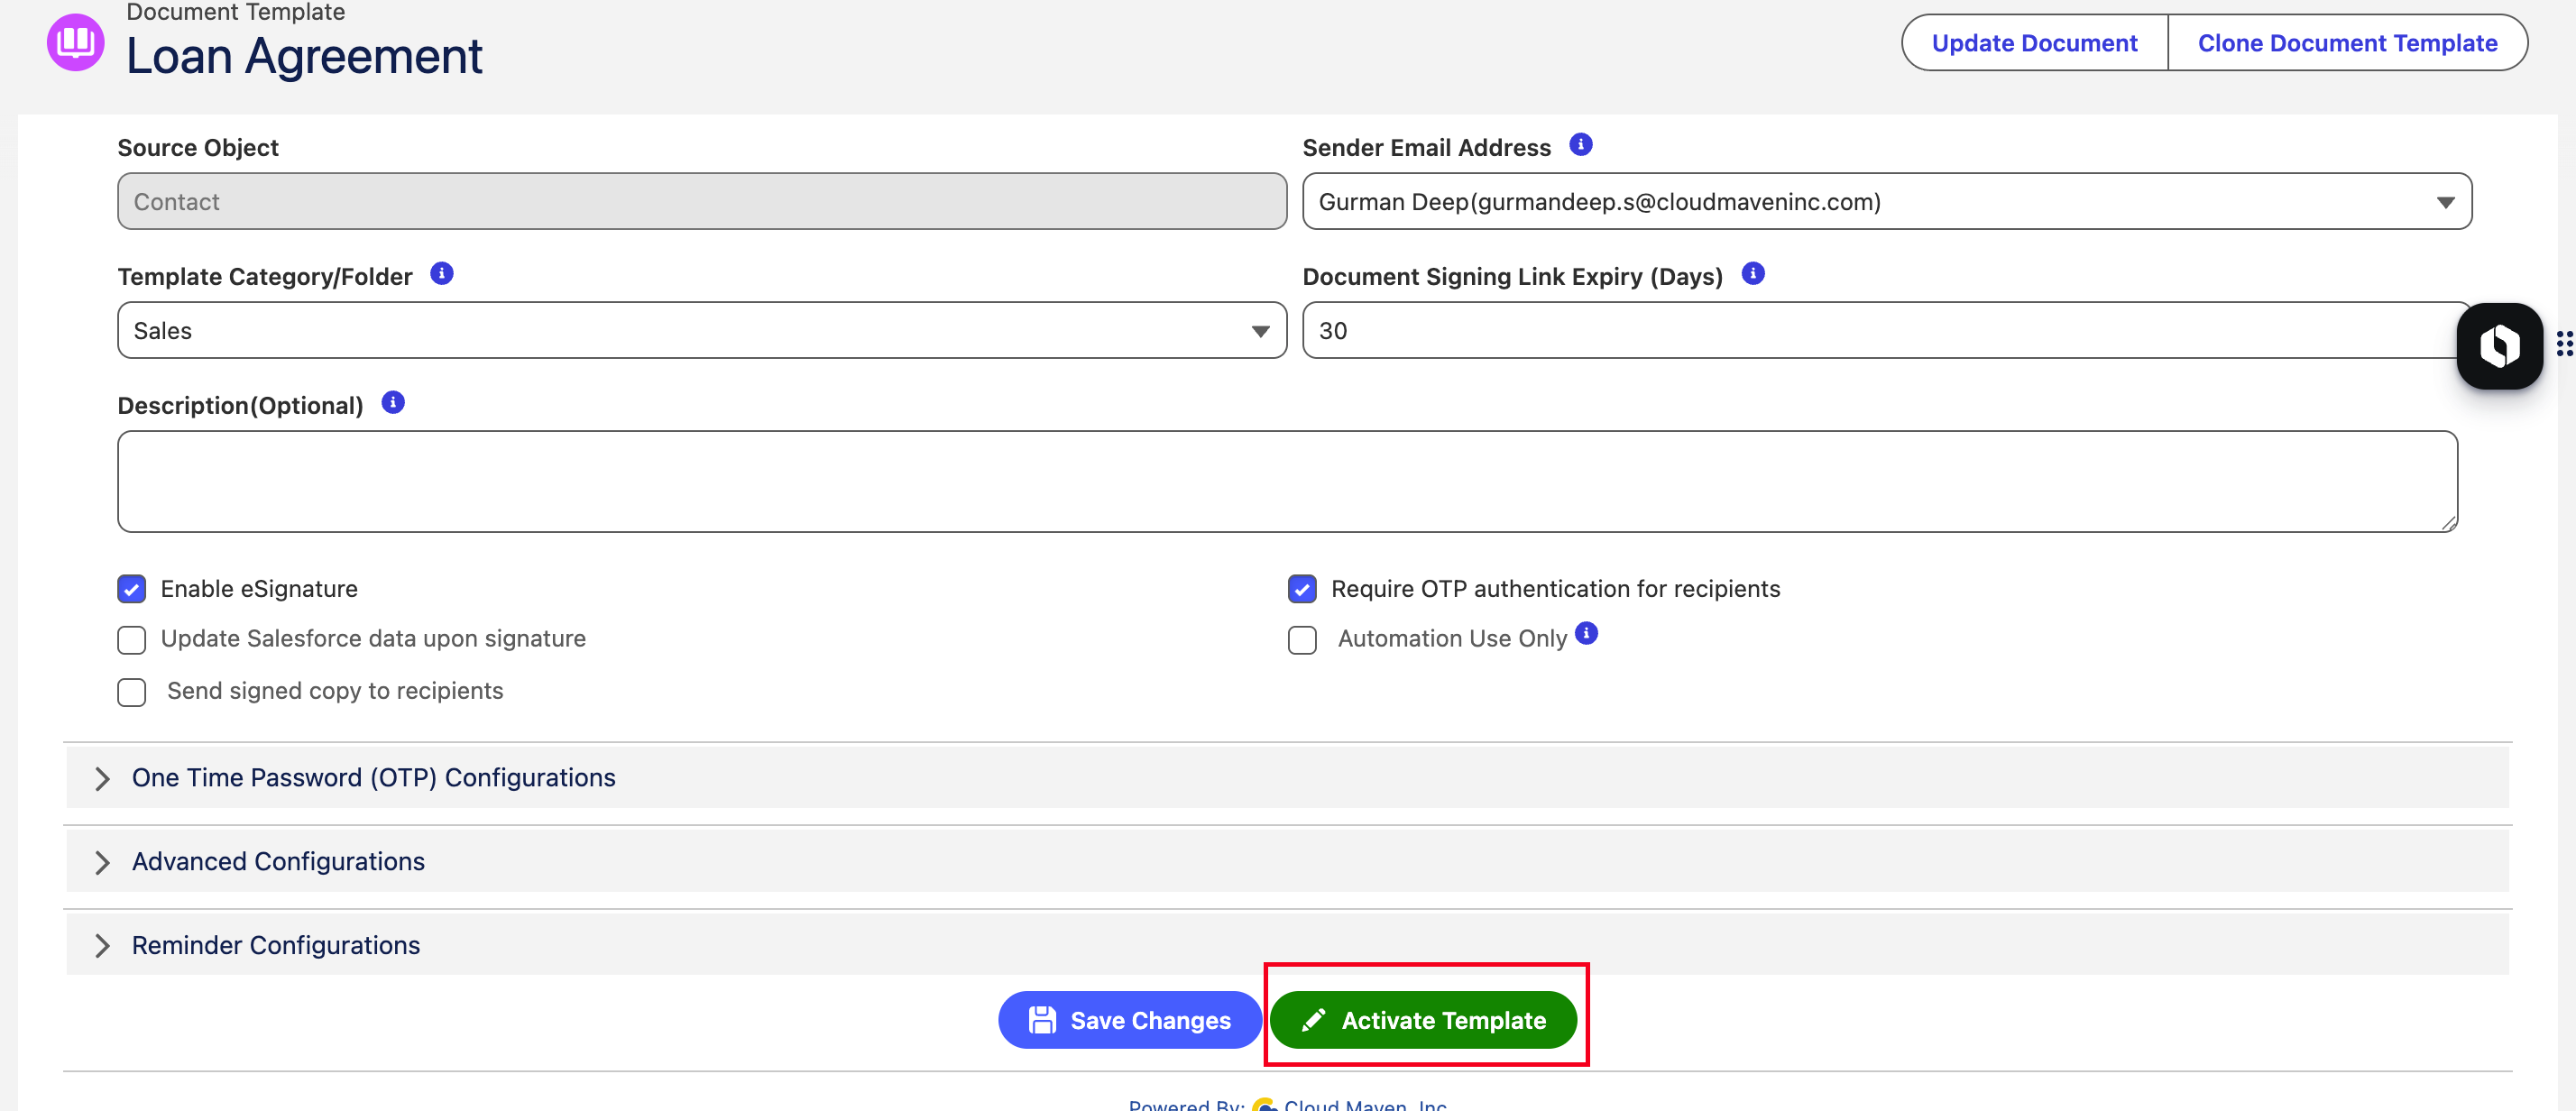
Once you have verified all the configuration details:
-
Click Activate.
-
The document template will be activated.
-
Once activated, the template becomes available for use in your document generation and e-signature workflows.