
Enabling the option to automatically send the signed copy to recipients after all signers complete signing.
📘 Instructions
-
Log in to Salesforce and navigate to the Document Template tab.
-
Open the Document Template Record that needs to be configured.
-
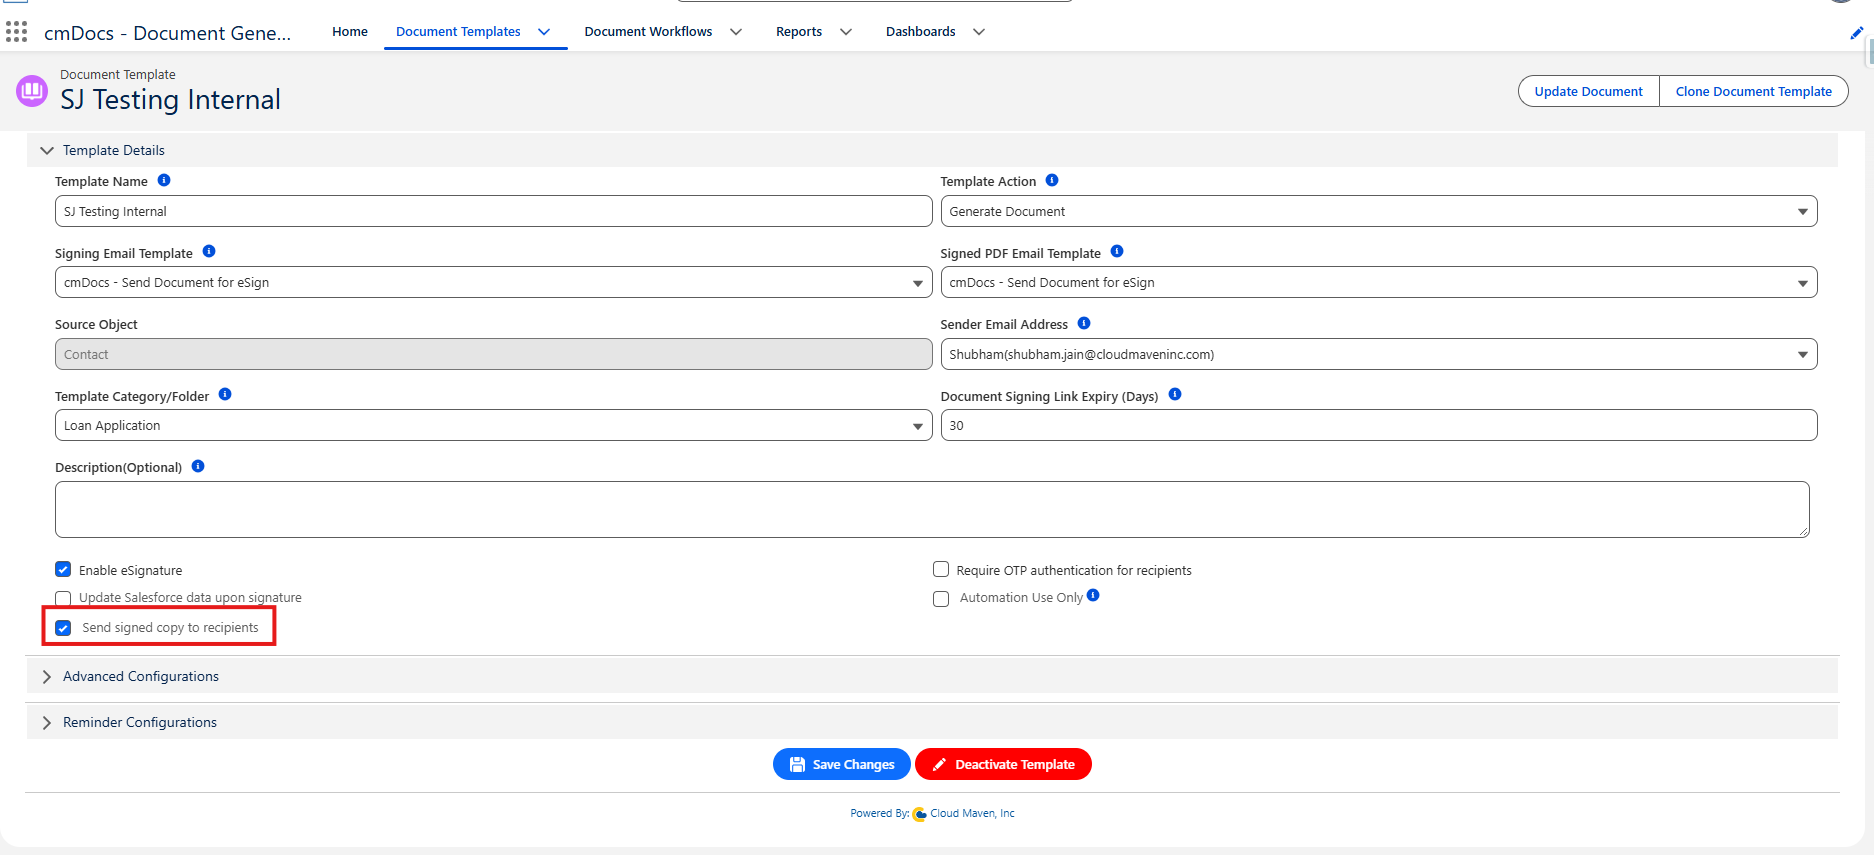
Enable the Send Signed Copy to the Recipients checkbox. This will enable that recipients can receive the copy of the document.
📋 Verification checklist
- The Send Signed Copy to the Recipients checkbox is enabled.
Signed PDF Email Template
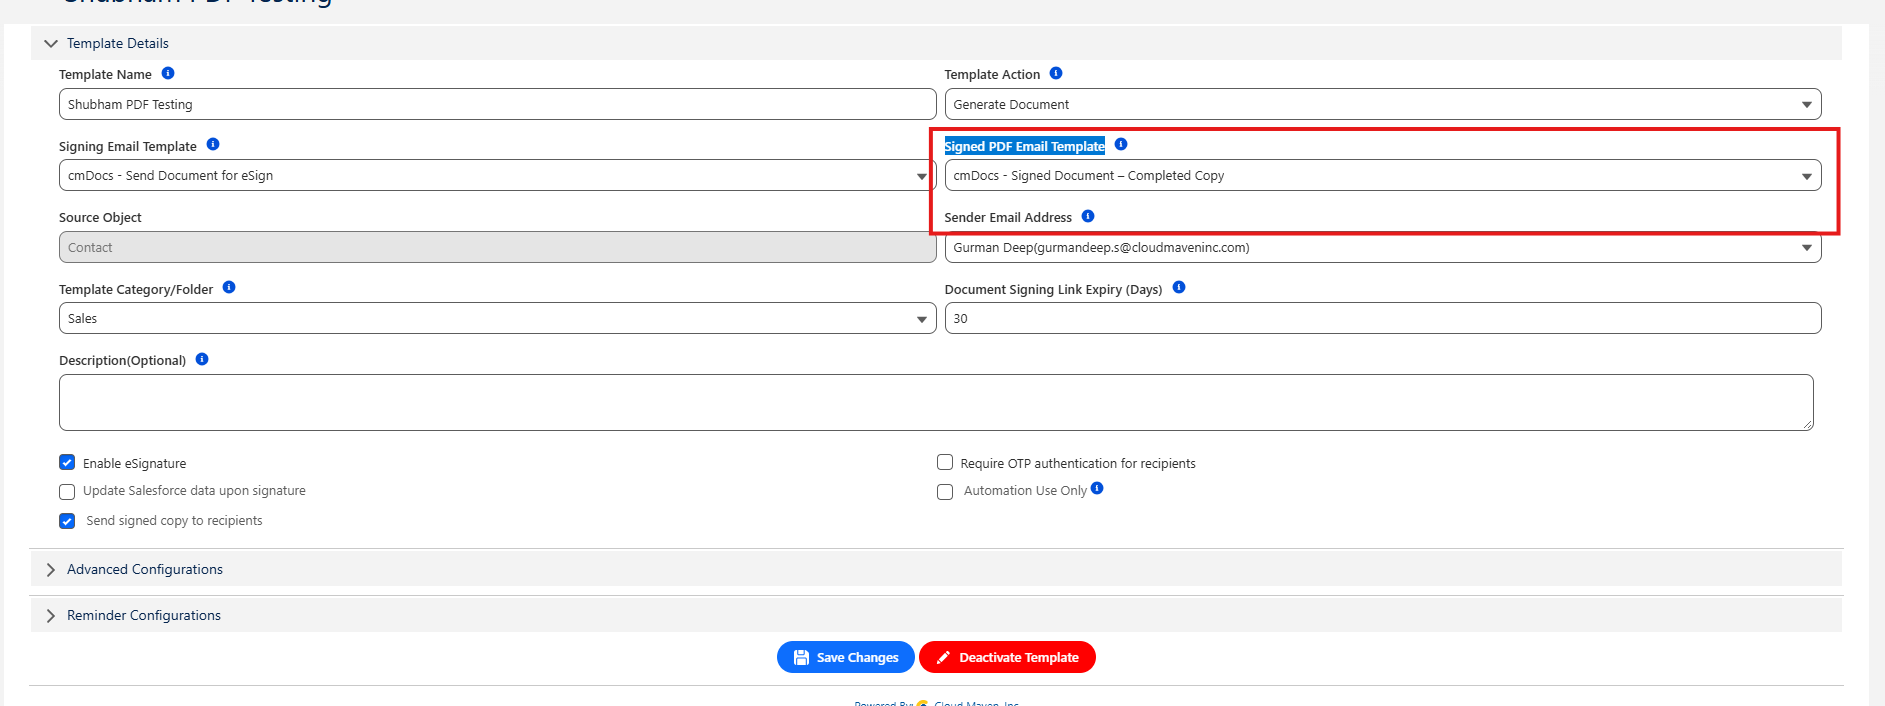
During document creation, the Signed PDF Email Template is selected to define which email template is used when sending the signed PDF to recipients. If someone wants to create a new custom template or their specific template, they can create a new one. This template is the one that recipients will receive the signed PDF in.
Steps to Create a New Email Template or Modify an Existing Lightning Email Template
Edit Existing Lightning Email Template
-
Log in to Salesforce.
-
Click on the App Launcher (nine-dot grid icon) in the upper left corner.
-
Search and select "Email Templates".
-
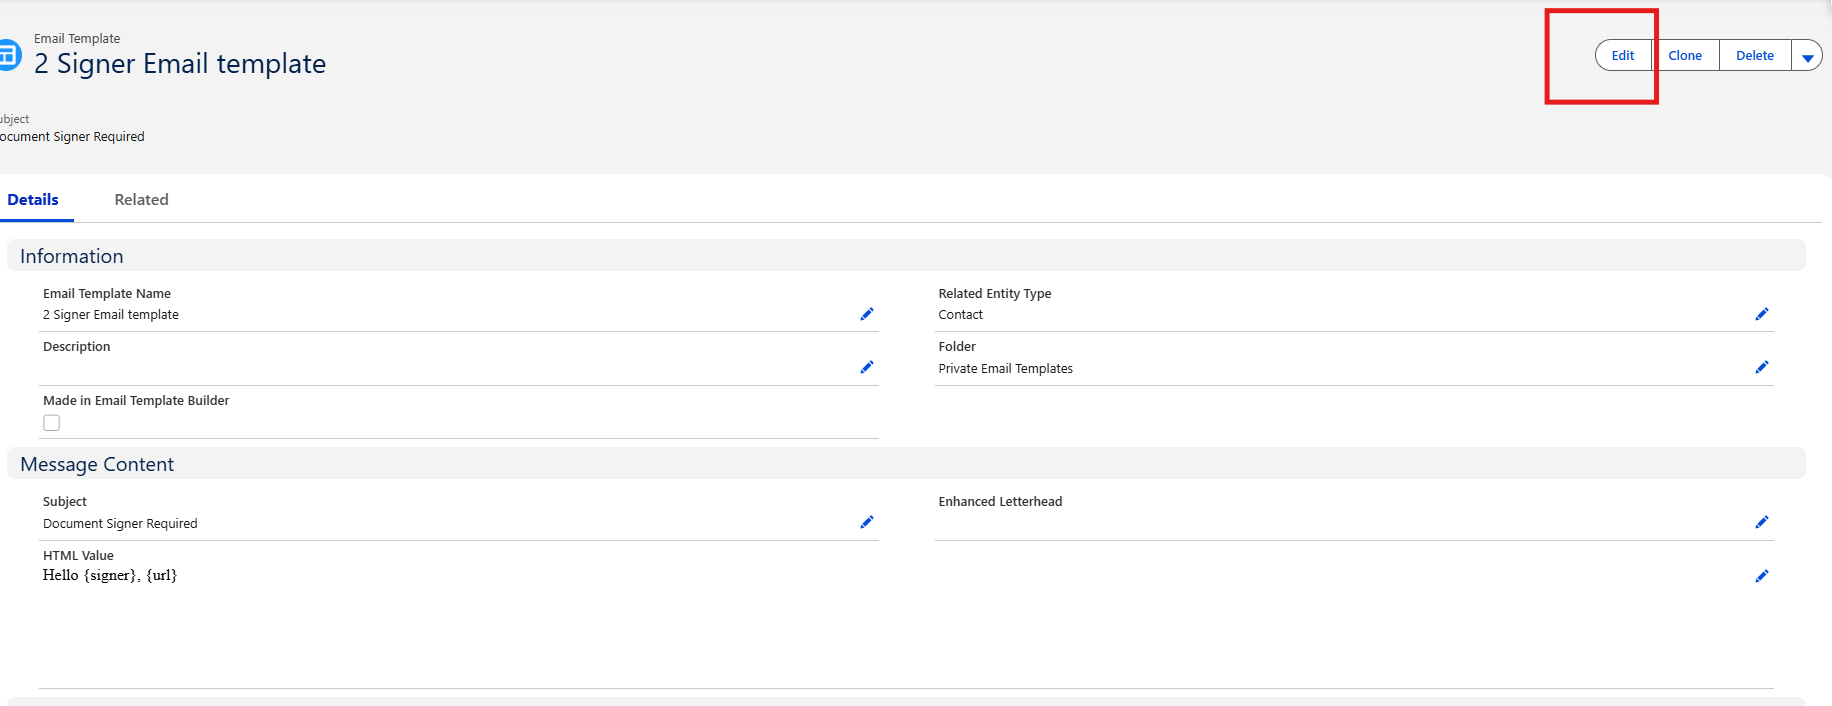
Open the existing email template that needs to be modified, then click Edit.
-
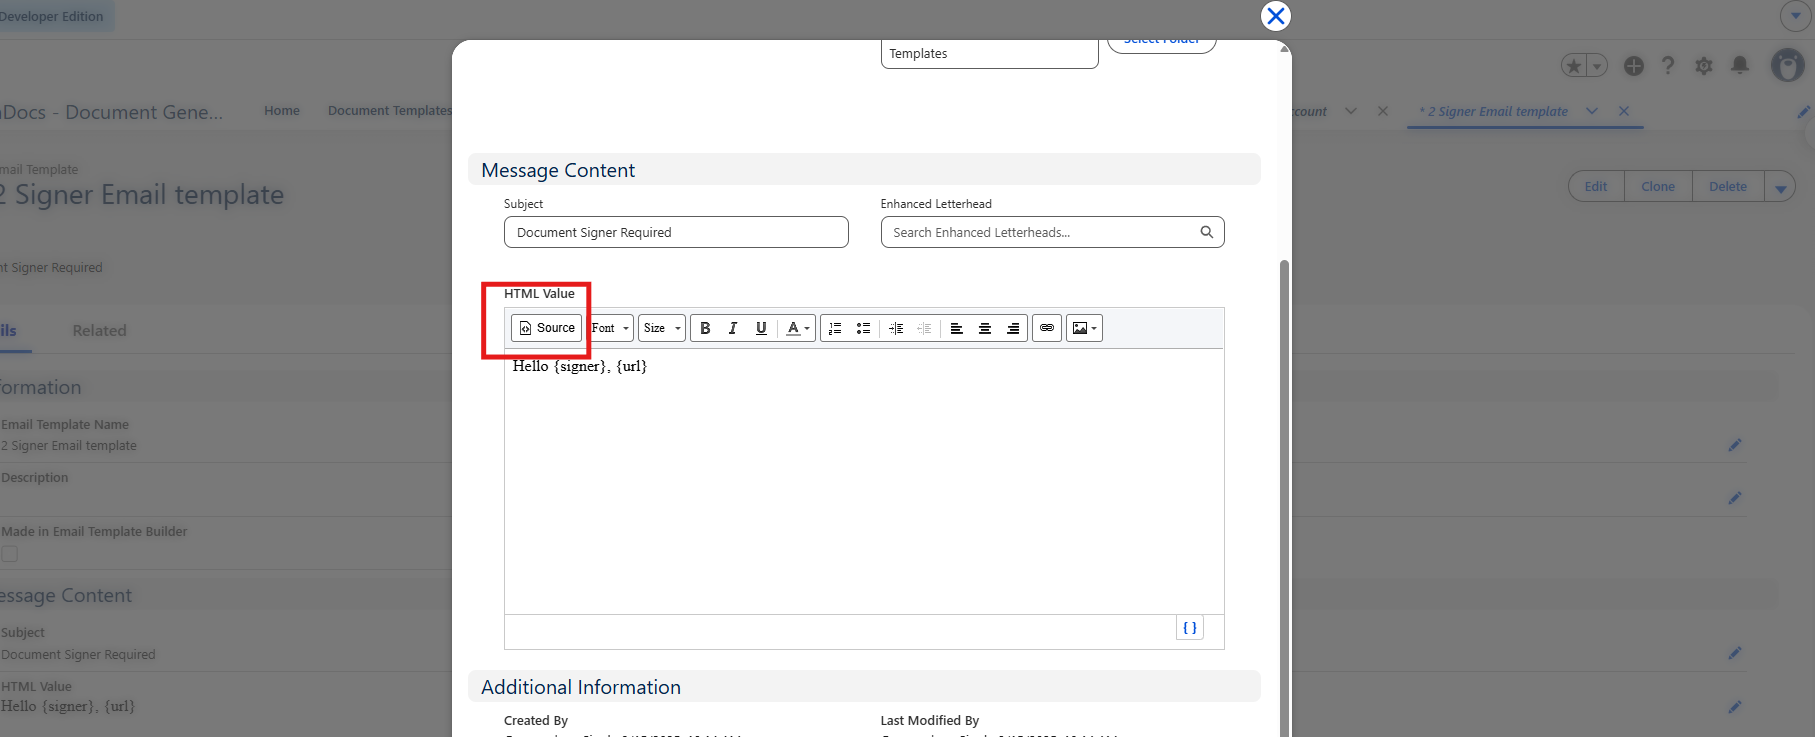
In the HTML Value (body) editor, click the Source button (
</>) in the toolbar to switch to HTML source view. -
Make the required changes to the HTML.
-
Click Source again to return to the visual view and confirm the layout looks correct.
-
Click Save.
New Email Template Creation
Use the following steps to create the email template required for the new document template:
Create a New Lightning Email Template
-
Log in to Salesforce.
-
Click on the App Launcher (nine-dot grid icon) in the upper left corner.
-
Search and select "Email Templates".
-
Click "New Email Template".
-
Enter the Email Template Name.
-
Select the Related Entity Type (the object the template’s merge fields will come from, such as Contact, Opportunity or a custom object).
-
Enter a Description (optional, but helpful for others finding the template later).
-
Choose the Folder where the template should be saved. Pick a shared folder if other users need access.
-
Enter the Subject line.
-
In the HTML Value (body) editor, click the Source button (
</>) to switch to HTML source view. -
Paste or write the HTML for the template body.
-
Click Source again to return to the visual view and check the layout.
-
Click Save.
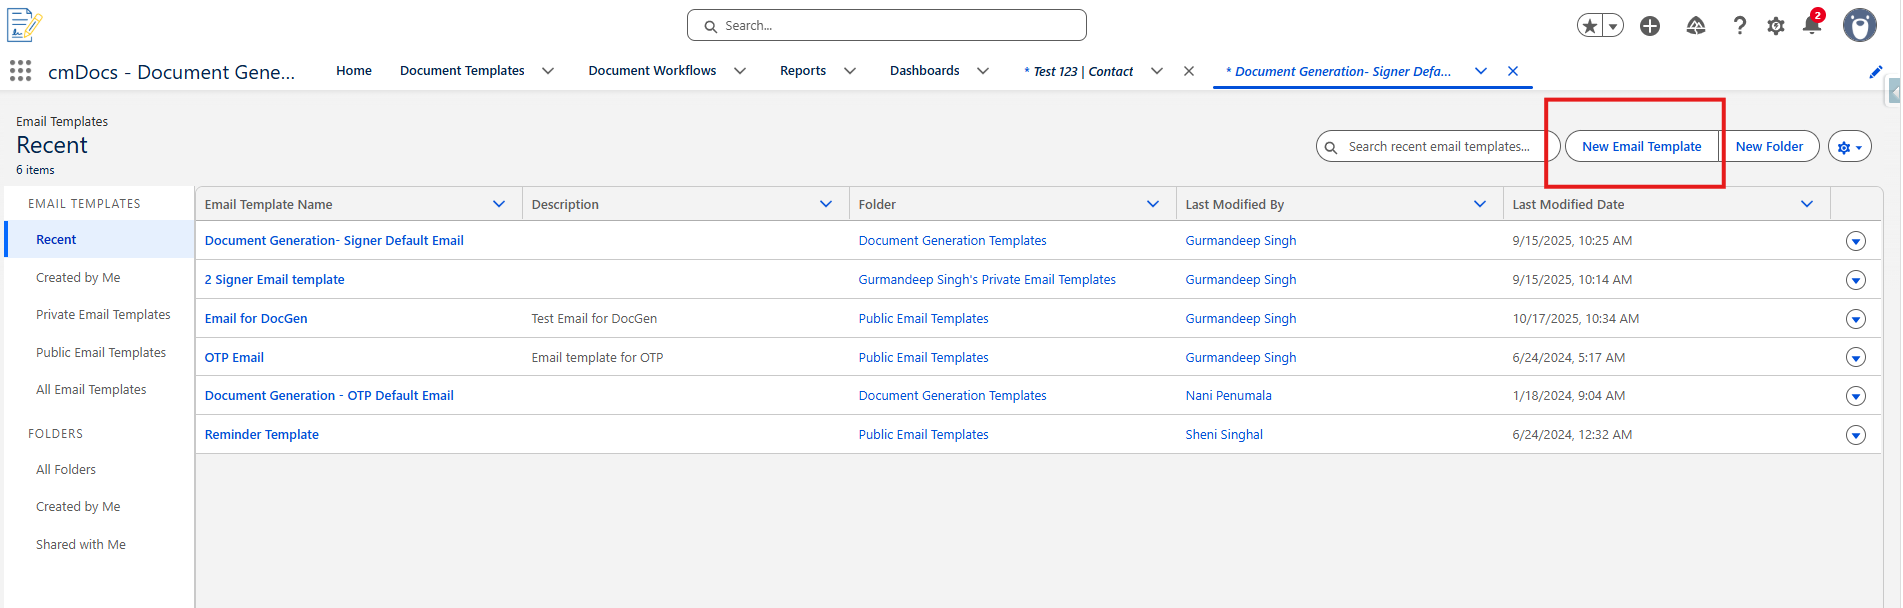
Expected result
Once the final signer completes signing, all configured recipients will automatically receive the signed copy of the document. Users can also modify the email template as needed to match their requirements.