
Overview
This guide explains how to prepare a Microsoft Word document template for use with the DocGen & eSign application. It covers the syntax and best practices for creating merge fields, loop fields, conditional sections, and other dynamic content that can later be mapped to Salesforce fields.
Prepare the Word Document
Open the document in Microsoft Word and add your static content, such as:
-
Headings
-
Labels
-
Paragraphs
-
Tables
-
Terms and conditions
-
Signature sections
-
Other text that should remain unchanged
Wherever Salesforce data needs to be inserted dynamically, use the supported merge-field syntax.
Add Merge Fields
Merge fields are used to populate data from a single Salesforce record.
Syntax
Use double curly brackets:
{{fieldName}}
Example
Customer Name: {{customerName}}
Email: {{customerEmail}}
Phone: {{customerPhone}}
Loan Amount: {{loanAmount}}
During document generation, these placeholders are replaced with the corresponding Salesforce values after the fields are mapped in DocGen & eSign.
Naming Guidelines
Follow these guidelines when creating merge fields:
-
Use unique names for different data elements.
-
Do not include spaces inside the curly brackets.
-
Use a consistent naming convention throughout the document.
-
camelCase is recommended.
-
Make sure the opening
{{and closing}}are present.
Correct
{{customerName}}
{{customerEmail}}
{{loanAmount}}
Incorrect
{{ customerName }}
{{customer Name}}
{{customer Name }}
Important: The merge-field name in the Word document is the identifier that you will search for when configuring the corresponding mapping in DocGen & eSign.
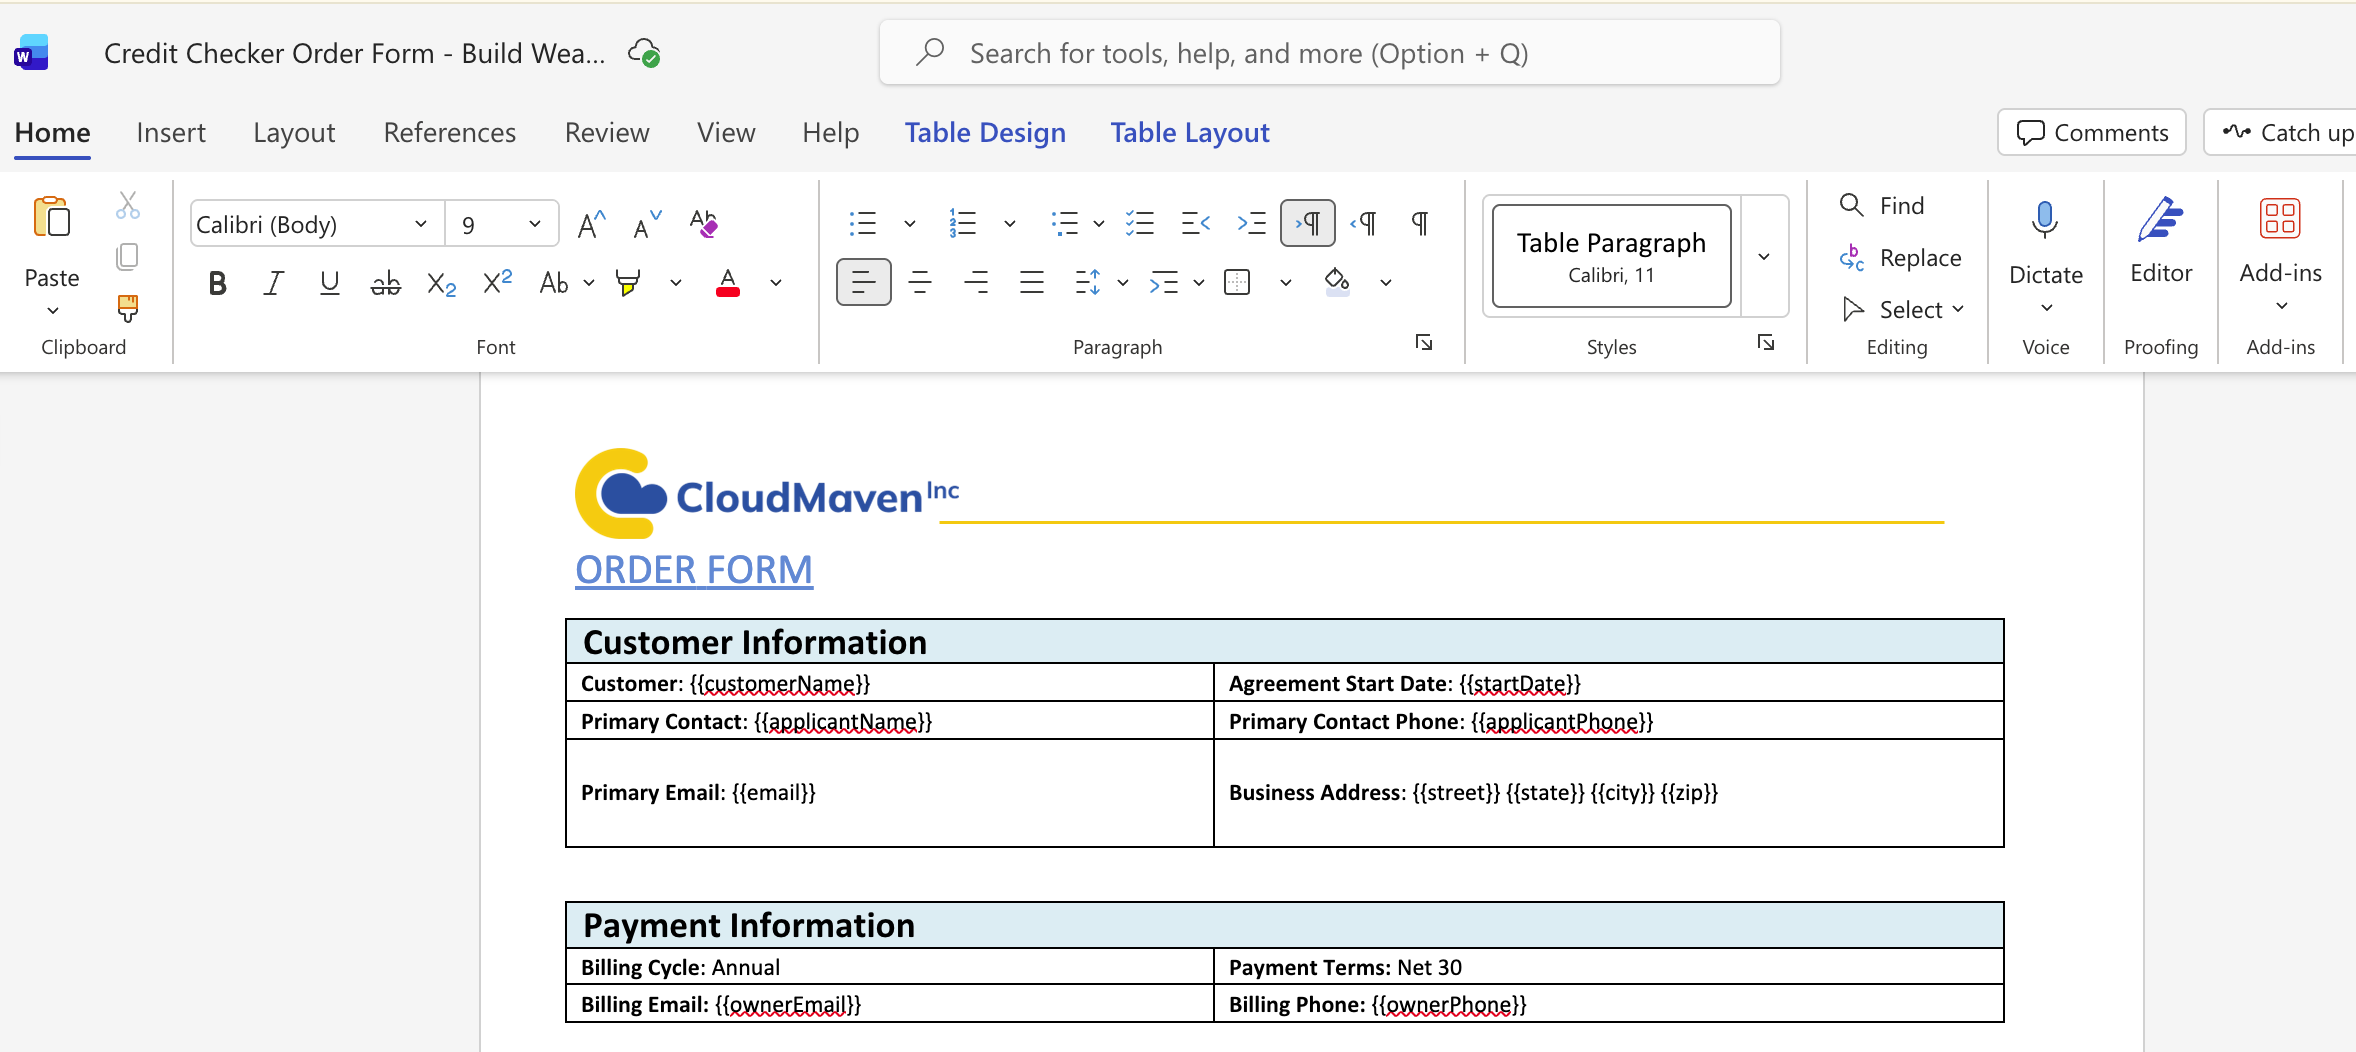
Add Loop Fields for Child Records
Loops are used when a document needs to display multiple Salesforce child records.
For example, an Opportunity may have multiple products. A loop can be used to display each product as a separate row in a table.
Loop Syntax
{{#relationshipName}}
{{fieldName}}
{{/relationshipName}}
The loop must have:
-
A start tag using
# -
One or more fields inside the loop
-
An end tag using
/
Example
{{#sku}}
{{skuName}}
{{skuTerm}}
{{fee}}
{{/sku}}
The content between the start and end tags is repeated for each child record returned by the configured relationship.

Add Conditional Sections
Conditional sections allow content to be displayed only when a specified condition is met.
Use conditional tags when a portion of the document should appear only when the corresponding Salesforce value or condition is true.
Syntax
{{#conditionName}}
Content to display when the condition is met.
{{/conditionName}}
Example
{{#isApproved}}
Application Status: Approved

The application has been approved.
{{/isApproved}}
isApproved - Is mapped to field in salesforce.
Mutiple Conditional Example
Use a condition keyword in the Word template and map it to the appropriate Salesforce field in DocGen & eSign. During document generation, only the content within the matching condition-value tags is included in the generated document.
Example
{{#condition}}

{{#florida}}
1. Property Insurance: The Borrower must maintain hazard insurance covering the property. The insurance policy must meet the requirements applicable to properties located in Florida and remain in effect throughout the term of the loan.
{{/florida}}

{{#texas}}
1. Property Insurance: The Borrower must maintain hazard insurance covering the property. The insurance policy must comply with applicable Texas requirements and provide coverage acceptable to the Lender throughout the term of the loan.
{{/texas}}

{{#northCarolina}}
1. Property Insurance: The Borrower must maintain hazard insurance covering the property. The insurance policy must satisfy applicable North Carolina requirements and remain active for the duration of the loan.
{{/northCarolina}}

{{/condition}}
In the example above, the condition tag is mapped to a Salesforce sObject field. For example, if the condition is mapped to the Billing State field (BillingState), the value of that field determines which conditional block is included in the generated document.
For example, if Billing State = Florida, the content within the {{#florida}} and {{/florida}} tags will be included, while the other state-specific blocks will be excluded.
Adding Multiple Condition Tags
You can add multiple condition tags within the same Word document to apply conditional logic to different Salesforce fields.
When adding multiple condition tags, each condition keyword must use the condition prefix followed by a unique identifier, such as condition, condition1, condition2, and so on.
{{condition}}
    {{#florida}}
    Florida-specific content
    {{/florida}}

    {{#texas}}
    Texas-specific content
    {{/texas}}
{{/condition}}

{{condition1}}
    {{#banking}}
    Banking-specific content
    {{/banking}}

    {{#retail}}
    Retail-specific content
    {{/retail}}
{{/condition1}}
Image URL Fields
You can also dynamically render images in your Word document using special image tags supported by DocGen & eSign.
The image tag can be mapped to a Salesforce field that contains the image URL. During document generation, the application retrieves the image from the URL and inserts it into the Word document at the location of the image tag.
Inline image placement
{{%logo}}
Centered image placement
{{%%logo}}
Document Signers
You can also use a signer loop in your Word document to dynamically display the signers configured for the Document Template.
Signer Loop Syntax
Add the following tags to your Word document:
{{#signer}}

Signature {{index}} - {{name}}
Date Signed (Signer {{index}})

{{/signer}}
The signer loop automatically retrieves the signers configured for the Document Template based on their Signer Sequence.
When the document is generated:
-
The system identifies all configured document signers.
-
All signers with Signer Sequence = 1 are retrieved .
-
The signer information is populated using the available signer details, such as
{{index}}and{{name}}. -
The corresponding signature fields/boxes are automatically added to the generated document.
-
The process continues for subsequent signer sequences as configured.
General Formatting Guidelines
Follow these guidelines when preparing your Word template:
Merge Fields
✅ Use:
{{customerName}}
❌ Avoid:
{{ customerName }}
Loop Tags
✅ Use:
{{#products}}
{{productName}}
{{/products}}
❌ Avoid:
{{ #products }}
{{productName}}
{{ /products }}
Keep Tags Together
Do not split a merge field, loop tag, or conditional tag across multiple Word elements.
For example, avoid manually formatting part of a placeholder differently from the rest of the placeholder.
Use Consistent Identifiers
Use meaningful and unique identifiers:
{{customerName}}
{{customerEmail}}
{{loanAmount}}
rather than ambiguous names such as:
{{name1}}
{{field2}}
{{value3}}
Recommended Word Template Structure
A typical DocGen & eSign Word template can be structured as follows:
LOAN APPLICATION

Customer Information

Name: {{customerName}}
Email: {{customerEmail}}
Phone: {{customerPhone}}

Loan Information

Loan Amount: {{loanAmount}}
Loan Term: {{loanTerm}}

Products

{{#products}}

Product Name: {{productName}}
Term: {{productTerm}}
Fee: {{productFee}}

{{/products}}

Additional Information

{{#hasCoApplicant}}

Co-Applicant Name: {{coApplicantName}}
Co-Applicant Email: {{coApplicantEmail}}

{{/hasCoApplicant}}

Terms and Conditions

[Static terms and conditions]

Signature

[Signature fields]